29

I need help creating such a graphic in illustrator or photoshop using simple tools and maintaining the perspective effect in sharp folds (contrary to wrap tools)

I tried mesh tool but couldn't figure out a way to have the slanted effect.
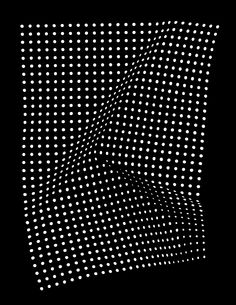
enter image description here

any ideas?

0

6 Answers 6

27

This is another method to do the job using Illustrator

  1. Create a circle and select it
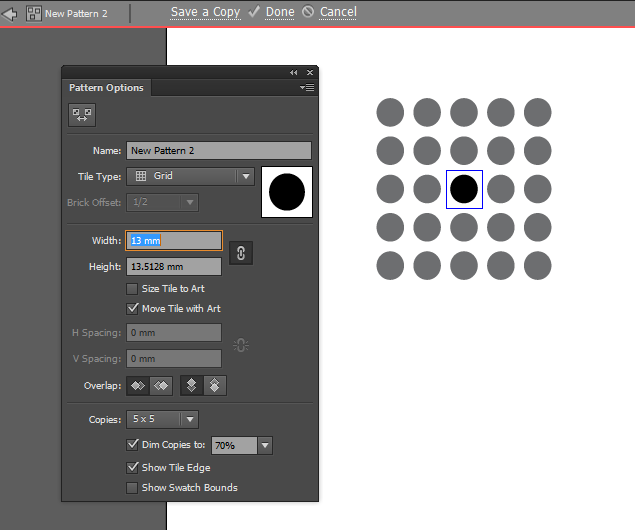
  2. Go to Object > Pattern > Make
  3. Adjust the spacing between circles in the pattern options panel and press Done

enter image description here

  1. Draw a rectangle and fill it with the pattern that you have just made; you may need to scale the pattern a little by choosing effects > distort & Transform > Transform and scale the pattern and make sure that you checked Transform Pattern only and uncheck the other options.
  2. Rasterize that rectangle by choosing Object > Rasterize
  3. go to object > Envelope Distort > Make with Mesh in the dialogue box make the mesh that you want. in my example i keep it 4X4 as a start and you can add more mesh anchor by the mesh tool U.
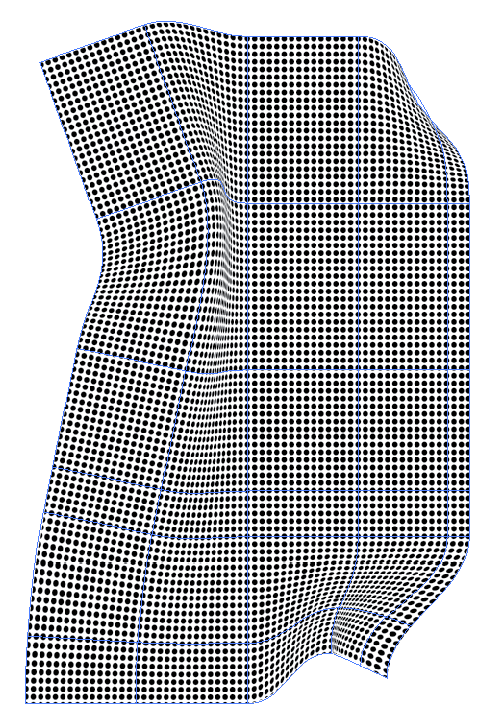
  4. With the white arrow select any mesh anchor and move it to a new location to get the effect that you want. enter image description here
4
  • 5
    +1 this is the best answer. The great things about envelope distort for this are, you can apply it to anything without harming the original vectors (you can even keep text editable!), and you've got complete control to create smooth curves. Tip: to push envelope distort points around in a smooth way, I find it can be really useful to use the lasso tool (q) to select several points in an area, then scale (s), rotate (r) etc. Can make it easier to create natural smooth curves than one point at a time. Commented May 8, 2015 at 10:36
  • I've added another answer (four good answers clearly wasn't enough :-D) with a couple of additional tricks for the straight edges the asker was looking for: graphicdesign.stackexchange.com/a/53302/3327 Commented May 8, 2015 at 11:09
  • Yes, I have notice it ... it is also a new nice answer, I was the first one giving you +1 :D -- actually my answer depend on pattern which is impossible to distort using the mesh tool that;s why i rasterize it. maybe if we array the circle we can get the same effect you describe it in your answer.
    – hsawires
    Commented May 8, 2015 at 11:14
  • 1
    You can expand the pattern instead of rasterising it? Commented May 8, 2015 at 11:31
19

It's not an easy task if you are seeking to be precise.

Illustrator won't do this easily. You'd have to manually draw the overall shapes and adjust perspective, size, and value for each element. A mesh in Illustrator fails because it's very difficult to get hard edge conversion areas, in addition, meshes distort the underlying objects based on position of mesh points. So, the overall pattern would look very different using a mesh.

The easiest way to do this is via displacement maps in Photoshop.

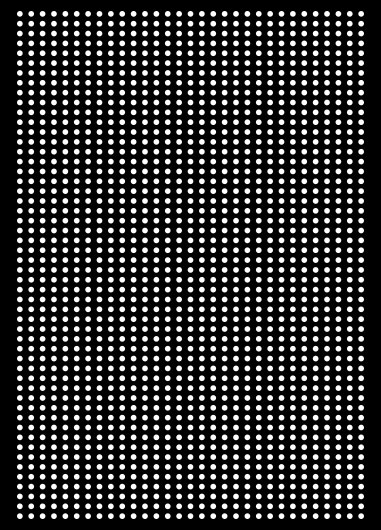
You create your basic document:
enter image description here

A layer of white objects and a solid black filled layer as a background.

You then create a grayscale document the same dimensions and add different values to create areas of depth.

For example:

enter image description here

The darker the area the farther off in the distance it will eventually be seen as. This is the difficult part. You probably have to play with the greyscale document to get it to accurately reflect the values for depth. This is called your Depth Map. When get it close save it as a standard greyscale .psd file somewhere you can locate easily.

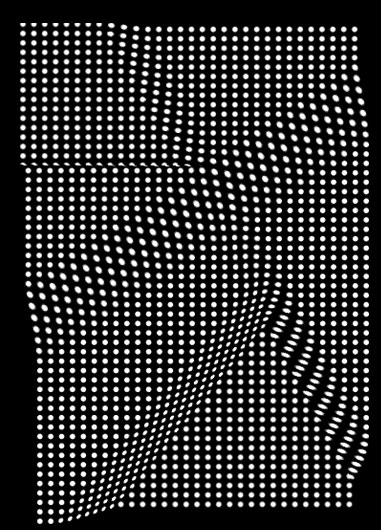
Then going back to your set up file, choose Filter > Distort > Displace. Click OK in the first little window then an Open dialog will pop up. Select your greyscale .psd file at that point.

This will distort the layer in the set up file to match the depth map you created.
enter image description here

It just takes trial and error to get the depth map the way you want it.

There are a number of tutorials regarding this on the web if you search for them.

Then if you really need this in Illustrator I'd save and use Image Trace in Illustrator. Trying to create this in Illustrator alone would be a lesson is patience, if not frustration.

1
  • This is offcourse an easy way to do it. Designing a particular fold with this method may be a bit challenging. Especially rotation is particulary nasty to achieve by hand painting. This said quite many 3D apps can genetate the needed displacement maps.
    – joojaa
    Commented May 8, 2015 at 10:43
15

hsawires' answer with envelope distort > make with mesh is the best answer, but there are some additional tricks you can use that make it easier to get the "the perspective effect in sharp folds" described (also, four very good answers clearly isn't enough :-D):
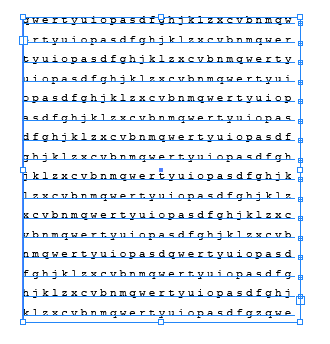
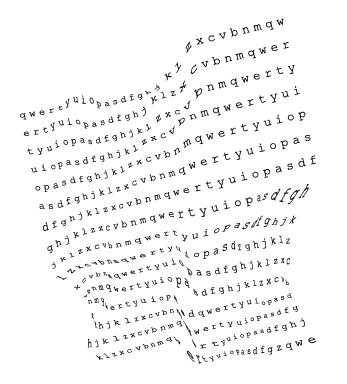
  1. Prepare your dots, any way you like... the great thing about Envelope Distort is, you can apply it to any vectors and they stay editable. For this example I'll use dot-like text to demonstrate that the vectors all stay editable:

enter image description here

  1. Don't rasterize! There's no need. Instead, go straight to Object>Envelope Distort>Make with Mesh, and choose lots of grid lines. For example, here I'm using 14x14.
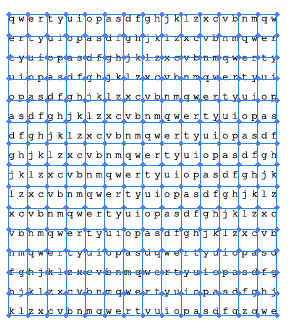
enter image description here

  1. (note that you can switch between the grid and the underlying vectors at any time with these buttons in the top left: enter image description here)

  2. Rotate the whole thing so the line you want to create is vertical or horizontal, then use the direct selection tool to drag a box selecting points in the area you want to give perspective to (here, a chunk on the left is selected):
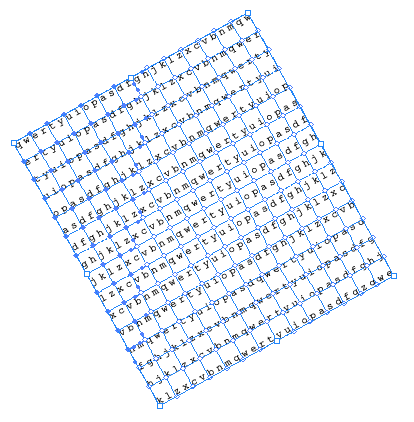
enter image description here

  1. Use the scale tool s. Drag the centre of scaling to the centre of the edge of your 'line', then scale (holding shift) to bring them forwards or backwards as desired. Also, the bloat tool and pucker tool (tucked away under the width tool) can be used to smooth things out if double-click and set Intensity very low (like 1%) and the brush very large. It's a little tricky to be accurate with them, but they only apply to the points selected, which helps.
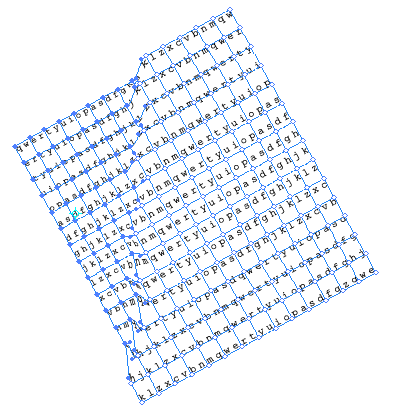
enter image description here

  1. Repeat as desired... Sometimes lots of small changes next to each other looks smoothest

enter image description here

  1. Did I mention that the underlying artwork is still totally editable, as if you hadn't done anything to it? Just switch to edit contents and you can make any changes you like to the underlying vector artwork: enter image description here

enter image description here

8
  • Please note: All the described methods work with arbitrary graphics.
    – joojaa
    Commented May 8, 2015 at 11:19
  • Yes, but all except yours are based on rasterized (pixel) graphics Commented May 8, 2015 at 11:30
  • Sure, basically my answer is the same as yours. I just use the mesh a bit differently so that i can do hard angled creases (which is the posters problem IMHO as he states that he tried using the method you describe, hard to say). In any case i am aware that my method is more involved i would have done it this way if not for the creases. I wouldnt use the displacement method as it is hard to design the shape you want to bend up with it.
    – joojaa
    Commented May 8, 2015 at 11:40
  • Does Illustrator have a feature like proportional editing? That could help to create smoother curves more easily.
    – wchargin
    Commented May 8, 2015 at 14:18
  • I thought it didn't - but actually you can get something a bit like that using the bloat tool set to very low intensity. There might be other such things too... I've editted a note about that in. "Is there something like proportional editing in Illustrator?" sounds like an interesting question Commented May 8, 2015 at 14:34
13

You can actually do this in Illustrator (as per request). The trick is to make sure that once you use mesh tool you drag the along handles back to 1/3 of the way along the edge otherwise it squeezes the image along*.

In addition it can help to keep rotating the are back and forth, for easier selection.
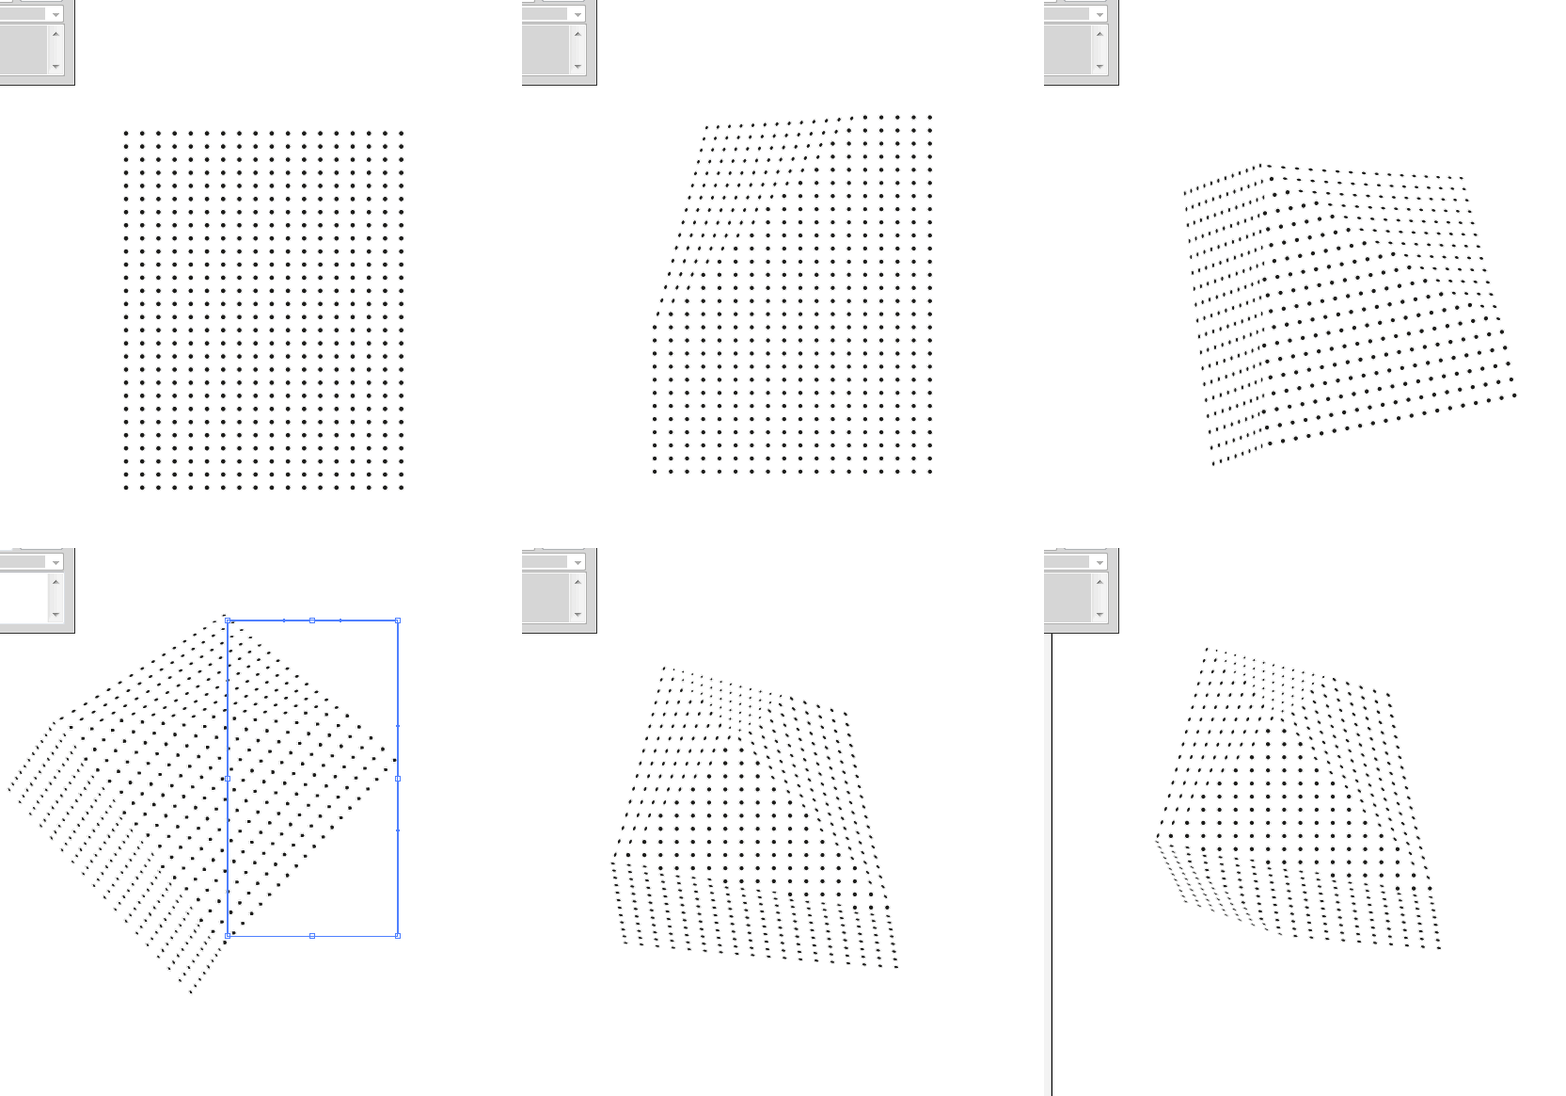
scrumple

Image 1: doing the scruple. What i actually do is create a new wrap after every turn. (then release it.)

Procedure used in image 1:

  1. make grid of dots (stars, letters etc)
  2. loop ← return here once you have done one fold
  3. rotate everything to some direction
  4. marque select grid items so your selection splits the shape
  5. apply wrap with mesh with oly 1 row and 1 column
  6. move the edge opposite to your mesh cut inward
  7. fix the 2 side edge tangents so they are about 1/3 of the way so that no big distortion hapens
  8. (optional) release mesh
  9. rotate back (if you alt click rotate illustrator remembers your rotation just negate the number)
  10. repeat.

Tough there are better tools for this, it can be nice t know this for other purposes that may arise.

Alternatives

It is actually sufficient to just scale along the selection line once rotated so skew and scale can be enough if you dont want to use envelopes that granted can be a bit tricky. Envelopes make the edges of creases nicer tough.
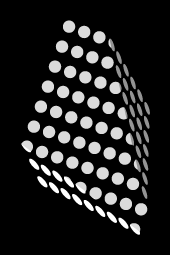
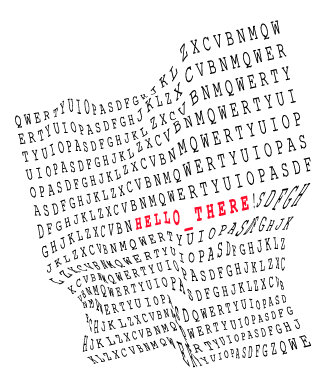
other example

Image 2: You can cut the shapes (they don't have to be dots) for sharp creases. And shade the areas further enhancing the look (perhaps slightly exaggerated effect).
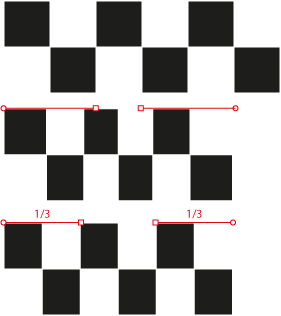
Appendix: *On using mesh for linear moves.

scrunch

Image 3: Getting a even distort along when the shape gets shorter

6
  • 2
    I'm not getting how your mesh is set up though. Is it just a lot of rows and columns?
    – Scott
    Commented May 7, 2015 at 18:52
  • @scott the mesh has only 1 square(1 row 1 column) the block are there so you see the effect of handle positions. if you dont shorten the handles you get a bnt effect (you could use scale on the mesh), or ust use scale and skew but i used mesh because that was what the op was asking (and yes you can get more dynamic weights) red ones are the top edges handle locations
    – joojaa
    Commented May 7, 2015 at 19:11
  • 1
    joojaa I want to upvote because it looks so awesomely easy, but I can't work out how to do it with the information you've provided. I'm guessing a few things atm, but no solid idea.
    – Dom
    Commented May 8, 2015 at 0:53
  • 1
    I'm having difficulty recreating these steps as well @jooja. I think there's something important in your procedure missing. How are you applying envelopes? How are you getting those rectangular 1/3 selections? Are the dots inside an envelope or just separate objects?
    – Scott
    Commented May 8, 2015 at 1:05
  • 1
    @Dom it is quite easy yes... Didnt think you guys needed more than a spark. But yes added how i did the second image in more detail. Also note that the last picture is done with scale and skew that is comparable in terms lf effect. Let me know if it needs more explanation.
    – joojaa
    Commented May 8, 2015 at 5:57
12

As an alternative to @Scott's answer you could use Puppet Warp in Photoshop (EditPuppet Warp).

If you try this, I would suggest a selecting Mode:Rigid and Density:Fewer Points in the options at the top in order to make the surface less pliable, like in your example.
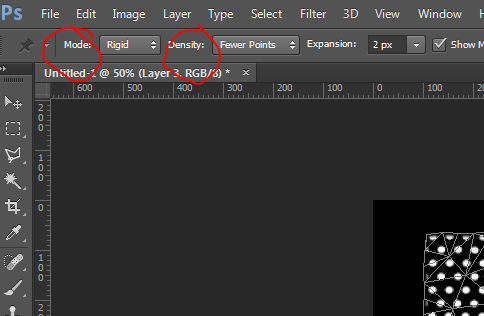
Location of puppet warp settings

Just add pins and move them around until you achieve the desired displacement. You will need lots of pins in order to control the straight edges, though. I would recommend lots of them at the edges, again, in order to control the straight edges of the surface.

Here is a very bad example of the results you can achieve.
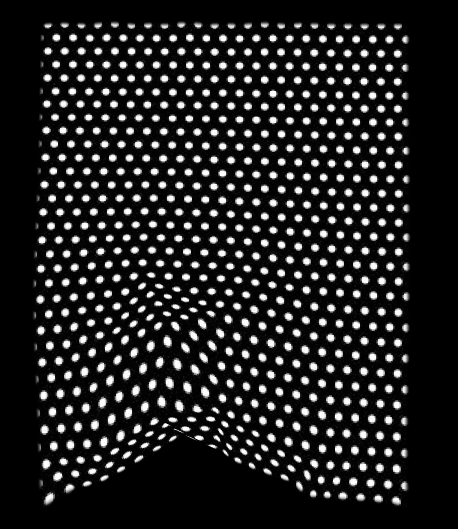
Example of simple puppet warp results (much better results can be created)

3

How about doing it manually?

You could print out dotted array in appropriate aspect ratio, manually fold printout to desired effect, photograph under well-lit conditions, threshold it in Photoshop & get paths via magic wand selection & import to Illustator & use pathfinder to isolate / colour.

0

Your Answer

By clicking “Post Your Answer”, you agree to our terms of service and acknowledge you have read our privacy policy.

Not the answer you're looking for? Browse other questions tagged or ask your own question.