image correction
Source Link
GerardFalla
  • 9.7k
  • 2
  • 16
  • 41

Alternately, you can simply modify your round rect to get your speech bubble without worrying about deleting lines or compound shapes:

Make your round rect, and then switch to the direct select tool (the white selection arrow), and then grab each of the points defining that lower left chamfered corner and move them (holding shift to constrain direction of motion) along their relevant lines a bit to flatten the curve of that corner a bit, getting your points to where you want the triangle to meet the main speech bubble, like so:

enter image description here

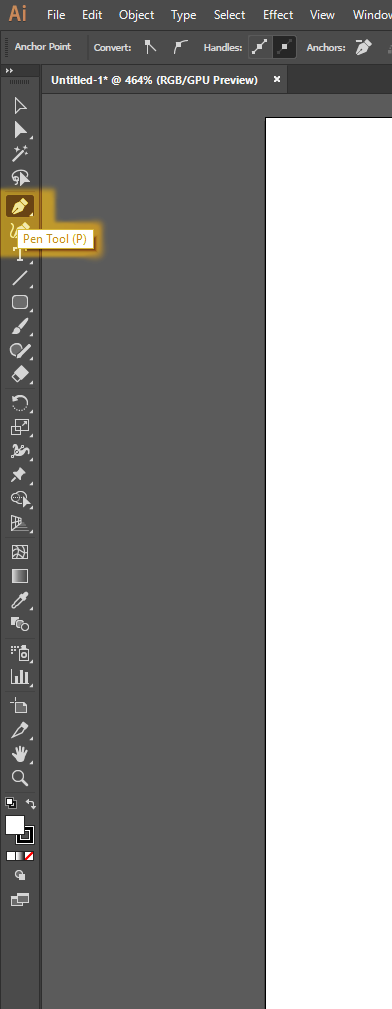
Then switch to your pen tool

enter image description hereenter image description here

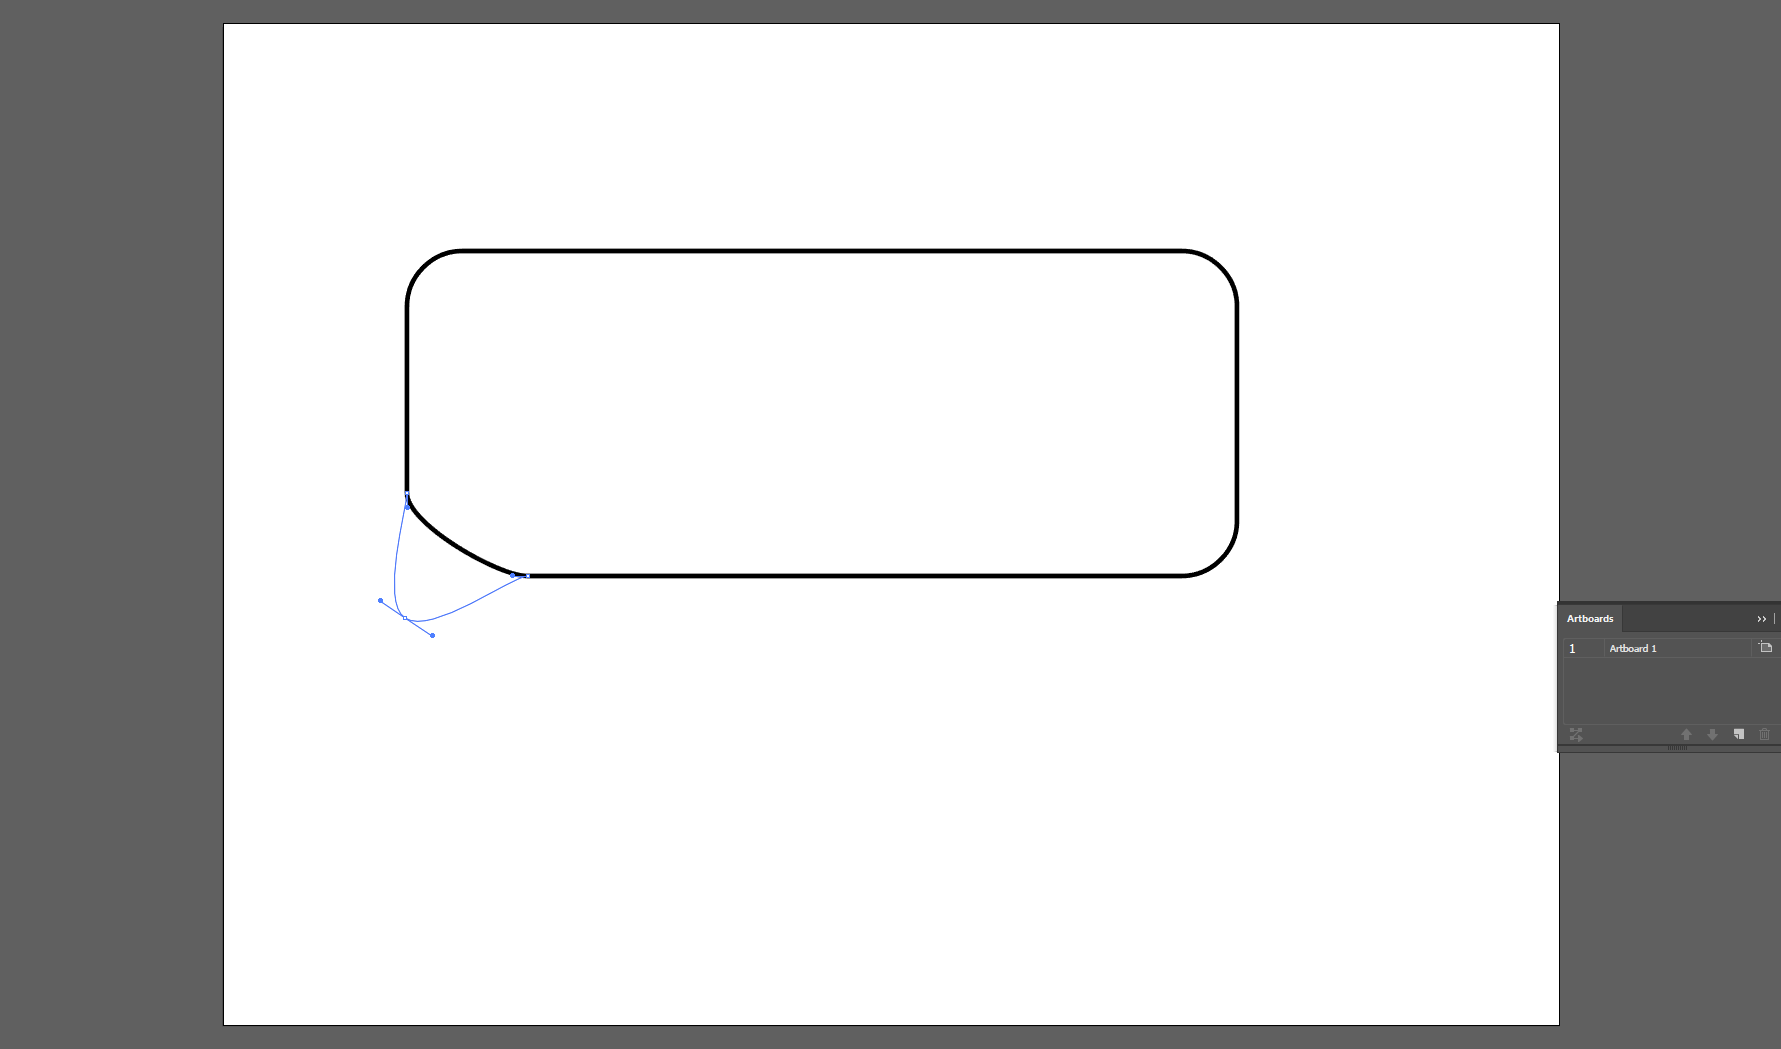
And then add one point in the middle of that chamfered corner curve, switch back to direct selection and pull it diagonally downwards, like so:

enter image description here

Then go to the pen tool and hold the pen tool tile down and switch to the anchor point convert mode of the pen tool (which toggles an anchor in a path from being a curve to being an angle):

enter image description here

Then click on that anchor point we just made to convert it to an angle:

enter image description here

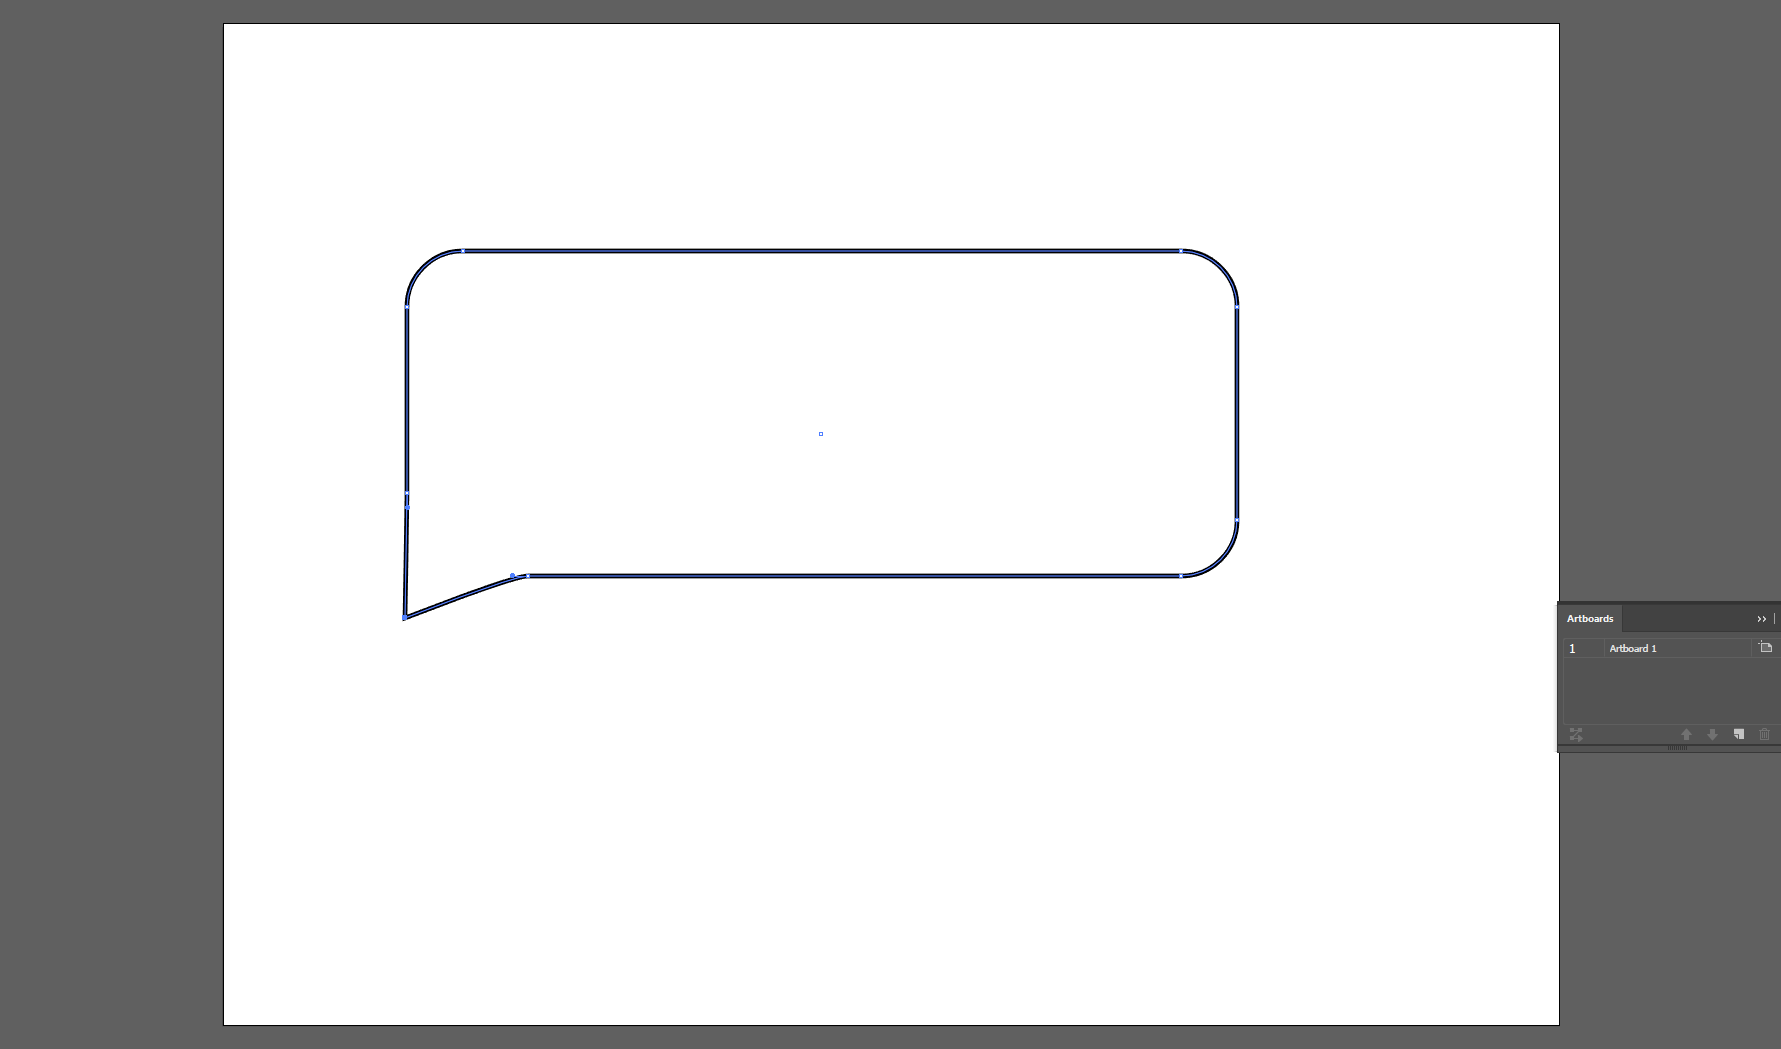
This is almost there, but... although the low corner is now sharp, the places where that triangle intersects the rest of the round rect are still slightly curved - so let's use that same anchor point convert tool on those too - first one:

enter image description here

Then the other:

enter image description here

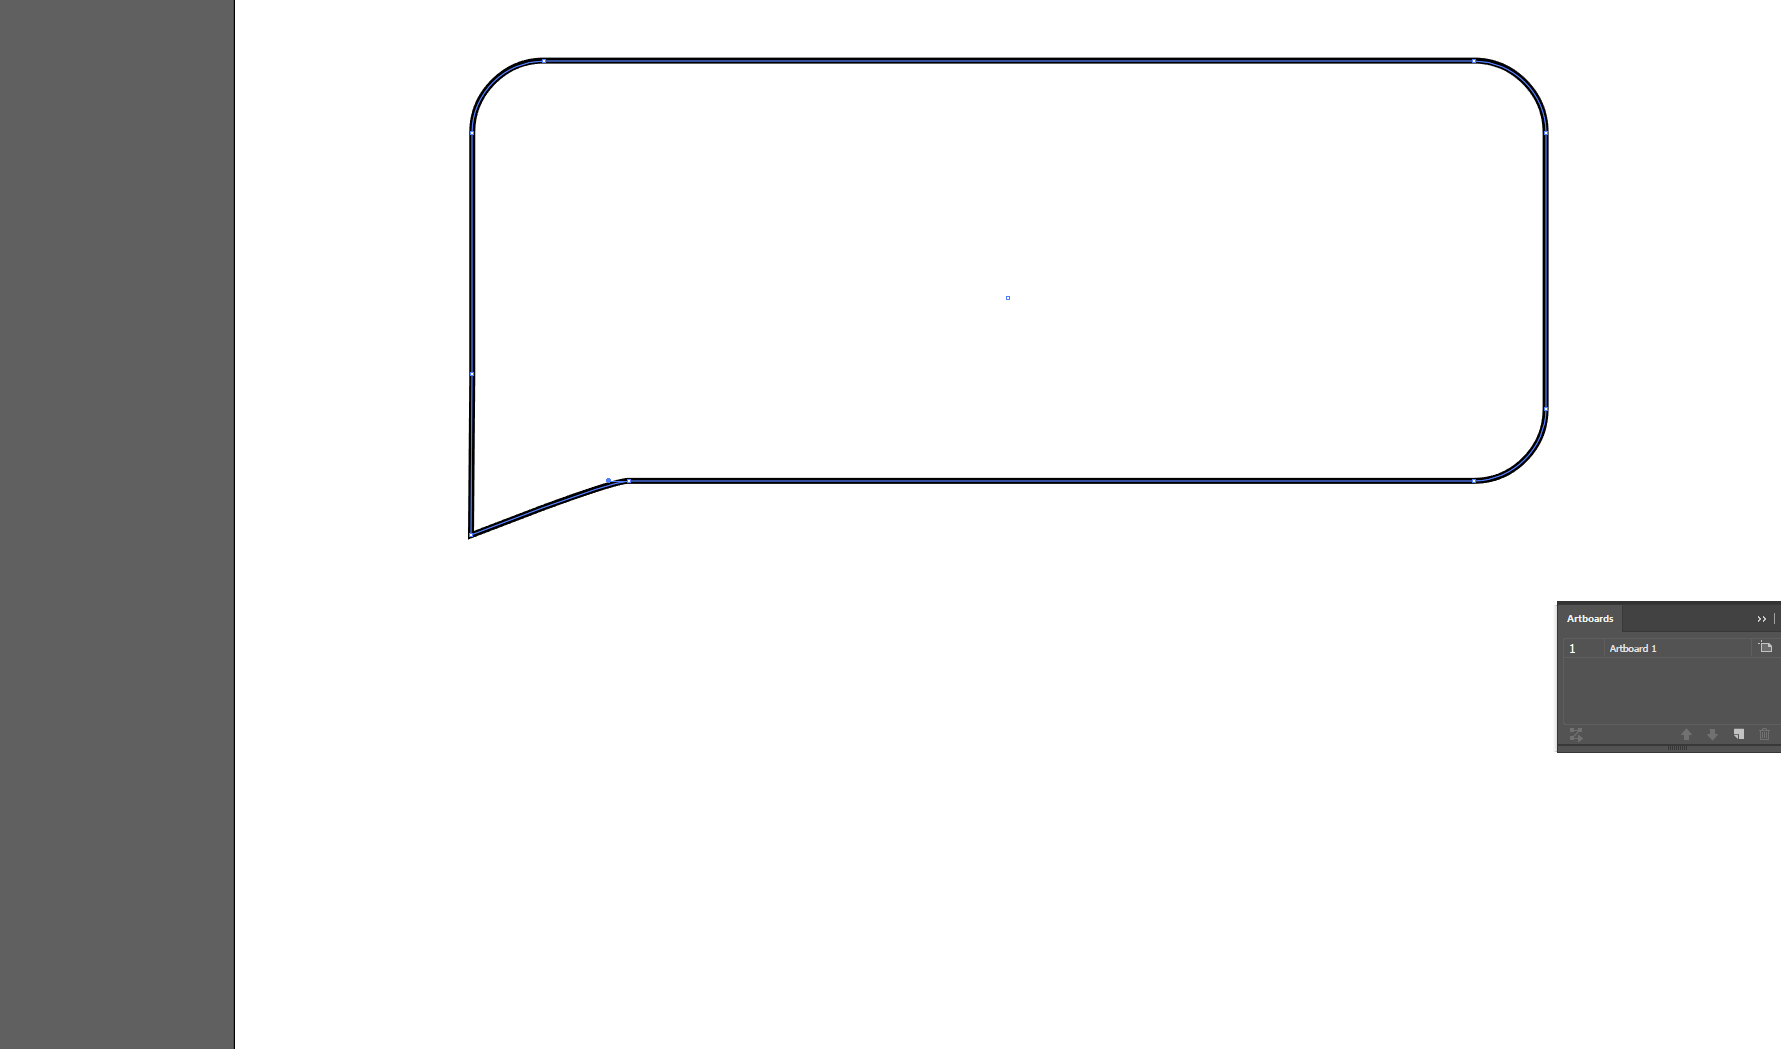
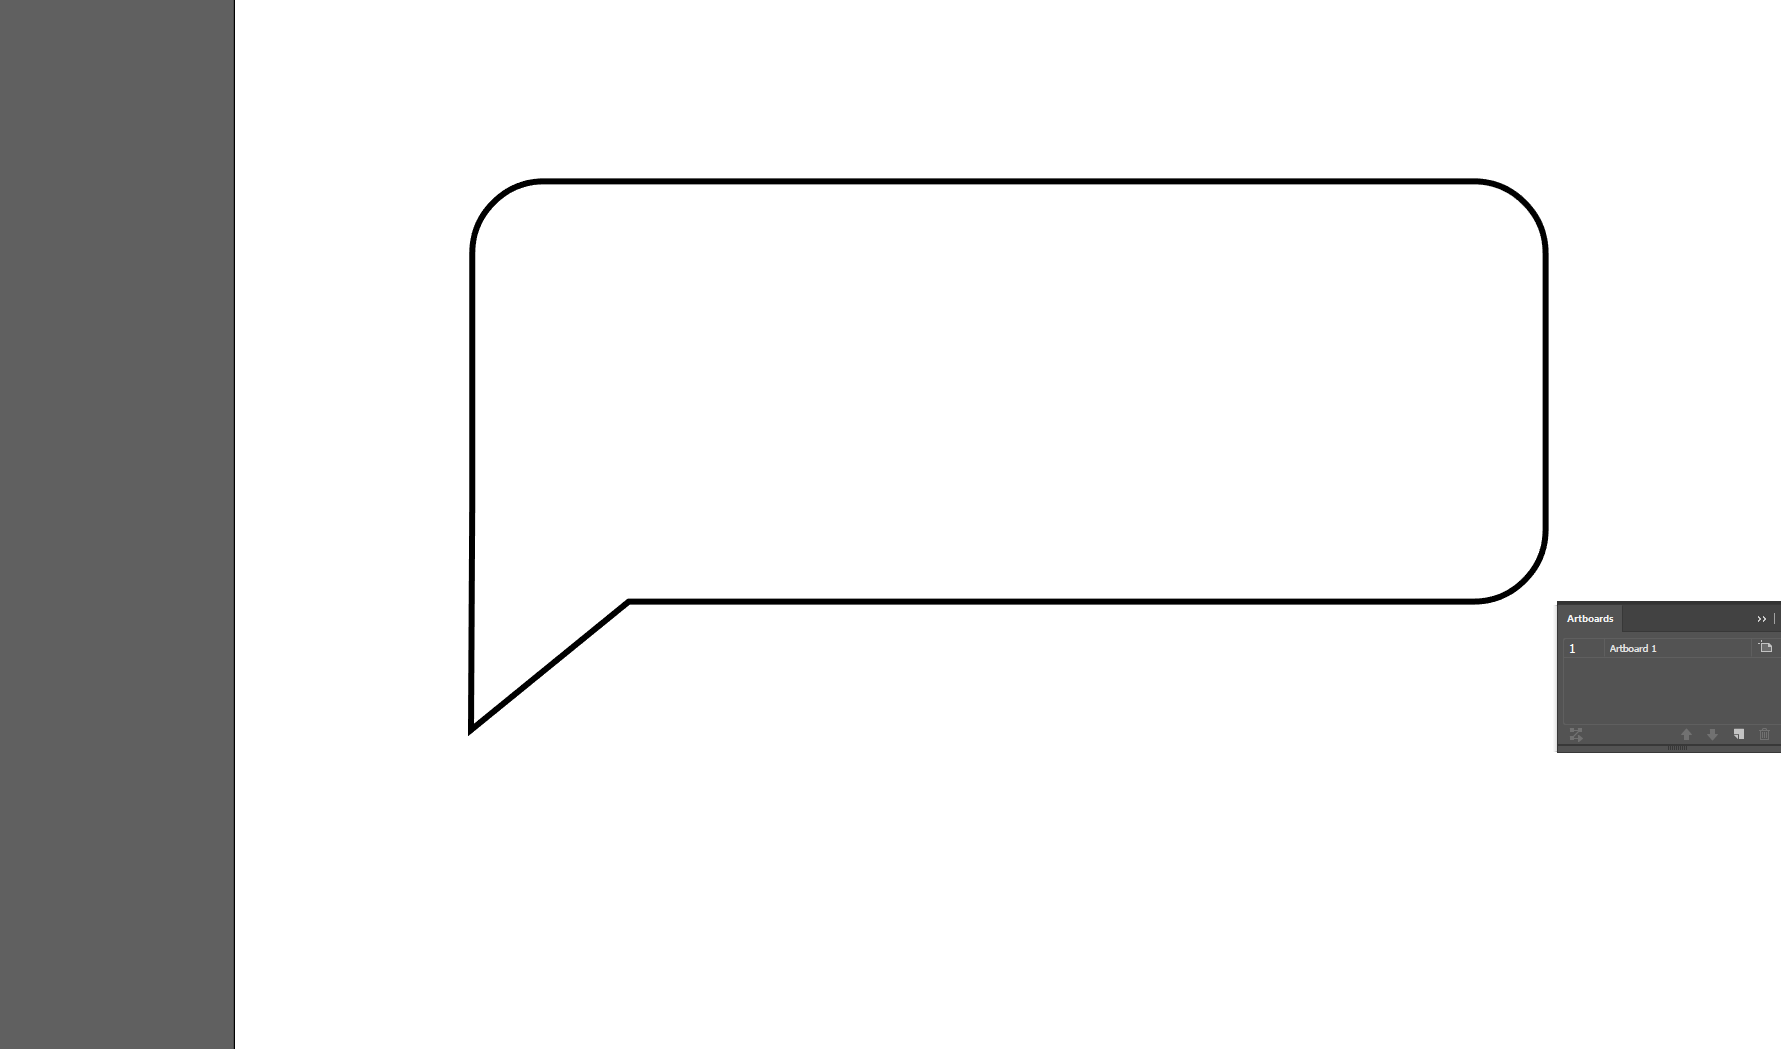
And there we have the shape you need, no additional shapes, and it's easy to manage fills and strokes and so on.

It sounds like more work and steps written down, but in practise it's not significantly more work or slower, and I think it's well worth your learning how to use the tools to get the most optimised version of the shape you need.

Hope this helps.

Alternately, you can simply modify your round rect to get your speech bubble without worrying about deleting lines or compound shapes:

Make your round rect, and then switch to the direct select tool (the white selection arrow), and then grab each of the points defining that lower left chamfered corner and move them (holding shift to constrain direction of motion) along their relevant lines a bit to flatten the curve of that corner a bit, getting your points to where you want the triangle to meet the main speech bubble, like so:

enter image description here

Then switch to your pen tool

enter image description here

And then add one point in the middle of that chamfered corner curve, switch back to direct selection and pull it diagonally downwards, like so:

enter image description here

Then go to the pen tool and hold the pen tool tile down and switch to the anchor point convert mode of the pen tool (which toggles an anchor in a path from being a curve to being an angle):

enter image description here

Then click on that anchor point we just made to convert it to an angle:

enter image description here

This is almost there, but... although the low corner is now sharp, the places where that triangle intersects the rest of the round rect are still slightly curved - so let's use that same anchor point convert tool on those too - first one:

enter image description here

Then the other:

enter image description here

And there we have the shape you need, no additional shapes, and it's easy to manage fills and strokes and so on.

It sounds like more work and steps written down, but in practise it's not significantly more work or slower, and I think it's well worth your learning how to use the tools to get the most optimised version of the shape you need.

Hope this helps.
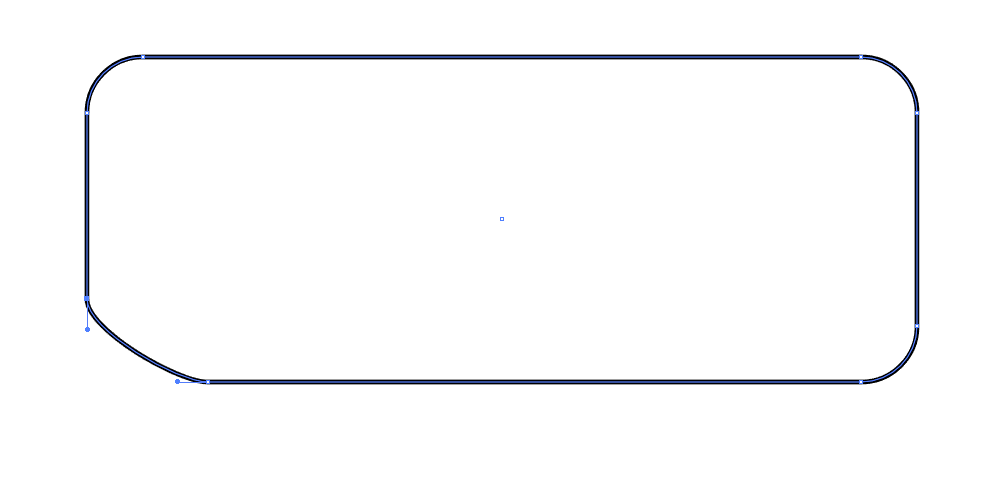
Alternately, you can simply modify your round rect to get your speech bubble without worrying about deleting lines or compound shapes:

Make your round rect, and then switch to the direct select tool (the white selection arrow), and then grab each of the points defining that lower left chamfered corner and move them (holding shift to constrain direction of motion) along their relevant lines a bit to flatten the curve of that corner a bit, getting your points to where you want the triangle to meet the main speech bubble, like so:

enter image description here

Then switch to your pen tool

enter image description here

And then add one point in the middle of that chamfered corner curve, switch back to direct selection and pull it diagonally downwards, like so:

enter image description here

Then go to the pen tool and hold the pen tool tile down and switch to the anchor point convert mode of the pen tool (which toggles an anchor in a path from being a curve to being an angle):

enter image description here

Then click on that anchor point we just made to convert it to an angle:

enter image description here

This is almost there, but... although the low corner is now sharp, the places where that triangle intersects the rest of the round rect are still slightly curved - so let's use that same anchor point convert tool on those too - first one:

enter image description here

Then the other:

enter image description here

And there we have the shape you need, no additional shapes, and it's easy to manage fills and strokes and so on.

It sounds like more work and steps written down, but in practise it's not significantly more work or slower, and I think it's well worth your learning how to use the tools to get the most optimised version of the shape you need.

Hope this helps.

Source Link
GerardFalla
  • 9.7k
  • 2
  • 16
  • 41

Alternately, you can simply modify your round rect to get your speech bubble without worrying about deleting lines or compound shapes:

Make your round rect, and then switch to the direct select tool (the white selection arrow), and then grab each of the points defining that lower left chamfered corner and move them (holding shift to constrain direction of motion) along their relevant lines a bit to flatten the curve of that corner a bit, getting your points to where you want the triangle to meet the main speech bubble, like so:

enter image description here

Then switch to your pen tool

enter image description here

And then add one point in the middle of that chamfered corner curve, switch back to direct selection and pull it diagonally downwards, like so:

enter image description here

Then go to the pen tool and hold the pen tool tile down and switch to the anchor point convert mode of the pen tool (which toggles an anchor in a path from being a curve to being an angle):

enter image description here

Then click on that anchor point we just made to convert it to an angle:

enter image description here

This is almost there, but... although the low corner is now sharp, the places where that triangle intersects the rest of the round rect are still slightly curved - so let's use that same anchor point convert tool on those too - first one:

enter image description here

Then the other:

enter image description here

And there we have the shape you need, no additional shapes, and it's easy to manage fills and strokes and so on.

It sounds like more work and steps written down, but in practise it's not significantly more work or slower, and I think it's well worth your learning how to use the tools to get the most optimised version of the shape you need.

Hope this helps.