It is a good idea to expand any strokes prior to doing this. This "bakes-in" the art and flattens it. So, this is a production step to be used to prepare the artwork for reproduction. It will make production easier/correct, but will also make any further aesthetic editing, with respect to placement or size of objects, much more difficult. A 2 file workflow may be wise - retaining a file before these steps are taken will allow for easier editing in the future, Then merely repeat the below steps for a new production file.
Set the fills to be an off-color. Something foreign to the rest of the artwork.
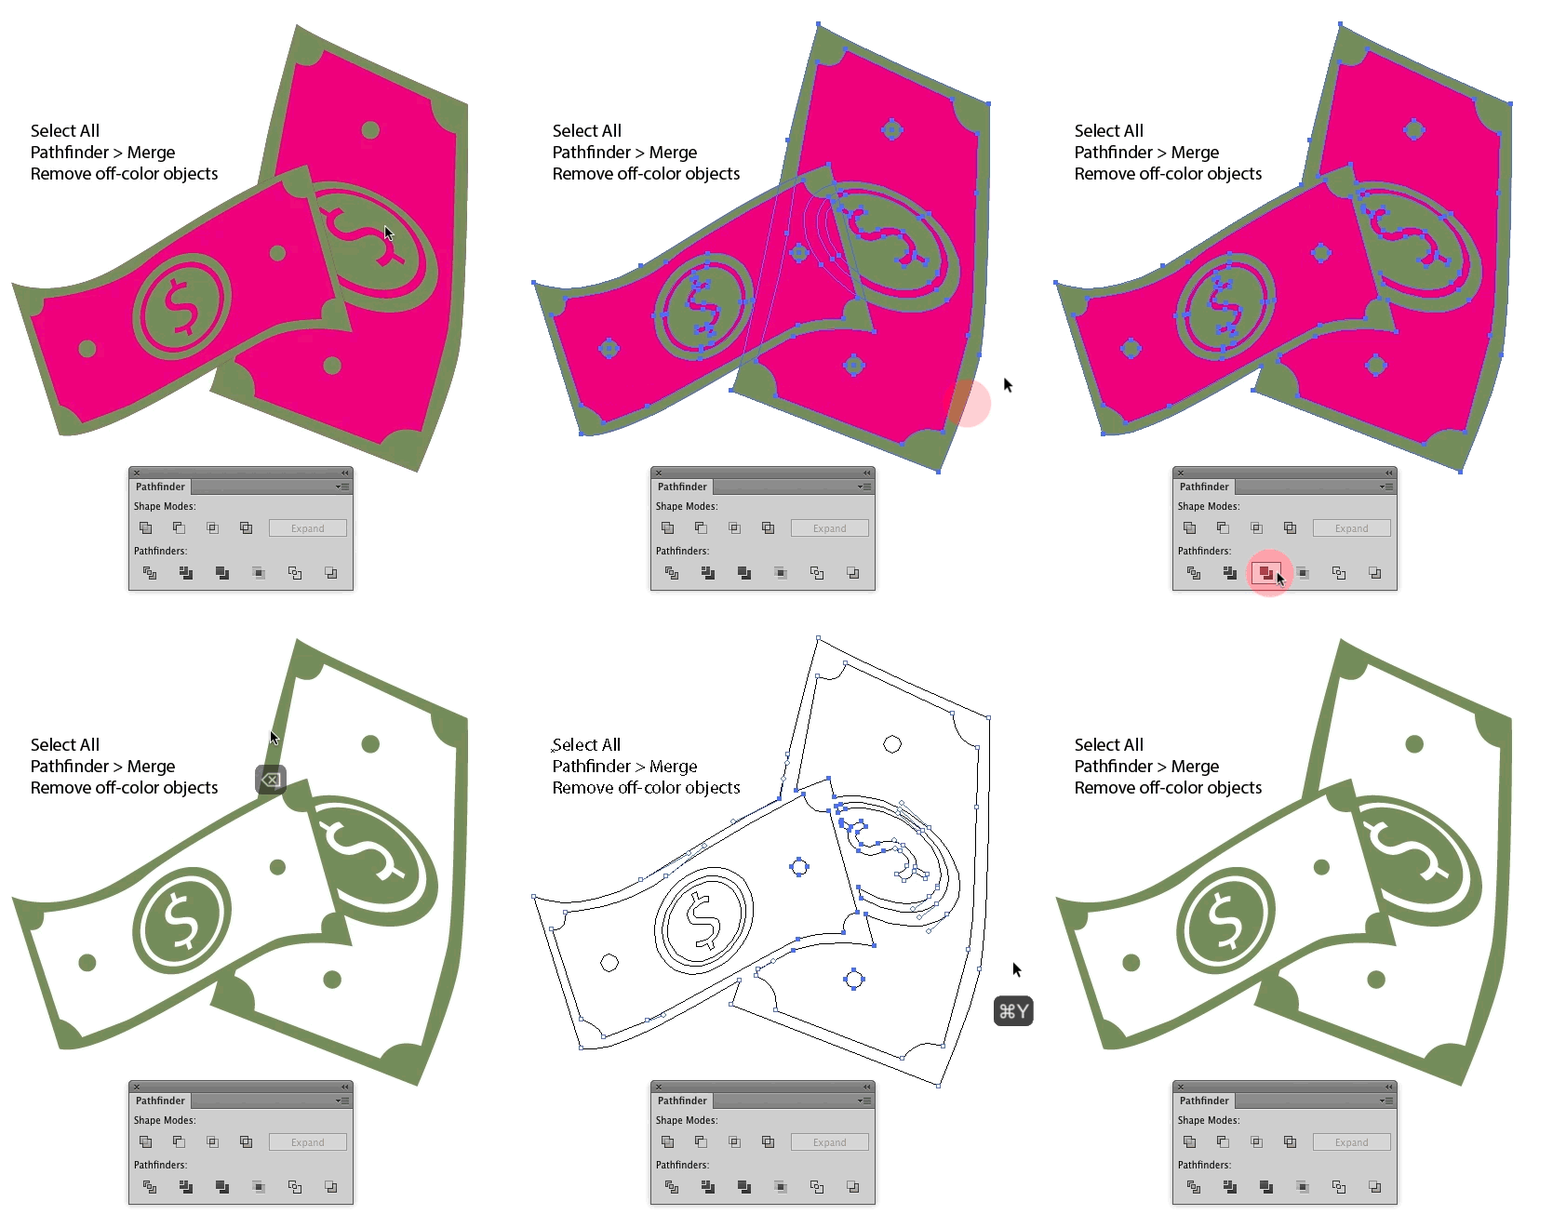
- Select all
- Pathfinder Panel >
Mergebutton - Use the Direct Selection Tool (white arrow) and click one of the off-color areas to select it.
- Choose
Select > Same > Fill & Strokefrom the menu - Hit the Delete key.
Merge combines areas of similar color, regardless of their stacking order, and removes any underlying elements. So, by Merging you eliminate anything which was underneath the fills. Then remove the fills if they are not to be part of the artwork.


