added 906 characters in body
Source Link
Hanna
  • 10.9k
  • 4
  • 42
  • 68

YouIn general you have three basic possibilities:

  1. Increase your picture's dimensions (on the shortest side) to make it square (As Lauren suggested)

  2. Crop them to be square (As DA01 suggested)

  3. Stretch your images to fit a square

All three of them have their pros and cons of course.

The first one makes it square, but it adds useless "information".

The second technique takes away some of your picture, and you may lose some "information".

The third one keeps everything but it makes it look distorted and strange.

There are of course more complicated options such as extracting your object and then standardizing a background or faking the background by extending it.

If you are the photographer, then I would suggest setting up a system when you take the pictures of your objects and leave plenty of room around your object so that you can crop it square later.

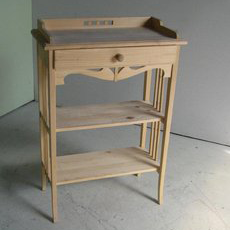
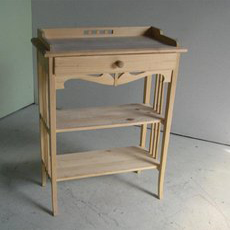
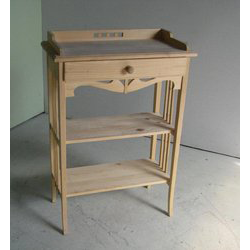
However, if there as the pictures you are using, then it shouldn't be a hassle to use either of the above techniques.... here's an example of the first three, respectively.

Extra background:
enter image description here

Cropped:

enter image description here

Stretched:

enter image description here

In addition to that (again, given that these are the actual pictures) it's important to remember what you're using these images for. If you're selling furniture, it's best that you don't stretch the image in any way, as it may make the furniture seems smaller/larger or more out of proportion than it really is. The second technique works great if you can simply crop out the background, and if that's not an option then adding a background to expand the image may be your best bet.

You have three basic possibilities:

  1. Increase your picture's dimensions (on the shortest side) to make it square (As Lauren suggested)

  2. Crop them to be square (As DA01 suggested)

  3. Stretch your images to fit a square

All three of them have their pros and cons of course.

The first one makes it square, but it adds useless "information".

The second technique takes away some of your picture, and you may lose some "information".

The third one keeps everything but it makes it look distorted and strange.

There are of course more complicated options such as extracting your object and then standardizing a background or faking the background by extending it.

If you are the photographer, then I would suggest setting up a system when you take the pictures of your objects and leave plenty of room around your object so that you can crop it square later.

In general you have three basic possibilities:

  1. Increase your picture's dimensions (on the shortest side) to make it square (As Lauren suggested)

  2. Crop them to be square (As DA01 suggested)

  3. Stretch your images to fit a square

All three of them have their pros and cons of course.

The first one makes it square, but it adds useless "information".

The second technique takes away some of your picture, and you may lose some "information".

The third one keeps everything but it makes it look distorted and strange.

There are of course more complicated options such as extracting your object and then standardizing a background or faking the background by extending it.

If you are the photographer, then I would suggest setting up a system when you take the pictures of your objects and leave plenty of room around your object so that you can crop it square later.

However, if there as the pictures you are using, then it shouldn't be a hassle to use either of the above techniques.... here's an example of the first three, respectively.

Extra background:

enter image description here

Cropped:

enter image description here

Stretched:

enter image description here

In addition to that (again, given that these are the actual pictures) it's important to remember what you're using these images for. If you're selling furniture, it's best that you don't stretch the image in any way, as it may make the furniture seems smaller/larger or more out of proportion than it really is. The second technique works great if you can simply crop out the background, and if that's not an option then adding a background to expand the image may be your best bet.

Source Link
Hanna
  • 10.9k
  • 4
  • 42
  • 68

You have three basic possibilities:

  1. Increase your picture's dimensions (on the shortest side) to make it square (As Lauren suggested)

  2. Crop them to be square (As DA01 suggested)

  3. Stretch your images to fit a square

All three of them have their pros and cons of course.

The first one makes it square, but it adds useless "information".

The second technique takes away some of your picture, and you may lose some "information".

The third one keeps everything but it makes it look distorted and strange.

There are of course more complicated options such as extracting your object and then standardizing a background or faking the background by extending it.

If you are the photographer, then I would suggest setting up a system when you take the pictures of your objects and leave plenty of room around your object so that you can crop it square later.