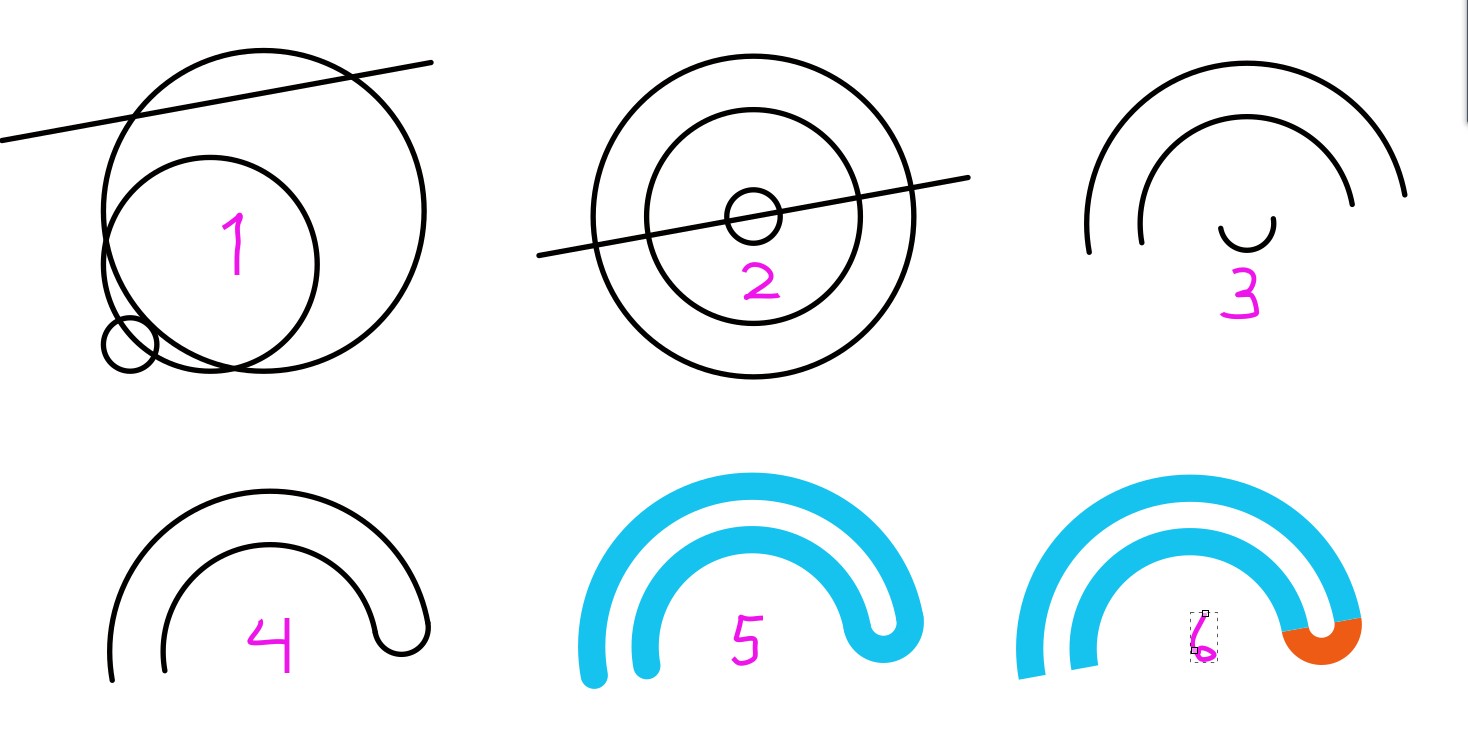
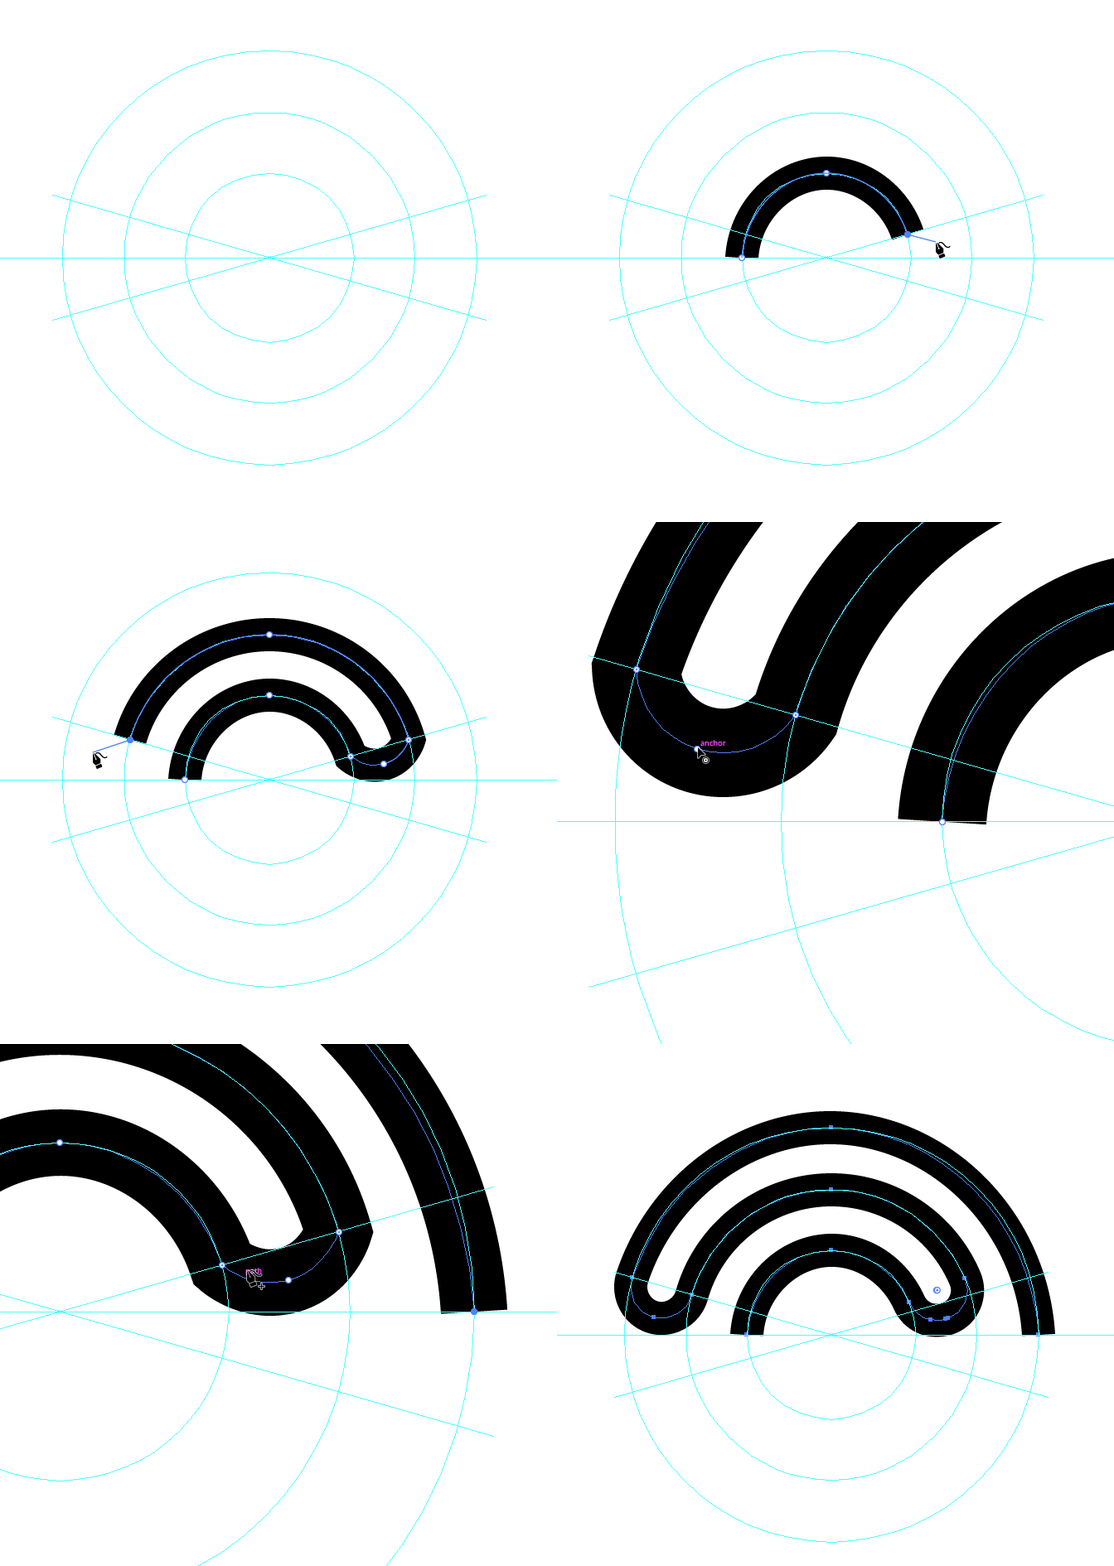
One way is to use circular paths which have calculated diameters.

Here we have three circles. Their diameters are 10mm, 40mm and 60 mm. The line has the forthcoming cutting direction.
Align all to the same center
Divide the circles using the line. In Illustrator you can for example
- send the line to back
- insert anchor points to the circles at the crossings (have snap to points and smart quides ON)
- use the scissors tool to cut the circles at the new anchors
- delete the unwanted segments with the direct selection tool + pressing DEL
Move the small arc to its place. It should snap perfectly if only snap to points is the active snap.
5-6. You can change the line widths and colors
These are still strokes without fill, but you can outline them when you are ready. Joining the arcs combine them to one object.
In Inkcape the same method works, but the circles must be sized with zero width stroke because half of the stroke width is inserted to the radius. Inkscape has easy to use Path > Divide command. It's easier than messing with the node tool. Only remember convert the circles to paths (Path > Object to Path) and have three copies of the line, all raised to top.
If you work in Inkscape, and make outlines, you have Path > Stroke to Path. It's possible that after conversion you notice a gap between the segments It's invisible, but appears when you try to make an union and add a common stroke & fill. The gap gets stroke, too. It can be avoided by dragging with the node tool the seam corners to snap or overlap.
A random coloring after making outlines:


