I bet Envelope distortion with simplest possible (= 1row x 1 col) mesh will solve your case.
Drag your label to symbols collection. If you must edit it, only double click the symbol icon in the symbols panel and you enter to the isolation mode. After editing and exiting the isolation mode, all copies (=instances) of the label in your image are updated. An example:
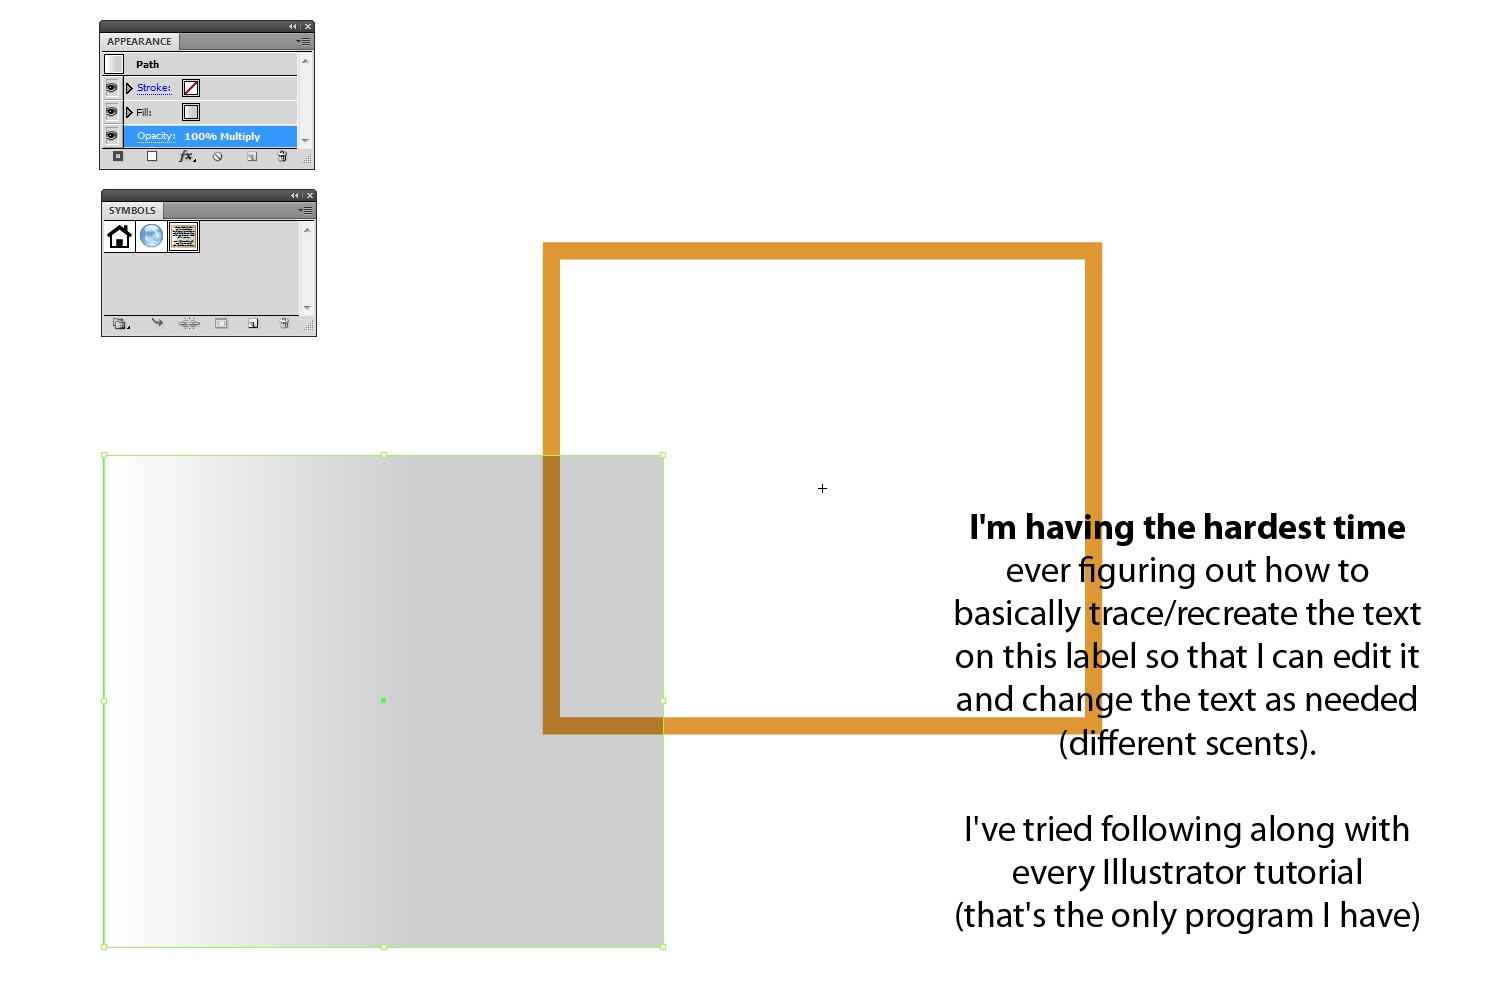
A label has been created, it has layered
- a white rectangle with orange stroke(aligned inside)
- a text object
- a grey gradient rectangle with blending mode multiply
The grey gradient darkens everything below it. The parts are temporarily moved apart to show them:
The label is dragged to the symbols panel and from there one copy is dragged onto the candle. An 1x1 envelope distortion mesh has been added (Object > Envelope Distortion > Make with Mesh > size 1x1) and the edges & handles are adjusted with the direct selection tool
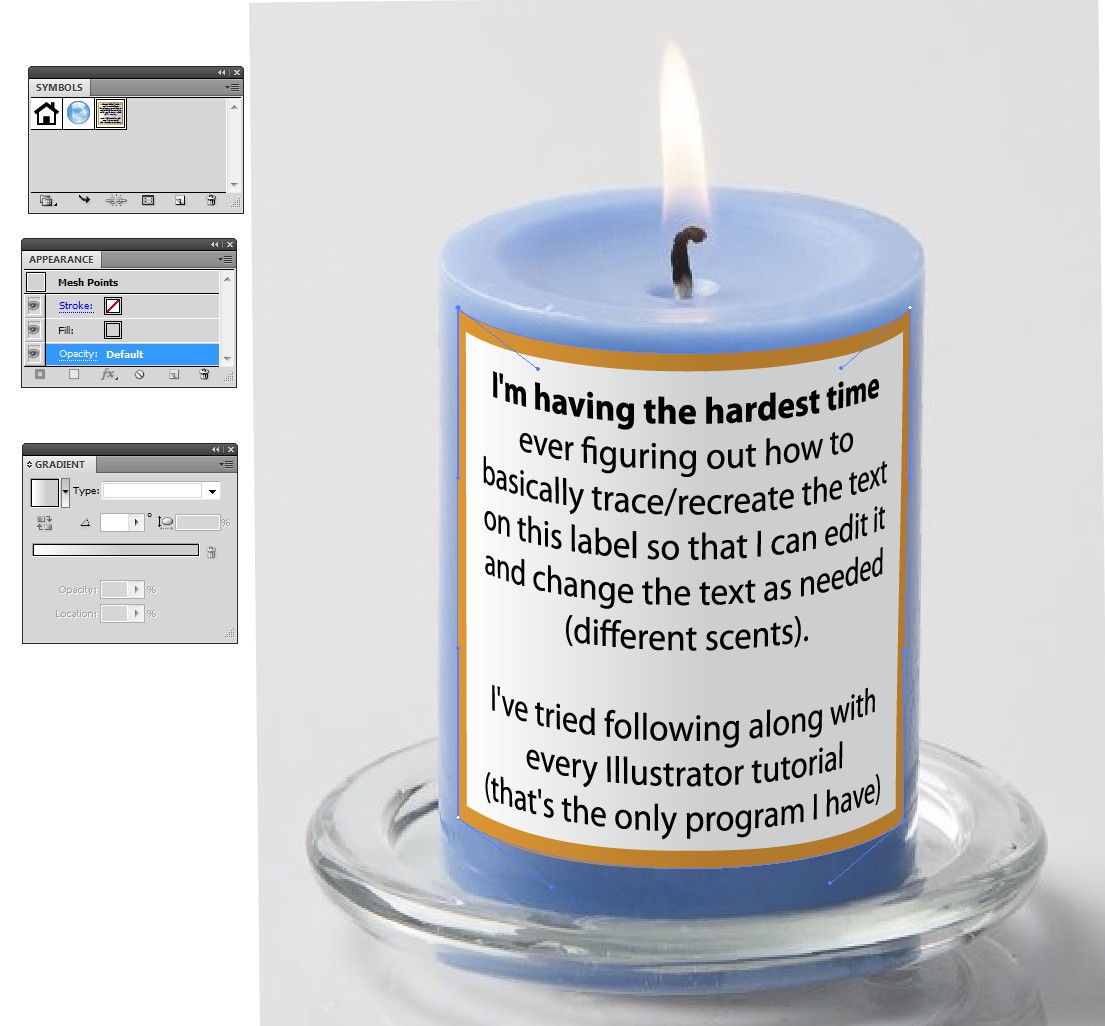
The mesh is adjustable as long as it's not expanded. Right adjustment is tricky - not because it's complex, but because one's eyes very soon accept poor adjustments and see it only after having say 15 min break.
The symbol icon in the symbols panel has been double-clicked, the symbol is now under editing in isolation mode window:
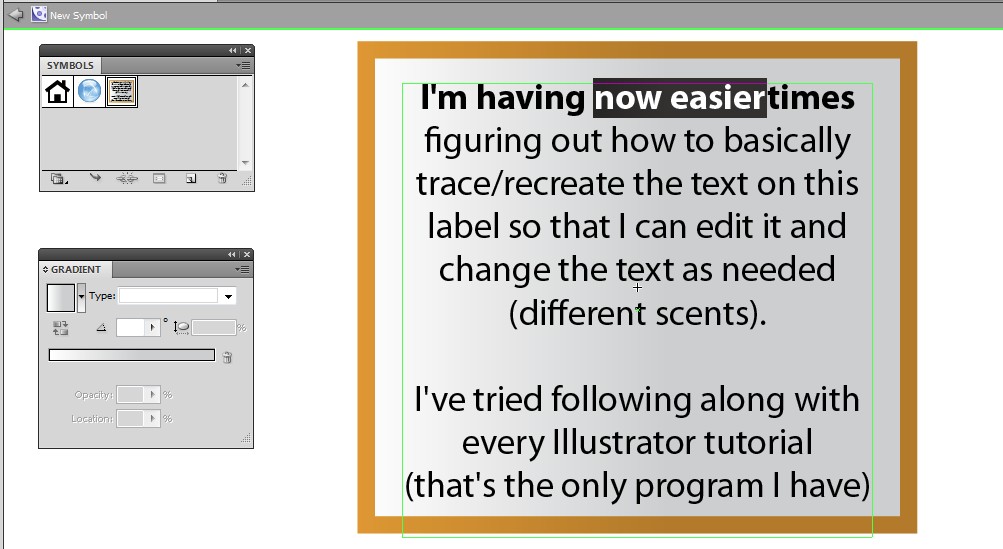
The text is changed and icon Exit isolation mode has been clicked:
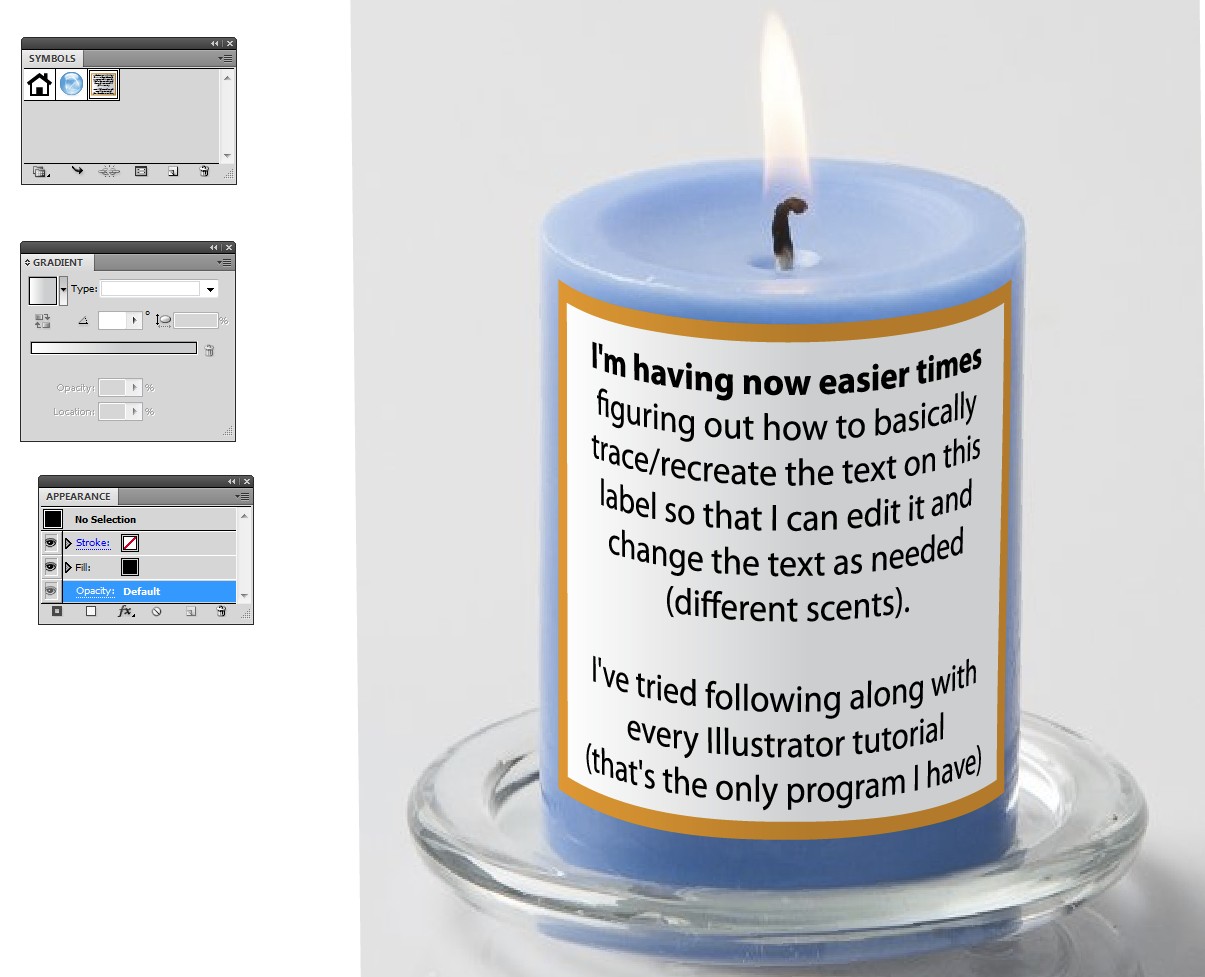
Other options: A label can also be mapped art on a 3D extrusion. There one can get good shading and right bending and perspective easily. Learning to fill all details in 3D extrusion dialog takes some time, but it's surely useful.
The mapped art image must be placed to the symbols collection to be available when one selects pieces of art onto the surfaces. This way the text stays editable. Unfortunately it does not update automatically. One must remap the edited label, but that's done quickly. Only re-enter to the extrusion dialog via the appearance panel.
This Easiest way to wrap label around an existing bottle / can is an older case where extrusion and mapping are used in a little more complex problem. The explanation is detailed.
As an example a piece of circle curve is extruded to have a label. It's white altough a black curve is shown in the screenshot:
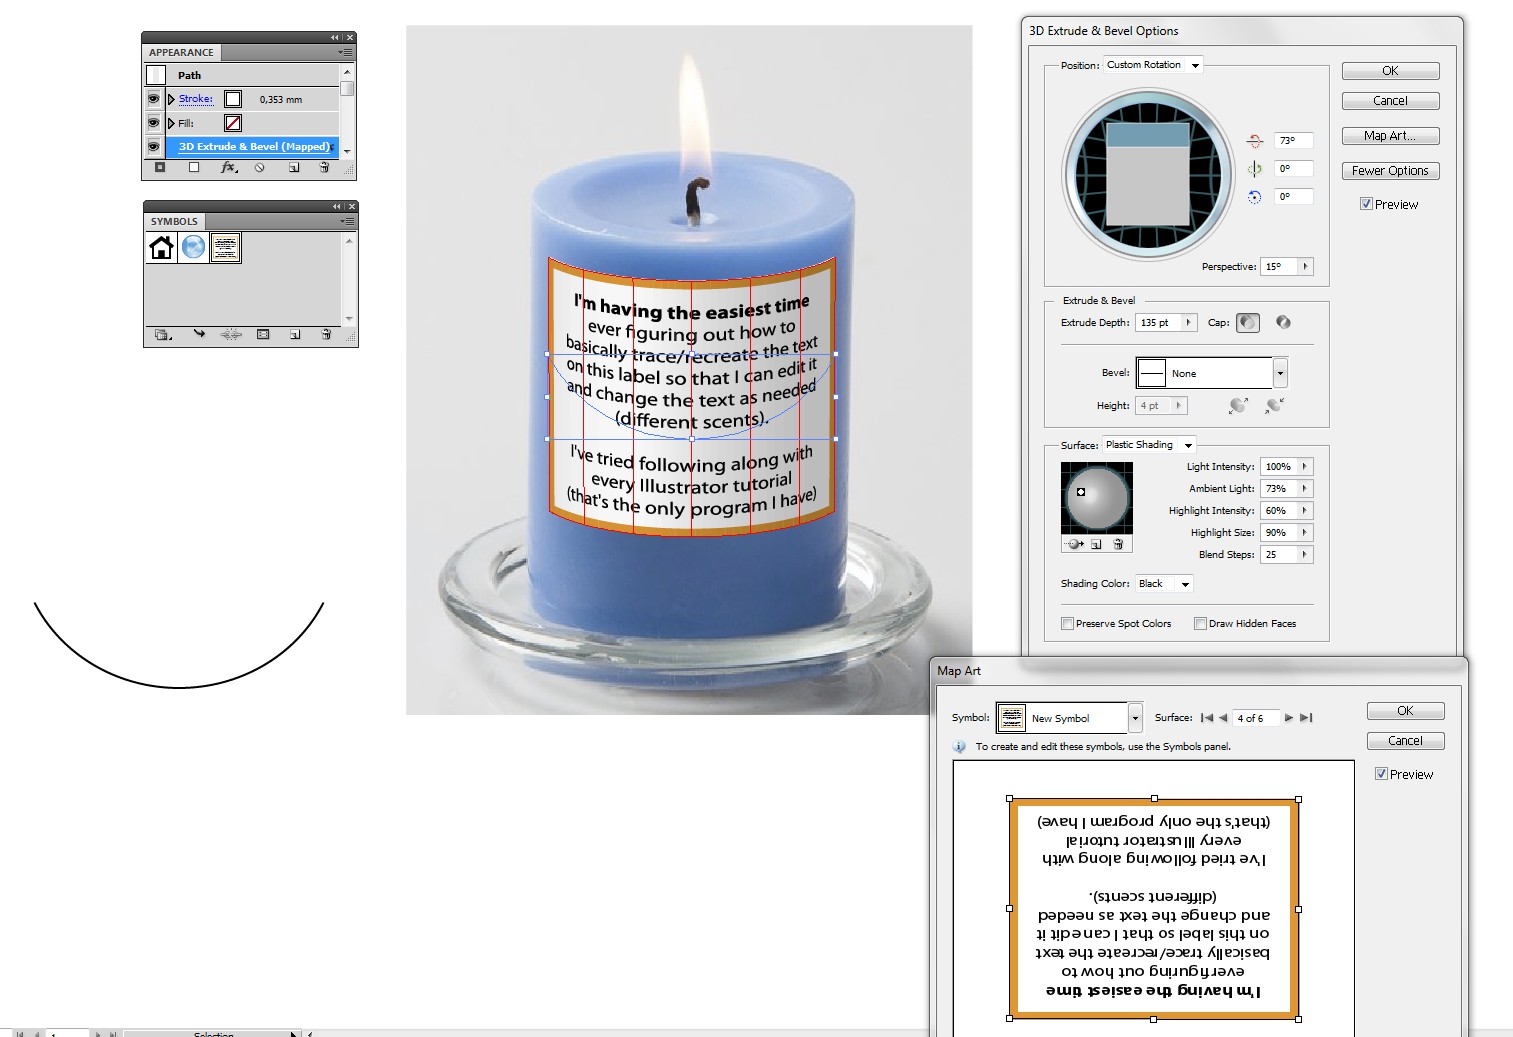
After all tweaks here's the result in bigger size:
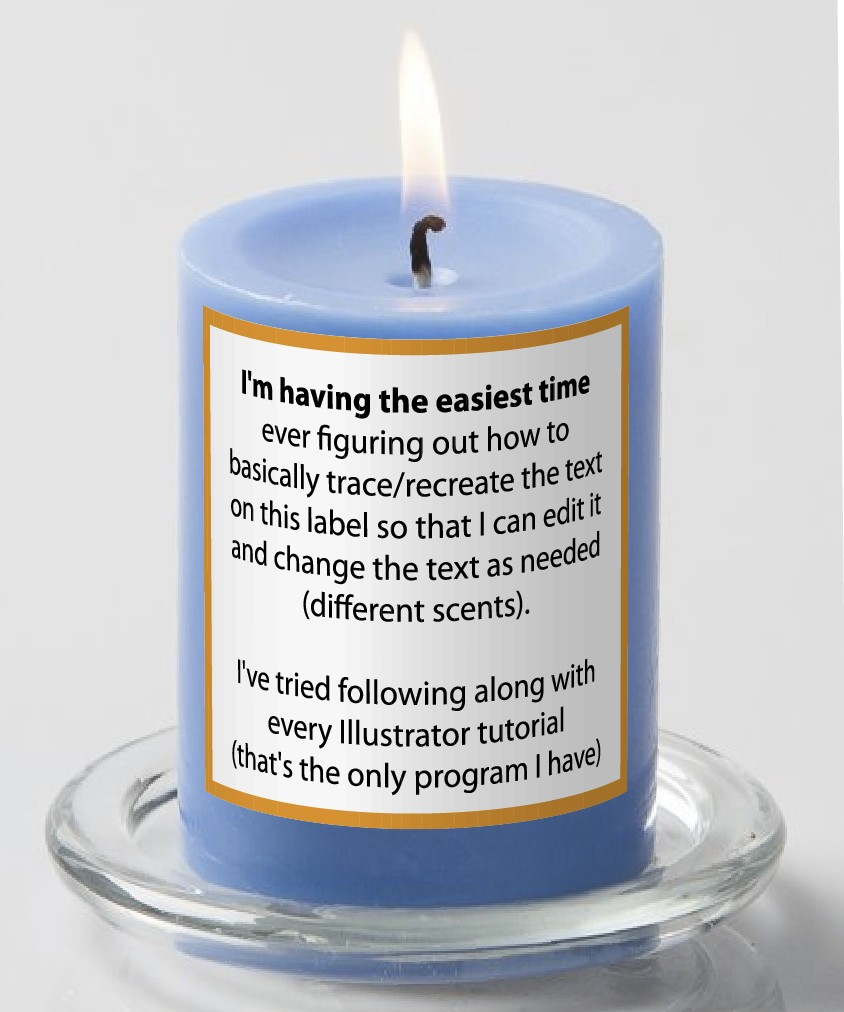
The label has a little artificial shading when compared to photo. A better solution would be to have a blank label in the photo and to insert only the non-white parts. That's possible by extruding pure white arc but with no shading.
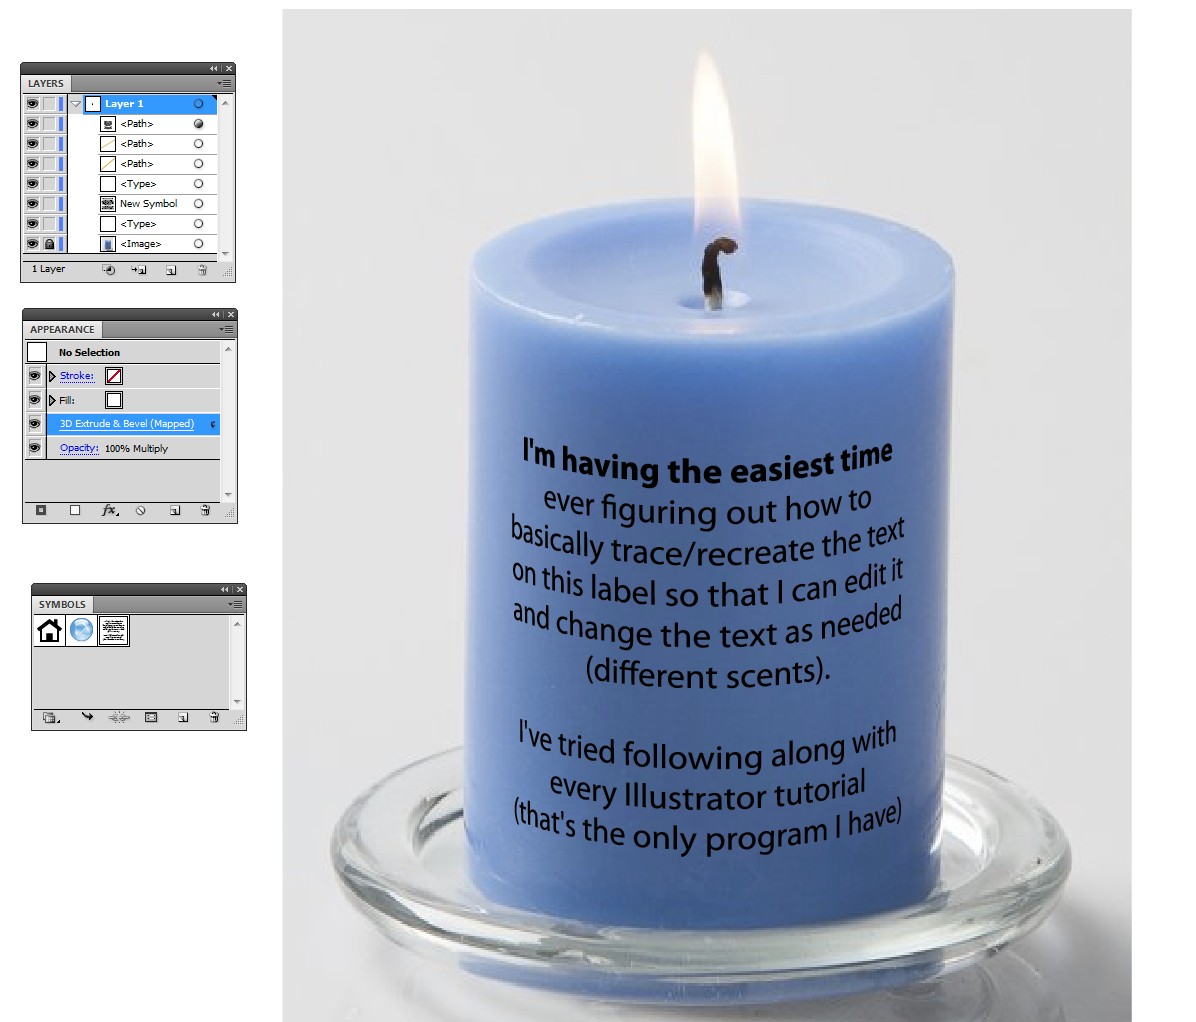
If one places the extrusion result with blending mode multiply, all white of the extrusion vanishes and the shading comes from the photo.
Here's an example. It's text only, because I had no candle photo with blank label -sorry!
Not asked: You should consider to get another program for adjusting and editing photos and removing the backgrounds. If you cannot afford Photoshop or you see it too complex, there's still plenty of options:
1) Affinity Photo - a low cost commercial, much simpler than Photoshop, very much simpler than GIMP, excellent mesh warp which would make the Illustrator unnecessary in the envelope distorted version, good photo editing and adjusting capablities, knows CMYK
2) Paint.NET freeware, simple to use, with plugins even more capable than Affinity Photo except doesn't know CMYK
3) GIMP freeware, complex, but capable except it doesn't know CMYK. It's intended for those who demand plenty of options and have no special tendency to get into troubles with complex software.
ERRATA: Just tried Affinity Photo - does it really keep warped text editable? Unfortunately it didn't. Warping turned text automatically to uneditable pixel layer.
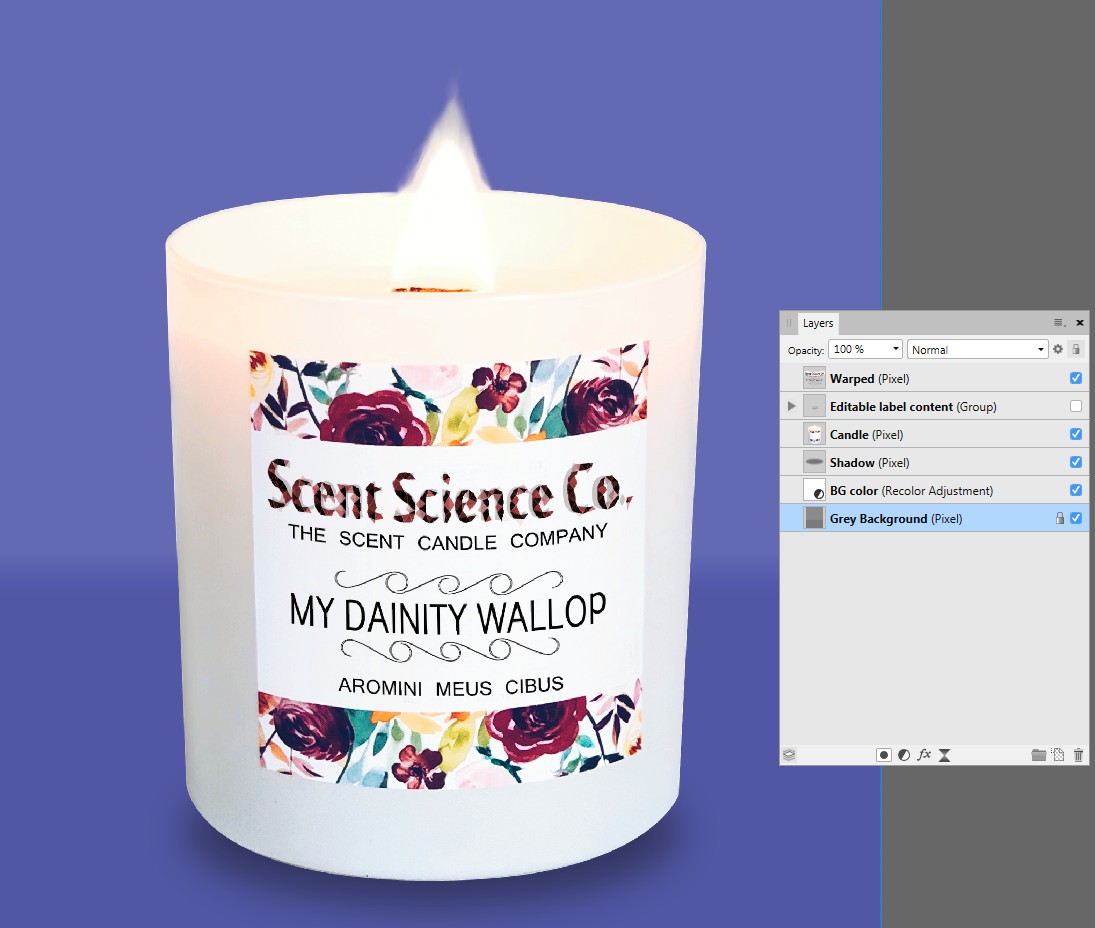
But warping is in Affinity Photo so easy that it's not a big deal. You can well keep a non-warped copy of label content. Duplicate and rewarp it after editing. You will lose less than one minute when compared to Illustrator.

