0

What is an easy way to create this pattern in Inkscape?

https://www.shutterstock.com/image-vector/set-decorative-card-cutting-square-pattern-788812207

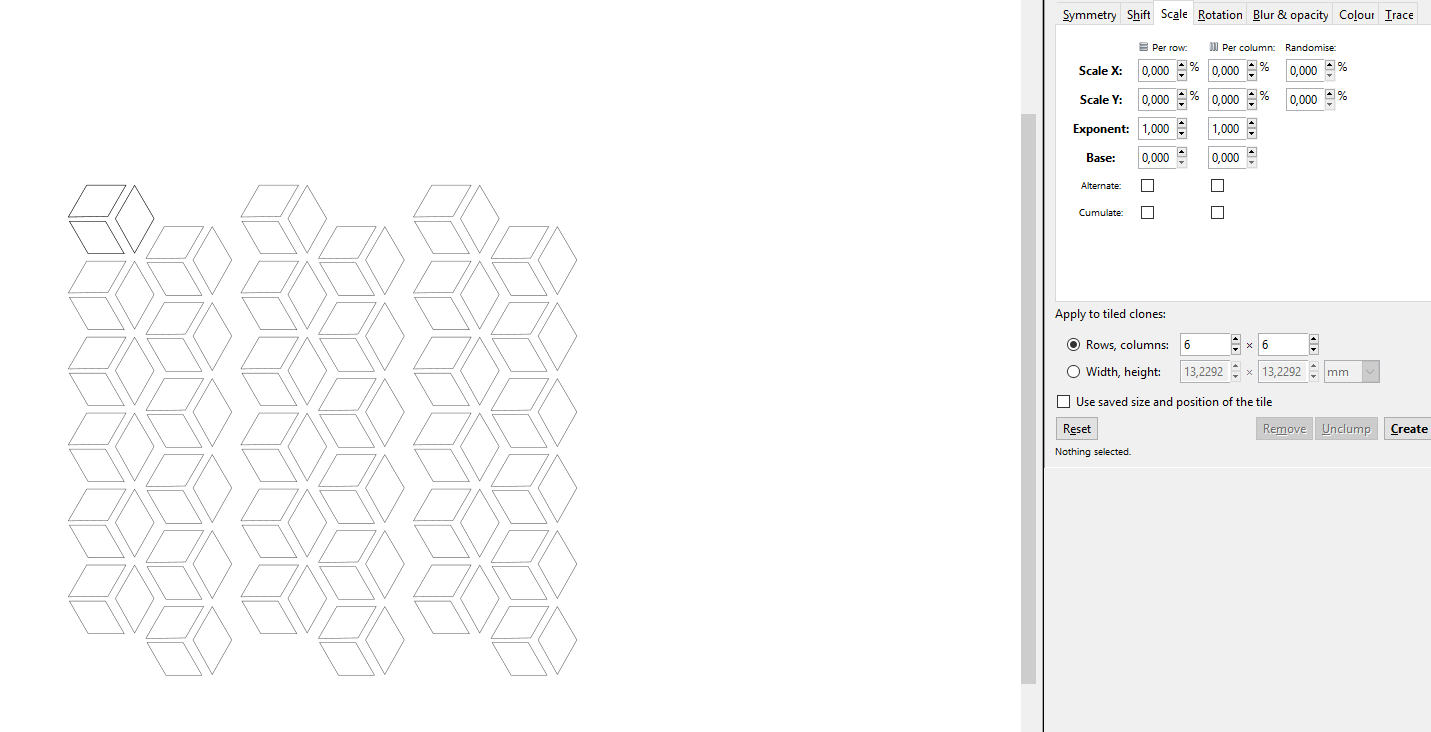
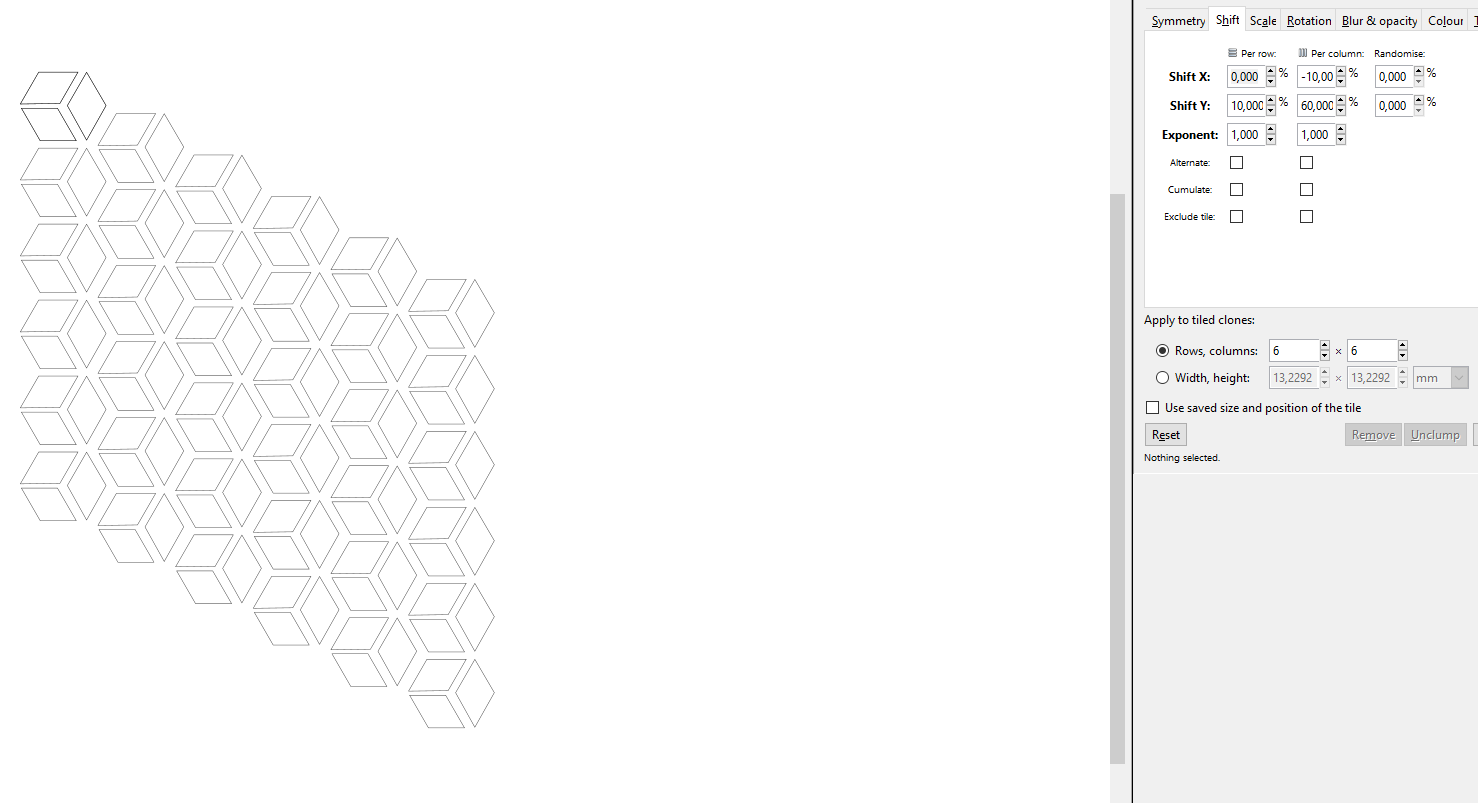
So far using Creat Tiled Clones I have been able to achieve following outputs: Inkscape screenshot showing tiling setup

This is without alteration on the column. As you can see the pattern shifts down.

If I enable the per columen alternation I get following result. Now the gap between the columns varies, because the horizontal shift changes its sign as well as as the vertical.

Inkscape screenshot showing tiling setup

About the scaling I'm not even sure where to start. The Scale tab, does not help, because I need to scale the segments individually, but the original is single combined path.

2 Answers 2

7

You have found a part of the idea, but seeing what's repeated and scaled during the repeats need a little experience - nothing ingenious, only practiced by making some cloned tilings.

You should see that there's downwards squeezing holes in a white plane. Through the holes one can see the brown background and a shadow.

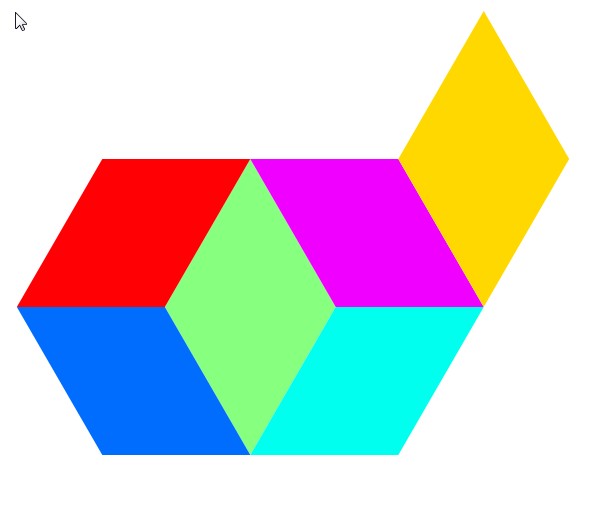
These are different tiled parts which should squeeze when the tiling advances downwards. There are skewed rectangles
enter image description here

The red one (= a horizontally minus 30 degrees skewed square) is made first. The blue one is a flipped copy. Magenta and cyan are two more flipped copies. The green one is drawn with the pen after placing the skewed rectangles. The yellow one is a copy of the green. All is drawn and placed within half a minute. With snaps ON everything gets placed perfectly.

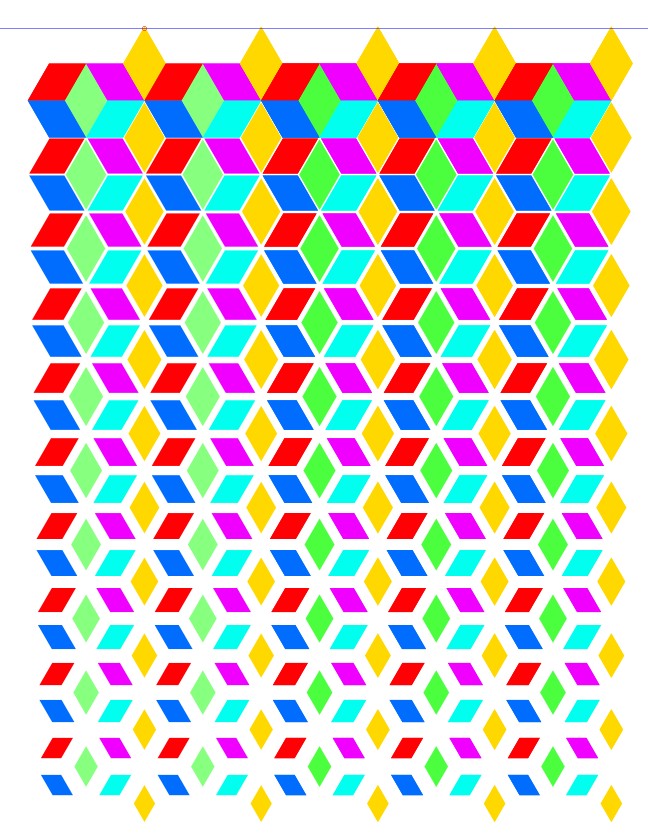
The parts must be tiled separately vertically because otherwise the scaling changes the placements. Here are the needed 6 tiled vertical stripes. Every piece is scaled -5% per row. The blue, red, magenta and cyan need also 100% Y shift per row because they are half as high as the green and yellow parts.

enter image description here

Making the needed amount of horizontal copies fills the area:
enter image description here

The first line on the top hasn't gap. It can be deleted. The rest can be subtracted from a white plane to get the holes.

NOTE: Clone links should be released before edits are possible. It's Edit > Clone > Unlink Clone. The shapes should be combined (Path > Union) before they can be subtracted from a rectangle.

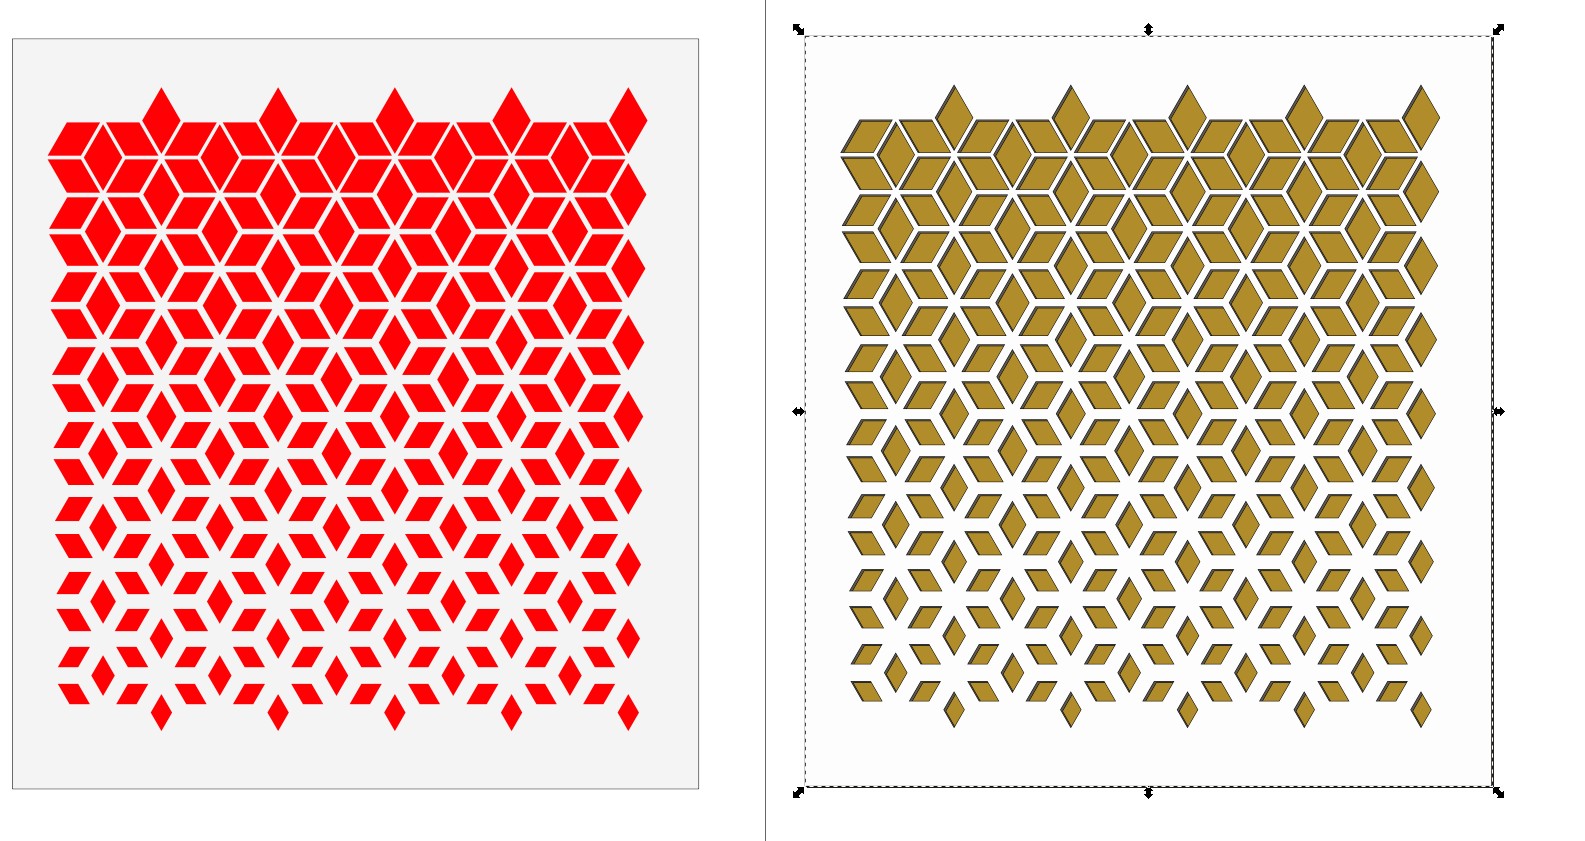
Here are two versions of the result:
enter image description here

In the left there's no holes, only the united shapes colored to red on a grey rectangle.

In the right there's holes and a darker copy a little shifted below as a shadow. On the bottom there's solid brown rectangle.

ATTENTION: You probably have no right to sell nor give for free these plates because they can be copyrighted works. A self made copy is as illegal as one which is downloaded from somewhere without paying. It's your job to find who owns the copyright and pay what he wants. I guess it's the image stocker.

The situation is different if the pattern happens be in public domain, for example someone has painted it say 150 years ago. The law and time limits vary wildly between different countries.
3

Here's a different method that doesn't use tiled clones at all, just for the hell of it.

Before you begin enable the following snapping options: Snapping, Snap nodes paths and handles, Snap cusp nodes inc. rectangles. This will help you place everything accurately.

  1. Draw a hexagon with a stroke and no fill, copy and paste it, and move so that they both intersect.

  2. Continue pasting intersecting hexagons until you have this complete shape, select all, and do Path > Combine

  3. Copy and paste to get a complete column of shapes, then delete the four in the middle indicated by the dotted line, leaving the two end copies (4 and 5)

  4. This is the original shape

  5. Add a thicker stroke to this shape

  6. Select both shapes 4 and 5, and do a four step interpolation using Extensions > Generate from path > Interpolate, and make sure you enable the Interpolate Styles option.

  7. Copy and paste additional columns, moving and snapping into place until you have the complete pattern

  8. This is the complete graphic. Strokes set to white, under that a copy with strokes set to black and a blur added and moved slightly to offset the shadow, and under that a filled rectangle. All are grouped and then clipped using a rectangle drawn on top as a clipping path.

enter image description here

Your Answer

By clicking “Post Your Answer”, you agree to our terms of service and acknowledge you have read our privacy policy.

Not the answer you're looking for? Browse other questions tagged or ask your own question.