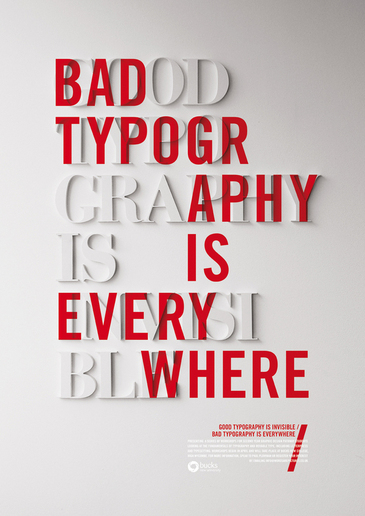
This has been bugging me for ages. I want to recreate the shadows that are on the background of this image. Whenever I attempt to recreate something like this the shading ends up looking very amateur no matter how much noise or blur I add or how many layers I introduce. I would really appreciate help on this!
-
1There's no formula for this and it sounds like you know what you're doing. Could you edit and post one of your attempts so we can tell you what looks off?– RyanCommented May 20, 2016 at 17:06
-
Take a look at this post. It is asked on a diferent program, but the steps are very simple: graphicdesign.stackexchange.com/questions/64599/… This image has some other characteristics, but as Ryan say, post your examples and lets see your effort.– RafaelCommented May 20, 2016 at 17:15
-
dont use pure colors it allows for more gradient.– joojaaCommented May 20, 2016 at 18:13
-
1I think the background is actually a 3D render, although it should be possible in Photoshop.– PieBie ♦Commented May 20, 2016 at 19:04
-
you should also take a look at the light being reflected by the letters on the left side, if you didn't. It's subtle and adds to the overall realism of the shadows.– LucianoCommented May 31, 2016 at 10:21
2 Answers
I would look at this as either
- A spotlight with a hot center, and with a falloff at the edge of the spot light
- Partly lens vignetting
- A combination
The latter often give a more realistic and natural look than just one of the top options.
It's easy to do this with 3D software for the light and then add vignetting in Photoshop or After Effects. But you could get close using these steps in Photoshop:
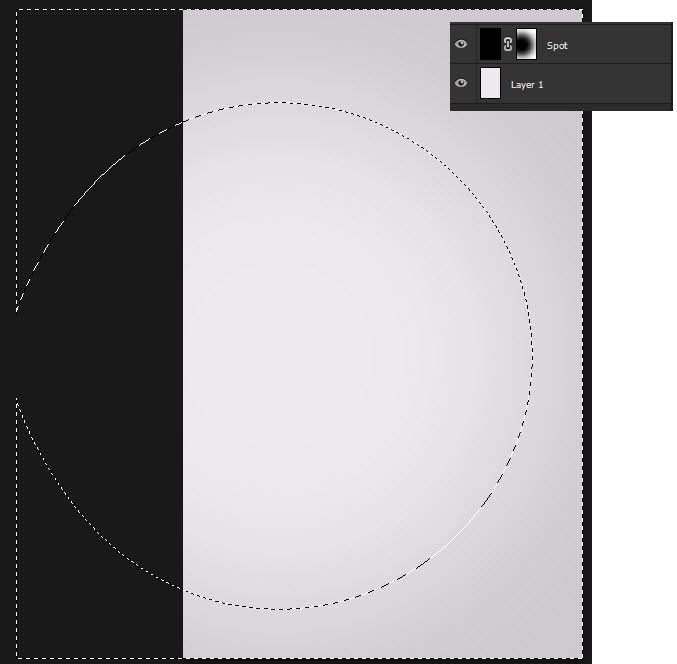
- Fill background with brightest color
- Add a circle mask representing the outer rim of the spot light
- Turn selection into a mask for an empty layer, invert mask, blur it to create soft edge and fill layer with black.
- Dial down the opacity of the layer (I'm using 14% below)
- Create a new layer for vignette. Manually draw in black solid in the upper and bottom right corners. Blur it (f.ex. 75 for Gaussian blur).
- Dial down opacity, optionally stretch and re-position the layer to your liking (I'm using 41% below)
- Throw on a LUT effect on top to warm up the result (I used
FallColorsfor the result below at 19% opacity) - If too much banding add some noise/grain, work in 16-bit mode etc.
It got me this result - I could have spent more time tweaking the vignette and spot layer's opacity but you'll get the idea:
Step 1
Step 2-3
Step 5 A
Step 5 B
Result
With LUT effect. The vignette layer was stretched downward in this end result.
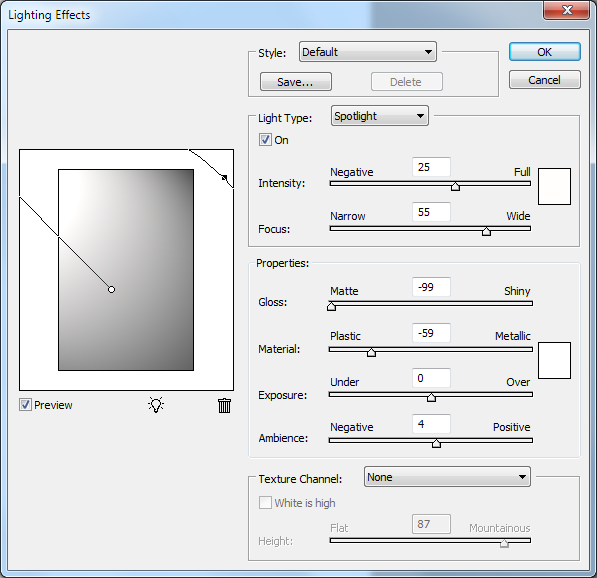
There is a filter in Photoshop that has not currently in fashion, hence not often seen used, that does these kinds of things. This is a bit similar answer to @K3N has to offer. This filer is found is Filter → Render → Lightning Effects.... It achieves the same thing as rendering in a 3d application.
Then just put tt on top with a slightly offset lightning effect and drop shadow. Adjust with levels to get the feeling you like.
-
-
I forgot about the lighting effect. Nice! (and much simpler)– user7179Commented May 21, 2016 at 8:33

