0

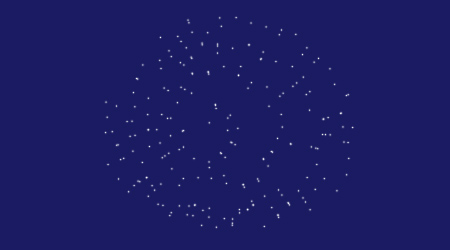
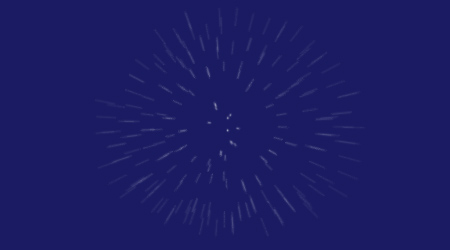
I have been trying to recreate this image. It looks to be a sphere which is exploding from its core, made from only lines and small circles. Can anybody help me recreate this sphere?

I have looked in many placed online for a tutorial, but I could not find anything. I have tried working with polar coordinates, but it just doesn't give me the same result.

How can I recreate this image?

enter image description here

1
  • 2
    ...they are just some dots (circles) and some lines ....
    – Alin
    Commented Oct 5, 2016 at 11:27

3 Answers 3

4

If you know how to use illustrator try this tutorial (https://www.behance.net/gallery/3531797/Radiolarians-(Ilustrator-tutorial)).

Actually even if you don't know how to use illustrator the tutorial it's quite explanatory.Besides I'm not sure if you can easily recreate this with photoshop. It seems to be a vector graphic.

Basically you can create unique shapes using a brush pattern, blend tool scallop tool, bloat tool etc. Experiment with the options that each tool gives you and you'll come up with something.

4
  • Hi paul, could you please explain a bit more what we'll find behind the link you provide and why it answers the question? That way, your answer is still of value in case the link breaks at a later time. Link rot is the main reason we really dislike link-only answers here. Thanks for your effort and keep contributing!
    – AndrewH
    Commented Oct 5, 2016 at 14:09
  • The tutorial shows how can you reproduce similar sphere like designs like the one Tamsyn is asking above. I could upload the images but i don't know if that constitutes an appropriate answer as they are quite long in dimensions.
    – paul
    Commented Oct 5, 2016 at 14:23
  • 3
    Please edit your answer and include this information. You don't have to write a tutorial for us but please summarize the tutorial in a couple of sentences. Basically stating that you can create unique shapes using a brush pattern, blend tool and scallop tool. Really cool tutorial though!
    – AndrewH
    Commented Oct 5, 2016 at 14:40
  • 2
    This is for Illustrator, though the OP has tagged the question for Photoshop...
    – Paul
    Commented Oct 20, 2016 at 9:47
3

Try this:

Create your canvas (I've used a 300x300 for this example). Place the central vertical and horizontal guides, like so:

Centre point

Create a single group and select it.

New group

Choose the Line Tool and drag a series of randomly orientated lines from the centre of the canvas to a reasonable, but random, distance from the centre. The more you make now, the more dense your final image will appear.

First rays

Make three copies of the group and rotate each one randomly about the centre of the image by moving the datum point.
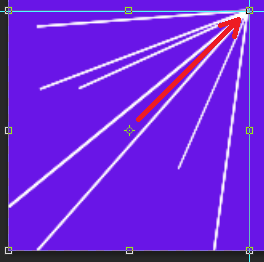
Move the datum Random rotation

Make a fifth group and drop your other four groups into it. For ths main group turn the Fill off completely (0%). Modify the Layer Styles, adding a gradient overlay. Set the gradient colour to all white (i.e. white at both ends of the scale).

Grouped groups

Change the opacity at both ends to 0% and slide the right hand side opacity location setting to about 60 or 70%. Now add two more 100% opacity points between locations 0 and 50% (give them a bit of distance). Note that the more you play with these values (in conjunction with the resolution of the image), the more of a feeling of distance from the 'core' you get.

Creating the rays

If you're really pedantic about it you can do this for each line to give it a more random feel, but doing this for the whole group should produce an adequate effect.

Now check the Reverse tick box and set the Style to Radial.

Gradient options

Duplicate the main group several times.
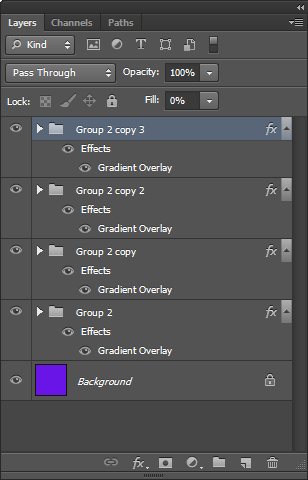
Start of the 3D rays

For each one in turn, move the datum point to the centre of the image and give it some random rotation. Perform an orthognally locked (Alt + Shift) scale about the datum, and finally change the positions of the opaque regions in the Gradient Overlays, moving them gradually closer to the centre (closer to 100%) and making the lines shorter, to give that 3D effect.

Hey presto!

This isn't the best method (using the right tool for the job is the best method), but it does produce adequate results.

As an afterthought, you could also try giving more distant rays less opacity in the gradient, so that closer rays are brighter. Oh! And remember to stack your layers properly if you start doing that.

2
  • 1
    why not edit that into the answer as comments are meant to be temporary?
    – user9447
    Commented Oct 20, 2016 at 15:22
  • @darthvader: Done!
    – Paul
    Commented Oct 20, 2016 at 21:52
2

You're looking for FILTERS - BLUR - RADIAL BLUR set to ZOOM in Photoshop. That's why the streaks appear to be shorter for those closer to the viewer. I quickly knocked this up with a scatter brush and applied Radial blur with zoom set to 34, but you'd have to fiddle with your own settings. The rest is applying another layer of scattered dots, but they don't appear to have an effect.

before blur

Radial blur photoshop

Your Answer

By clicking “Post Your Answer”, you agree to our terms of service and acknowledge you have read our privacy policy.

Not the answer you're looking for? Browse other questions tagged or ask your own question.