I'd like a plugin that allows me to click 2 points to draw an arrow in between. All the options mentioned in different posts work for GIMP 2.8 but are broken in 2.10 (such as the arrow.scm file floating around or the python script)
3 Answers
The following linked script-fu works in GIMP 2.10.2
I assume also in the latest 2.10.8
Link: https://www.gimp-forum.net/attachment.php?aid=360
Copy and paste the file named arrow-set-size.scm in you scripts folder, and restart GIMP
In a document, create a path using the Paths tool with a start and end point
Click Tools > Arrow-Set-Size. Make adjustments to the settings if required. Hit OK.
-
2Just wanted to add that at least in most Linux distributions, the scripts folder mentioned is usually located at ~/.config/GIMP/{gimp version number without revision number}/scripts/, in case you have lets say GIMP 2.10.2, the folder is
~/.config/GIMP/2.10/scripts/Commented Mar 8, 2019 at 1:54 -
4@MarianoRuiz The scripts folder is best found using
Edit>Preference>Folders>Scriptsand using the one marked R/W. Flatpak and AppImage versions of Gimp have different user profile locations, but Preferences always point at the right place.– xenoidCommented Mar 14, 2019 at 8:21
To improve on @Billy Kerr's answer (this is a new account so I can't comment on his answer) by providing the latest of the script by programmer_ceds (original version by Berengar W. Lehr) and more detailed instructions:
- Get the latest version of the Draw Curved or Straight Arrows script. The file will be named
arrow.zip(or similar). - Unzip the downloaded zip file, which should contain the arrow.scm file and instructions.
- Copy arrow.scm to the GIMP scripts folder.
- The scripts folder can be found using
Edit>Preference>Folders>Scripts(thanks to @xenoid for instructions) - For a Linux DEB install, the scripts folder may be
~/.config/GIMP/{gimp version}/scripts/or~/.{gimp version}/scripts/. - For a Linux Snap install, the scripts folder may be
~/snap/gimp/current/.config/GIMP/{gimp version}/scripts. - Restart GIMP and check that there is a
Tools->Arrow...(or similar) option. - Click on the Path tool in the Tool Options dialog (or Edit → Stroke Path from the image menu).
- First click in image at the location for the head of the arrow and then the location of the end of the tail.
- Click
Tools->Arrow...and clickOKfor the arrow to be created.
-
N.B. it looks like once GIMP updates to 3.0 (which may come by the time the next person reads this comment), people should use
arrow_V3.scm. Commented Sep 28, 2023 at 18:45
The scripts work fine, but the lack of a preview in the settings window with so many options make them hard to use.
I found this solution using predefined brushes much simpler: https://www.gimp-forum.net/Thread-Lines-and-Arrows?pid=1359#pid1359
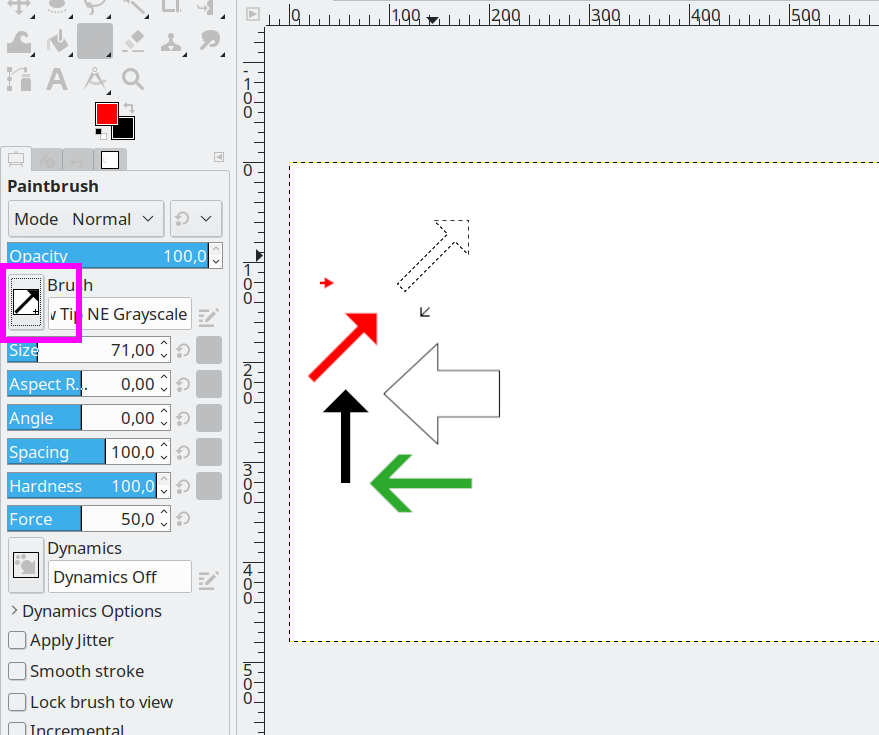
Once installed, you only need to use any draw tool like the Pencil and pick one of the arrows from the brush button:
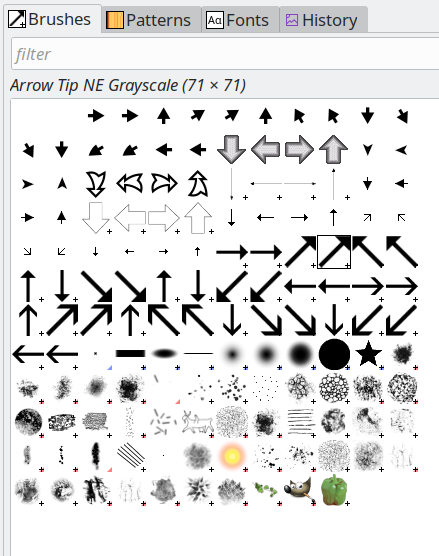
There are plenty of brushes to select:
To install them, download the arrowofcursor.zip file from the post, find the brushes folder from your GIMP installation with Edit > Preference > Folders > Brushes, open it, and copy all the brushes there and restart.


