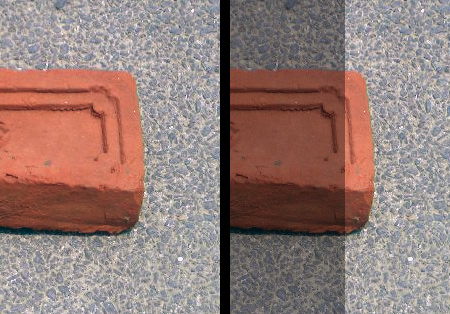
Here is the result I got. On the left is what the questioner wanted to do. On the right, I have not removed the bright box, but applied this process around it to show that you can either match the higher brightness or the lower brightness portion with this same process.

Here's the process:
Step 1. Find a common pixel between the modified and unmodified image.
Put the original and modified images on separate layers. I'm going to assume you put the brighter image on top like me, but it really wouldn't matter after you do this once. With the bright box visible, zoom into it really close and rectangle-select any pixel, so later you can reference it easier. Which pixel probably doesn't matter. One that's close to medium brightness would be best I think. I used one from the middle of the brick.
Step 2. Find out the brightness difference on the common pixel.
Now go to Image > Adjustments > Curves... If you have never seen Curves before, it's a dialog with a Mathy looking graph and its axes are Input on the horizontal and Output on the vertical.
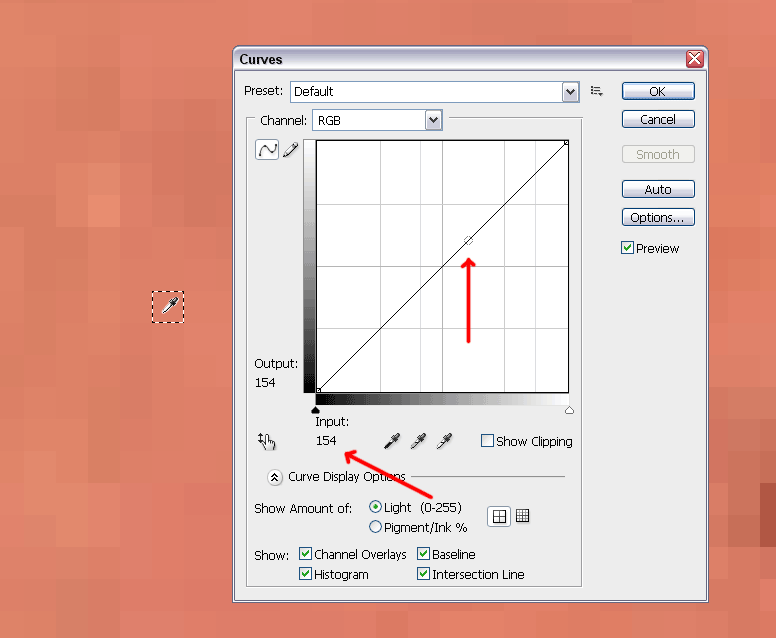
With the Curves dialog showing, move your cursor over your selected pixel. You will see that the Eye Dropper tool is set by default. Click and HOLD on the pixel, and you will see the Curves dialog update to display a little gray circle on the line graph and Input/Output values, which should be the same number. (See image below) Write down this number, we will call it Bo (original brightness).

Now close the Curves dialog, hide the current layer so we see the darker layer underneath (don't deselect the pixel though, we still need that). Open the Curves dialog again, and sample your selected pixel again to get another Input/Output value. Write down this value as well, and we will call it Bm (modified brightness).
Step 3. I don't know how to title this, so just do it :)
You now have two values, Bo and Bm. Let's also calculate a value called MAX:
MAX = (256 * (Bm + 1))/(Bo + 1) - 1
So that's 256 first multiplied by (Bm + 1) and then divided by (Bo + 1), then subtract one from that. The result should be lower than 255. If the result is not an integer, I would round it up to the next nearest integer E.g., 154.4 -> 155.
Step 4. Apply the MAX value to either increase or decrease brightness.
Deselect the pixel you had selected. Select the layer that has the dark image and open the Curves dialog again. On the curves graph you will see a diagonal line with two anchor points, click the top right anchor point and the Input/Output values will become editable. (See image below) Click on the Input value and change it from 255 to MAX. Click OK.

Some Notes:
I think this outcome is pretty precise, but as there is some rounding involved I don't believe its 100% accurate. An good algorithm could probably detect the differences, but for the eye it's close enough imo.
Step 4 works for increasing brightness, but if you were ever looking to match a decrease in brightness, you'd need to do that step differently: once you have the value of MAX, select the light image that you want to darken, open the Curves dialog and apply MAX to Output instead of Input. That is how I darkened the left side of the bright box in the image at the top of this post.
This will not work if saturation or hue changes have been applied. It will also not work if the brightness has not been applied uniformly to all pixels, like by using the Levels or Curves dialogs to affect shadows one way, midtones another way, and highlights in yet a different way. If the brightness was not applied uniformly, my guess is that these changes are in a way destructive, and there is no way to accurately undo them by hand.


