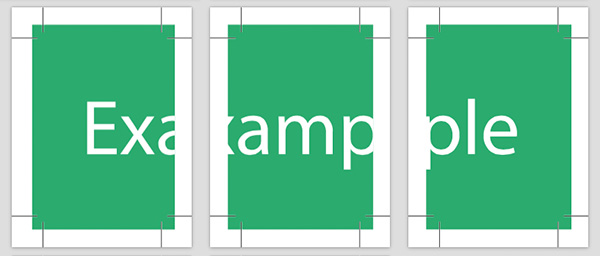
3

We have been sent a design which is to be used as three panels for an exhibition shell scheme - at the moment we have a single page in essence which has a coloured bar top and bottom and there is currently 5mm document bleed.

The problem is that to print, we need to provide the printer with three individual vector prints (PDF ideally) so they can print one per panel and each panel needs to have its own bleed - for example, at the moment, the left most panel when created would have bleed on the top, bottom and left side from the document bleed but it would not have any bleed on its right edge.

The designer won't reply to emails and we have an exhibition next week so we are really up against it.

I have read up on slicing but it refers to "web images" which I don't think will be good enough quality so how do I create three equal vectors from one and how do I ensure that each of those created prints then has a bleed all around as needed?

1 Answer 1

8

So if I got this right.

You could either manually make 3 artboards side by side, or:

  1. With Rectangle tool M, draw a rectangle on top of your current artboard and make sure it is exactly the size of the artboard.
  2. From the top menu: Object > Path > Split into grid...
    • Row: 1
    • Columns: 3 I'm assuming you want to split it vertically
    • Gutter: 0
  3. Again from the top menu: Objects > Artboards > Convert to artboards
  4. From the top menu: Window > Artboards. In the Artboards panel Select the first artboard and delete it.
    • You could skip this part if you want to. If the original artboard is left there, the first page of the exported pdf will have the full design. This could be confusing for the printer, so it might be simpler to just delete it at this point. Your call.

Now you're left with 3 artboards with the design spread across all of them.

  1. You can then set the bleeds at: File > Document setup...
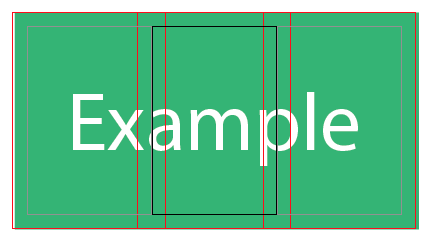
    • There isn't a "hide bleeds" setting in Illustrator, so in this case you may want to skip this step and set the bleeds when exporting to pdf in the Marks and bleeds. Although if you set bleeds in the document setup, you'll be able to see the bleeds, so it may help you understand how they work in this case. enter image description here
  2. Save the document as pdf: File > Save as...
    • In the pdf export window on the left, click Marks and bleeds, check Trim marks and check Use document bleed settings.

Each artboard will automatically be saved as an individual page in the pdf.

enter image description here

1
  • Awesome, thanks - the designer had a single artboard so this got me pointed in the right direction so allowed me to change that artboard and then add two more, thanks again
    – bhttoan
    Commented Oct 15, 2015 at 20:26

Your Answer

By clicking “Post Your Answer”, you agree to our terms of service and acknowledge you have read our privacy policy.

Not the answer you're looking for? Browse other questions tagged or ask your own question.