15

I have a regular panorama image. How do I convert it into an equirectangular picture (normal → equirectangular)?

Most results I find on Google are a conversion in the opposite direction (equirectangular → normal).

This is the image I want to convert (HR link)

enter image description here

10
  • Are you starting with a 360 spherical photo or are you manually taking pictures?
    – AndrewH
    Commented Feb 7, 2017 at 20:36
  • I've created a 3d picture. You could compare it with a regular photo. I would like to convert it into an equirectangular image. Commented Feb 7, 2017 at 20:37
  • I am not sure how to do it from a 3D scene but for stitching photos together you can use PTGui or Hugin.
    – AndrewH
    Commented Feb 7, 2017 at 20:48
  • Does it have to be mathematically accurate? You could wrap the image around a cylinder and save an image in ortho perspective?
    – Wolff
    Commented Feb 7, 2017 at 20:57
  • No it doesn't, I'm really struggling, Hugin seems to create incorrect images. Commented Feb 7, 2017 at 21:10

5 Answers 5

13

Equirectangular image presents a sphere, it's distorted so that meridians and parallels on the sphere are shown as straight vertical and horizontal lines. An example from Wikipedia:
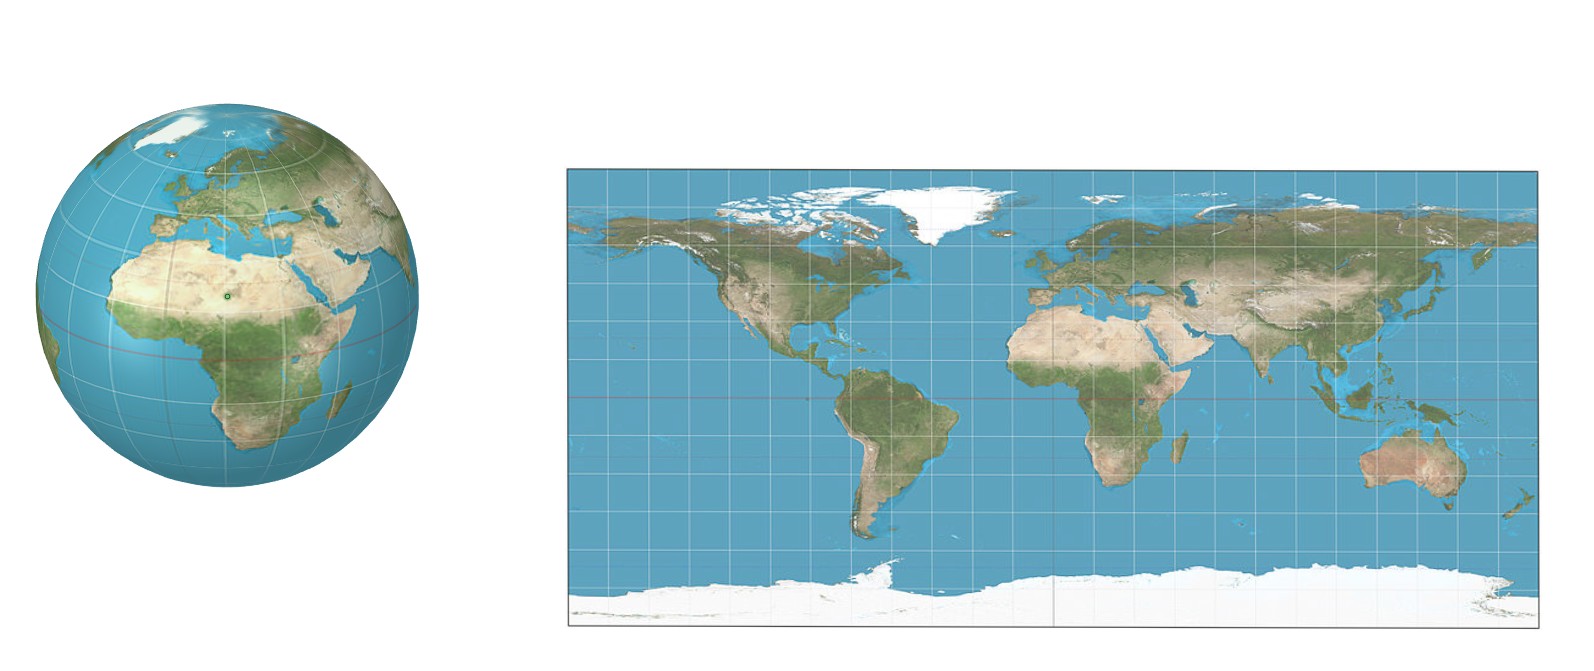
enter image description here

In the left there's a spherical map and in the right there's the equivalent plane map, the equirectangular projection from sphere to a rectangle.

There's no stretching on the equator, but the the image is stretched horizontally elsewhere. The more stretching the further the point is from the equator. Top and bottom edges contain actually only single points - the poles.

The rectangle has proportions W/H=2:1. That reflects the fact the distance between the poles along the sphere is exactly half of the full round trip along the equator.

You wanted to convert your image to equirectangular. Seemingly the proportions are 2:1, so it is equirectangular already if the corresponding sphere is this:

enter image description here

Half of the image is hidden behind the sphere, but there it is. As you see, top and bottom edges of your image are pinched to points, the poles.

I think you see this as an useless piece of math sophistry, you expected something else. I guess you want

1) an equirectangular image which presents a sphere with your image as a part of the surface, no need to cover full sphere with it

2) when one watches it sitting in the middle of the sphere, he can see your image on the sphere without distortion and in so big size that the image covers a substatial part of the field of vision, say a sector 90 degrees wide and 45 degrees high.

If you accept some distortion, You simply increase the canvas size to 400%
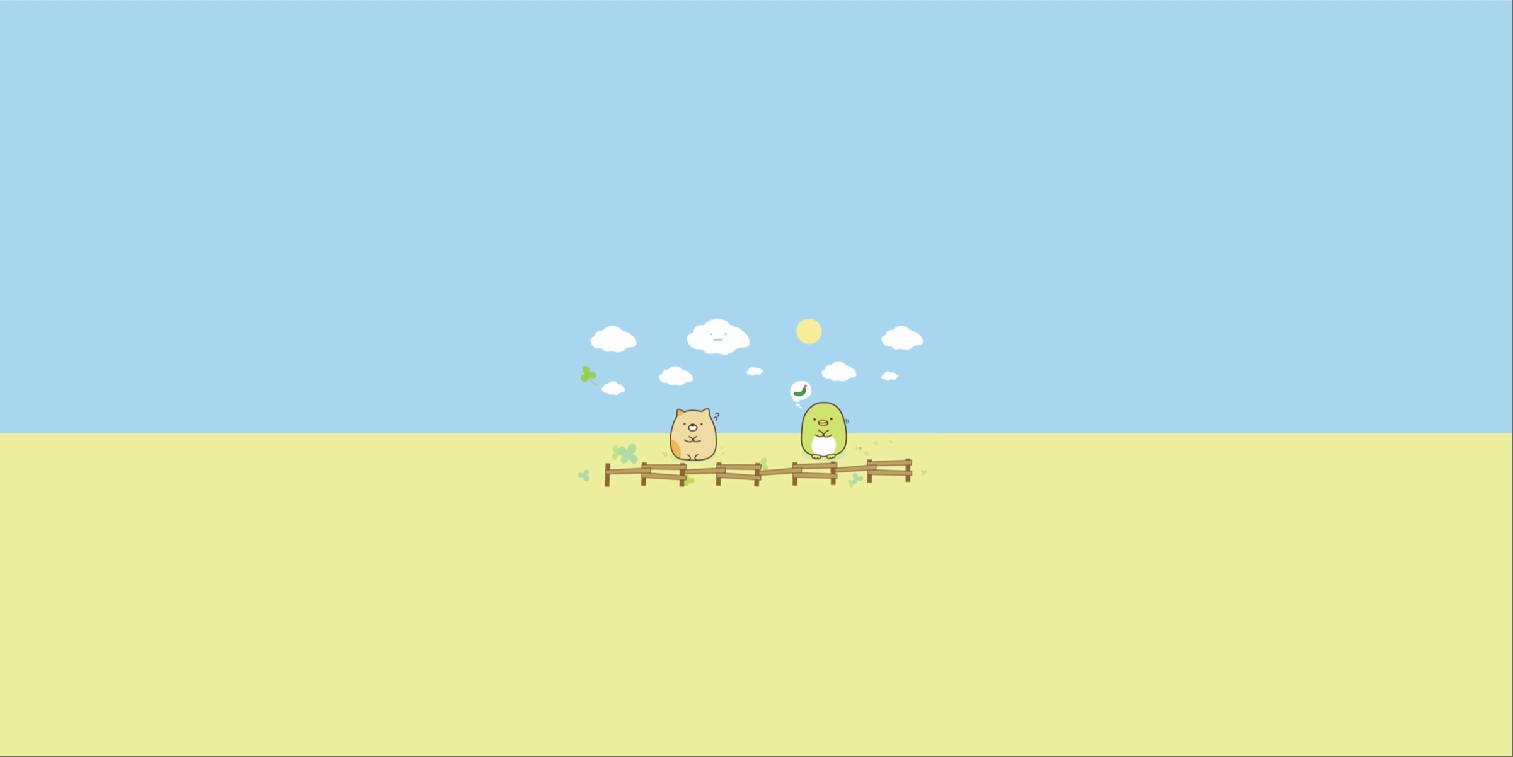
enter image description here

On a sphere seen from outside it is this:
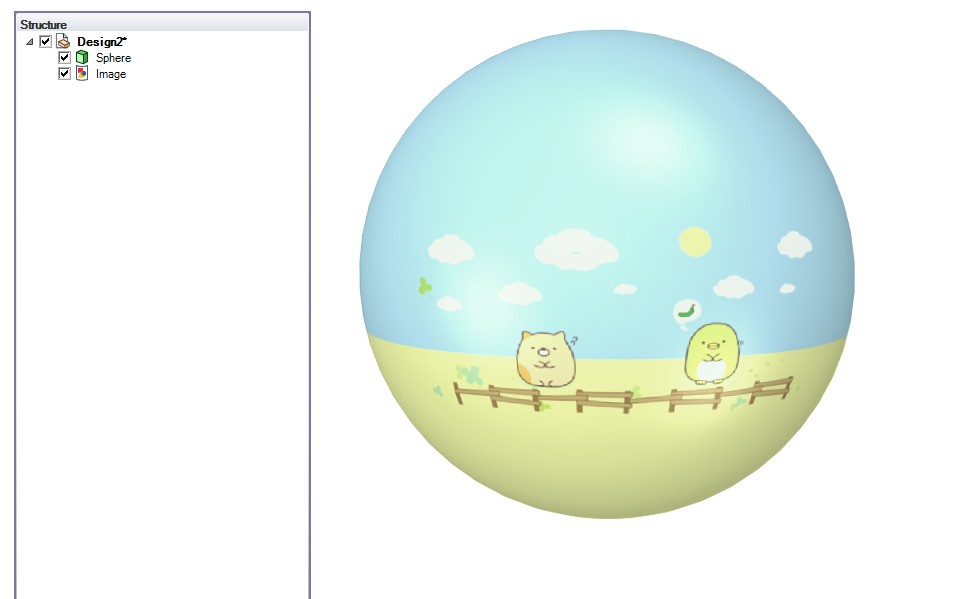
enter image description here

(sorry for the glosses, my freeware CAD program doesn't allow editing the lights)

Affinity Photo has Layer > Live Projection > Equirectangular which can show the wiew inside the sphere like the image were painted onto the inside surface of the sphere and the observer is in the midpoint. It shows this:
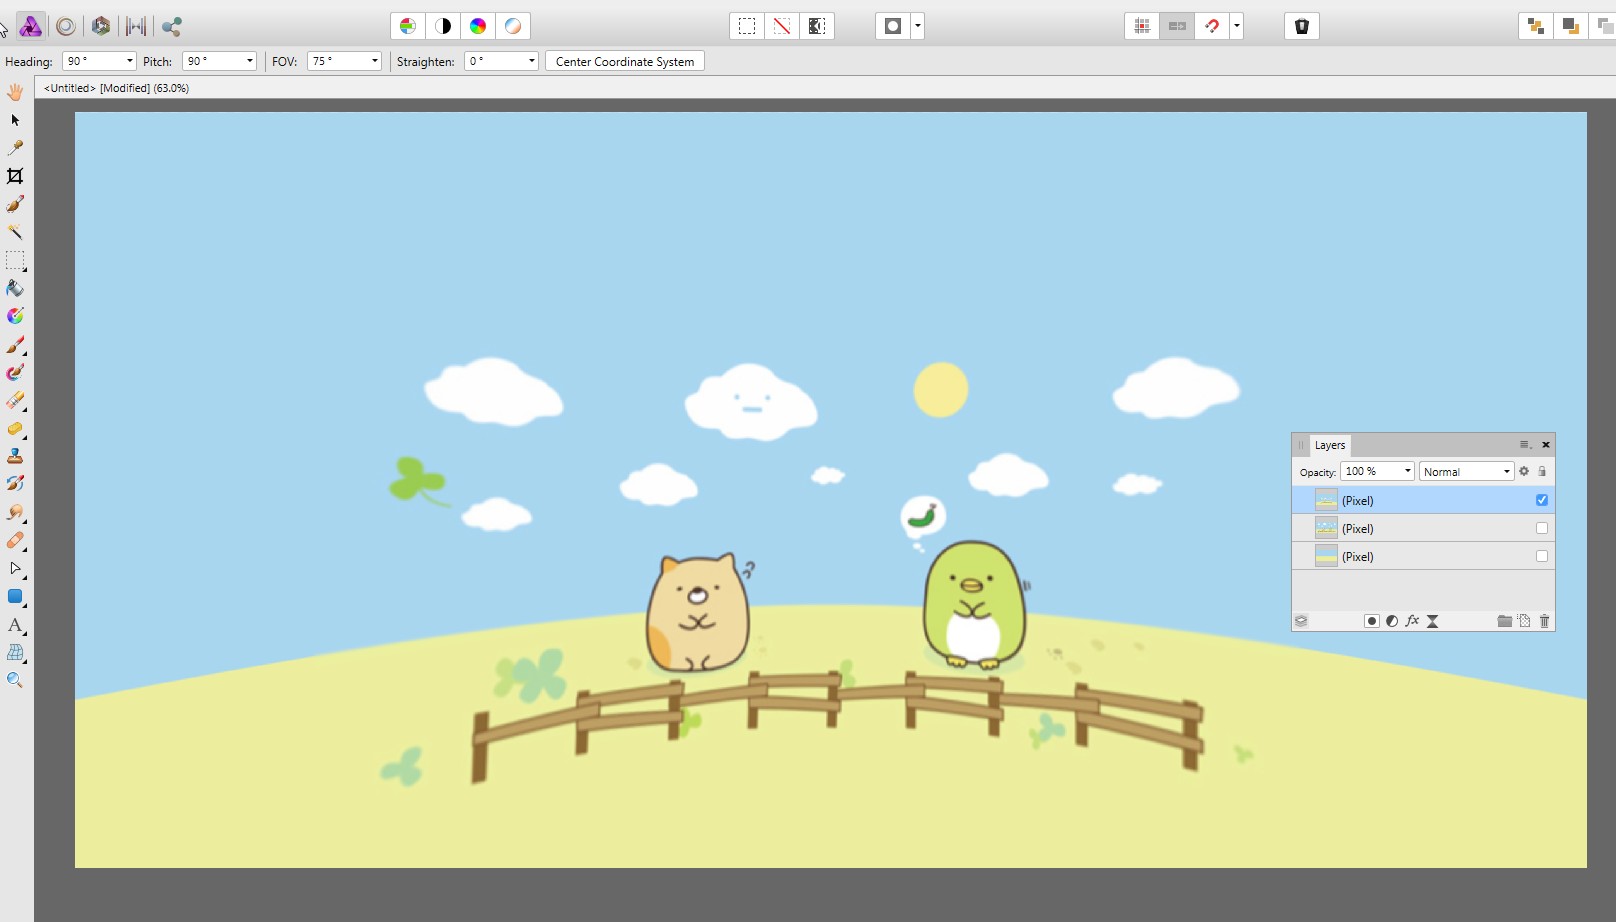
enter image description here

Curved fence and horizon obviously are unwanted, but the sun is still quite round. That's because it's much smaller and it's near the equator line. Horizon and fence are curved, because they are actually on horizontal circles (=parallels of the spherical map), one watches them a little downwards and sees them as ellipse arcs.

One can straighten the original image area with compensating distortion ie. by warping or more exactly with math distortion equations (Affinity P supports them, too).

Affinity Photo allows image edits in live projection mode. The edits are applied to underlying equirectangular image, but one watches the projection on the sphere. Here's a coarse warping attempt:
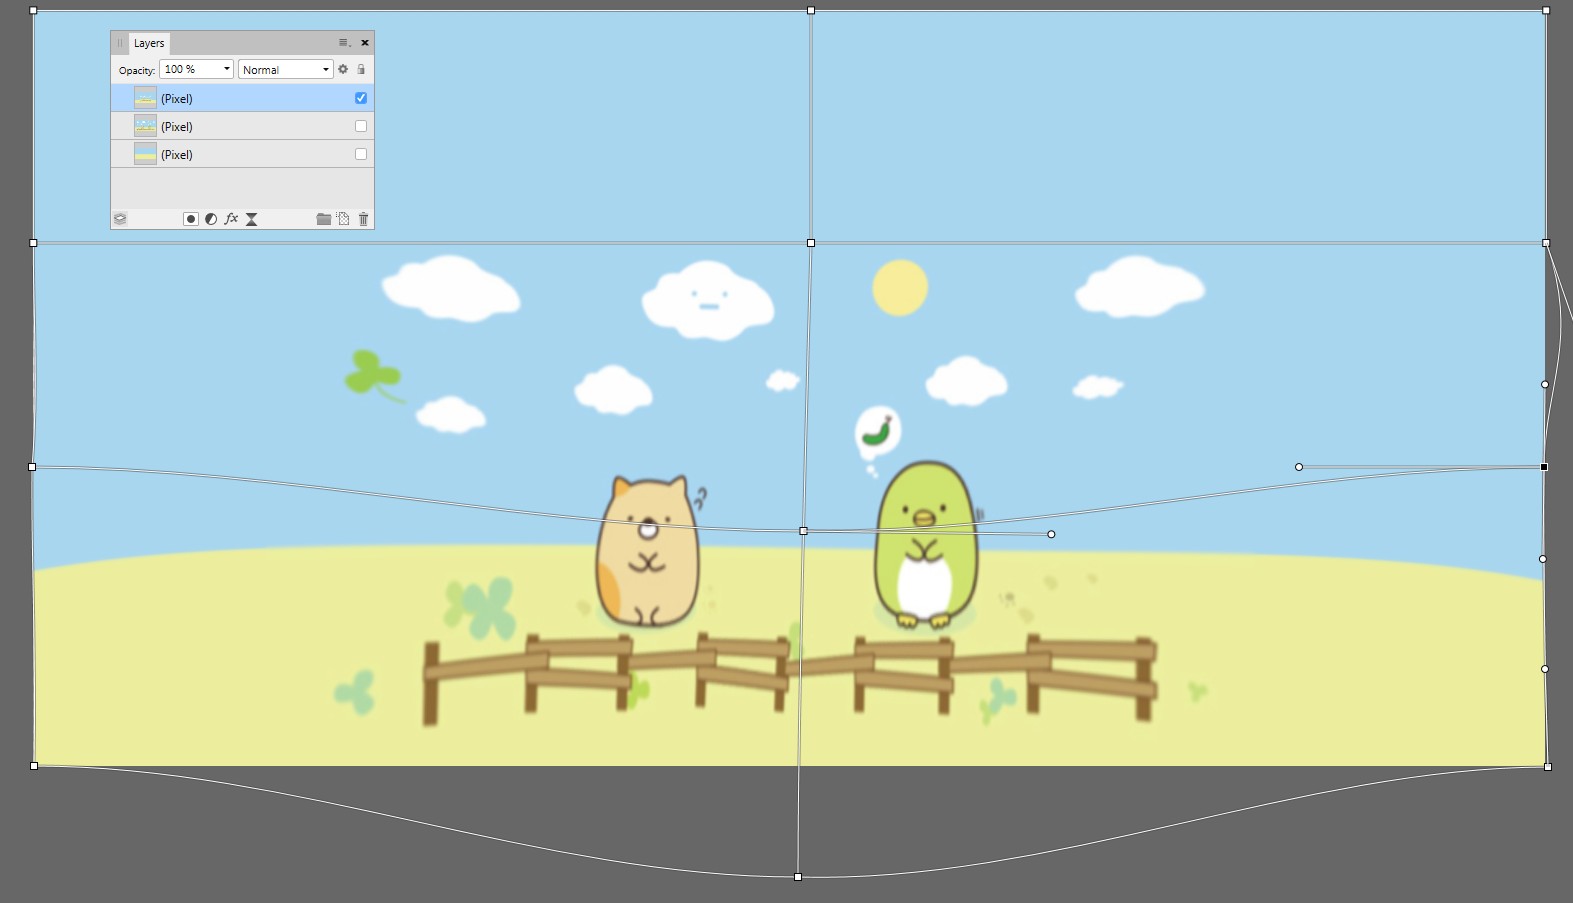
enter image description here

As well one can paste the original image and merge it to bare background layer, which is under Live projection:

enter image description here

But this is not a general fix. As soon as the watcher turns his head a little he sees in a new way distorted scene (=a flat card seen from a little aside)

enter image description here

There is no general fix, because you haven't a 3D scene, only a flat image on a 3D sphere.

My opinion is that mapping the environment as a single image onto a sphere and watching it from the midpoint can be plausible virtual reality only if the mapped scene is so far away that it cannot have any perspective. Even in that case one needs some clever viewport wide distortion to make the apparent distance infinite, not = the radius of the sphere. The distortion should live as the watching direction changes.

This answer was totally rewritten after checking this much later case: How can I paint equirectangular (360 degree) images?

0
13

You can not do that on your image as you have it.

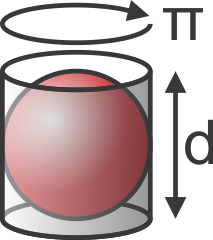
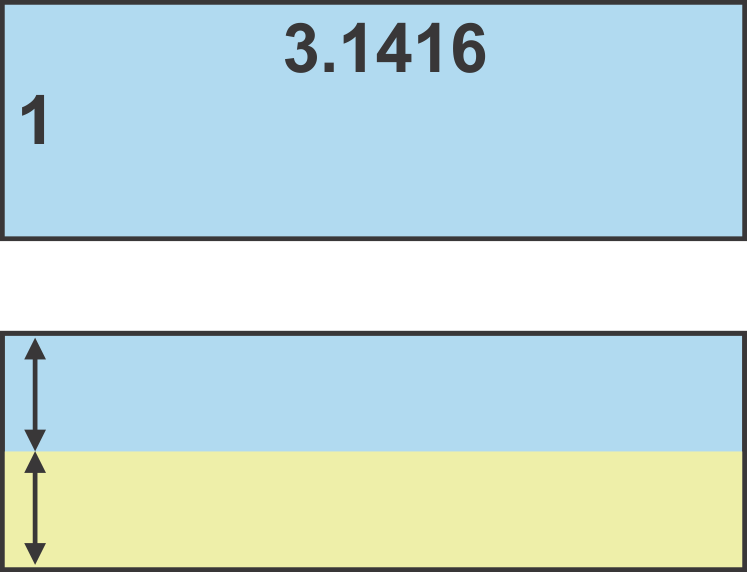
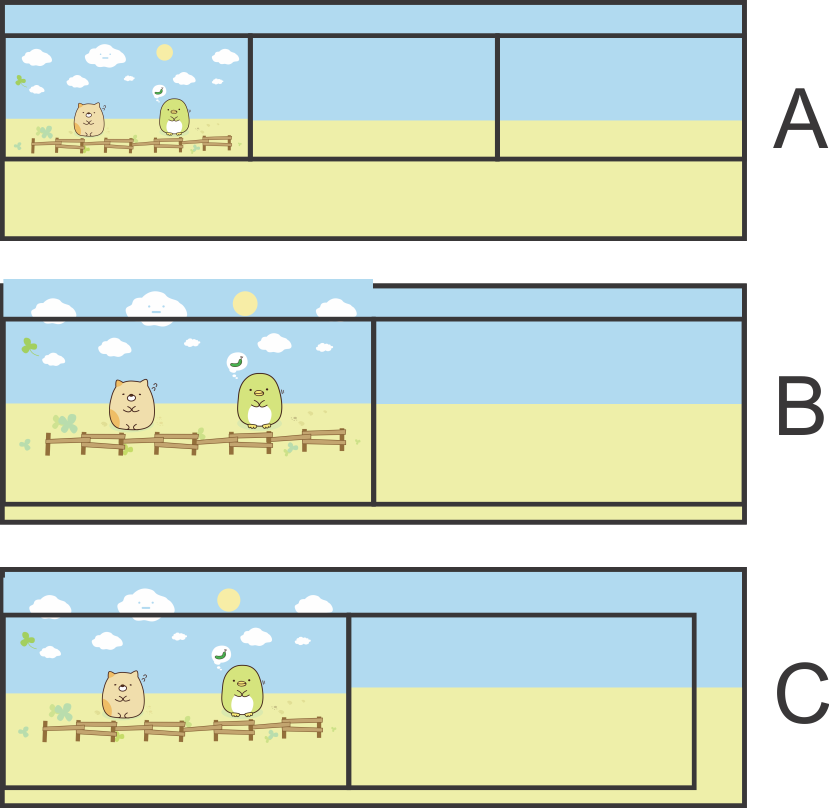
1) You want a cylindrical projection on a sphere. First your canvas needs to be at one exact proportion. 3.1416:1 (Use any pixel sized canvas you want, for example 3141x1000px)

enter image description here

2) And you (normally) need the horizon to be at the center of the canvas.

enter image description here

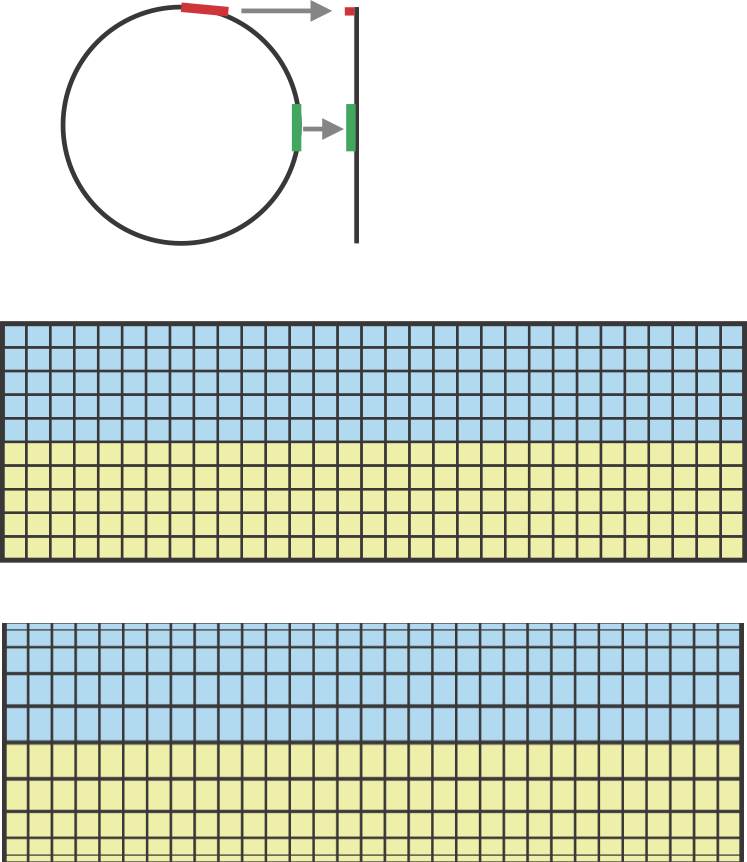
On a cylindrical projection (from a sphere) you have a specific deformation on the projection due the vertical projected dimension versus the real height of that segment, so you need to compensate that when you draw your cartoon at a flat canvas.

An easy way to do this is using the Spherize filter in Photoshop. (On the arcaic version I have right now on this computer is on Filter >Distort > Spherize)

But you ONLY need to distort that on the vertical axis.

enter image description here

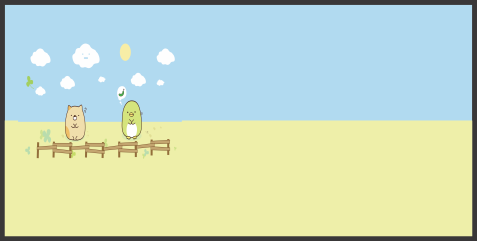
But besides that you need to define what portion of a 360 panorama you have. Imagine another chicken taking a photo. What would be the angle of the lens used?

I feel that it is a wide angle lens, lets thing you are taking like 120° angular field. This means you need to complete your image to the stuff you have behind the chicken photographer.

enter image description here


The Google VR aplication you want to use says that need a cylindrical projection, but asks for a proportion of 2:1 on your image. A 2:1 projection normally is a spherical one that has a diferent deformation, but it is harder to achive in a video for example.

For practical reasons they are in fact asking for cylindrical projections, so you simply resample your original 3.1416:1 to 2:1 as a final step.

enter image description here

Simply resample the final image. If your canvas was 3141x1000 px simply resample it to 2000x1000px. Do not crop it. The chicken will look slimmer but will go faty again on the VR aplication.


For your initial canvas: On your specific image it is hard to tell the angle of view, but let us see 3 scenarios.

(A) Your field of view is arround 120° so you can acomodate 3 photos of the cute pets as your posted image is 2048 the canvas needs to be 2048x3=6144px and now divide that with pi = 1955px

6144x1955px

(B) But if you do not want the pets to be too small let us asume the photo covers 180° = 2048x2=4096 / pi=1303

4096x1303px

(C) Or play with the numbers.

enter image description here

6
  • Ooooohhhh.... Wait. The link of google VR you are providing does not use cylindrical projections, they use spherical ones. I'll complement my answer.
    – Rafael
    Commented Feb 8, 2017 at 16:19
  • Thanks. Quick question, not sure how to get the 3.1416:1 to 2:1 Commented Feb 8, 2017 at 16:24
  • Simply resample the final image. If your canvas was 3141x1000 px simply resample it to 2000x1000px. Do not crop it. The chicken will look slimmer but will go faty again on the VR aplication.
    – Rafael
    Commented Feb 8, 2017 at 16:27
  • Aha, thanks, almost there. What would be the correct settings in the image -> image-size settings in Photoshop? Commented Feb 8, 2017 at 16:33
  • One aditional note. The clouds, the coser you are to the top and bottom, needs to be reshaped to mantain the aparent size of the original image.
    – Rafael
    Commented Feb 8, 2017 at 16:52
4

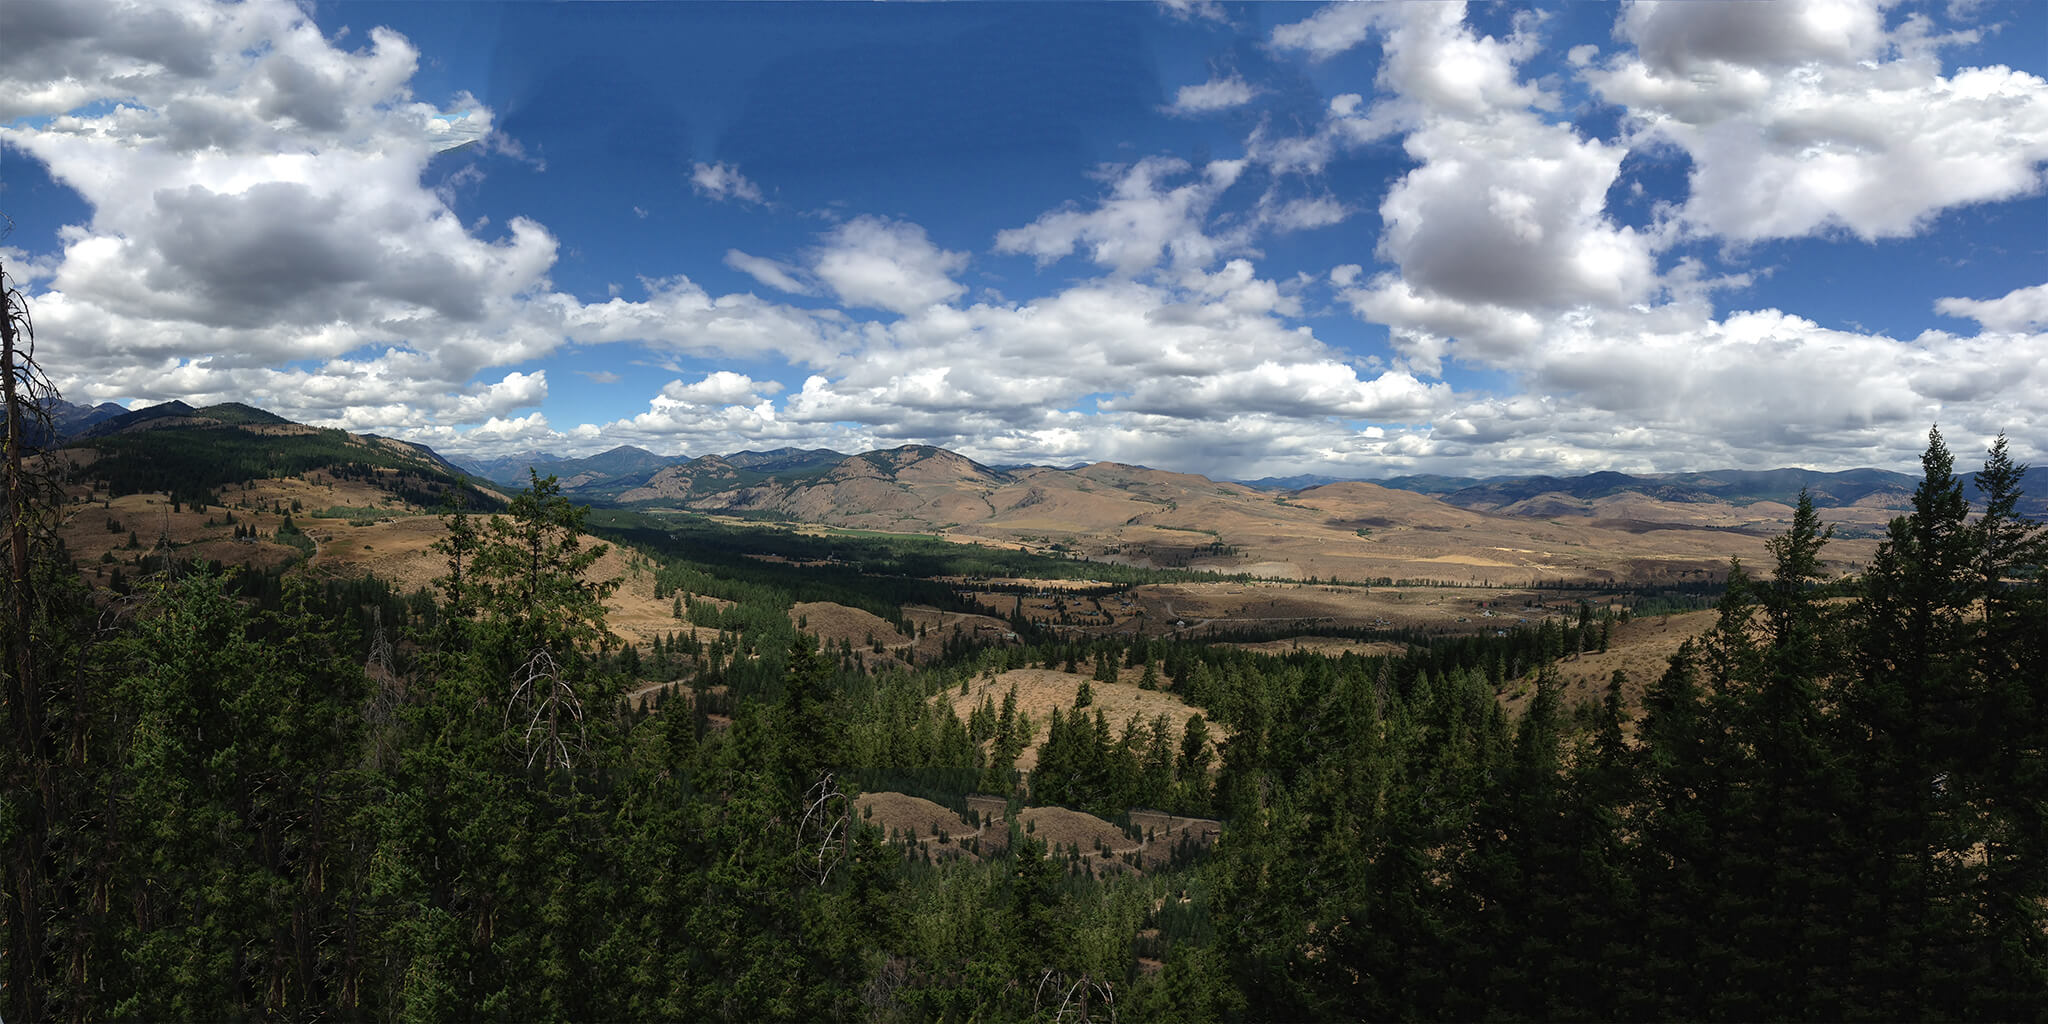
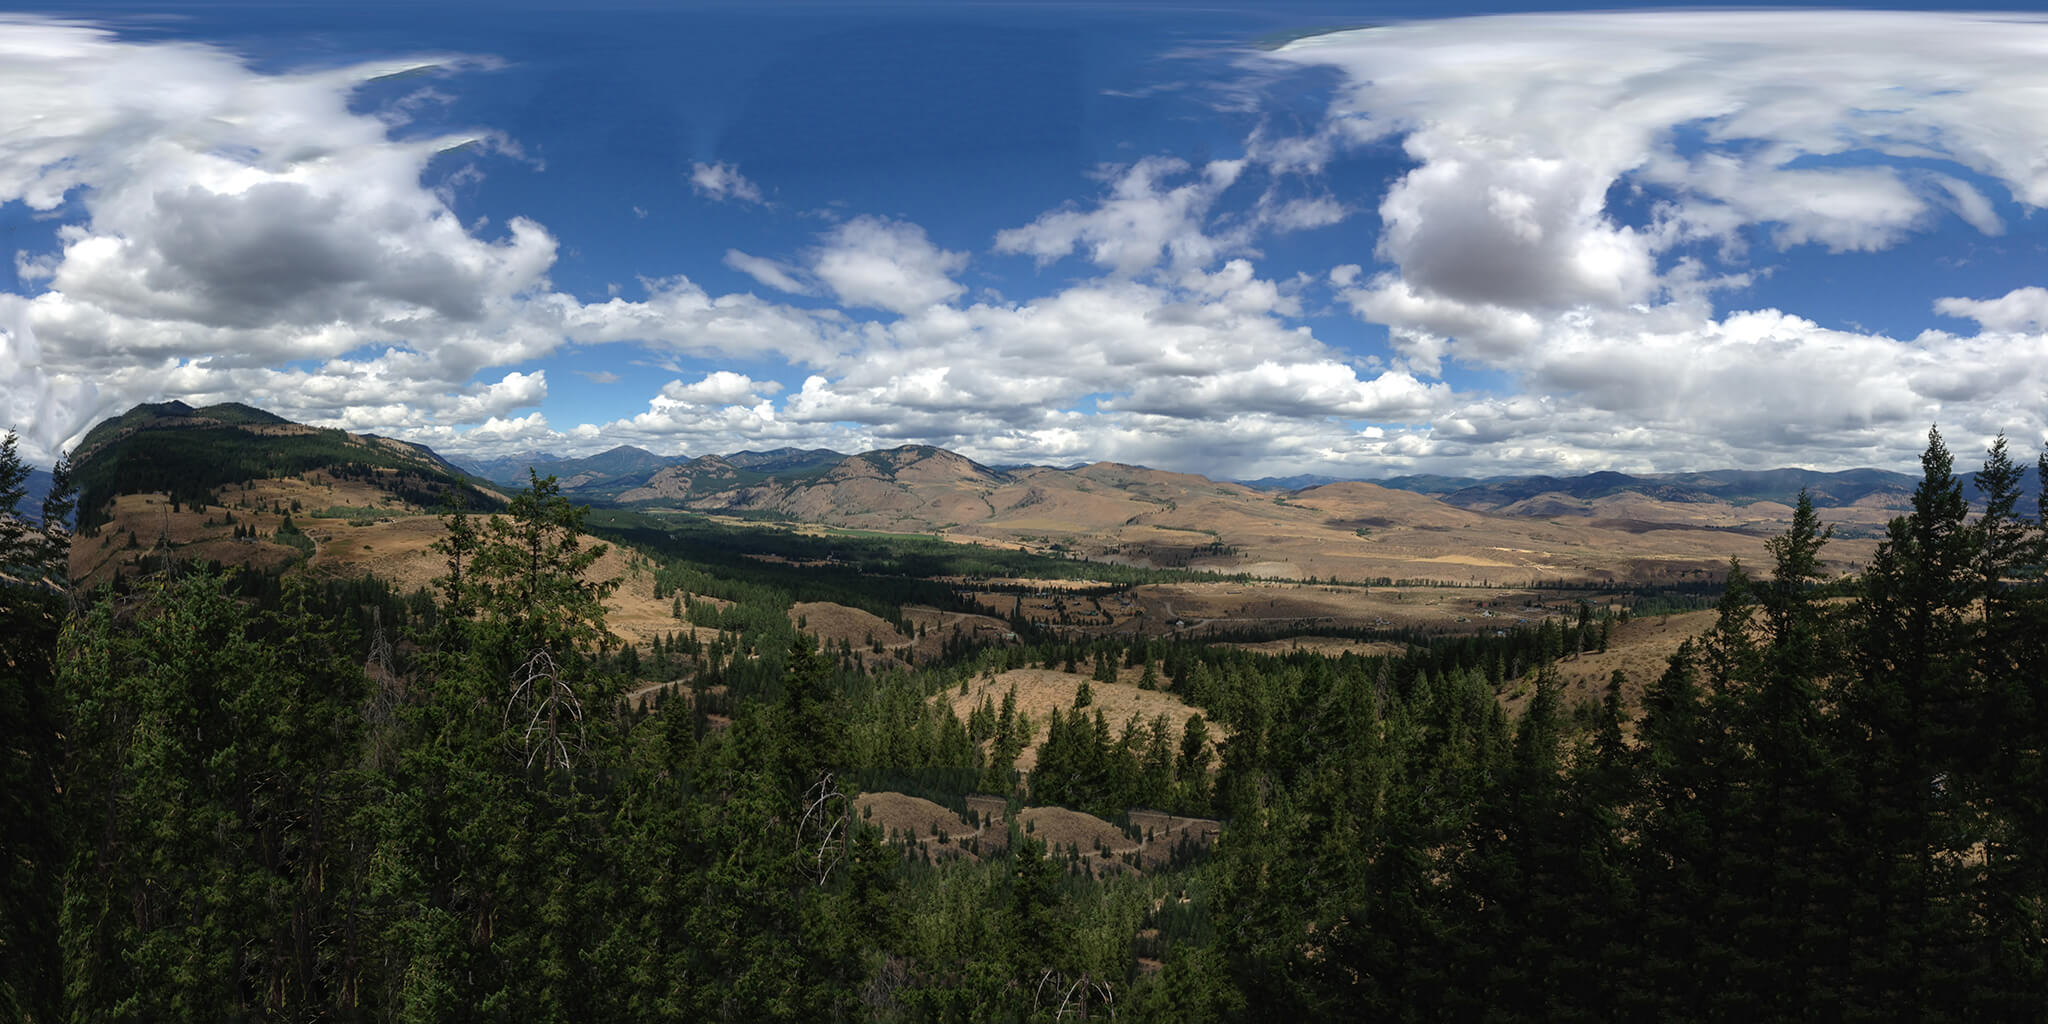
Original image:

enter image description here

Increase canvas size and use content-aware fill, to give the image more sky and ground. I used Photoshop:

enter image description here

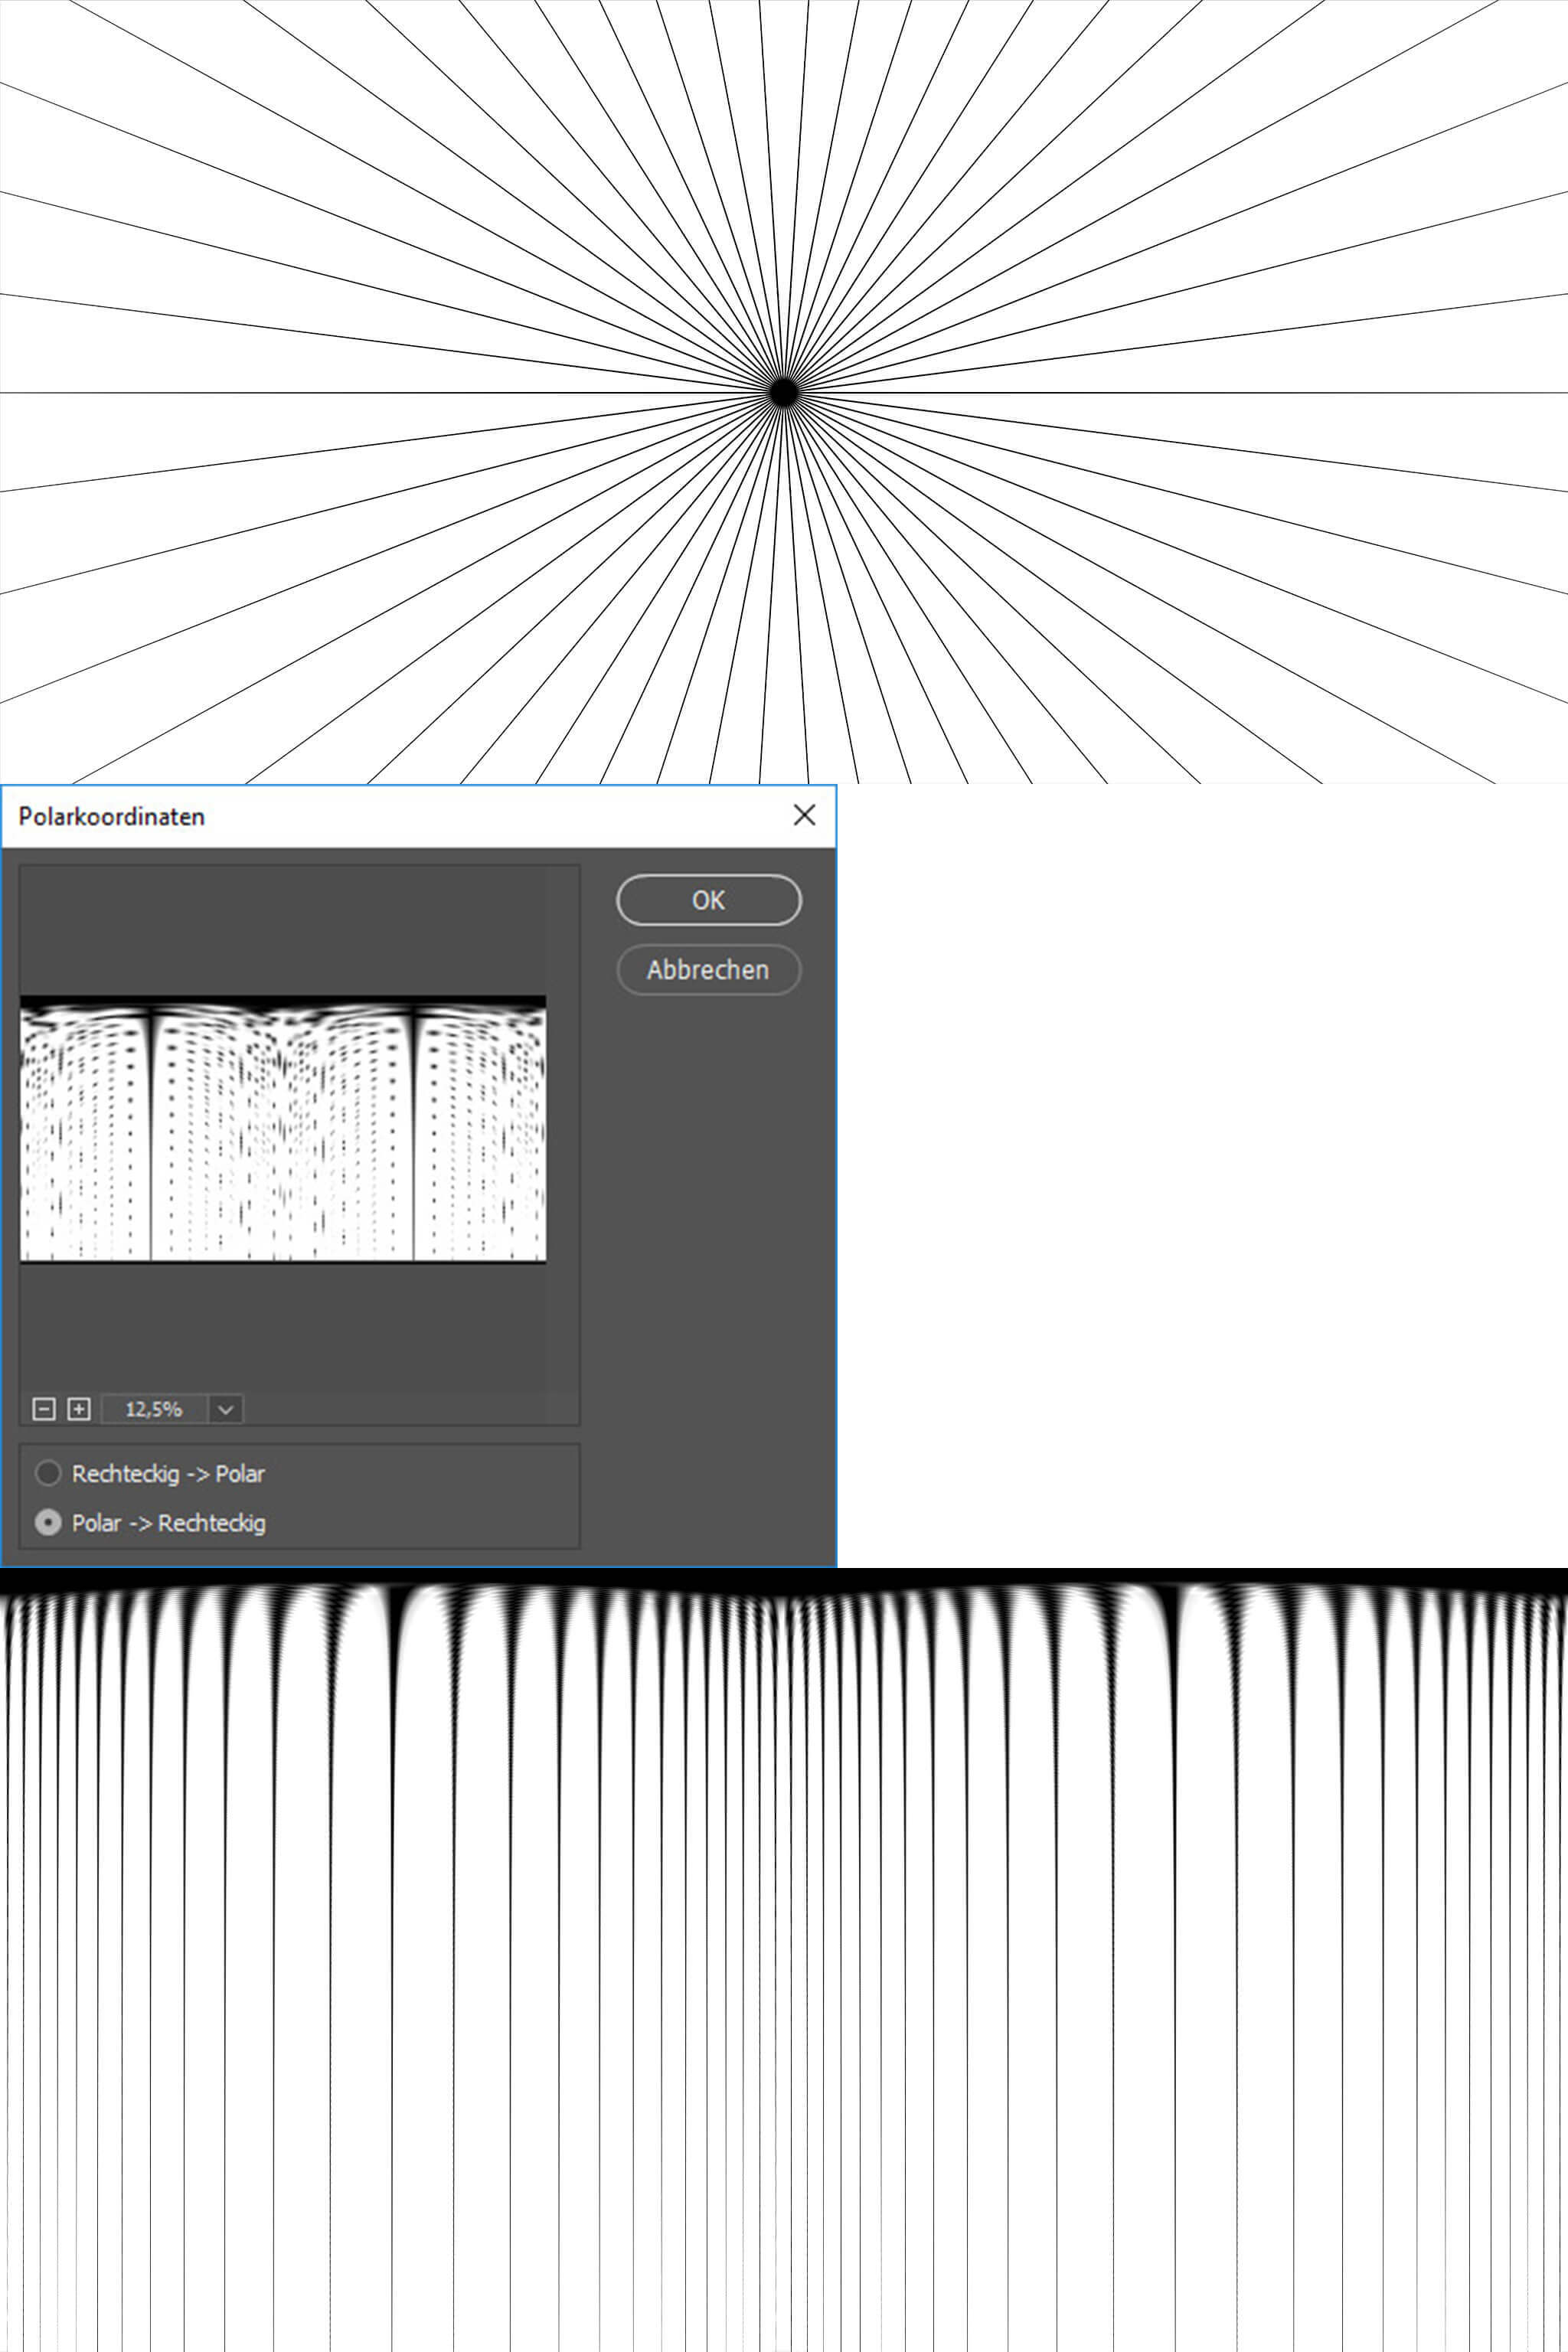
You will use the Polar Coordinates filter in the next step. Here's an image that shows how Polar Coordinates works exactly:

enter image description here

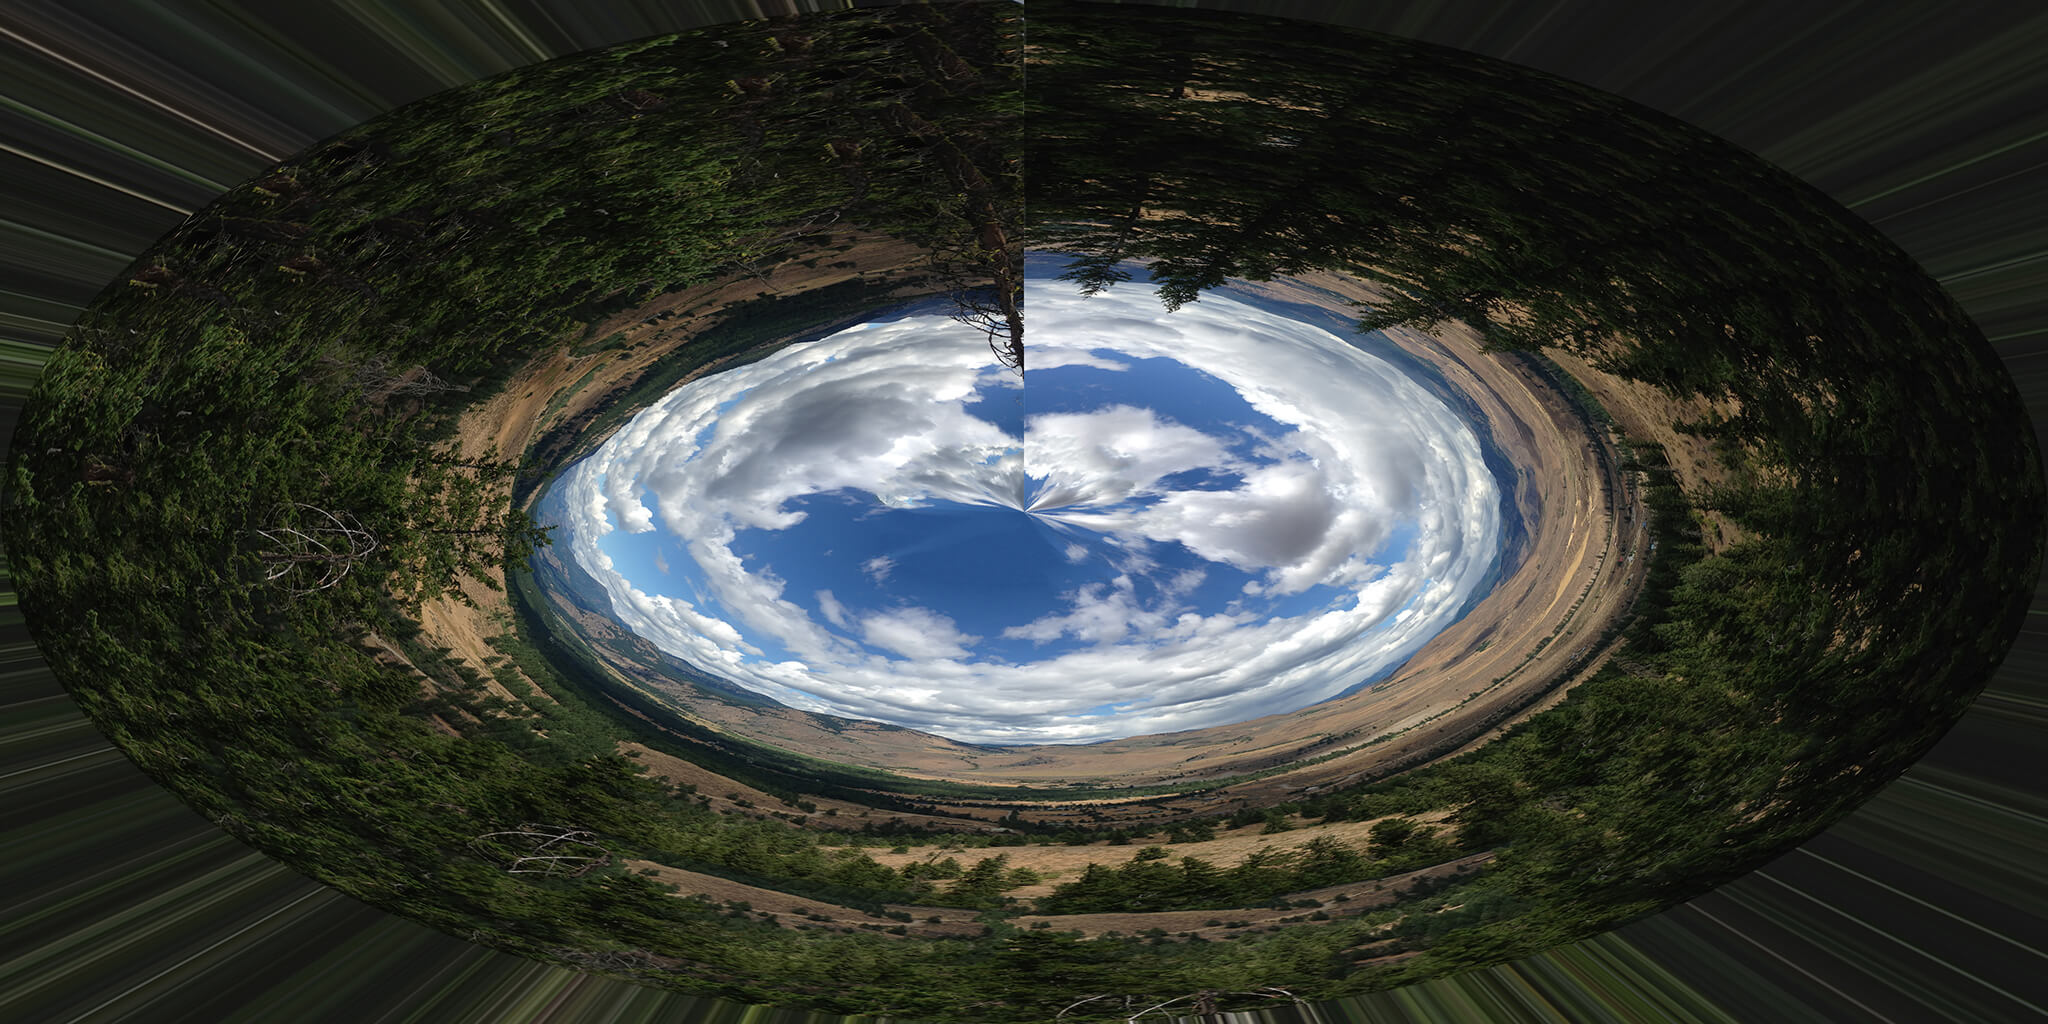
As you see, we will want to convert from the lower (Rectangular) to the upper perspective (Polar). To do this, go to Filter -> Distort -> Polar Coordinates -> Rectangular to Polar:

enter image description here

Use content-aware fill, repair tool or stamp tool to fix the areas in the center and around the edges:

enter image description here

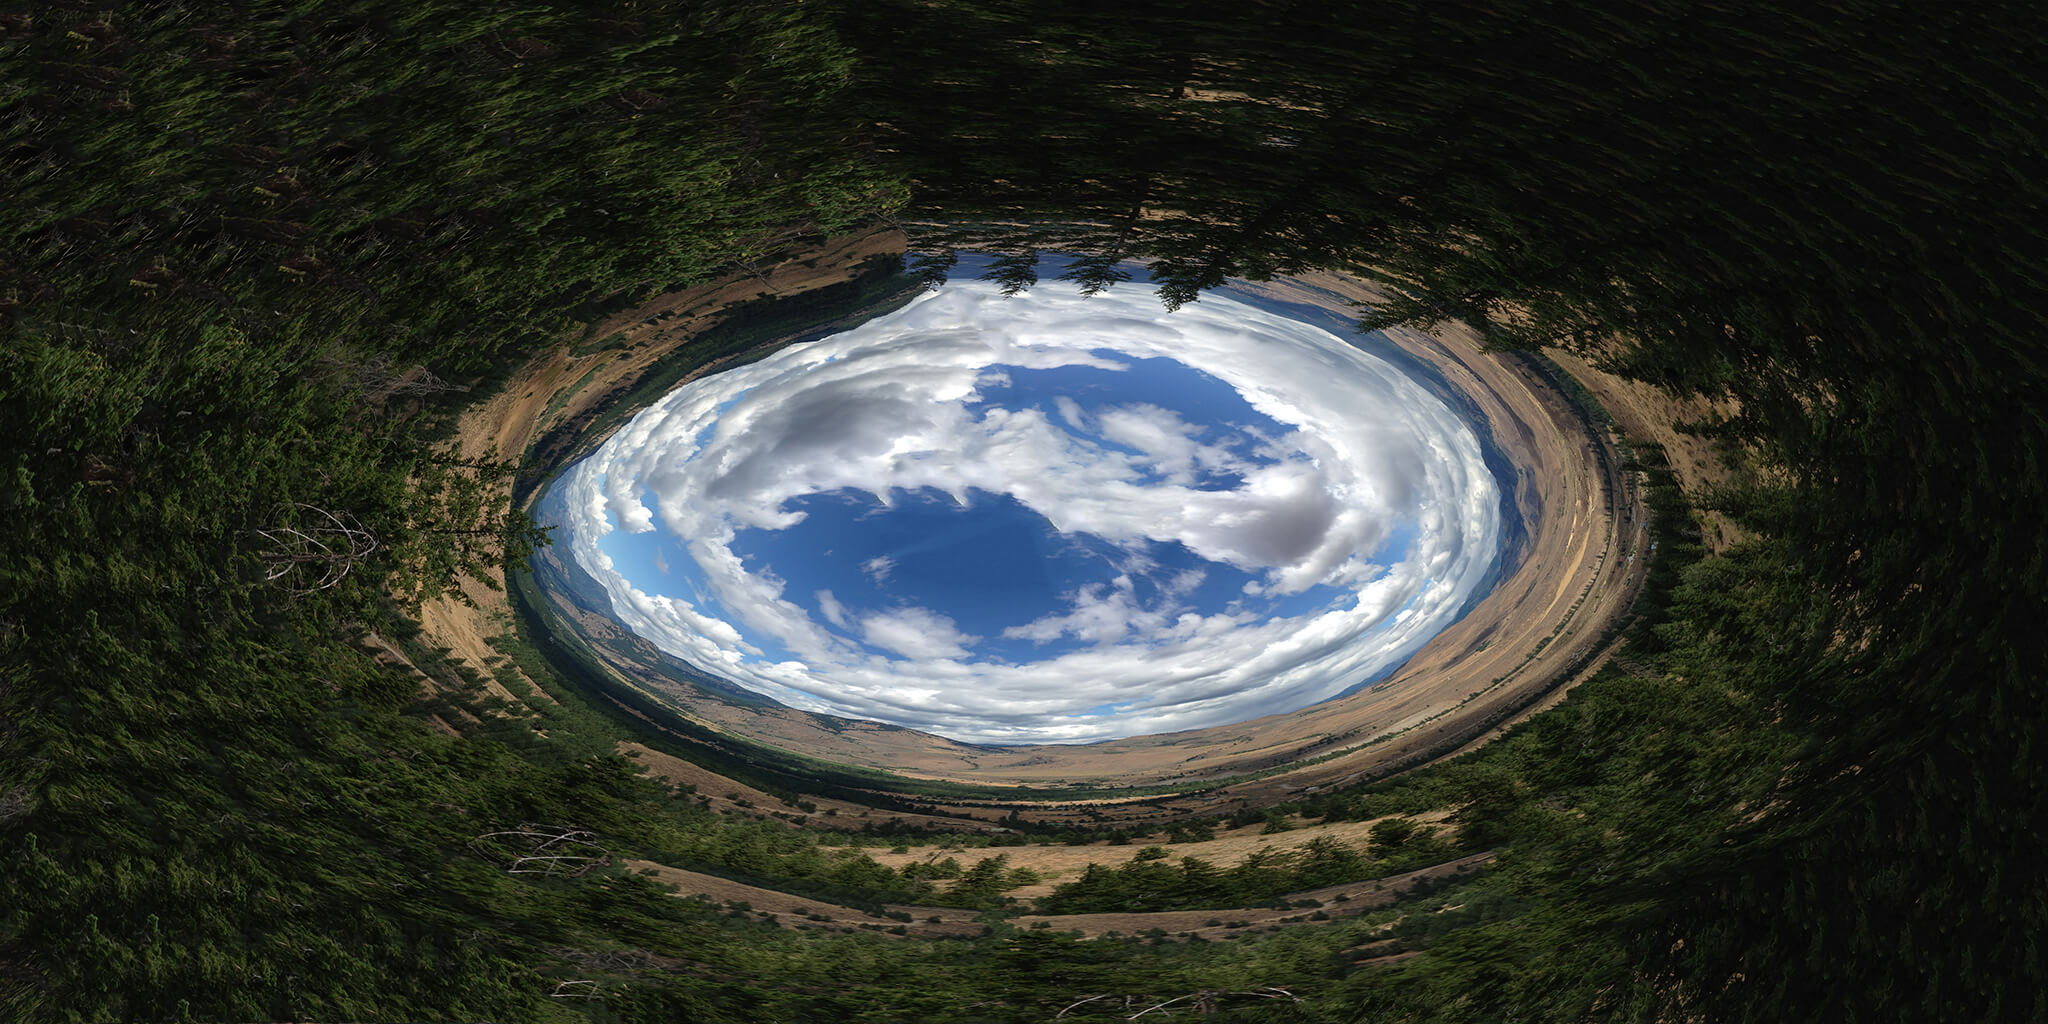
Use Polar Coordinates again, but Polar to Rectangular this time. You can project this image on a 360° sphere:

enter image description here

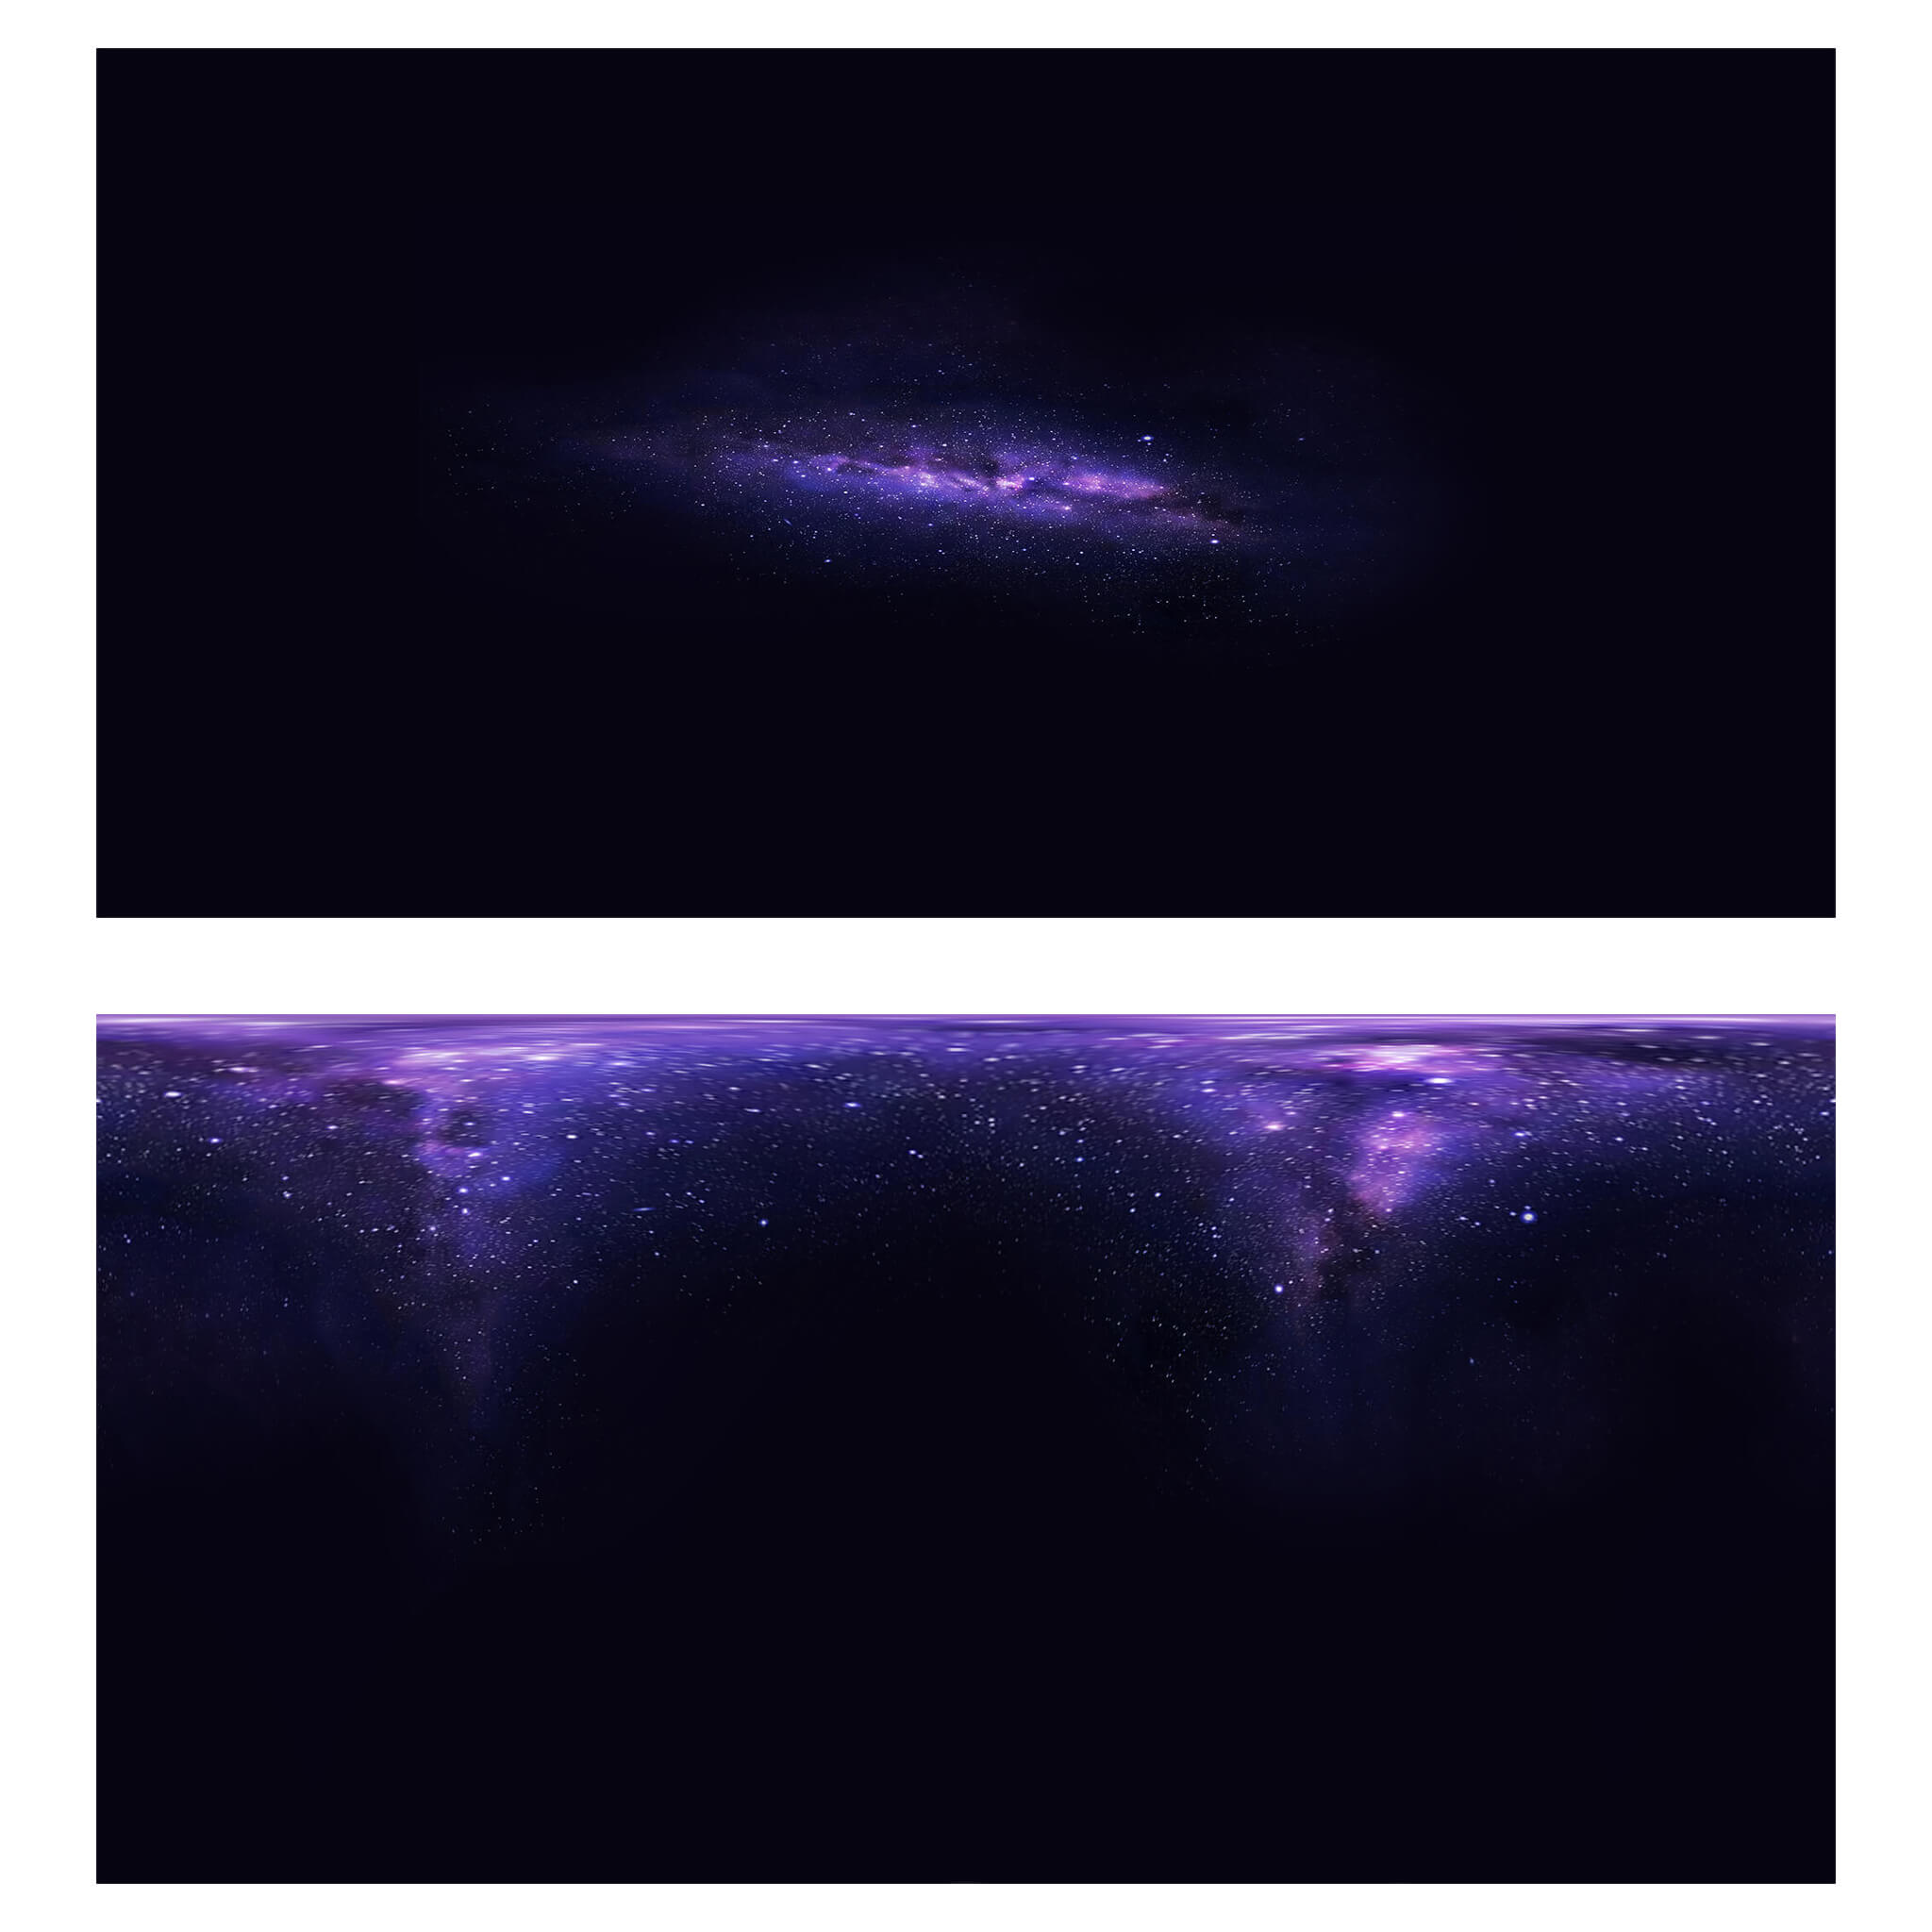
Let's say you have an image of a night sky. You can use Polar Coordinates again. But since the center of your image will become the top after equirectangular distortion, you only use Polar Coordinates Polar to Rectangular once:

enter image description here

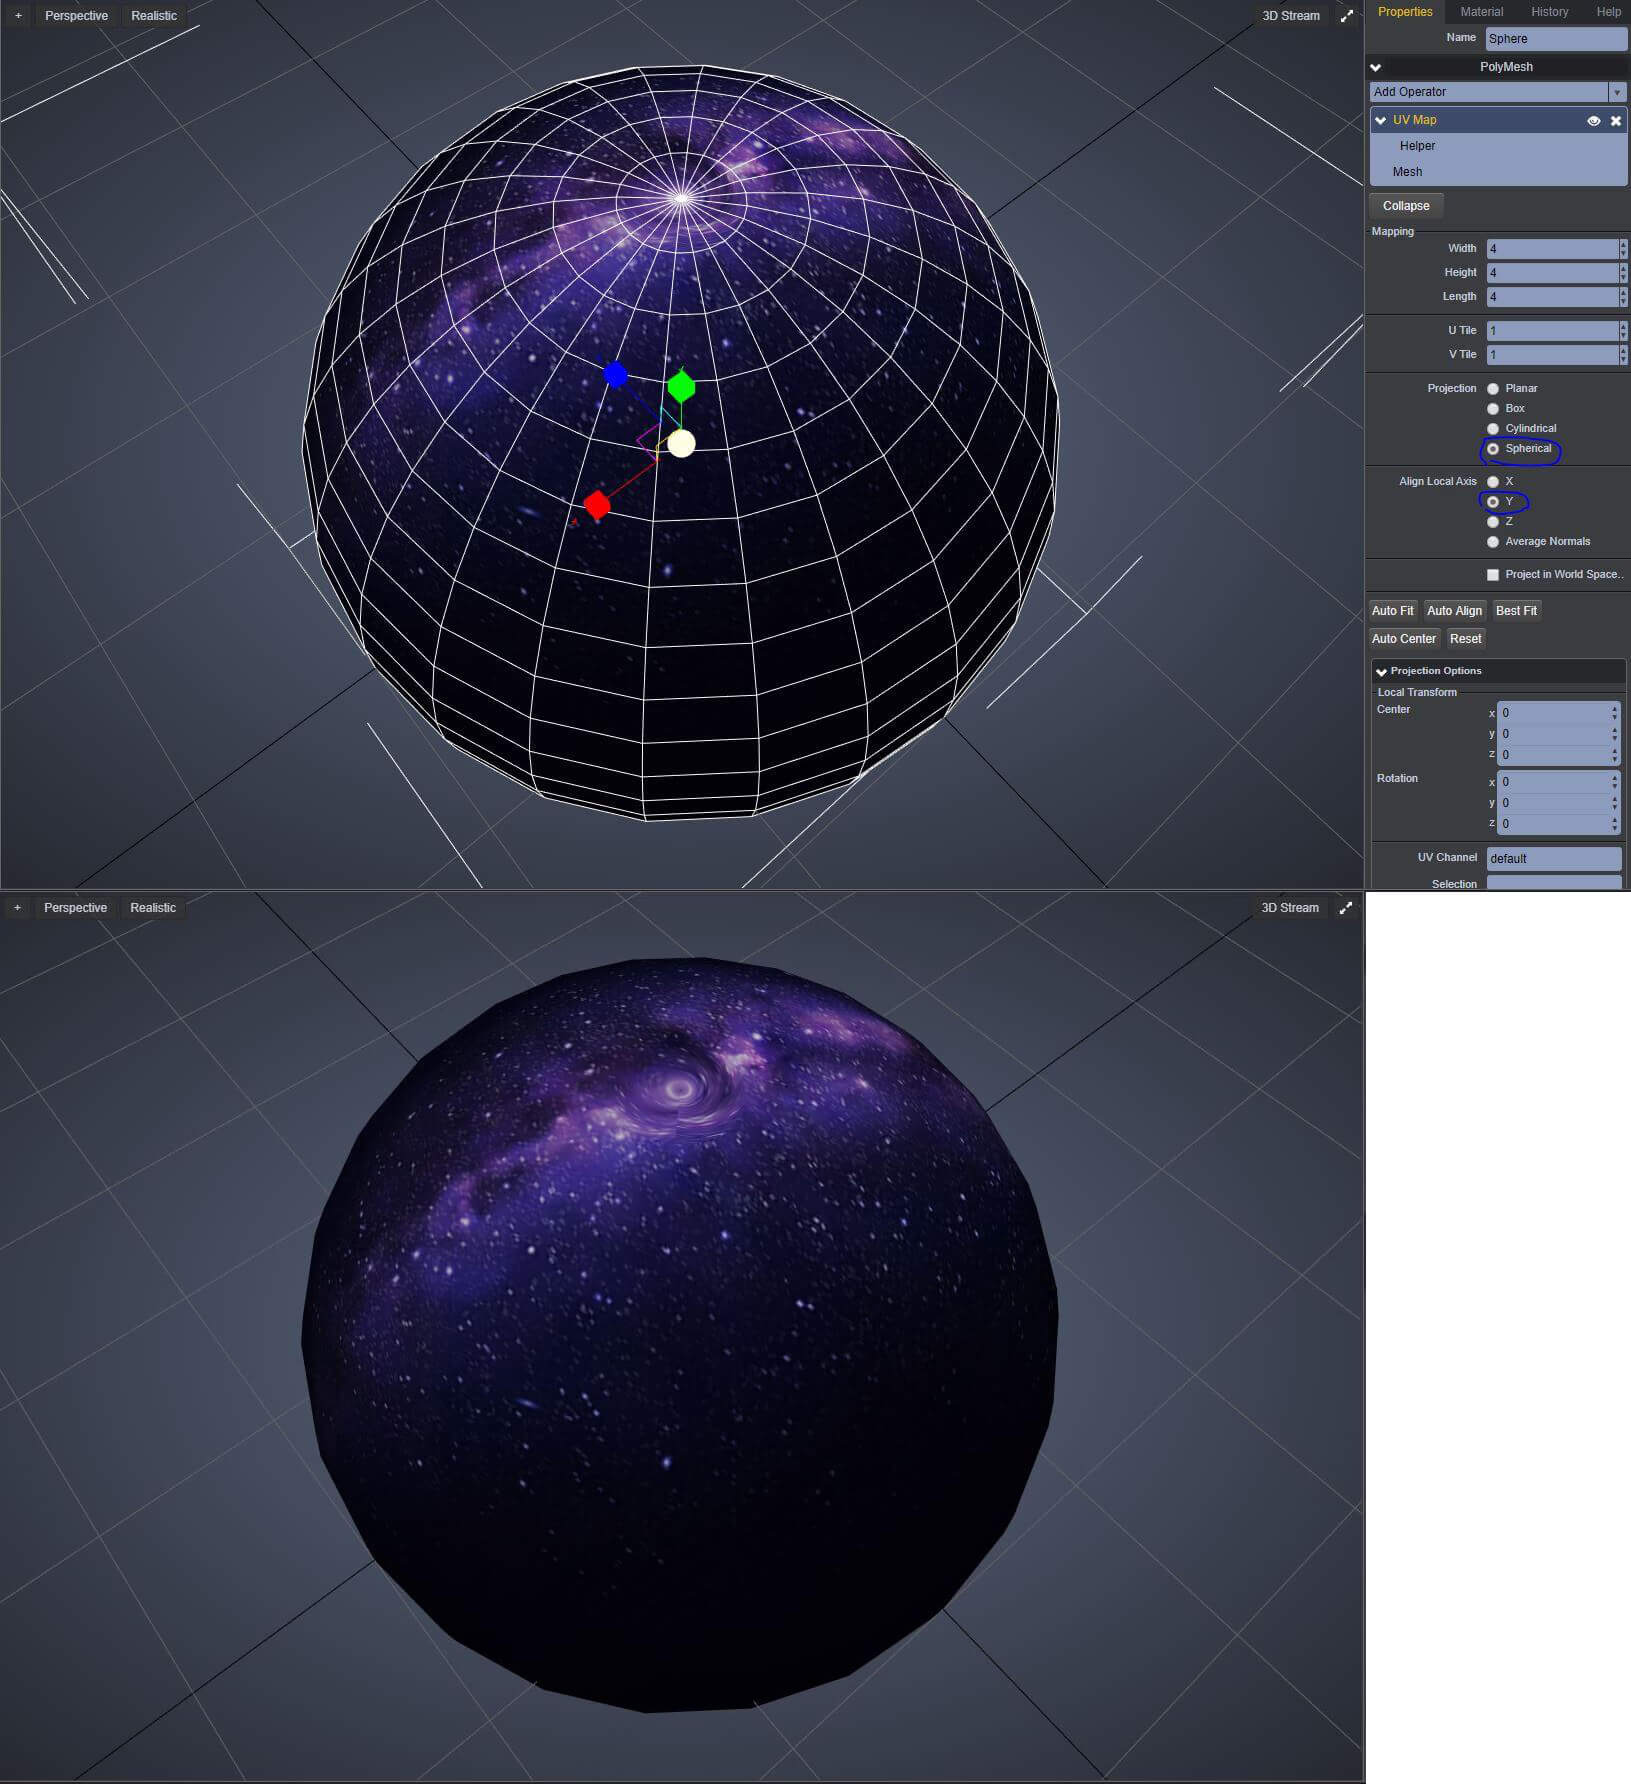
In a 3D software (I used the free Clara.io), this is how the texture looks on a sphere:

enter image description here

3

enter image description here

Your image have realy litle information and is too small. Also dont have a equirectangular geometry. But you can do it in Blender, its free. Just render it in "Panorama"> "equirectangular"> "Render. To see HDRI images in 360 you can use this site: http://panoramaviewer.1bestlink.net/

0

All of this probably is a better answer than what I am about to give..but mine is a quick and dirty way of doing things if:

a. You don't care if the sky fills the top of the image. b. You want something that takes a moment to do.

In Photoshop (because thats what I know best)

  1. Cut your image into a left and right half.
  2. set your work area resolution to the size of both images horizontally, and set the vertical resolution to (the square of the vertical resolution/divided by the horizontal resolution of one image). (example: your original image is 600x300...so, the new image space is 600x1200
  3. Import your first image into the center of the workspace and move it to the far left, and import your second image into center of the workspace and move it to the right.
    Save your image.

Now, if you go to your VR viewer and set it to 360 degree viewing to view that image, you will have black at the top and bottom, but the viewer will pretend its a 3D sbs image, and you can look around and see up, down, left and right.. if you want to make so the black is not distracting, just zoom in a bit..

Your Answer

By clicking “Post Your Answer”, you agree to our terms of service and acknowledge you have read our privacy policy.

Not the answer you're looking for? Browse other questions tagged or ask your own question.