I'm scanning some old text my grandma wrote in a book. I need to remove the background and just keep the handwriting on a white background. I've tried the Magic Wand, but that way a lot of spaces in letters like o, a, e, etc stay in the color of the background. I've got like 50 pages to do, so is there a faster way to just separate this handwriting?
3 Answers
Open the file or image Click on Image > adjustments > Auto levels (shift+ctrl+L)
Below step you have to do twice with different settings
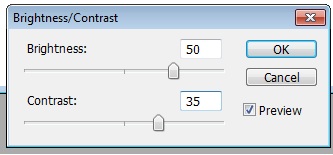
- click on Click on Image > adjustments > Brightness / contrast A pop Adjust 50 / 30 > ok
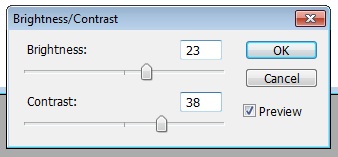
- click on Click on Image > adjustments > Brightness / contrast A pop Adjust 23 / 38 > ok
This settings will give the below result
-
wow, this is exactly what I am trying to achieve. Please explain to me how I can do this too.– HollandCommented Feb 12, 2017 at 13:14
-
-
Thanks, when I try what you adviced, the picture ends up completely white. See the pictures of the steps I take: [link] imgur.com/a/oOq9M and imgur.com/JaMp7Wg. Also after the second time adjusting the brightness and contrast 23/38, it's still completely white.– HollandCommented Feb 12, 2017 at 13:54
-
I have said the settings in photoshop and you are doing in online pixlr.com– atekCommented Feb 12, 2017 at 14:00
If you're working with Pixlr you need these settings:
Go to Adjustment > Auto Levels
Adjustment > Brightness & Contrast: 28 & 15
Adjustment > Color Balance: 11, -12, 45
Adjustment > Hue & Saturation (ctrl+u): -13, -22, -2
This result you should get:
-
You sir, are plain awesome. Thanks for this, I just wasted 2 hours of frustrating myself and already had the free trial version of Photoshop in download. atek u the man! I salute you with awesomeness– HollandCommented Feb 12, 2017 at 14:51
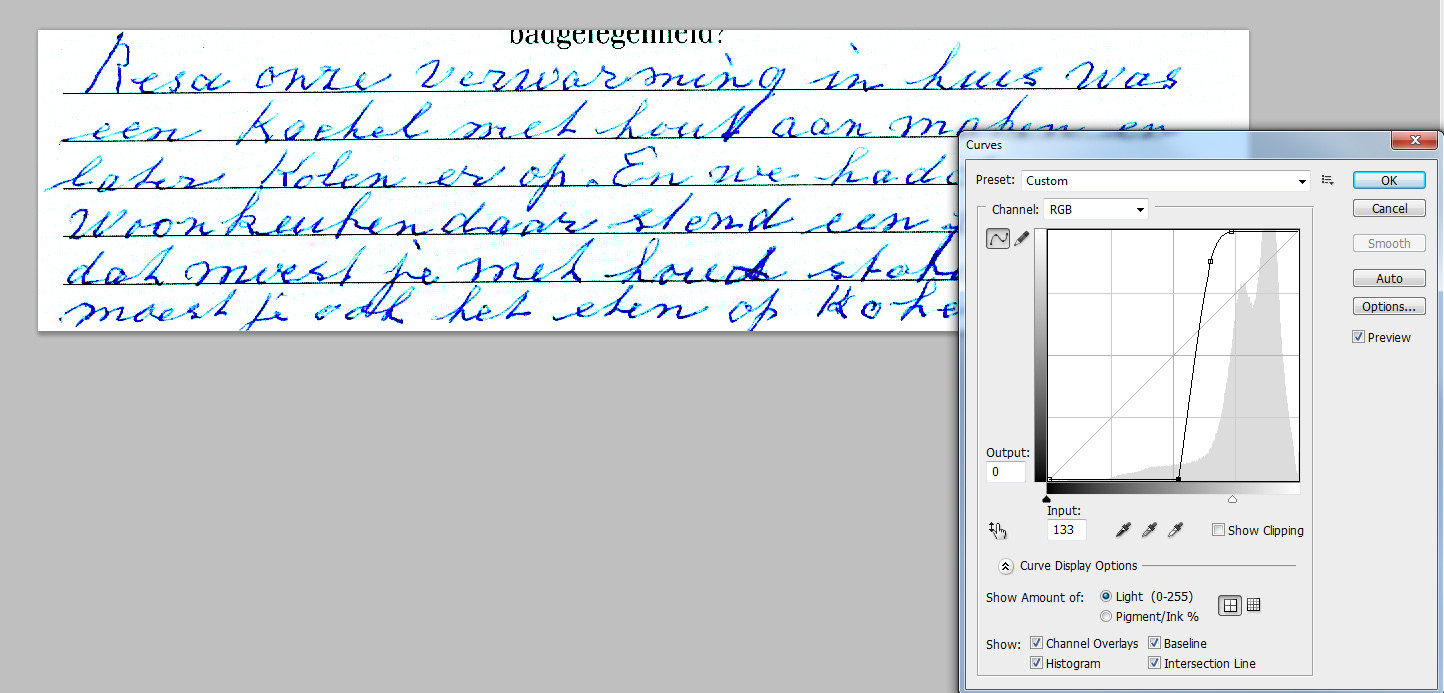
Use curves in Photoshop:
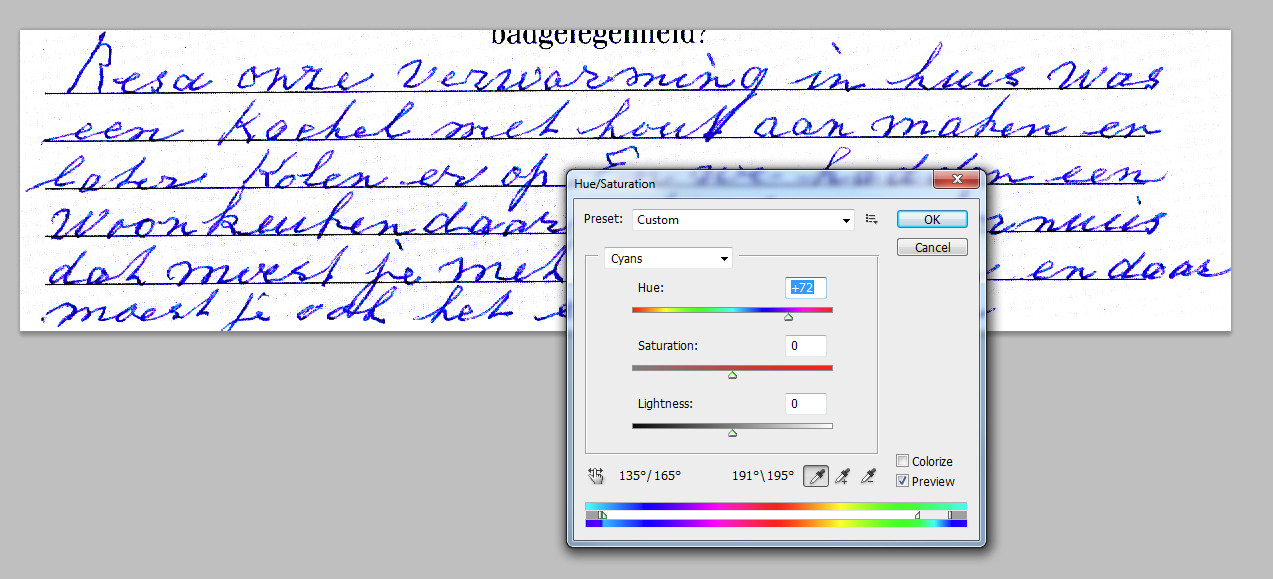
The background gets overexposed and loses its color. This kind of curve unfortunately adds saturation and color differences in darker areas. Turn the cyan back to blue by Hue & Saturation
You can reduce the saturation, if the blue is too saturated for you.
ADDENDUM: The remnants (=random dots) of the paper surface texture can be dramatically reduced by using some noise sample based noise reductin software such as Neat Image Free. It must be applied just after the curves tool. The curves tool should be used more careful to keep the clipping low in the textures, only the plain paper should reach overexposure limit. The noise sample was taken from the paper area. See the result after turning the cyan to blue:
Another hint: probably your scanner has in its user interface the curves tool or also very good "levels tool". There you can save the settings for faster work.
-
@all, thanks for all the effort and answers. I'm getting busy with your advice right now, and I'm happy with the results. Great site, good people. It's true. ;)– HollandCommented Feb 15, 2017 at 18:31


