I have a group of 6 images that are masked in even-sized rectangles. I'd like those rectangles to be evenly distributed along the outside of the bottom half of a circle. Whats the best way to handle this in Adobe Illustrator?
1 Answer
It's a bit detailed.. I'll do my best to explain....
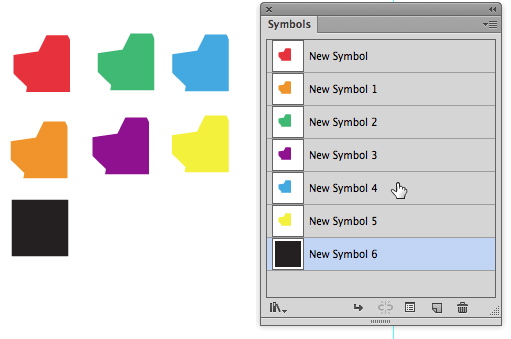
First, drag your 6 masked images to the Symbols Panel to covert them to symbols. And create a rectangle the same size as your clipping masks but no masking. You just want a standard rectangle that is the size of the masks.
I used simply 6 random objects with clipping masks. The black square is the mask size. Drag that to the Symbols panel as well.
In your circle, set guides to indicate the center point.
Turn on Smart Guides (View > Smart Guides) and place the black rectangle symbol on the center left edge of the circle. Now, using the Line Tool or Pen Tool, draw a path from the center of the black rectangle to the center of the circle.
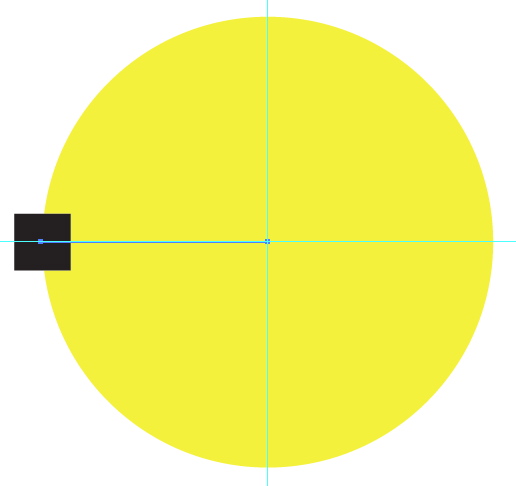
(You can turn off Smart Guides now if desired. Smart Guides can slow down drawing and won't be needed for the rest of this description.)
Select the black Symbol and the path and group them (Object > Group)
- Choose
Effect > Distort & Transform > Transformfrom the menu. - Click the right-center point for the 9 Point Origin box
- Enter 5 for the number of copies (1 original + 5 copies = 6 objects)
- In the Angle field, let Illustrator do the math. Half a circle radius = 180° and you want 5 copies. So enter 180/5 in the Angle field. That is 180 divided by 5 and illustrator will calculate the angle. This will ultimately be 36°.
- Hit OK.
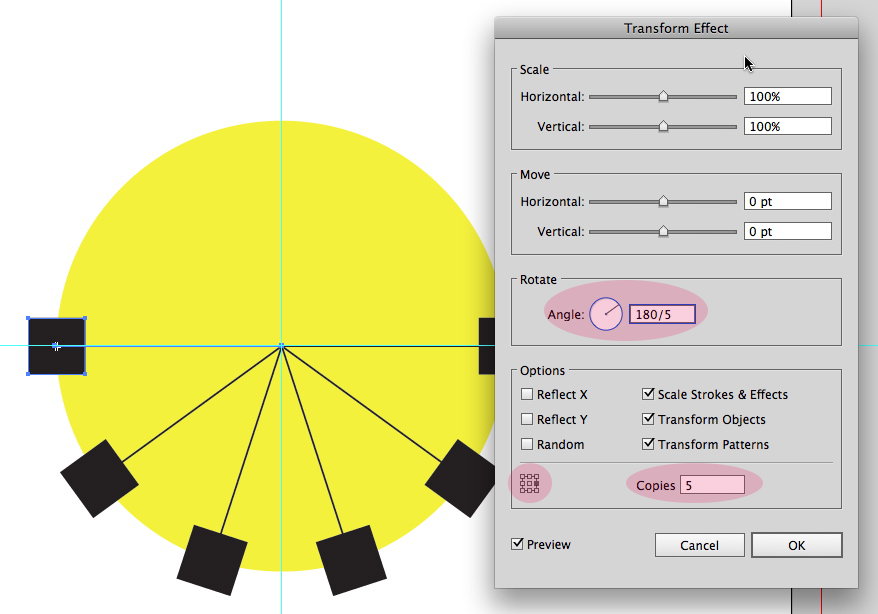
- Now choose
Object > Expand Apeparance - Choose
Object > Ungroup, andObject > Ungroupagain. (You need to ungroup twice.) - You can now delete the paths to the center of the circle.
This leaves you with 6 perfectly spaced black symbols around the bottom of the circle.
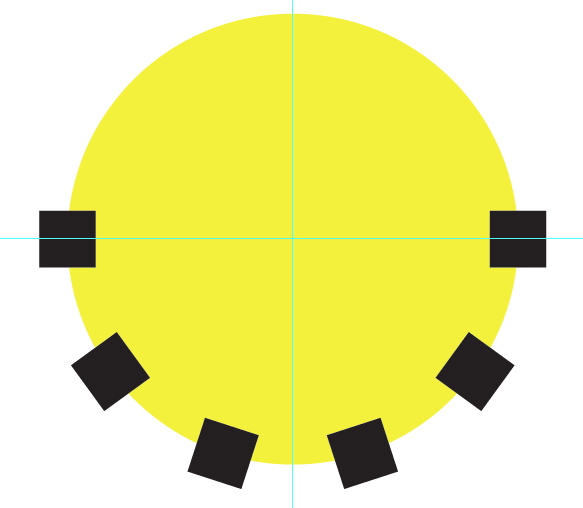
Now to use your desired images...
Select one of the black symbols on the circle, in the Control bar, at the top of the screen, a Replace item will appear. Simply click that and choose the symbol you wish to replace the black symbol with.
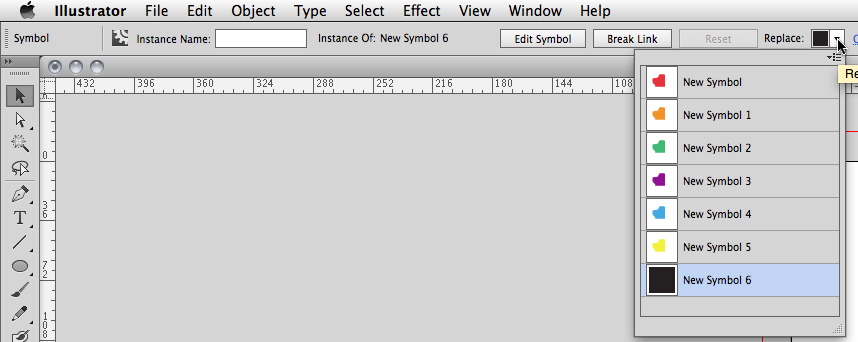
Go through clicking all the black symbols and replace them with the other symbols. And you should end up with 6 masked images all distributed along the bottom edge of the circle.
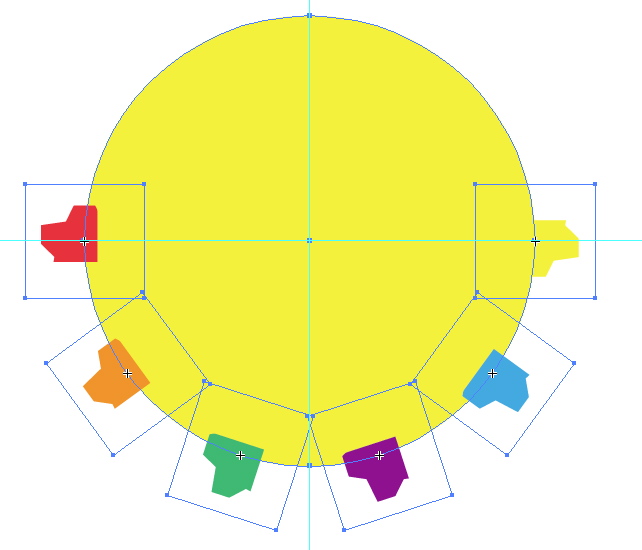
I've specifically used Symbols due to the ability to simply replace them on the artboard. You don't have to use symbols though. If you want, you can simply get to the point where you've got the 6 black squares distributed on the circle and then move your artwork in place, using the black squares as guides for placement. The use of Symbols here is solely to make things easier since you can't perform the transform effect with 6 different objects.
-
Wow. Exactly what I was looking for and well explained & detailed answer. Thank you.– JawadCommented Aug 7, 2012 at 0:04
