In IronMan 3, Eve-Online, or Star Trek, 3D models render in a bluish fashion.
Examples:
Is there a simple way to achieve this result with my own models? I typically use Blender, but if it is easier in another software package, I'm pretty agnostic...
In IronMan 3, Eve-Online, or Star Trek, 3D models render in a bluish fashion.
Examples:
Is there a simple way to achieve this result with my own models? I typically use Blender, but if it is easier in another software package, I'm pretty agnostic...
This is pretty easy in cycles, by mixing a transparent node with an emission shader based on how close the camera is to facing the normals head on.
You can get the "facing" value with a Layer wieght node or by taking the dot product of the normal and the incoming rays from the camera:
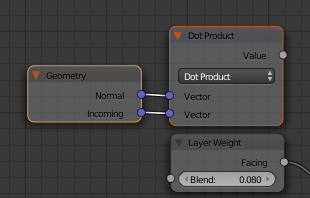
These methods are pretty much equivalent, though you have a handy blending factor if you use the layer weight node.
Plug this into a mix node:
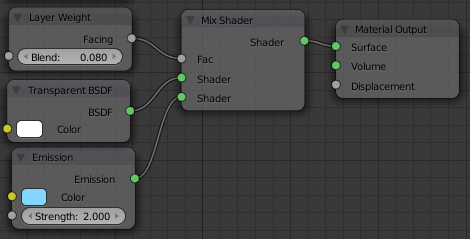
And you get this:
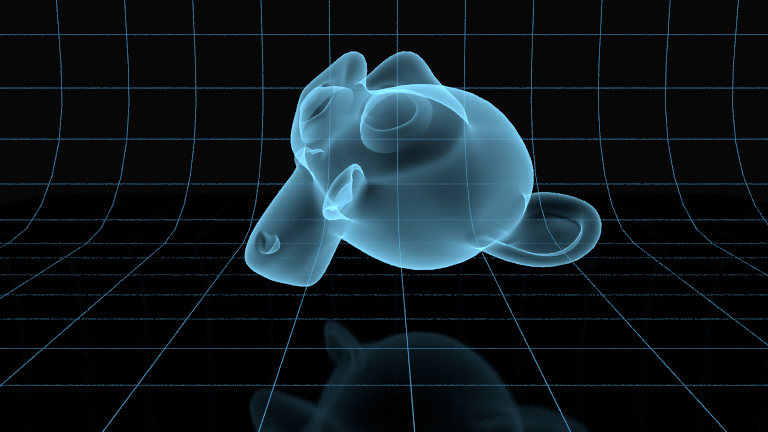
To get rid of the geometry behind the rest of the model, you can use the Transparent depth output of the lightpath node (note that this output is only available in the latest development versions of blender, but it will be in 2.71)
This value goes up based on the number of "transparent bounces" (a transparent bounce refers to the sampling ray passing through a transparent layer/surface of the mesh). Since we only want to see the top layer, we can use a Less than math node and a mix shader node to make every bounce past the first bounce (bounce 0) will use only the completely transparent shader (Transparent Depth is never negative, so this is basically testing if it's equal to 0).
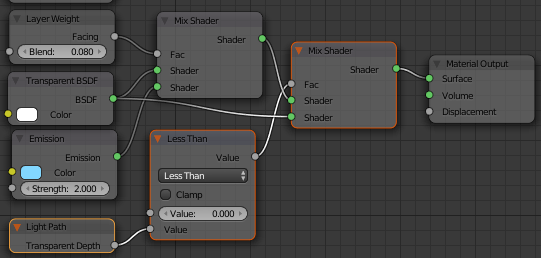
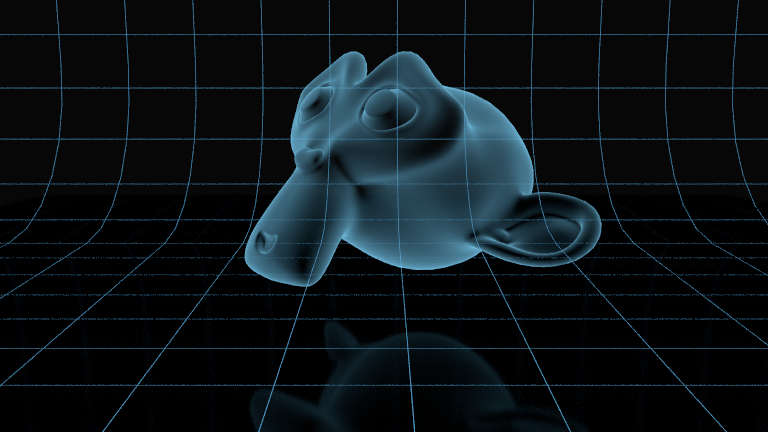
If you want more control, you can use a ColorRamp node to fine tune the blending as much as you like:
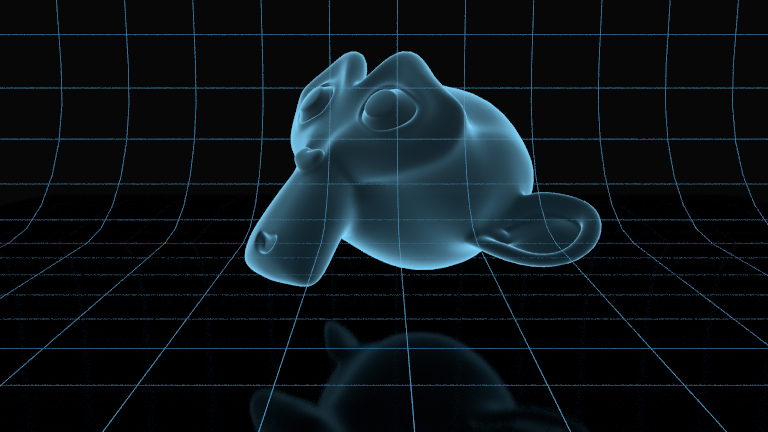
Here is an example .blend for you to play with.
Note that I hid some of the input/output sockets on the nodes with CtrlH to conserve screen real-estate. So they might look different.
There's possibly at least 4 phases to creating this look.
Reduce or adjust your models to their shapes as per visual recognition, not how the model is actually made. So instead of polygons or NURBS, find those delineations of shape and form that communicate the desired message of the shape. See IronMan's helmet for an instance of this. It's only the Outline and a Seam that's being shown, not the 3D geometry/topography.
Give these "lines" a weight by way of light. It's actually white light that's being either transmitted or received on these "lines" that's given the effect of showing you the shape. I say "lines" because often they'll be geometry far more complex than mere lines to give these "lines" their weight as per their emittance or receiving of light.
Render your objects as filled objects in whatever colour you like. Blue, as you're stating.
Composite the different renders in something else and balance up their relationship to one another to get whatever look you consider to be ideal.
I think you need a Fresnel material. I don't know how it's achieved in Blender. It reflects 2 colors. One would be black for the normals pointing at your eye and blue for those who get perpendicular to your eye. If you don't know what I mean read this: