I'm sorry that you're finding the pattern tool frustrating to use. Hopefully, this answer might help clarify a few things. First, we'll tackle using the pattern options panel and then I might be able to help you optimize your pattern to reduce its complexity.
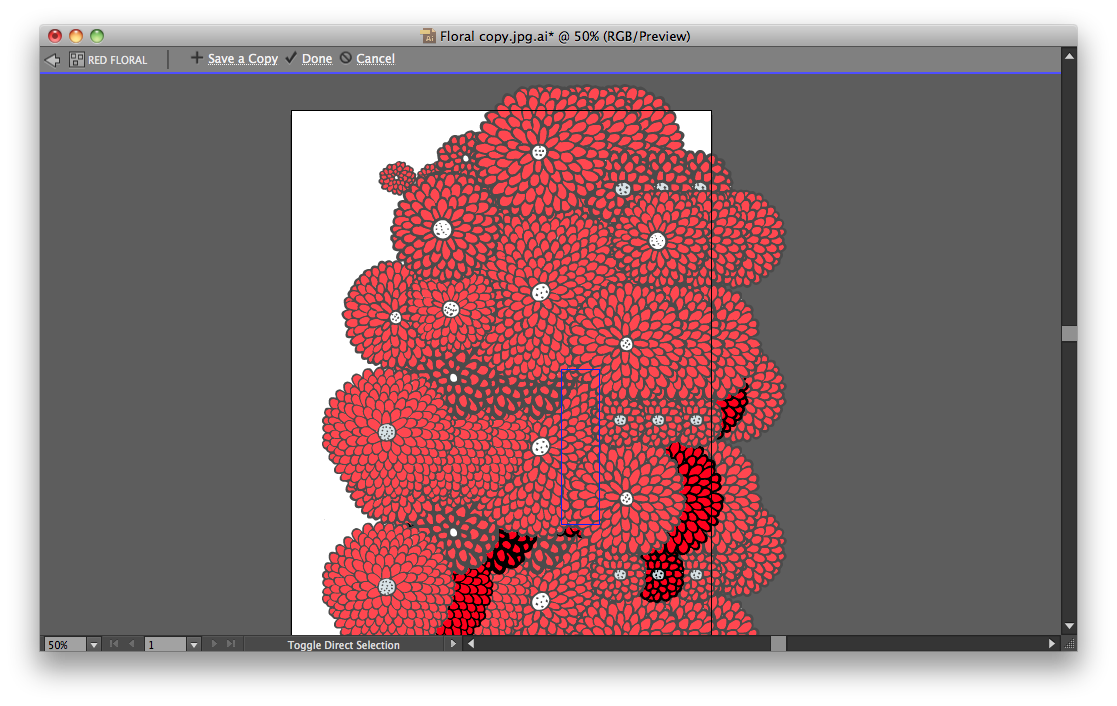
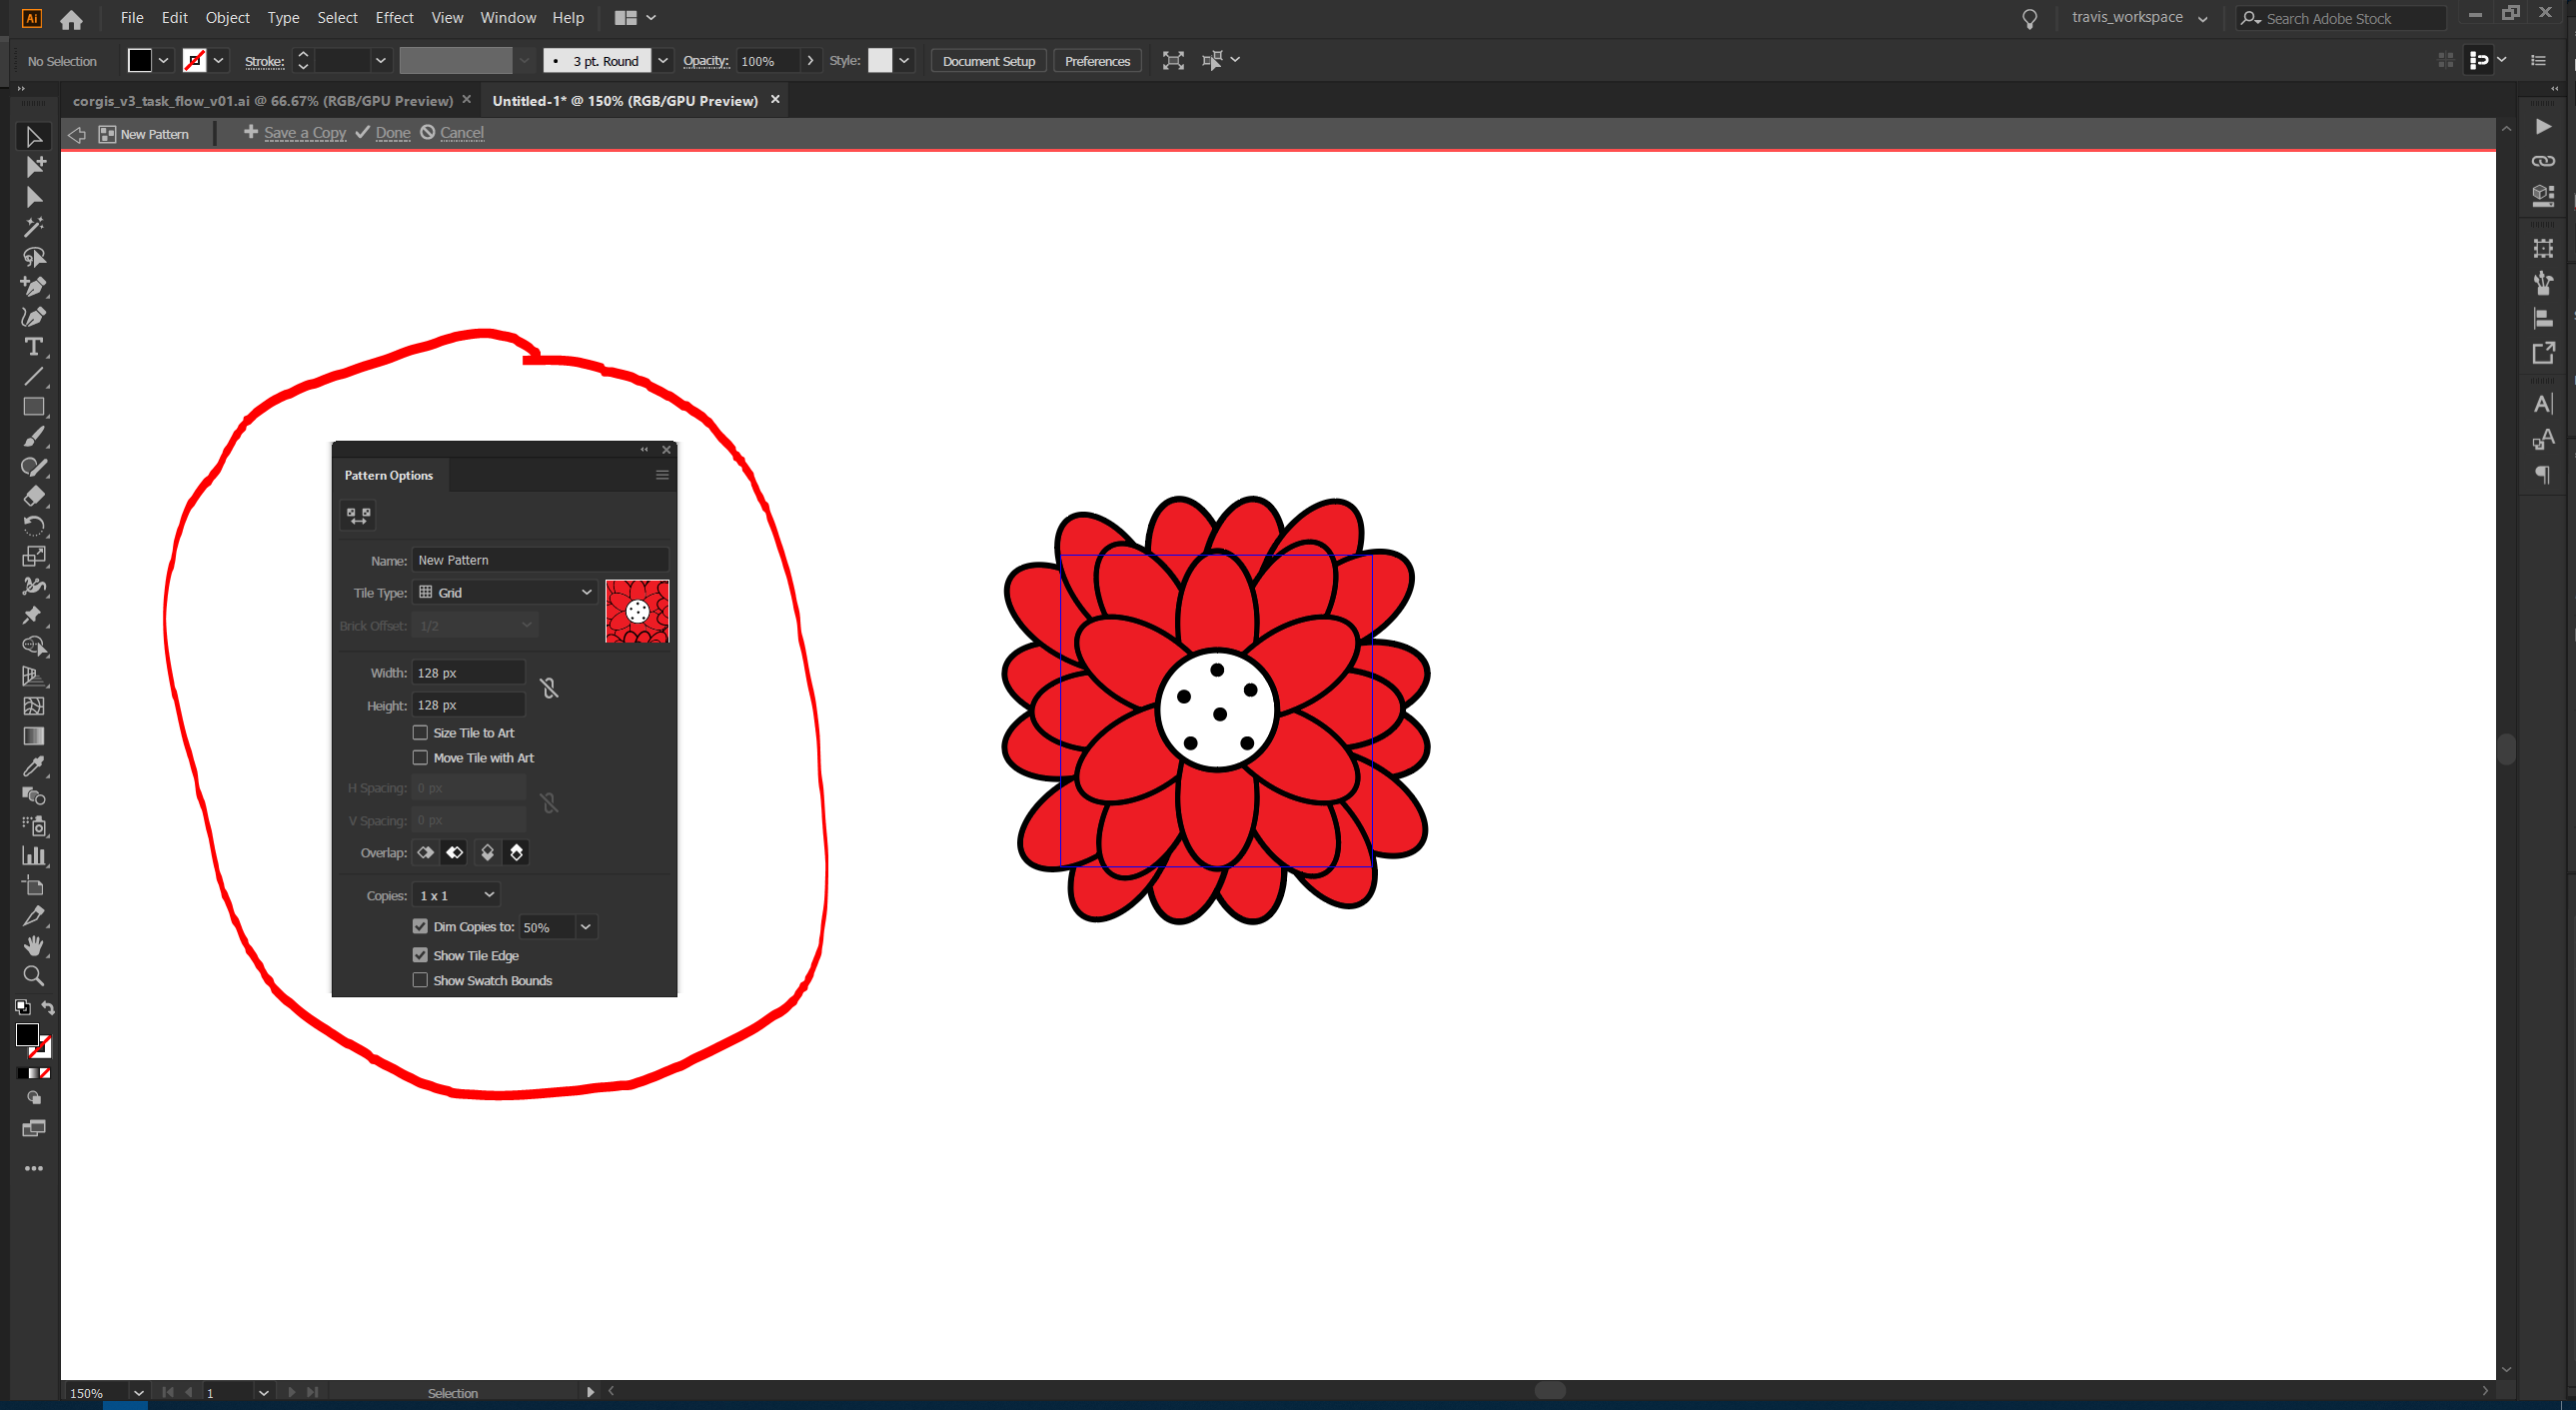
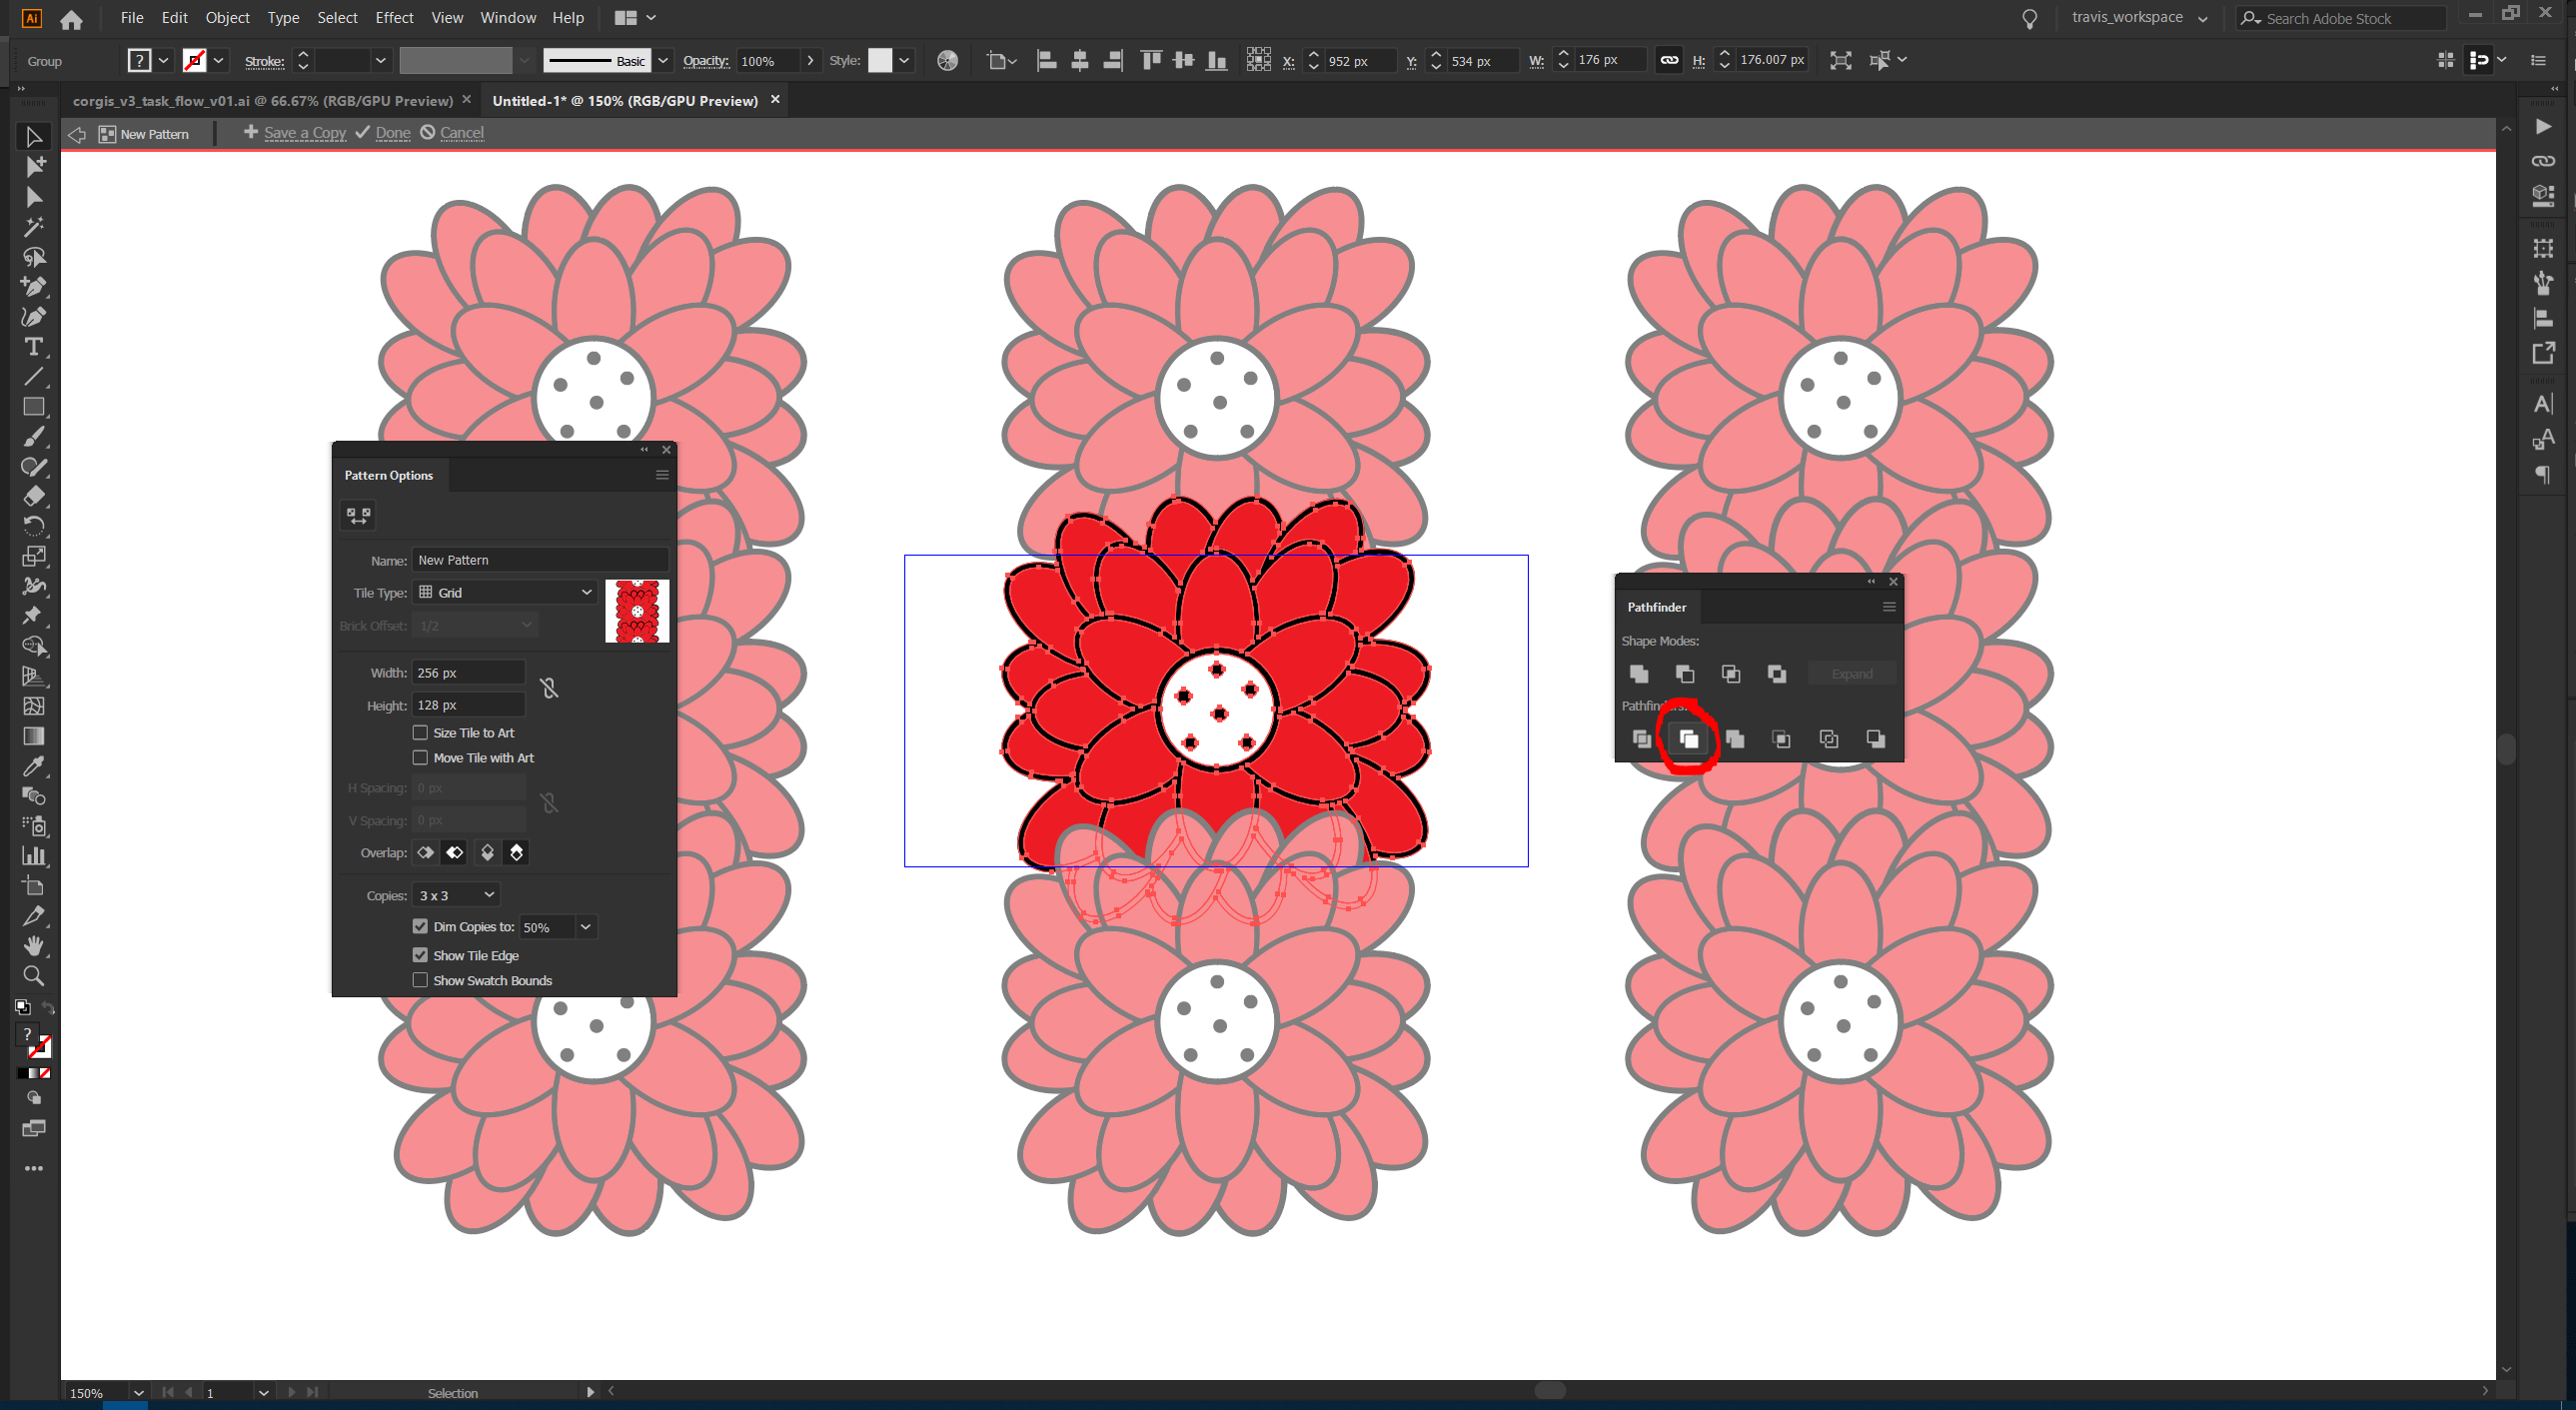
I noticed in your photo that you don't seem to have a pattern options panel. When you start a new pattern you should get a helpful little panel that looks like this:
 I recommend starting out with the settings that I've circled in the photo to help reduce confusion when first starting out (you'll notice I even made a quick and very simple flower similar to yours ;D). With these settings you'll be able to see JUST the object that you're trying to make a pattern of.
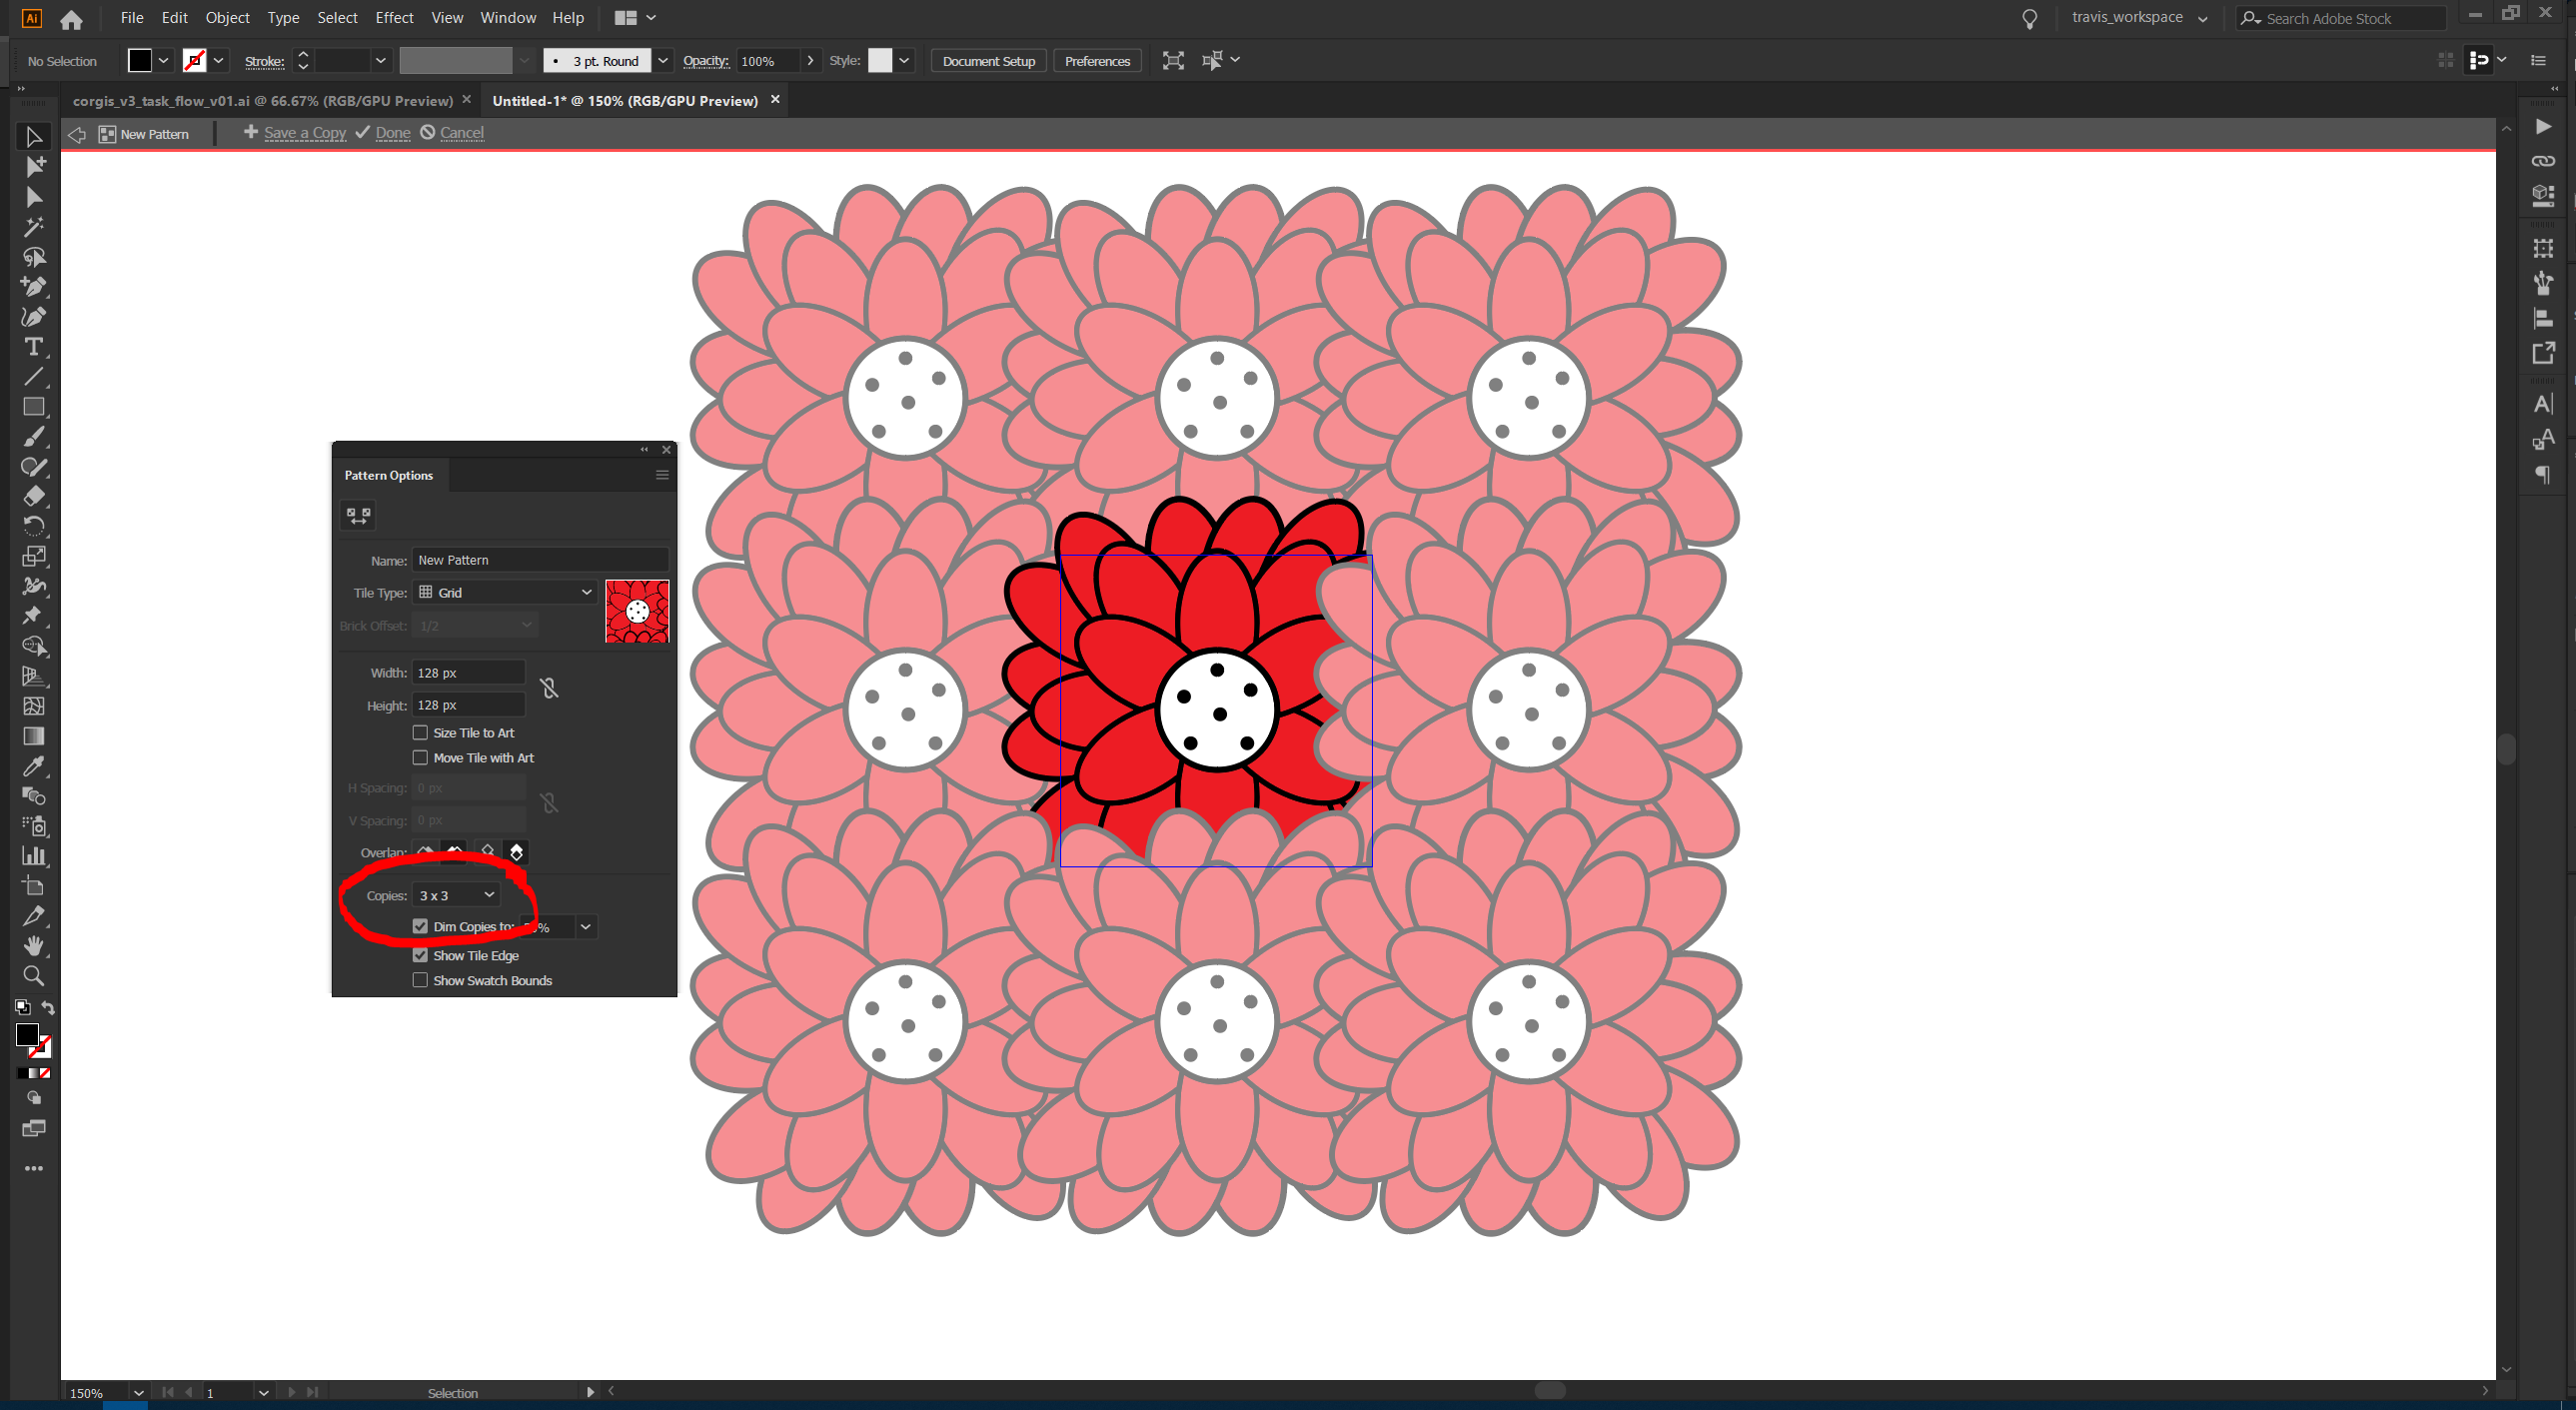
When you're ready to see how it will look as a pattern, use the "Copies" dropdown and select else besides 1x1.
 You'll notice 50% transparent copies of your object surrounding your object. If you don't see something symmetrical like I have above, it's probably because of your tile boundaries (the little blue box around your object).
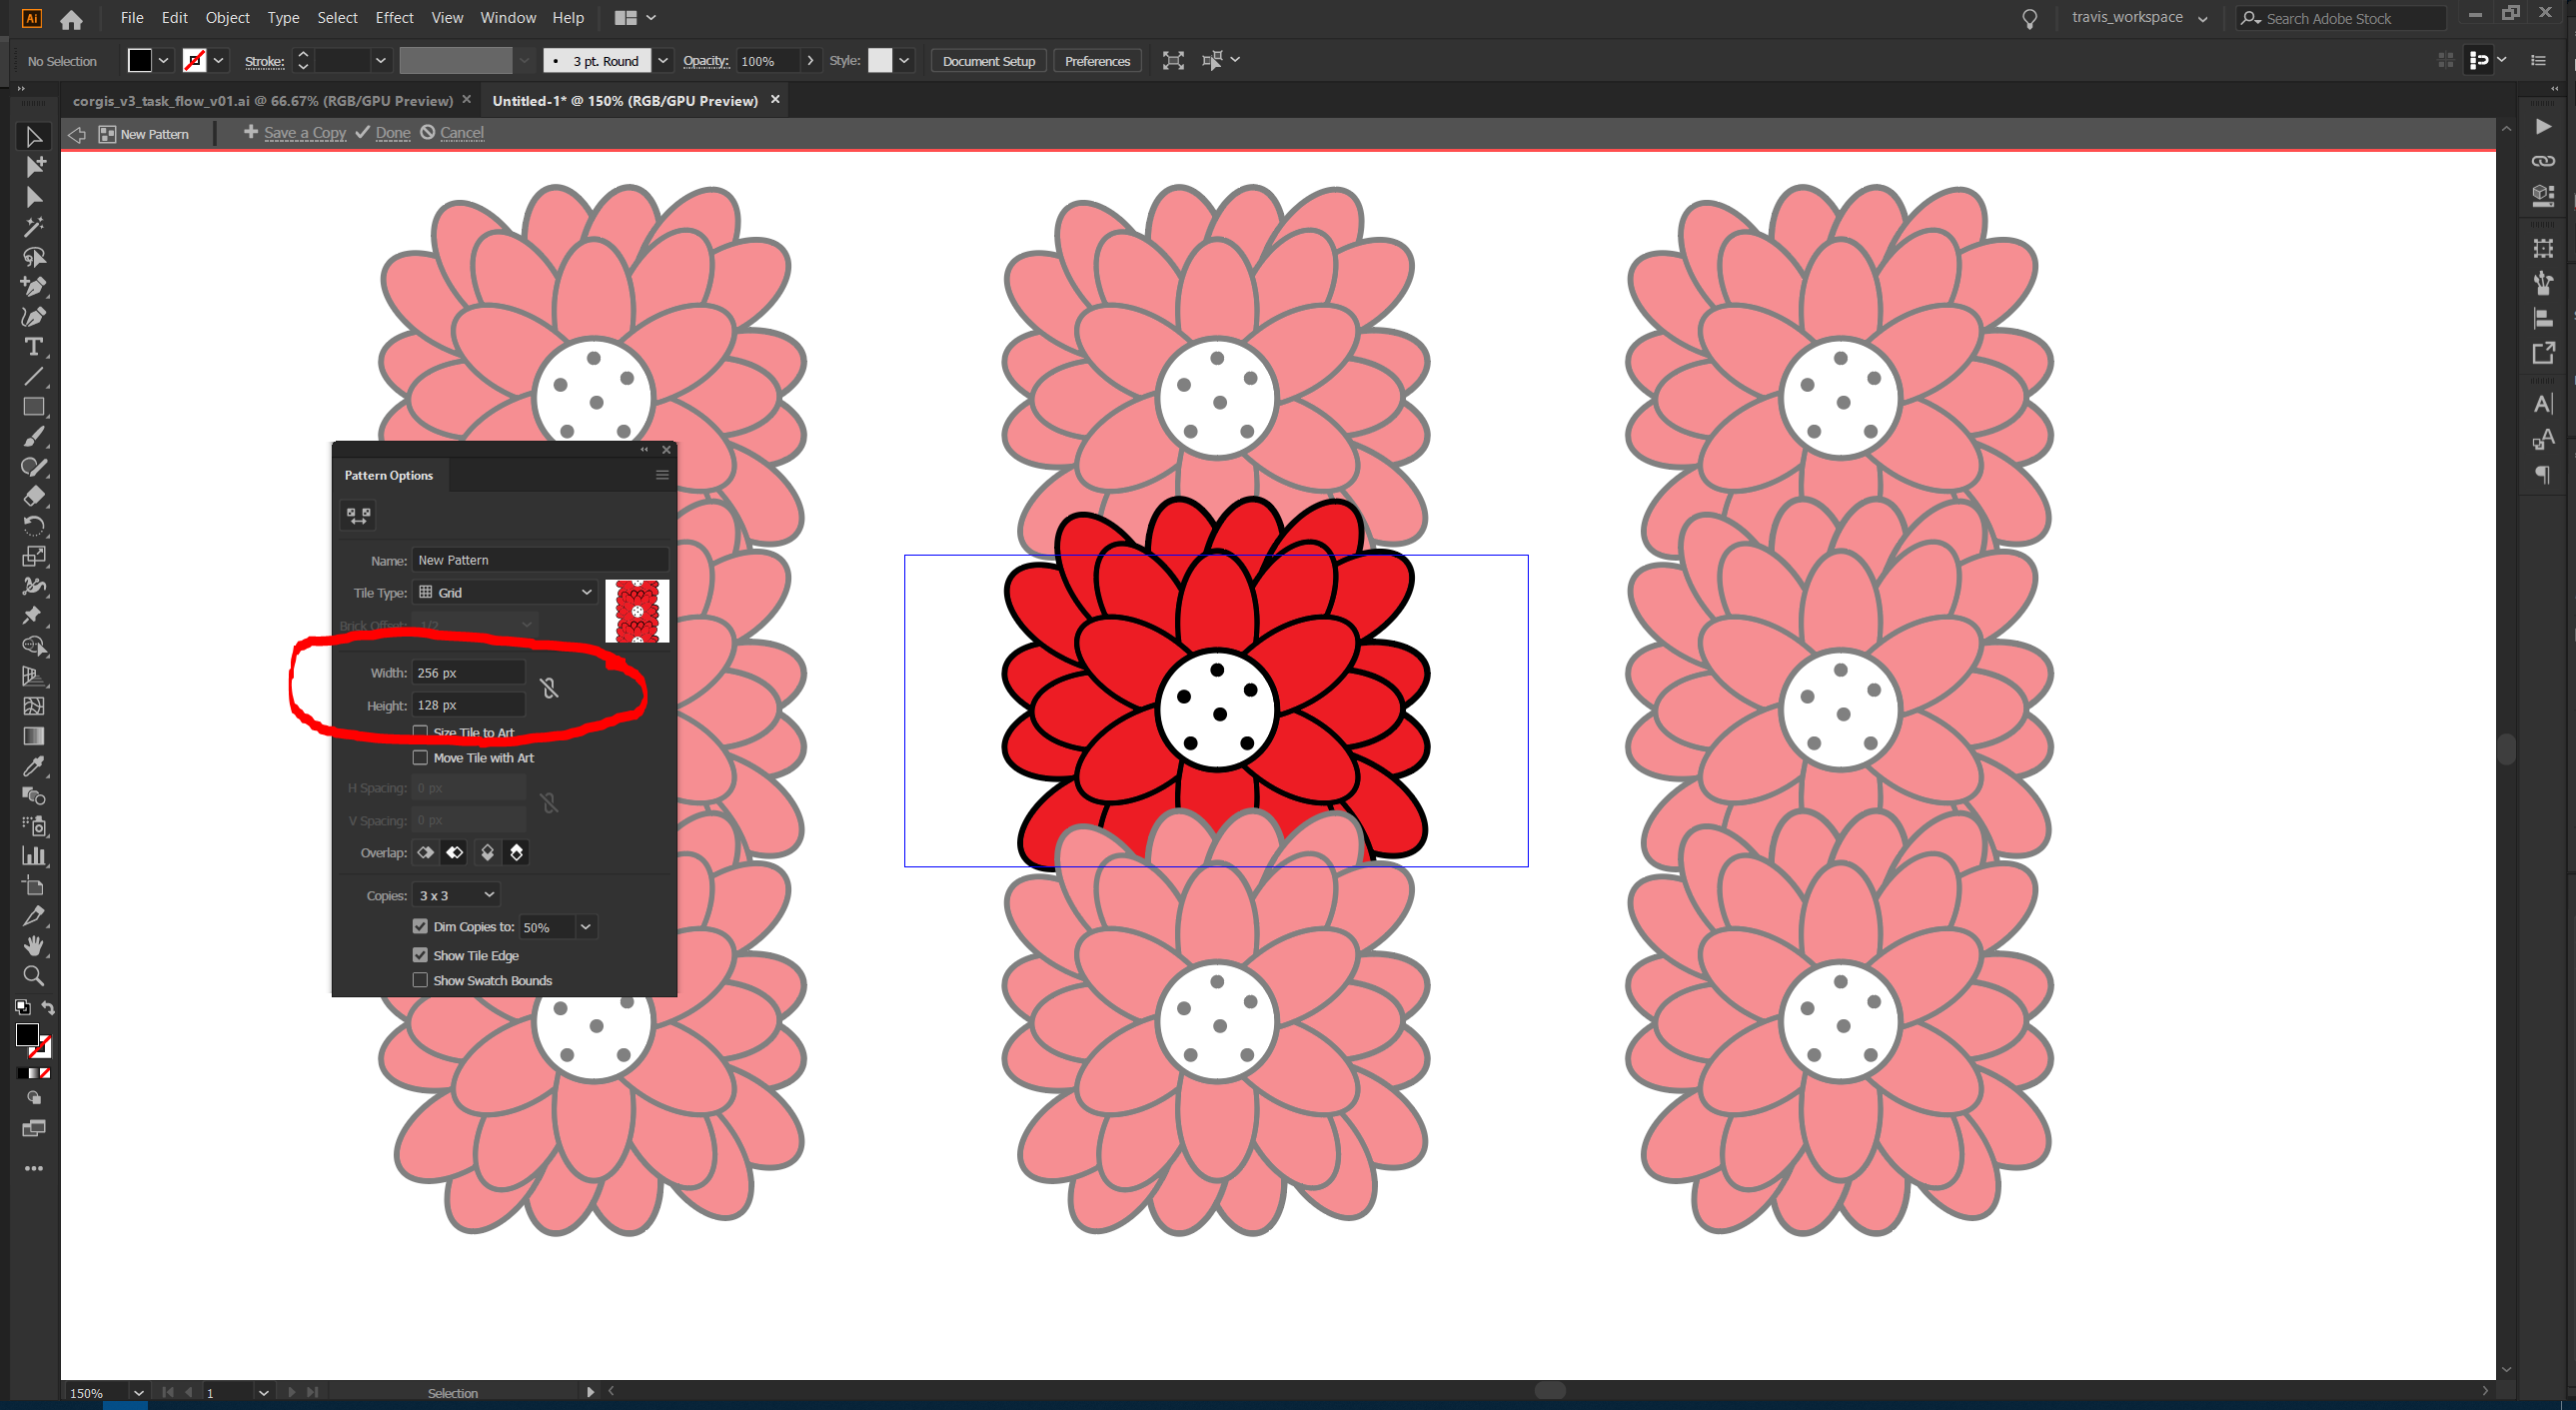
 In the picture above, I changed the size of the tile and it affected the pattern so it's not so tight on the x-axis. For more control over the boundaries, use the checkboxes below the width and height.
That's pretty much the basics, as for optimization, I recommend using the pathfinding tool to merge together the many pieces of your artwork into one object. You can find the pathfinder tool in Window->Pathfinder and then use "Merge" (see the picture below). You might have to expand strokes in order to make this work.

Without actually opening up your file, it does look like you have many copies of some art in there that you might need to delete in order to make it look right. Also, the boundaries have been transformed into a tall rectangle, which is something you also may not have wanted.
Hope this helps!

