9

I have a green background picture with some shadows. I would like to use it as a mask so I can place it on background with any color (e.g. red or pink) and get the same style of shadows.

I tried converting it to grayscale and changing opacity to 20%, but this resulted in a lot darker image.

I am using this on a webpage where admin can set template color. Then I am using something like this in CSS:

background: #557d0d url("img/background.png") center center;

enter image description here

Using Gimp 2.8.6 on Ubuntu.

1

5 Answers 5

5

You can desaturate the image with Colors > Desaturate.... Next, use Colors > Color to Alpha... to eliminate the gray which makes it darker (#808080).

Set opacity to 40% and it should do.

I just did a small test with a website I created: enter image description here

3

You can't exactly replicate the image using just a masked grayscale layer on a solid color background, since the hue of the green color also varies along the vertical gradient.

You could get pretty close just by picking one of the medium green hues from the middle of the image with the eyedropper tool, maximizing its saturation and value and turning that color transparent using the Layer → Transparency → Color to Alpha... tool. However, this would leave your layer with color casts at the top and bottom, which you may not want.

A better solution may be to decompose the image into hue, saturation and value (HSV), discard the hue channel and reconstruct the saturation and value channels into a grayscale mask that can be laid on top of any pure saturated color to replicate the saturation and value of the original image with the new hue.

One way to do that would be:

  1. Use the Colors → Components → Decompose... tool to decompose the image into layers using the HSV mode.

  2. Delete the hue layer. We will not be using it.

  3. Select the saturation layer, open the Layer → Mask → Add Layer Mask... dialog, select the "Grayscale copy of layer" mode and check the "Invert mask" checkbox.

  4. Repeat step 3 for the value layer as well.

  5. Using the bucket fill tool (in "Fill whole selection" mode), fill the value layer (not its mask!) with all black, and the saturation layer with all white.

  6. Move the value layer above the saturation layer in the stack.

  7. Optionally, merge the layers together with Image → Merge Visible Layers... or with Layers → Merge Down.

The resulting semitransparent grayscale image should look like this:

Semitransparent PNG image
Click to download / view in full size.

The trick is that, after steps 3–5:

  • the "saturation" layer will be pure white where the original color was 0% saturated, and transparent where it was 100% saturated, and
  • the "value" layer will be pure black where the original color had 0% value, and transparent where it had 100% value.

Placing those two layers (or their merged combination) on top of a pure saturated color background then replicates the process of converting a HSV color to RGB: you start with the pure saturated color of the correct hue, mix in enough white to get the desired saturation, and then mix in enough black to get the desired value.

Here's what the resulting image looks like on various colored backgrounds:

Green background (#83ff00) Blue background (#00aeff) Orange background (#ffa200) Red background (#ff002a)
Colors: green (#83ff00), blue (#00aeff), orange (#ffa200), red (#ff002a).

2

In The Gimp you can do essentially the same thing as the photoshop answer, using color to alpha. I would recommend still desaturating and then setting white to alpha in case you have more than one color in there. It looks like there is some blue / yellow variation. The key steps are:

  1. desaturate image so that you have a greyscale image
  2. set white (you can input #FFFFFF for white in the color picker) to alpha
  3. save as png so you retain transparency
1
  • Note that converting to greyscale as opposed to desaturating may result in an image without an alpha channel and you can add this back in using the layers dialog. You might also need to do this if the original file you opened has no alpha channel. Commented May 5, 2014 at 1:27
1
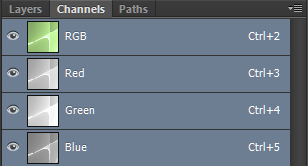
  • Open the Channels Panel.

enter image description here

  • Decide which channel will give you the degree of contrast you're looking for.

Method 1:

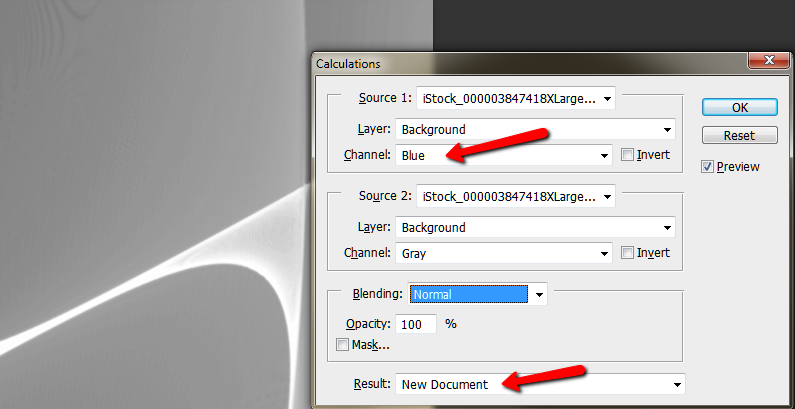
  • Select Image > Calculations and use the channel you picked as Source 1, the same channel or "Gray" as Source 2, and "Normal" as the Blend Mode. Choose "New Document" as the destination.

enter image description here

  • Change the Mode of the new document to RGB or Greyscale and Save As a png or jpeg.

Method 2:

  • Ctl/Cmd-click on the thumbnail for the channel you've chosen.

  • Edit > Copy or Ctl/Cmd-C

  • File > New, accept the dimensions, Edit > Paste or Ctl/Cmd-V

  • Delete the background layer.

  • Image > Mode > RGB

  • Save As a 24-bit png with transparency.

You can use either of the resulting images as an overlay or as an Alpha channel whenever required.

1
  • This seems to be Photoshop, OP asked for a GIMP solution.
    – kelunik
    Commented May 4, 2014 at 20:34
-2

Double Click on Layer, a Layer style box will be appear, in left side find & select Gradient Overlay & change the color of Gradient according to your need & click OK then in Gradient overlay box change style to linear & change angle & scale according to your need.

1
  • Second time you added your company link. That does not smell for spam, that is spam!
    – Mensch
    Commented Jan 16, 2015 at 12:42

Not the answer you're looking for? Browse other questions tagged or ask your own question.