2

I've created a simple text logo in gimp with an image inside of it. I don't know how to delete the black background I have and only have the text with the word left in it.

When I go to delete the black background the full image I used for the text stay completely intact, covering my text logo.

I just want the text with the image inside so i can use it as a watermark on flyers. thanks enter image description here

enter image description here

3 Answers 3

3

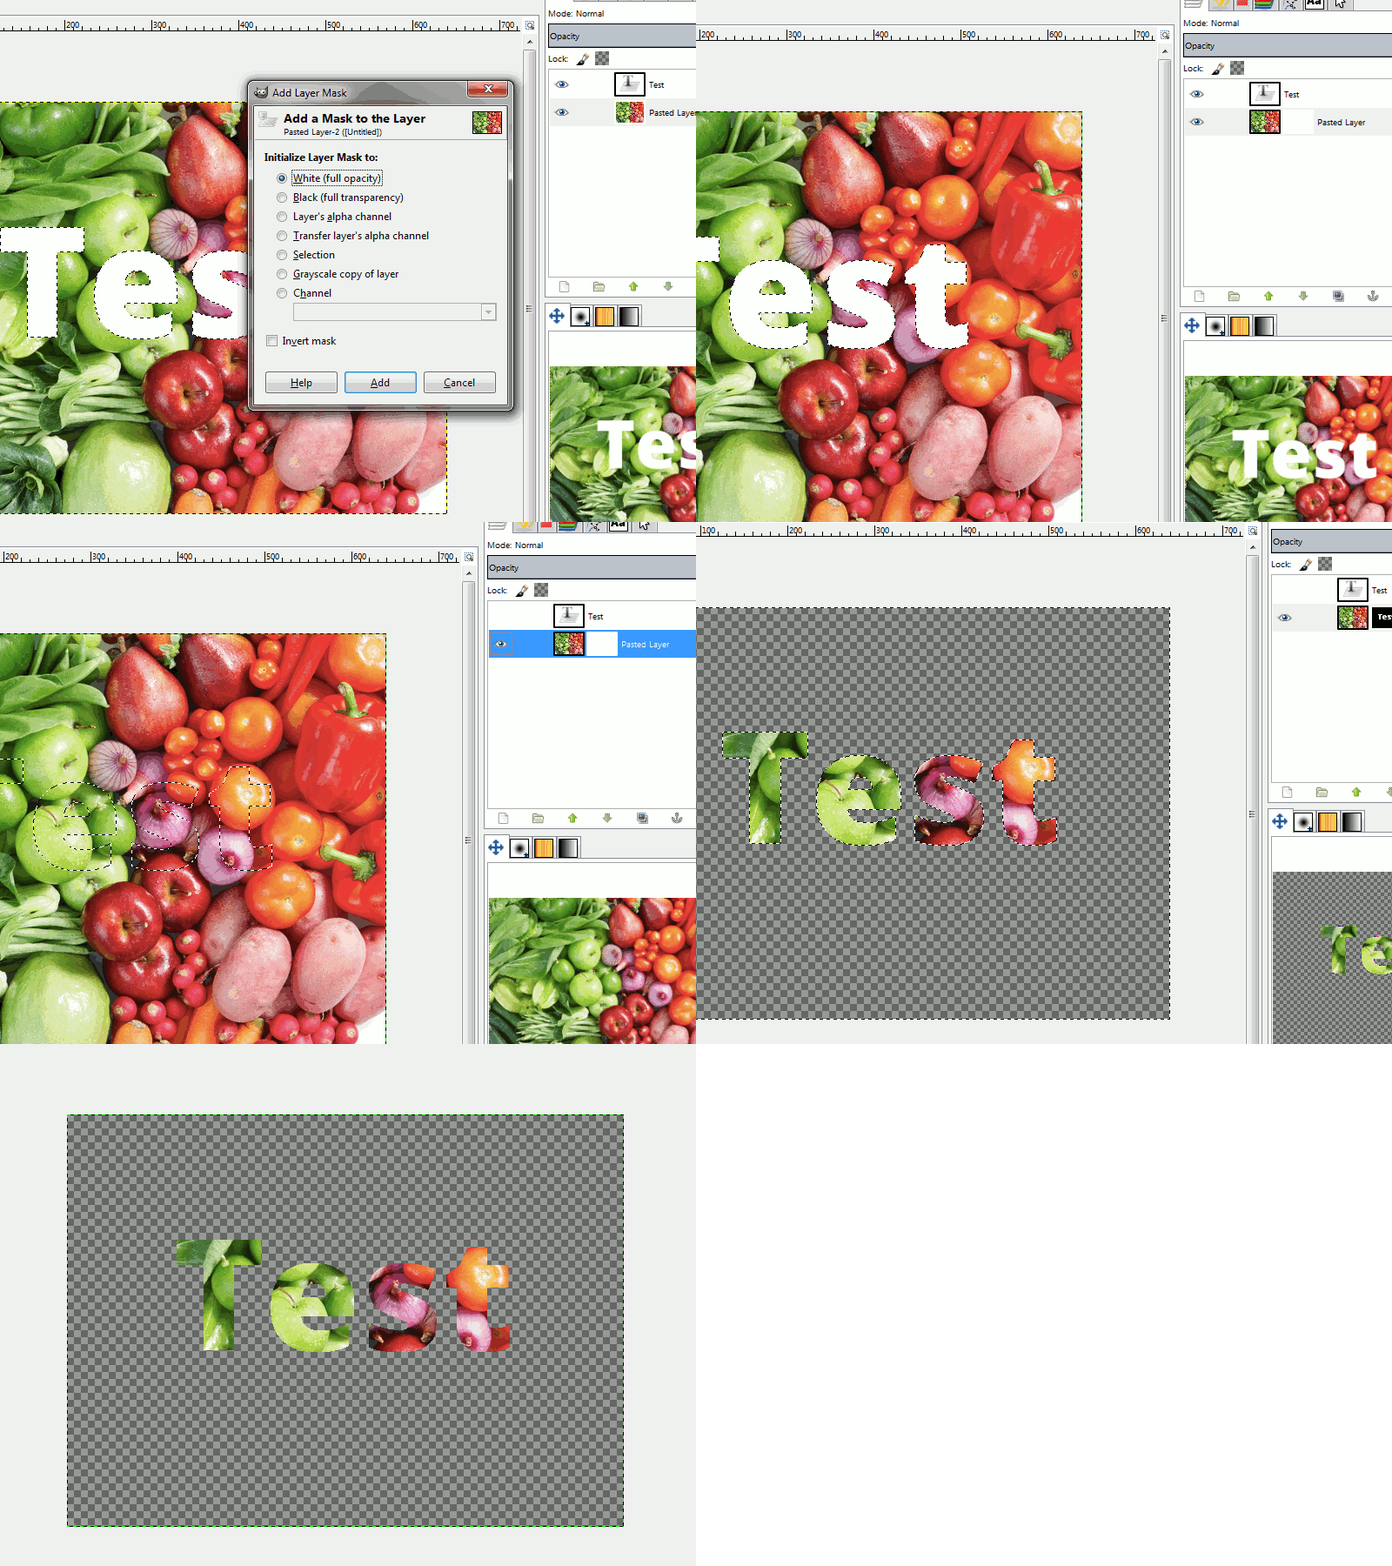
The best way to do this is using a layer mask. A layer mask is basically a black and white layer telling the layer what to show (white) and what not (black). The upside of this is that you never lose your original image and can always edit it later if you need to.

Step 1: put the image in Gimp

Step 2: create a text layer with your text, style it as you wish

Step 3: select the text with the color select tool. Invert your selection (ctrl-i or select > invert)

Step 4: select the bottom layer (image), right-click it and select 'add layer mask

Step 5: Select White from dialogue and click add (you'll see a white layer next to the image thumbnail in the layers panel)

Step 6: Select the white layer, Select you brush tool and choose black as the foreground color. Hide the text layer by clicking the eye icon on the left.

Step 7: Now you can use the paintbrush to 'remove' everything from the image outside your text by painting black on the image layer.

Step 8: Deselect (ctrl-shift-a) and done!

text to logo in Gimp


This method has some upsides:

  1. you never lose your original text layer, so you can always go back to edit it

  2. you never lose your original image. just disable or remove the mask to restore it.

4
  • You can create a layer mask from text in two steps, as follows: a) on the text layer, use Layer -> Transparency -> Alpha to Selection b) on the layer to be masked, use Layer -> Mask -> Add Layer Mask, Initialize to: Selection Commented Oct 1, 2015 at 12:04
  • True, there are more ways to create a layer mask. But I wanted to make clear how it works, so I spelled it out :)
    – PieBie
    Commented Oct 1, 2015 at 12:55
  • TY! very effective! .. However you can't easily adjust the image to your liking after you set it inside the text. not to my knowledge anyways (im a newbie) ... to accomplish my goal of using multiple images and adjusting them to my liking, i had to use a combination of the youtube method i found, which doesn't show you how to turn your logo into a water mark, and also your method. I also found this video on youtube for photoshop which does accomplishes it in two minutes! i think in the end it will be worth it for me to invest in photoshop youtube.com/watch?v=qcHTowgFW7k Commented Oct 1, 2015 at 20:34
  • In PS you can turn the image into a smart object and add a layer mask to that. This enables you to edit the image afterwards. This is indeed slightly easier. But even in Gimp you can just disable the layer mask, make you edits to the image, then enable it again, so it's not that much more work. And as Michael Shumacher pointed out, Gimp offers much faster methods of creating layer masks from a selection, so even repeating your work with different text and images would take about 30 seconds.
    – PieBie
    Commented Oct 2, 2015 at 9:01
0

To "remove" the black background to be able to copy the image eithin the text we can have two approaches using Gimp.

  1. Select the Text and copy & paste it as a layer onto the new picture
    You may already have the text object defined as a layer so you could just use this. Else, or in case the image was flattened we can select the background black color with the select by color tool (enter image description here Shift+O). After inverting the selection Ctrl+I we have just the text selected. This selection can then by copied to clipboard (CtrlC) and pasted onto the new image (CtrlV).

  2. Make the background transparent
    On creating the text, before adding the black background, we may already have it selected. In this case, or after selecting the black inverse the selection to have the backgroud selected (see above). Then add an alpha channel for transparency (*Layer > Transparency > Add Alpha Channel). Simply remove the selected background (Del). By this we can copy & paste the whole picture with only the text being visible.

-2

Sorry, I didn't realize that gimp might be another software until I answer the question. Is GIMP a software like photoshop? If it is, then never bother with my answer. I know how to do what you need in PS, not tin GIMP

============ You could use Photoshop to get what you need.

The process might be a little bit tricky. I am not a English native speaker, so it's little bit hard for me to explain. But I am giving it a try.

Ok. 1) open your image in photoshop, then choose type mask tool on the left choose type mask tool, the third one
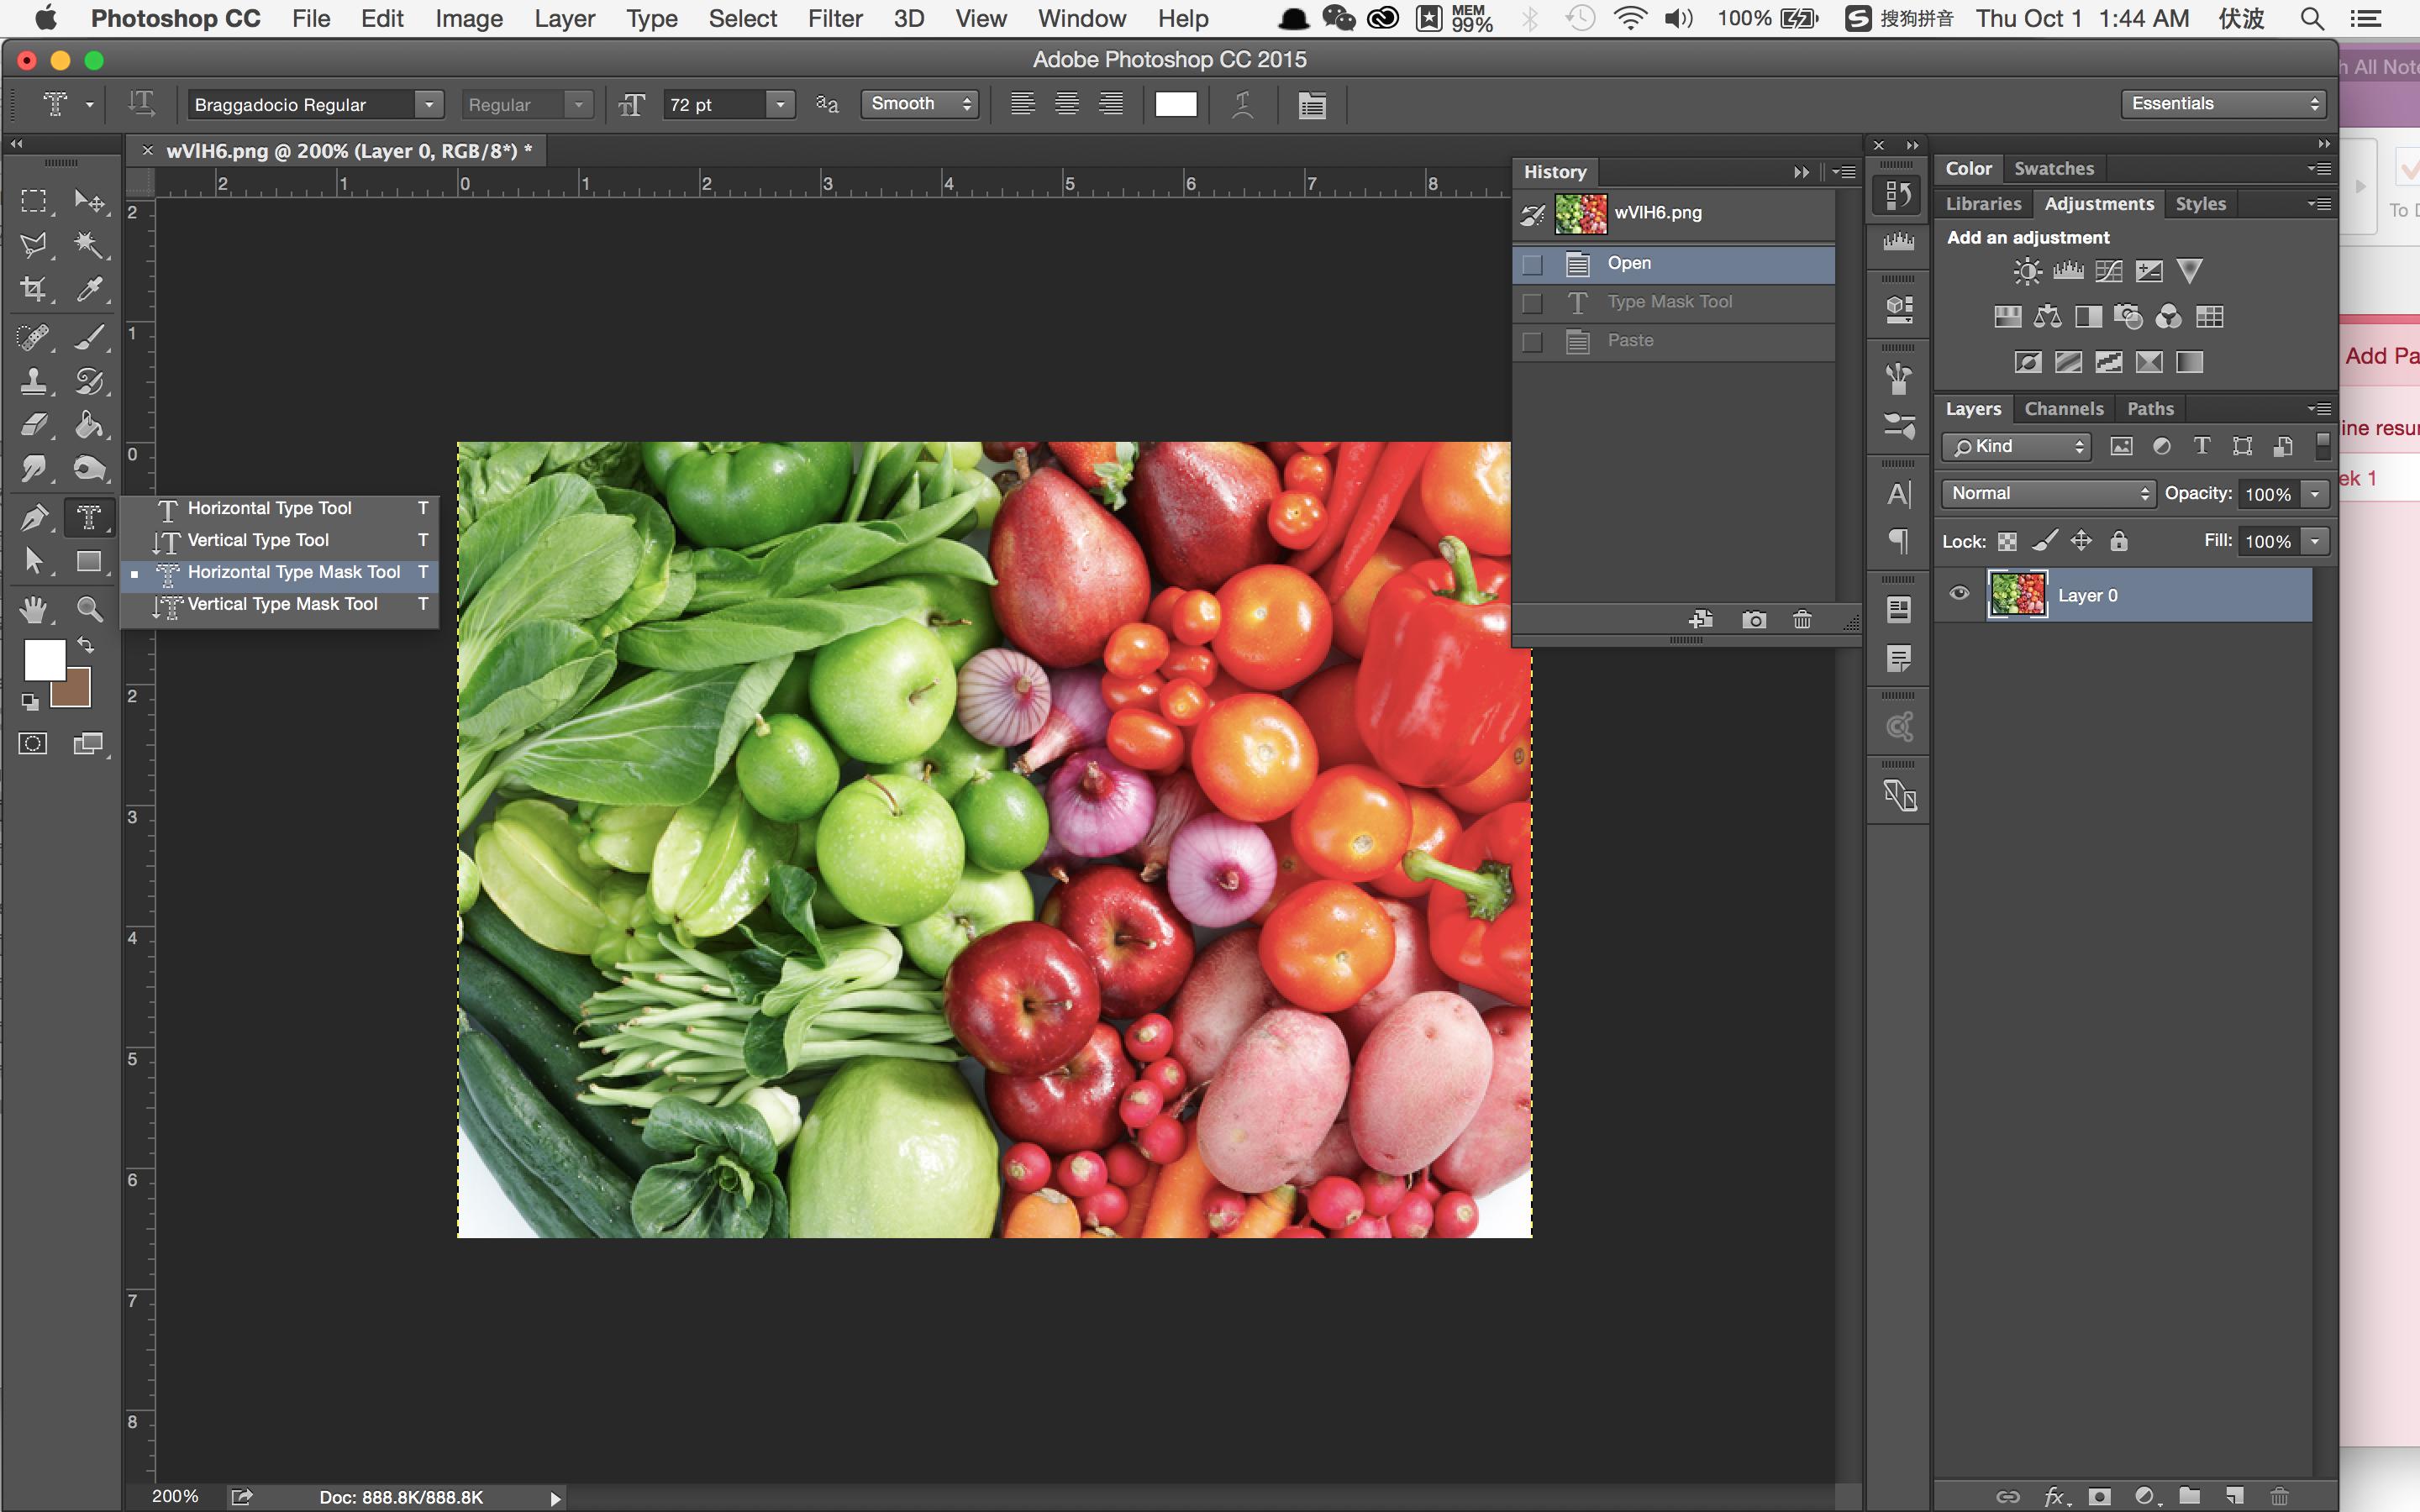
2) Start typing the letters you need. In this step, I suggest you adjust the font size as you need.

3) press "esc" when you finish editing the letters, you will get a selected area of letters [![get the selection][3]][3]

4) then copy (ctrl+c) paste(ctrl+v), delete the original image layer or make is invisible in layer panel as you like you will get this: letters with images inside of it on a transparent background
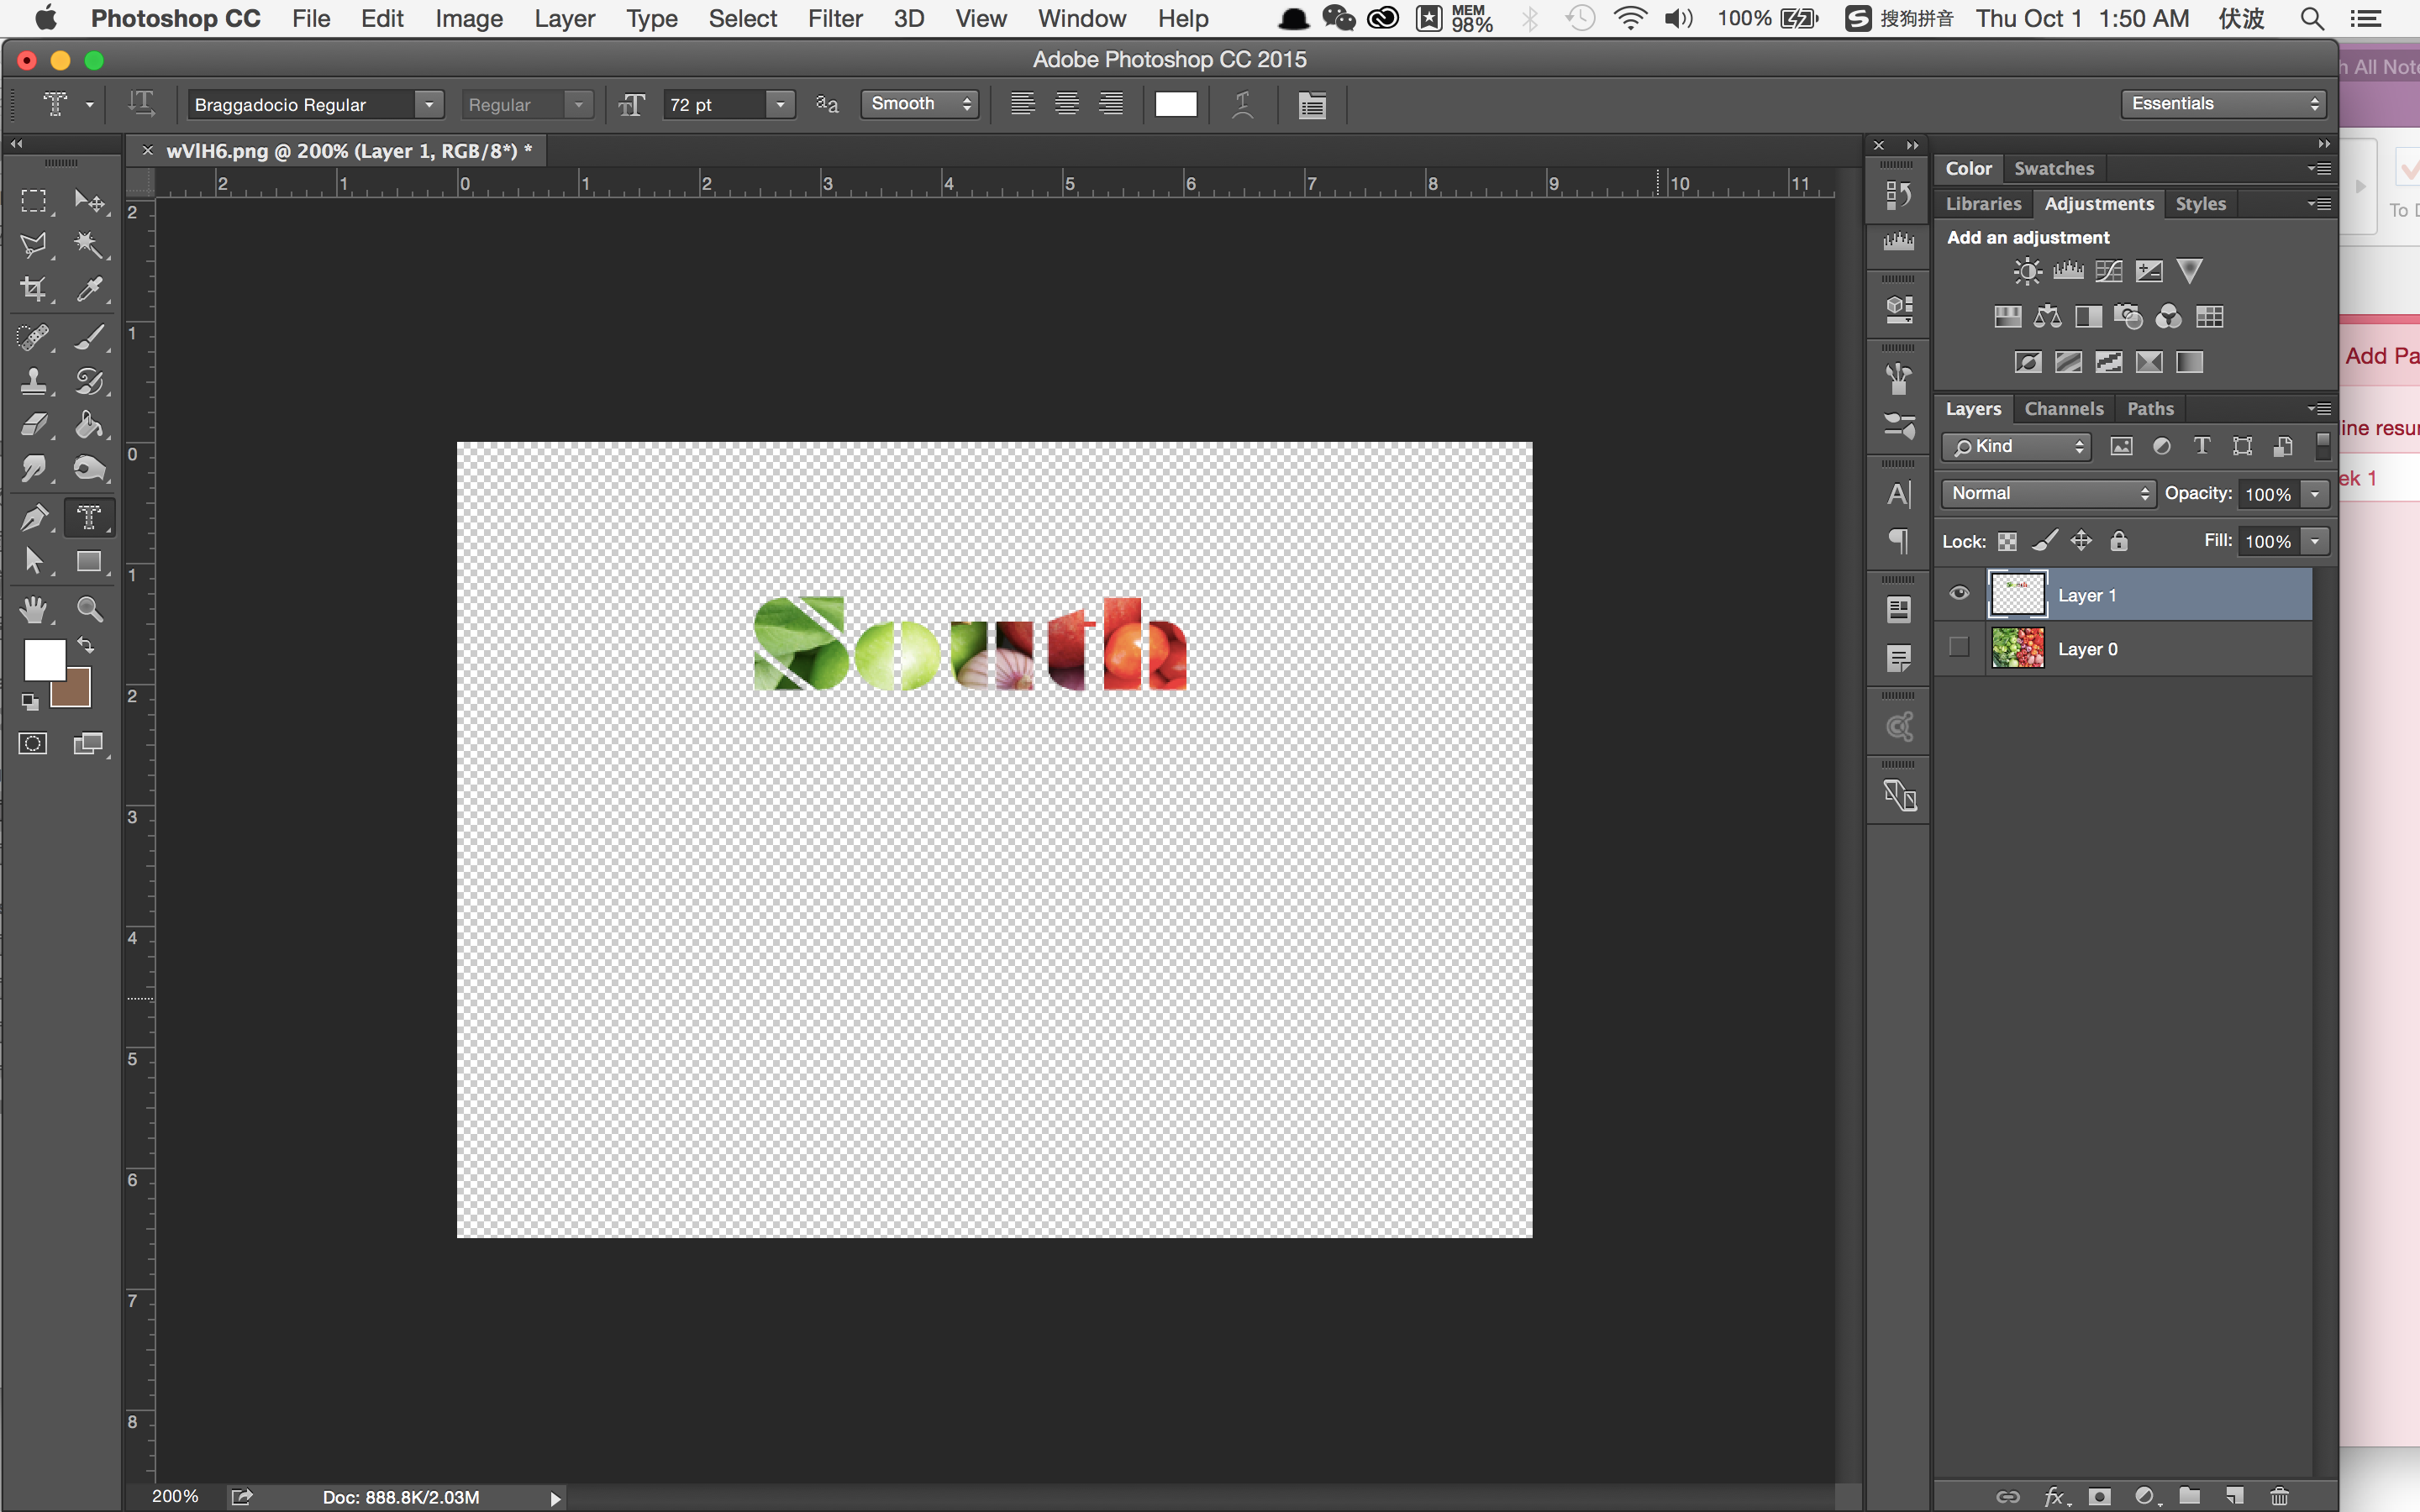
5) Finish the editing: like crop the image size accordingly.Make sure you save the image in .png or .psd format, otherwise you will get white background. If you don't know how to save them, leave a comment.

1

Not the answer you're looking for? Browse other questions tagged or ask your own question.