1

I am a newbie with Illustrator and could really use some help.

I am trying to convert some icons to SVG and part of this process is making a compound path. Quite often this works just fine but sometimes, the shape changes with sections becoming white.

Below is an example icon where I have tried to create a compound path - the white sections should not be visible.

I can't for the life of me figure out why this is happening, and how to stop it.

Would appreciate any help you can give me

enter image description here

3 Answers 3

4

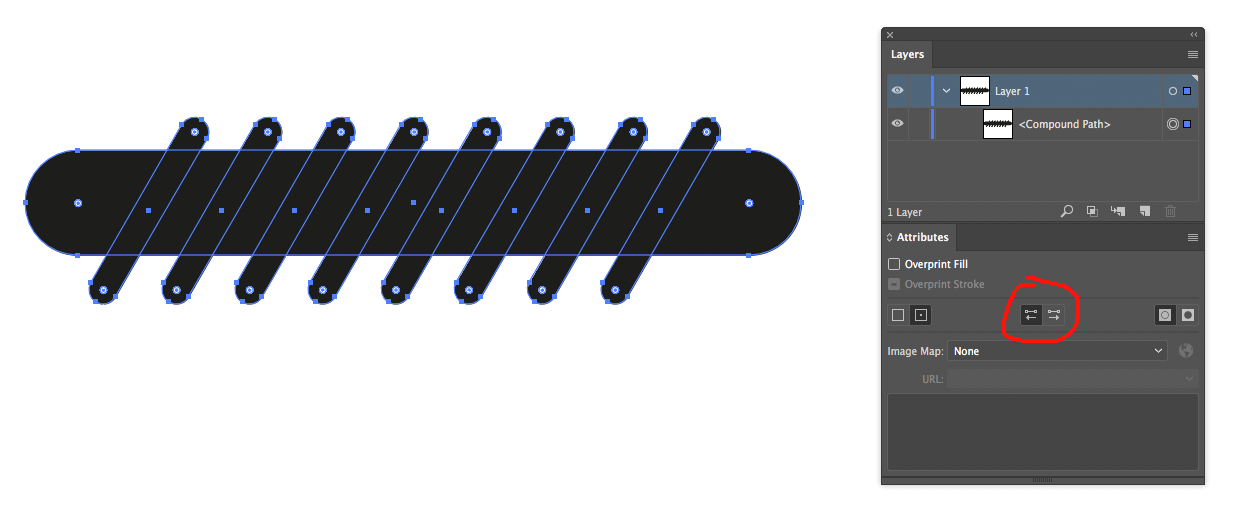
Compound Paths that use a non-zero winding fill rule use path direction to determine if an area is filled or not. You can use the Attributes panel to change a compound paths fill rule and each path's direction...

So to fill everything; set the compound path to use a non-zero winding fill rule (the left of the far right buttons) and with all of the constituent paths selected, hit one of the path direction buttons (the middle buttons) so that all the paths have the same direction:

enter image description here

You can also use Pathfinder, which is a bit more intuitive.

If you want to keep the separate shapes editable while using Pathfinder you can hold alt while hitting the Pathfinder mode buttons to keep the result as a compound shape rather than expanding the result as is the default.

1
  • Thank you - this did the trick! I was able to use the compound path just as I needed to. Commented Nov 21, 2017 at 10:55
2

From Adobe's Methods of combining objects:

Compound paths let you use an object to cut a hole in another object. For example, you can create a doughnut shape from two nested circles. Once you create a compound path, the paths act as grouped objects. You can select and manipulate the objects separately using the Direct Selection tool or Group Selection tool; or you can select and edit the combined path.

From this you will realize what you are doing wrong, you are basically cutting your objects with the diagonal lines plus that one horizontal one.

What you are looking for is a Group (Ctrl+G) and not a compound path.

Simply remove those troublesome lines from the compound, add them as separate objects in the layer and then group them.

0
0

Since this is an icon and icons usually have all the bits and pieces merged together (unless you need to re-adjust in the future), use 'Window → Pathfinder' and 'Unite' everything into a single shape.

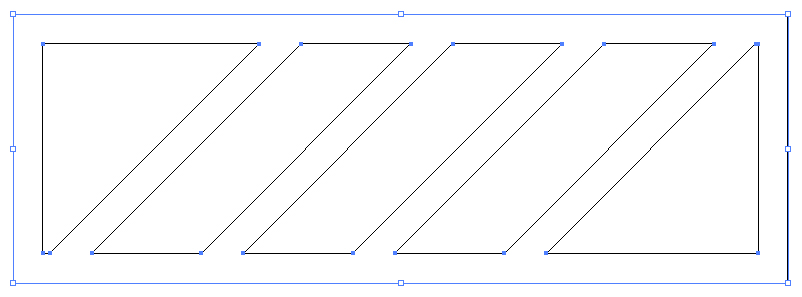
Your final artwork should look like this when seen in Ouline mode (Ctrl+Y). Note how the angled lines are "blending" into the rectangular frame, resulting in a single, final, non-editable shape.

Downloading this, for example, will reveal it is actually a single object, not a group of smaller pieces.

enter image description here

Your Answer

By clicking “Post Your Answer”, you agree to our terms of service and acknowledge you have read our privacy policy.

Not the answer you're looking for? Browse other questions tagged or ask your own question.