3

I am trying to make a simple, nicely spaced table of horizontal lines.

Coming from an InDesign background, I could accomplish this easily in Indesign by making a single line and then choosing "step and repeat," choosing the number of rows and columns, and adjusting the vertical and horizontal differences with preview mode on, and clicking "okay" when the appearance was what I wanted.

For example, to design a simple form (black and white) that has lines that are going to be filled out, I might want a section with two columns of blank lines (e.g. for names or items to be written in).

In Inkscape, the closest I have found is edit -> clone -> create tiles clones, but this has two problems:

  1. There is no "preview" for what the results will be, so I can't adjust it until it visually looks like what I want; and
  2. The "shift" for vertical and horizontal is only possible in terms of percentages, not in terms of distance. (And since the line doesn't have any height really, I can't seem to get the vertical translation to work at all.)

In Scribus, there is a "Multiple Duplicate" option which allows for shifts in terms of distances, but there is still no preview mode.

I am trying to transition my workflows to use only freely available open source software, especially for simple work. It seems like a live preview for the "step and repeat" result is a simple, obvious feature, so I feel I must be missing something that would allow me to do this in Scribus or Inkscape.

How can I get a live preview for the "step and repeat" result, either in Inkscape or Scribus?


The workaround that I used, not an answer to my question but the closest I could easily figure out for my desired workflow, was (in Inkscape):

  1. Make the single line.
  2. Ctrl-drag it down (to keep the dragging strictly vertical).
  3. Press the space bar while dragging, in my case 14 times since I wanted 15 rows. Don't worry that the copies will all be very roughly spaced.
  4. Ctrl-drag the top and bottom lines exactly where I want them (but maintaining vertical only movement so all lines are aligned).
  5. Use the "align and distribute" panel to evenly space the lines.
  6. Group the 15 lines.
  7. Ctrl-drag the group horizontally and use space bar to drop a copy (or multiple copies).
  8. Repeat the "align and distribute" panel action but space the groups horizontally to get them into evenly spaced columns.

This is far from ideal but it did at least let me handle the spacing visually rather than by calculation.

3
  • 1
    Is it for printing on paper or do you plan something finer such as data collection forms filled in a computer?
    – user82991
    Commented May 8, 2019 at 6:55
  • @user287001, very good question. Currently I'm just doing this for printing. How to make form-fillable PDFs with open source tools would be a great question, too, but that's not my question here. :)
    – Wildcard
    Commented May 8, 2019 at 7:11
  • scribus has very few tools that provide a live preview... and -- since i'm not coming from an ID background? -- i have never really missed it for this type of use cases. personally -- as you are doing, i would go for a multiple duplicate and then use align and distribute to get closer and closer to the desired result. i can even keep the align and distribute window open while you change the vertical spacing of the items... personally, i tend to consider that such a live preview is more interesting for vector drawing than layout... but i don't know what is the task you need to perform...
    – a.l.e
    Commented May 8, 2019 at 8:01

3 Answers 3

5

In Inkscape you can use the Interpolate extension. It's basically Inkscape's equivalent of making a step blend in Illustrator.

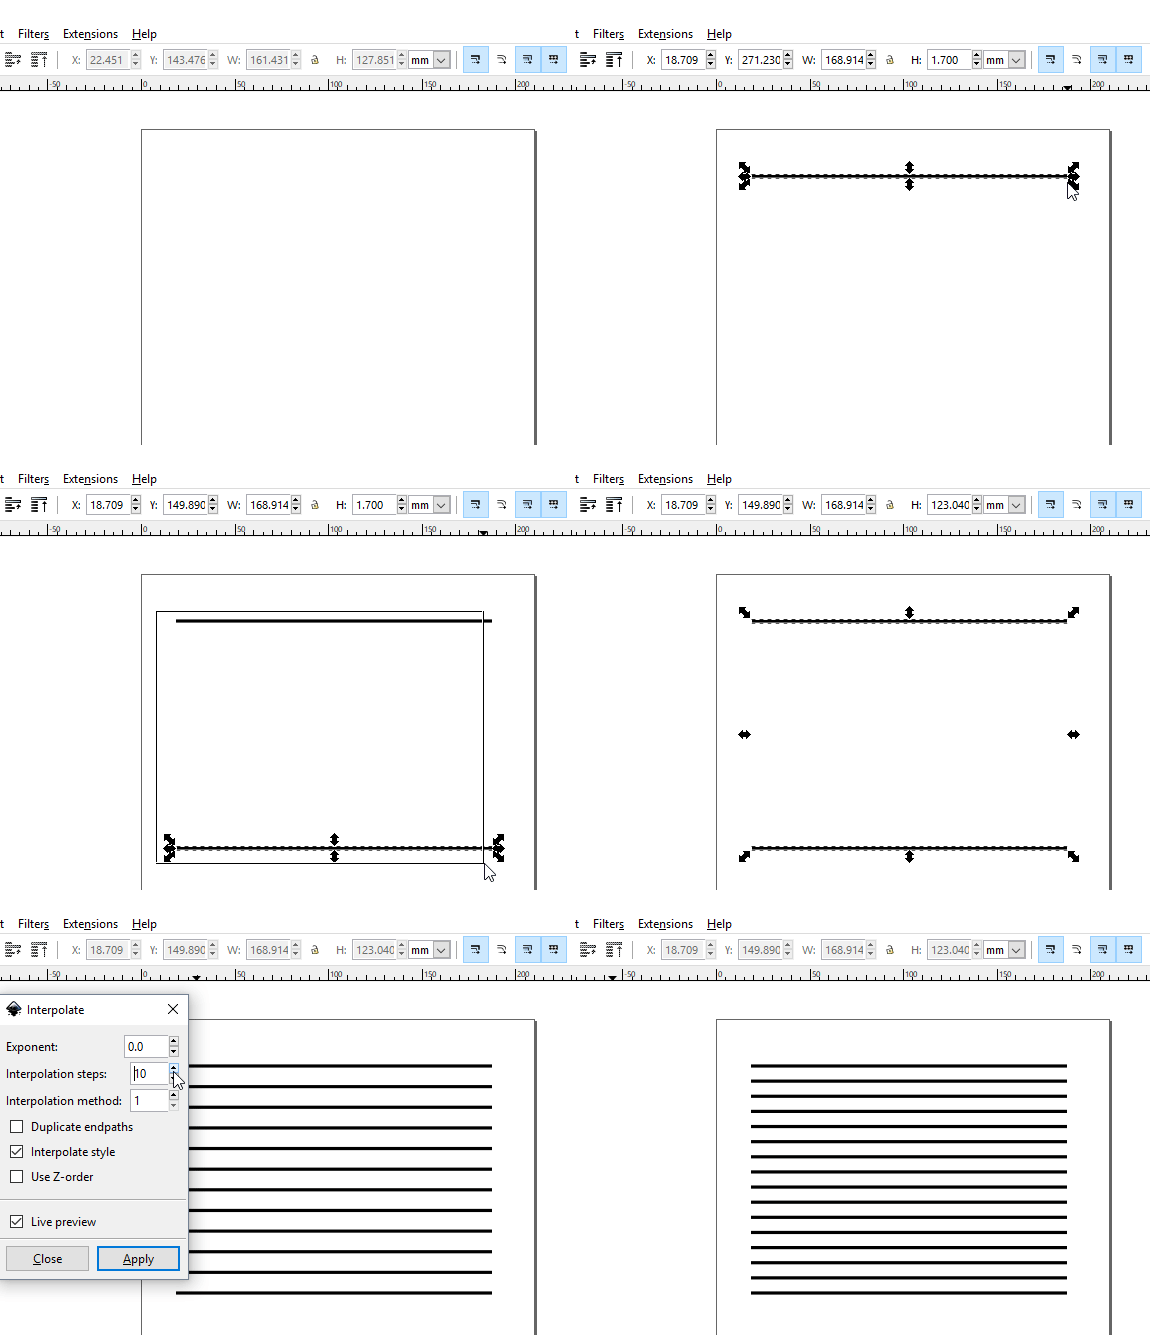
  1. Draw a line with the Bézier tool F6. After making the first node, hold down CTRL as you click and it will constrain the line horizontally.

  2. Duplicate the line using Ctrl+D

  3. Using the Select and Transform tool F1, hold down CTRL as you move the duplicated line down vertically into the desired position.

  4. Select both lines, then click Extensions > Generate from Path > Interpolate, and enable the Live preview if required. Click Apply and Close when finished.

enter image description here

Note also that the Interpolation extension doesn't only work with straight lines, it can interpolate between any two lines/shapes. For example:

enter image description here

2
  • Thanks! This is a very neat solution for this specific use case of a table of lines. I would love if some Inkscape update were to add the more general "step and repeat" feature with live preview, but for now I think this is the best I will find.
    – Wildcard
    Commented Nov 22, 2019 at 23:38
  • The extension already has a live preview
    – Billy Kerr
    Commented Jul 5, 2022 at 10:25
1

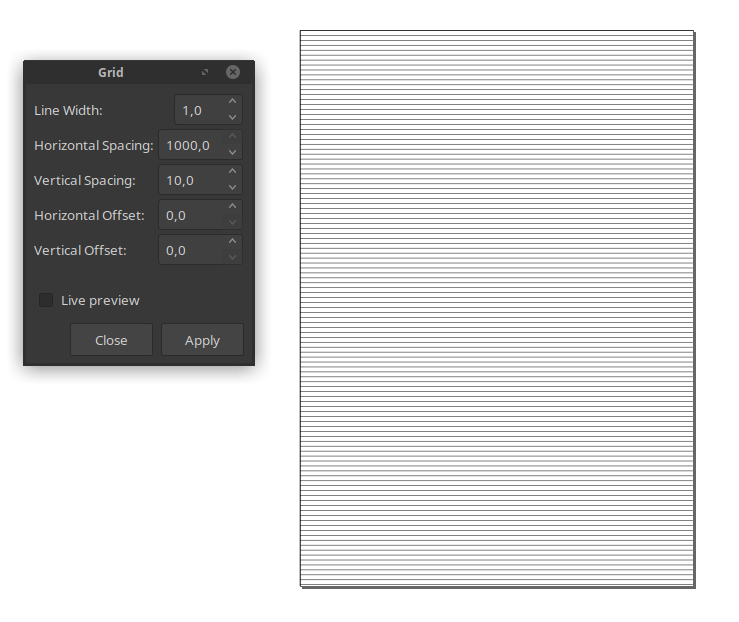
You can use an extension (Extensions > Render > Grid...) to draw a grid automatically. Just choose a very high value for the horizontal spacing.

enter image description here

1

Ordinary users very rarely can add missing functionality to programs, only programmers can do it properly. Even scripting needs programmer's attitude and thinking, but the needed underhood knowledge is remarkably less.

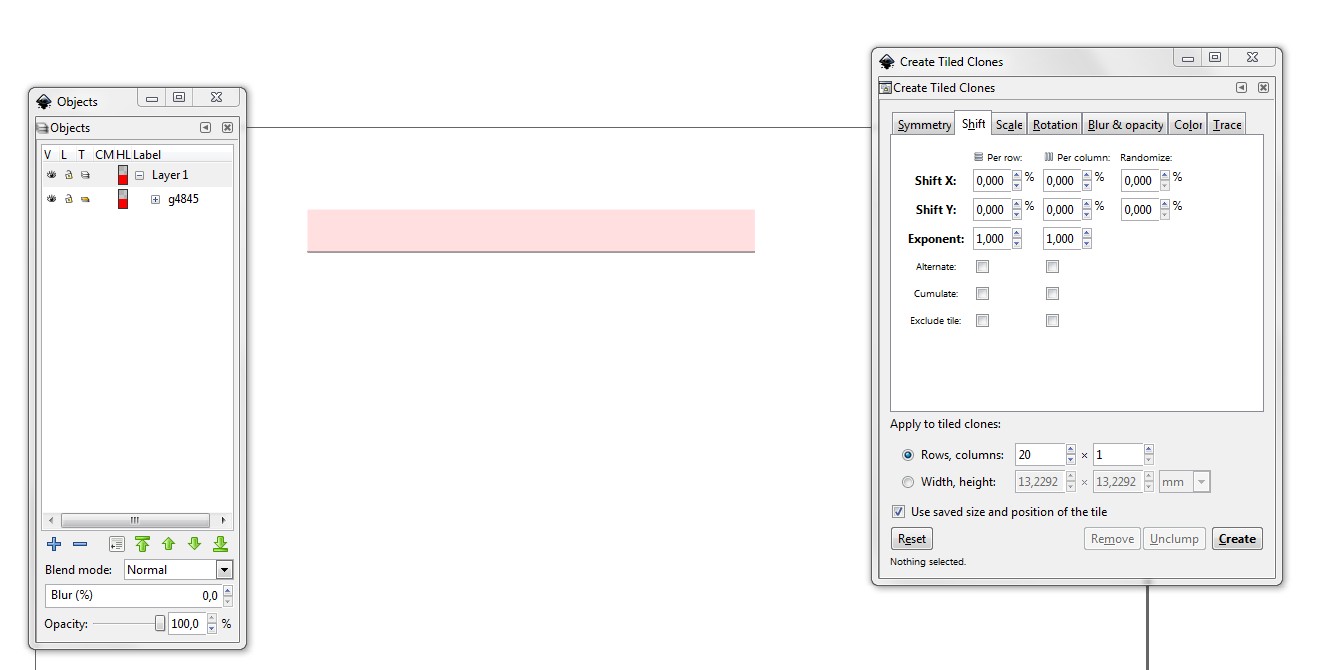
Here's another workaround. Make a group: A rectangle and a line:

enter image description here

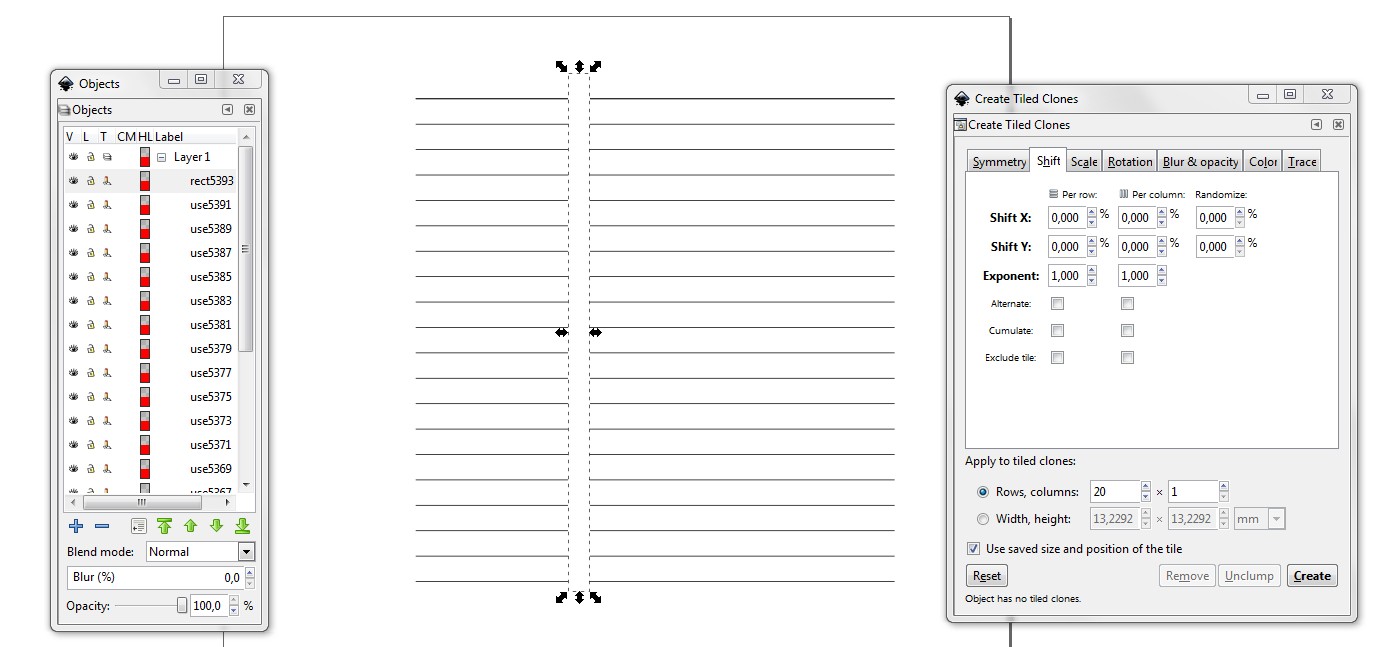
Tile clones, scale the result (you must prevent stroke scaling in the preferences), remove fill color, draw a white colored overlay to have a blank zone:

enter image description here

Not asked: If you need some shapes often, make a worksheet which contains them for easy access. Symbol list is another place for them.

Your Answer

By clicking “Post Your Answer”, you agree to our terms of service and acknowledge you have read our privacy policy.

Not the answer you're looking for? Browse other questions tagged or ask your own question.