1

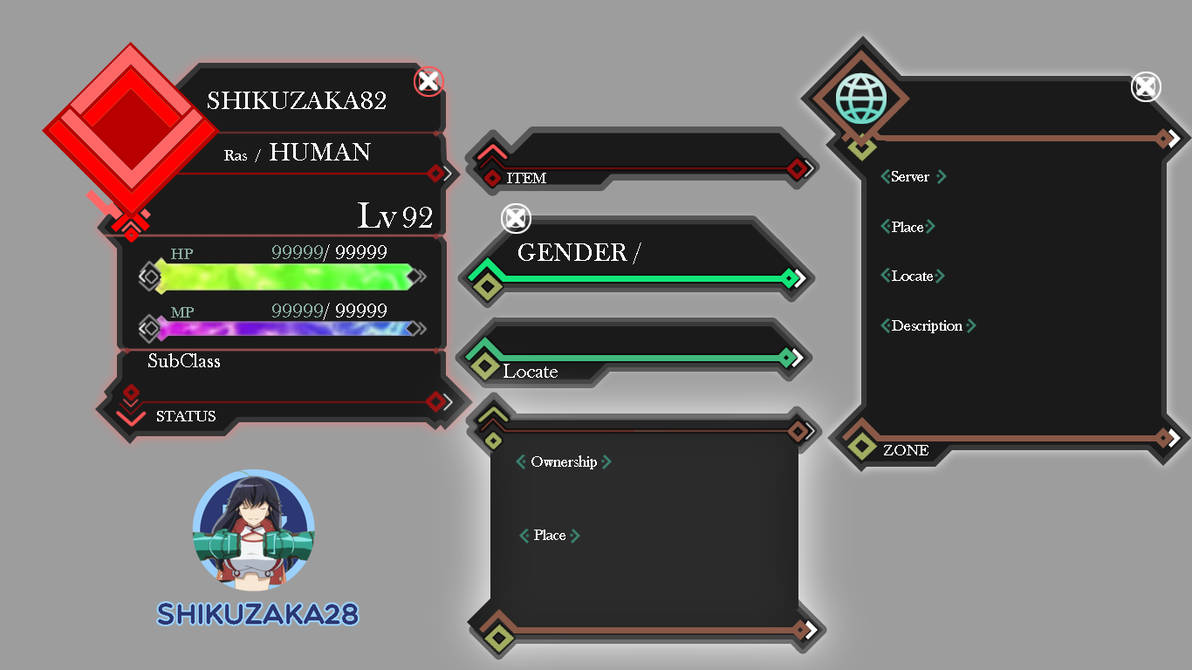
I'm pretty new to this all, especially Game UI Design and I would like to know how to create a realy good looking Healthbar.

I should perhaps mention that, since I'm so new to this, I don't have Photoshop or any of the other paid Tools!

Here is an example from DeviantArt where somebody created a Bar like I would like to.

enter image description here

4
  • 1
    well first of all Welcome to GD SE ; i'm professionally game designer and since you want some brief details i'm commenting instead of answering; if you are new you can go with inkscape and gimp; both are free and supports many features; im not used to use above softs since i have photoshop and illustrator but even with gimp you can do a lot more; and about design; it always depends on theme and if you want to use photoshop you can get free trial of it :) have fun in community . i'll provide further instructions once you get clear about your software since if it photoshop then i can help a lot
    – Mr.Online
    Commented May 17, 2019 at 5:54
  • 5
    What do you expect as an answer? The question is really vague and 'a really good looking' something is a subjective statement. If you don't have any experience with software maybe it's a good idea to learn some software first? Commented May 17, 2019 at 8:07
  • 1
    @Design Phoenix thanks for the comment and I think I will go with gimp xD
    – N3wb33
    Commented May 17, 2019 at 12:09
  • @Sergey I know that good looking isn't rly a good description, thats why I added the link for the picture. Concerning learning the software first: Probably a good idea. I will look for some nice tutorials.
    – N3wb33
    Commented May 17, 2019 at 12:13

1 Answer 1

2

You could use GIMP (which is free) to create such a texture. No need to buy anything! Since you have no experience, here's a very simple method:

  1. Open a new image in GIMP using File > New, and set the image size to the size of the health bar you want.

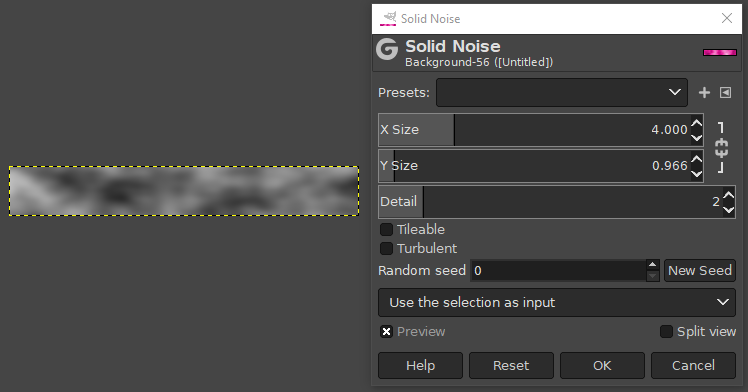
  2. Click Filters > Render > Noise > Solid Noise. Deselect the link icon to break the aspect ratio. This is located to the right of the X and Y size sliders. Adjust the X, Y and Detail sliders until you get a texture you like. For example:

enter image description here

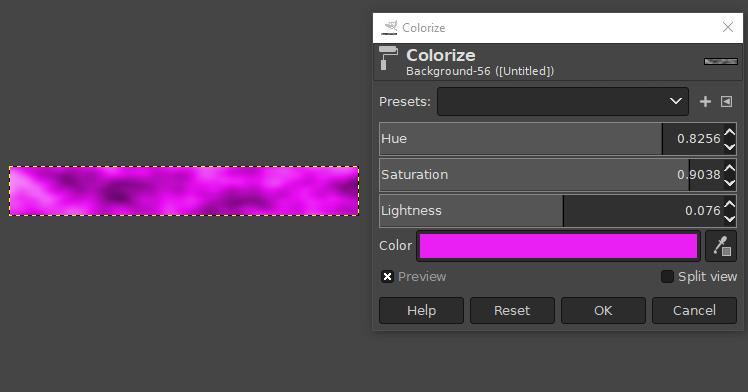
  1. Click Colors > Colorize and choose a nice bright colour:

enter image description here

  1. Click Layer > New Layer, choose transparency as the fill colour

  2. Select a bright contrasting colour as the foreground colour (I chose a bright blue shown below)

  3. With the Gradient Tool, click and drag to make a Foreground to Transparent gradient. You can choose this option in the gradient dialog which is shown as FG (t) in the example below

enter image description here

  1. Finally set the layer blending Mode in the layers panel to Value (HSV). This will allow more of the texture detail to show through the blue overlay.

enter image description here

3
  • You're too nice Commented May 17, 2019 at 12:05
  • 1
    Thanks for the answer that really helped me a lot. And I think I have to thank you for replacing the link with the actual picture as well so thank you :)
    – N3wb33
    Commented May 17, 2019 at 12:15
  • @ZachSaucier - well, we were all newbies once upon a time!
    – Billy Kerr
    Commented May 17, 2019 at 16:32

Your Answer

By clicking “Post Your Answer”, you agree to our terms of service and acknowledge you have read our privacy policy.

Not the answer you're looking for? Browse other questions tagged or ask your own question.