4

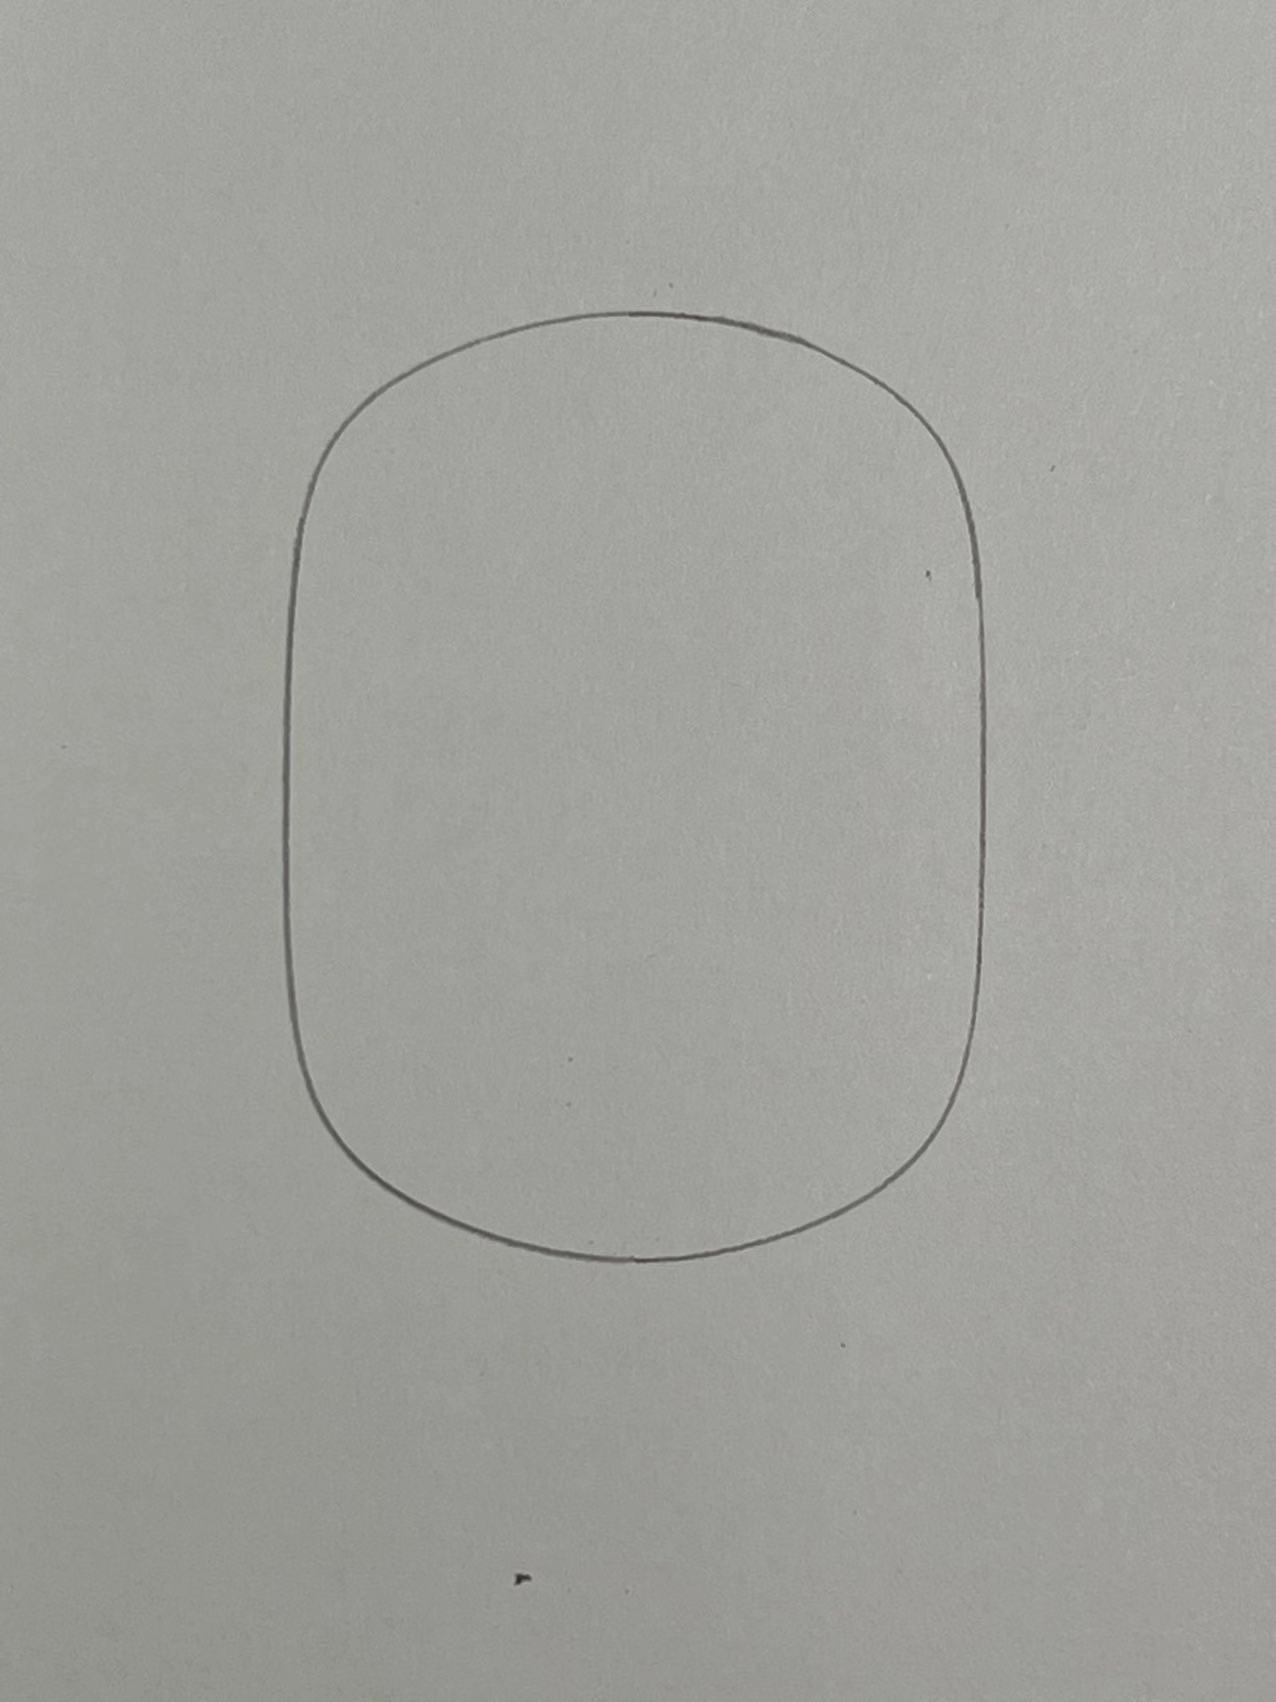
I want to make a 3D model of a non-round bike headset spacer. So I traced one onto a sheet of paper and took a photo with my phone. I think the next step should be turning it into a vector file.

But after I used the trace bit map function in Inkscape, the result was not a single line as I needed. It had thickness and the thickness is uneven due to my pencil sketch being thicker and thinner in some parts.

So how do I trace this line? Are there automatic methods? How do I apply mirror to it? enter image description here

1
  • Using your sketch as a template, for this pretty basic shape, you can re-draw with the pen tool (or Inkscape equivalent). This will give you a uniform width vector stroke to work with. Perhaps you can adjust the trace settings and get something more use-able but anything "automatic" will exhibit the irregularities you are experiencing.
    – Kyle
    Commented Aug 8, 2022 at 4:17

2 Answers 2

4

I wouldn't bother with auto tracing, as it's sure to introduce irregularities. Here's a semi-automatic method to generate a symmetrical shape, which doesn't involve auto tracing, but still requires manually re-drawing one of the curves.

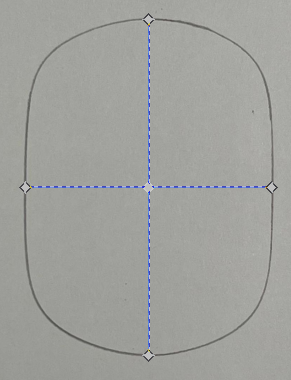
  1. With the pen tool, draw two lines to bisect the shape horizontally and vertically, add a node in the middle of each line using the add nodes button in the Pen Tool options. Line everything up so that the two centre nodes intersect to create an origin at the exact centre of the shape. Drag a horizontal and vertical guide to these lines using Snapping.

enter image description here

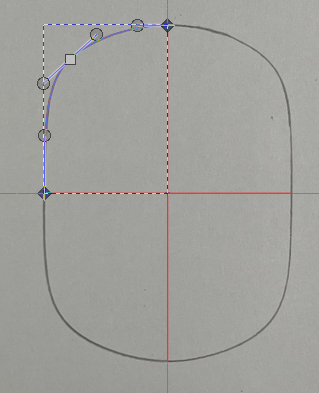
  1. With the Bézier/Pen tool, draw one curve. Zoom in to get it as close as possible to the original.

enter image description here

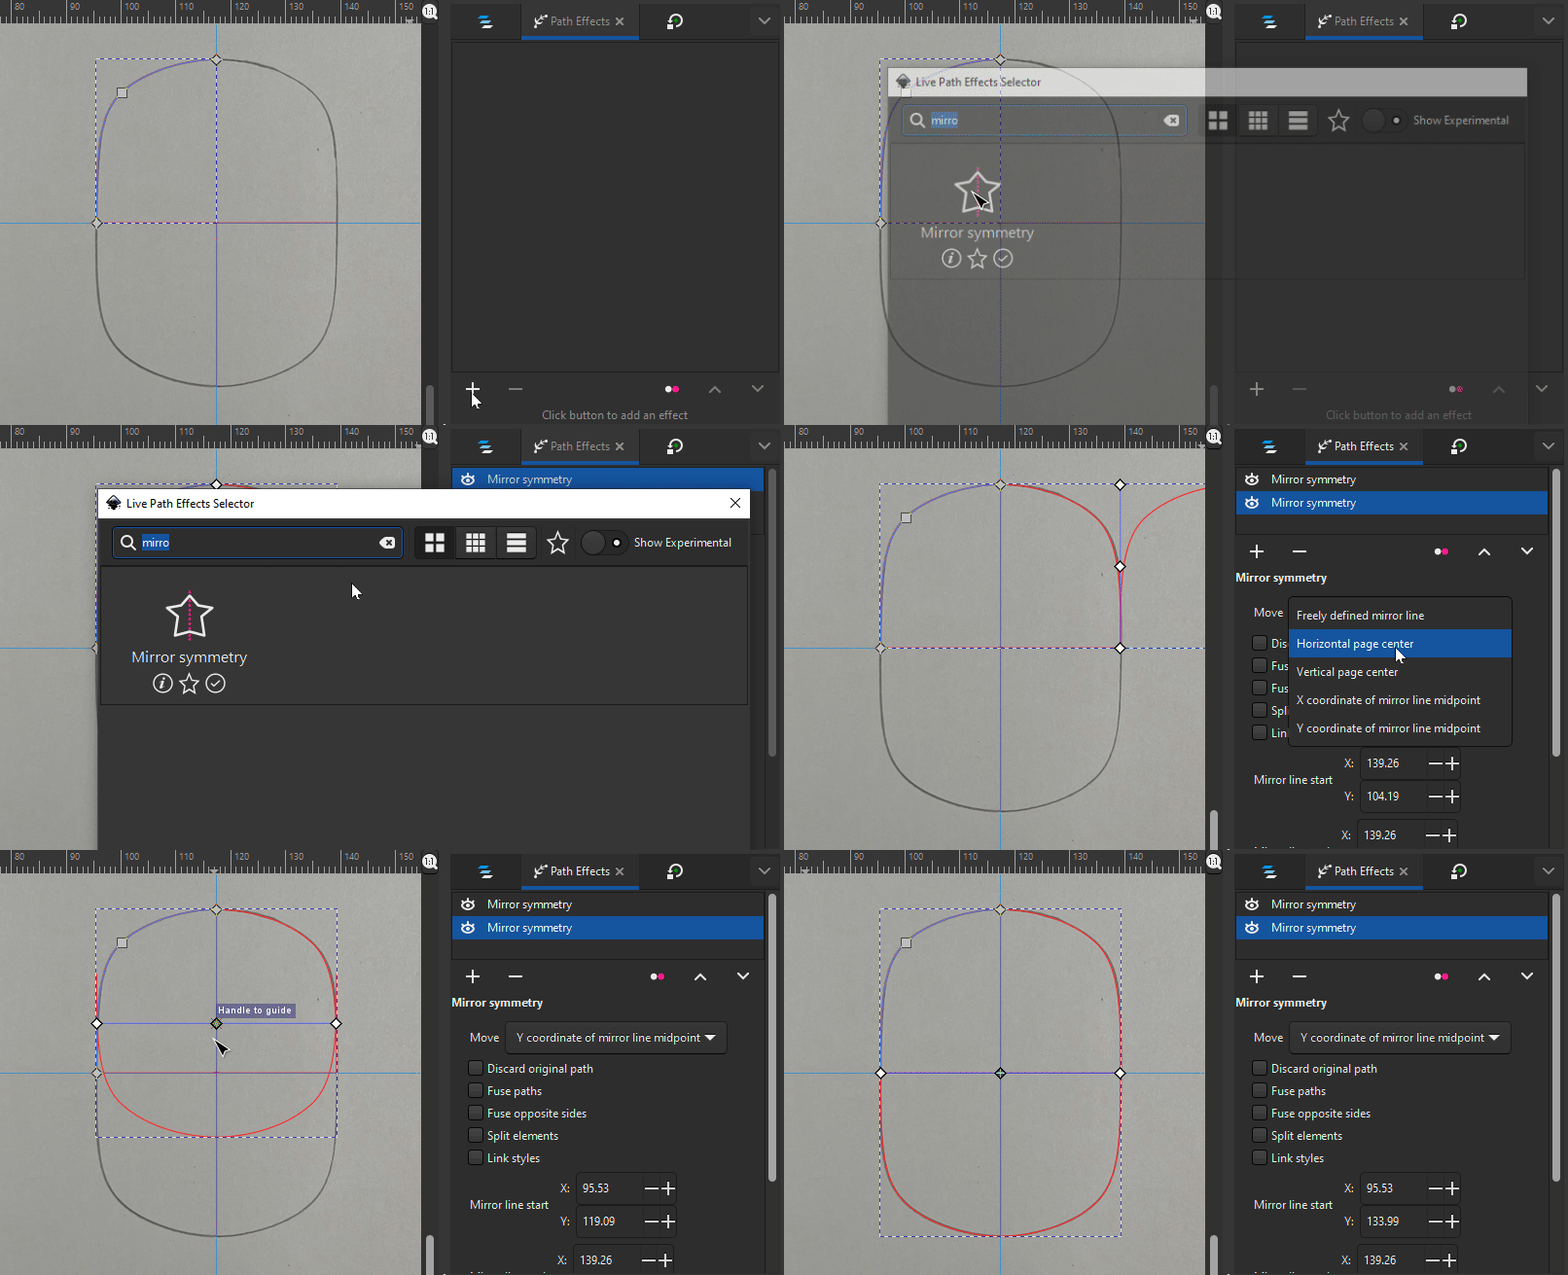
  1. Apply two Mirror Live Path Effects, leave the first at the default, but for the second choose the "Y coorinate mirror" option, and click and drag the mirror line down until it intersects with the origin

enter image description here

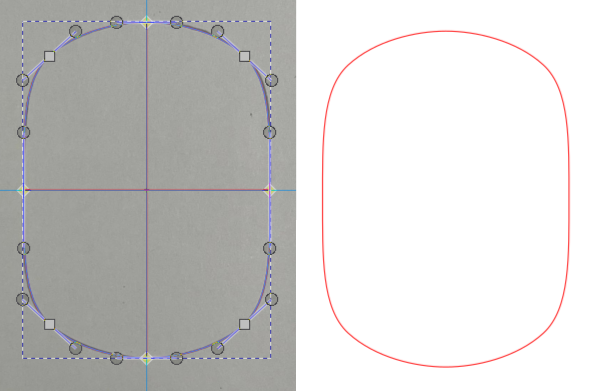
  1. If you need this object converted to a path, do Path > Object to Path, and then select and join the nodes of each segment using the Join Selected Nodes button. Finally remove the construction lines and the raster image.

enter image description here

4
  • That's of great help! One question, how do I create a curve without closing it?
    – Zyleyus
    Commented Aug 10, 2022 at 5:47
  • @Zyleyus - press the Enter key
    – Billy Kerr
    Commented Aug 10, 2022 at 8:49
  • I did and then it connected the start and end and formed a grey shape. But it doesn't seem to matter when I imported it into CAD.
    – Zyleyus
    Commented Aug 10, 2022 at 12:24
  • 1
    To create an open path (a path with two open ends) press the enter key. If there is a fill, just remove it in the fill and stroke panel. There's a possibility here that you might be better to look up some beginner tutorials before attempting something more complex like this. There are lots on youtube - Logos by Nick is a very good youtube channel.
    – Billy Kerr
    Commented Aug 10, 2022 at 16:36
3

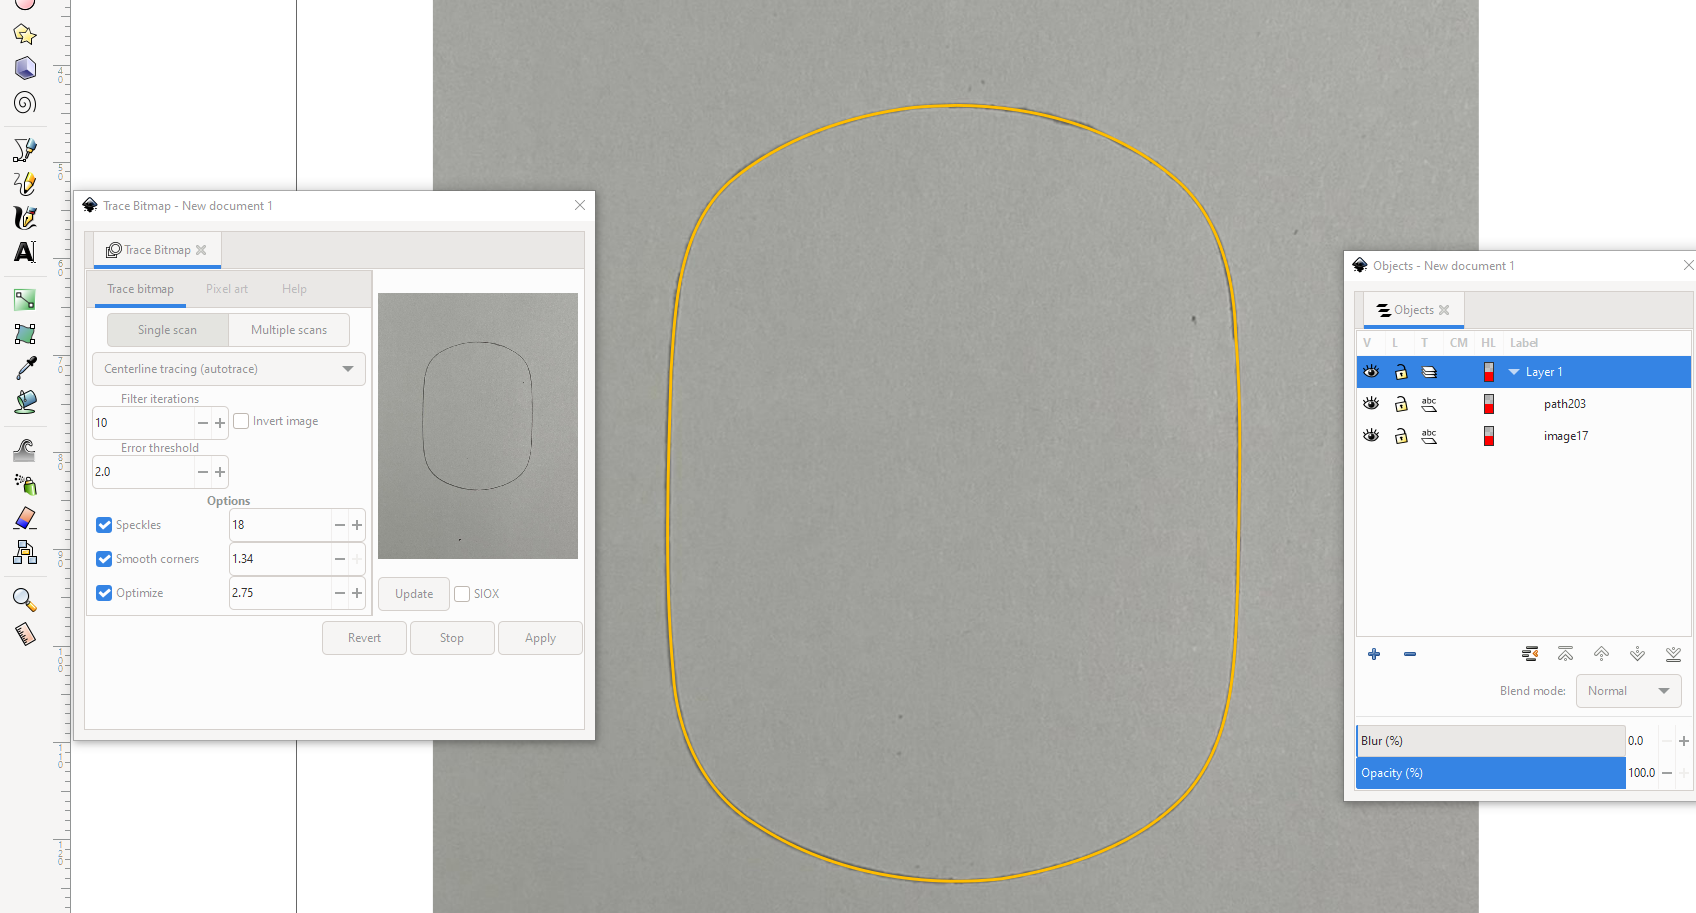
Inkscape has centerline tracing mode. It gives a single curve. Unfortunately it will not be as regular as you hope, it's only as regular as you have drawn + how the smoothing adjustment decides. It doesn't know the magic perfect curve that you obviously can imagine.

The next image shows the centerline tracing result after some manual tweaks:
enter image description here

The said tweaks are:

  • Change stroke color to orange and select narrower stroke width for better visibility
  • Apply Path > Break apart and delete the unwanted dots here and there
  • Apply Path > Simplify to reduce small twists

Inkscape does not have any automatic method which fixes your image to perfectly symmetric. You must select and separate the best quarter, turn its ending node handles to horizontal and vertical for continuity and glue together the flipped and rotated copies of it. As well you could draw one quarter with the pen - a three node curve. Only keep a rectangle (keep it locked as the image) below as a reference for perfect centerpoints and directions and have enough point snaps ON.

BTW I do not know your 3D modelling method, but I would make the sketching directly in the used 3D drawing program.
2
  • I thought I would input the vector into a 3d modeling software and extrude it into a mesh. But tracing the sketch in CAD seems to be a good option too. BTW is there a way to rotate the photo so it's completely straight? The photo I took wasn't straight enough.
    – Zyleyus
    Commented Aug 8, 2022 at 8:00
  • It can be made with guides manually. There's available no "straighten automatically". Drag from the rulers horizontal and vertical guide lines and rotate the image for the best visual fit. Your image may have also perspective and lens distortion if you do not have pro photographer's skills and tools. I would draw a perfect rectangle with known side lengths around it before taking the photo to be able to fix the image geometry in GIMP or Photoshop. A flatbed scanner distorts much less than a camera.
    – user82991
    Commented Aug 8, 2022 at 9:07

Your Answer

By clicking “Post Your Answer”, you agree to our terms of service and acknowledge you have read our privacy policy.

Not the answer you're looking for? Browse other questions tagged or ask your own question.