7

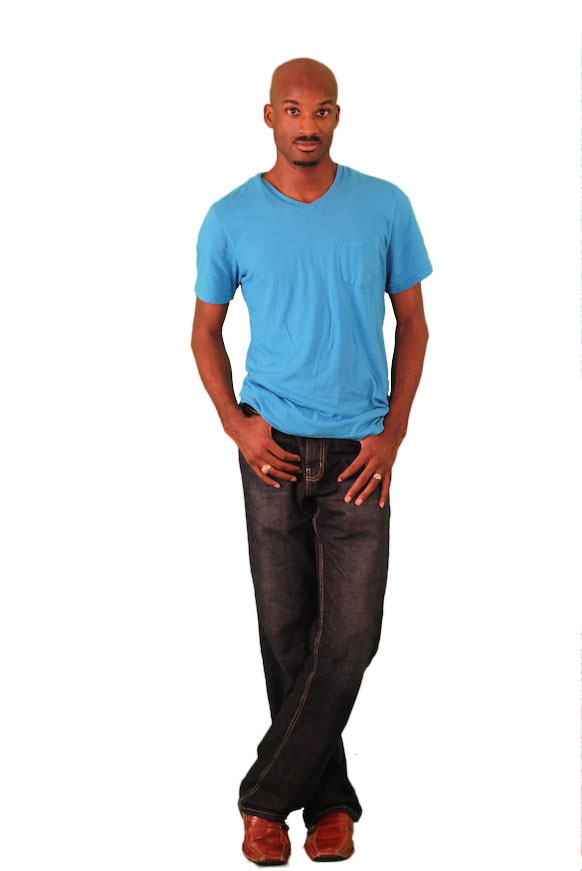
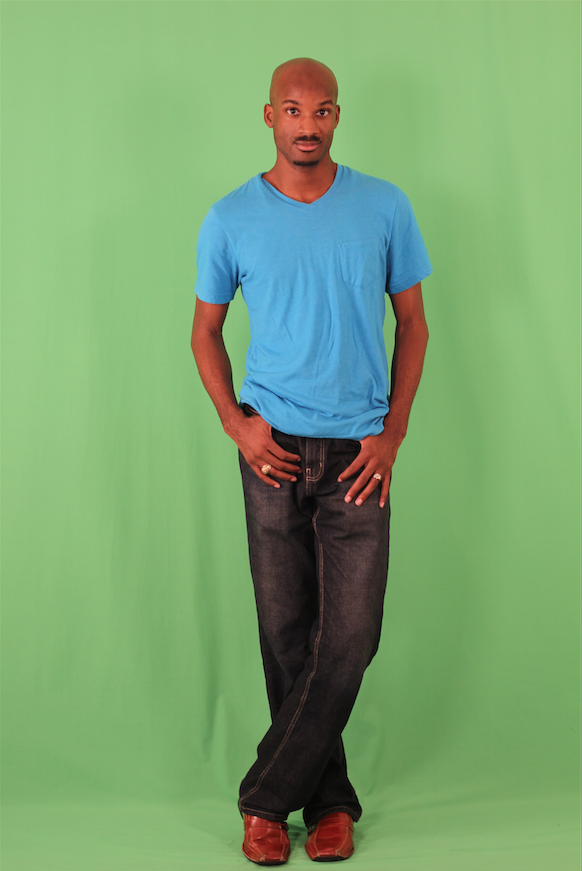
I took a few head shots for a friend recently. We were going to do it outside around or downtown area, but due to inclement weather had to use a green screen last minute. It was evenly lit, but between the light and the green, the color reflected on his head. (The subject was bald) How can I chroma key effectively and remove the green coloring from his head?

enter image description here

enter image description here

I've tried the wand in PS and color range. When removing the green, the color reflected on the subject's head around the sides and somewhat on the top. How can I fix that in PS? Also what are some ways to color correct his skin tone, he came out a little on the red side in some of the shots?

1
  • Perhaps make a selection of the chap and make a colour adjustment, I agree with Ryan however, would be much easier to answer with the image in question. Commented Jun 24, 2015 at 10:40

5 Answers 5

6

Alright well first off I wouldn't use the Magic Wand or Color Range. For something like this:

  1. Go into Channels (it's attached to the Layer Panel by default)
  2. Select the Blue Channel which will give you the most contrast. Now the pants and skin are about the darkest things, the shirt is by far the lightest thing, and the background is a midtone.
  3. Duplicate the Blue Channel
  4. Now you can use Curves or Levels to bump the contrast a little more
  5. Select > Focus Area and change the output to Layer Mask
  6. Now go ahead and change your Channels back to the RGB image by deselecting that Blue Channel Copy.
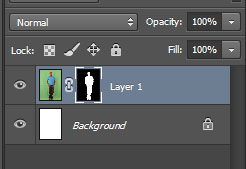
  7. You should now have a Layer Mask in your Layer Panel. Notice the box around the Mask on the right, not the Photo on the left. To do that just click on the mask portion of the layer in the layer panel.

Layer Mask

  1. Use a Brush to do some cleanup particularly around the feet which wasn't as good of contrast. You'll also want to get rid of the gaps in the arms. I used Magic Wand for those holes and then again Brush for some find touch

  2. Now on the layer panel click the actual photo so you're no longer on the Layer Mask. (You might even want to duplicate it at this point to have a copy)

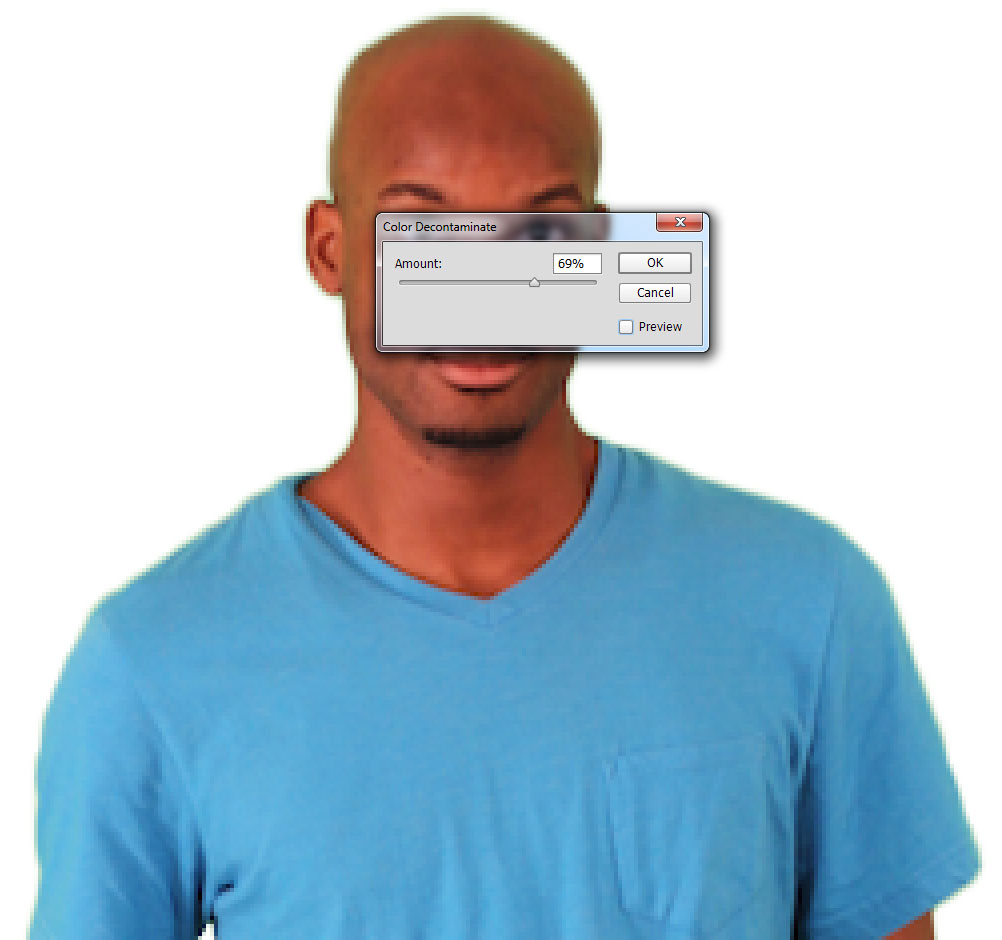
  3. Edit > Matting > Decontaminate Colors

Before:

Decontaminate 1

After:

Decontaminate 2

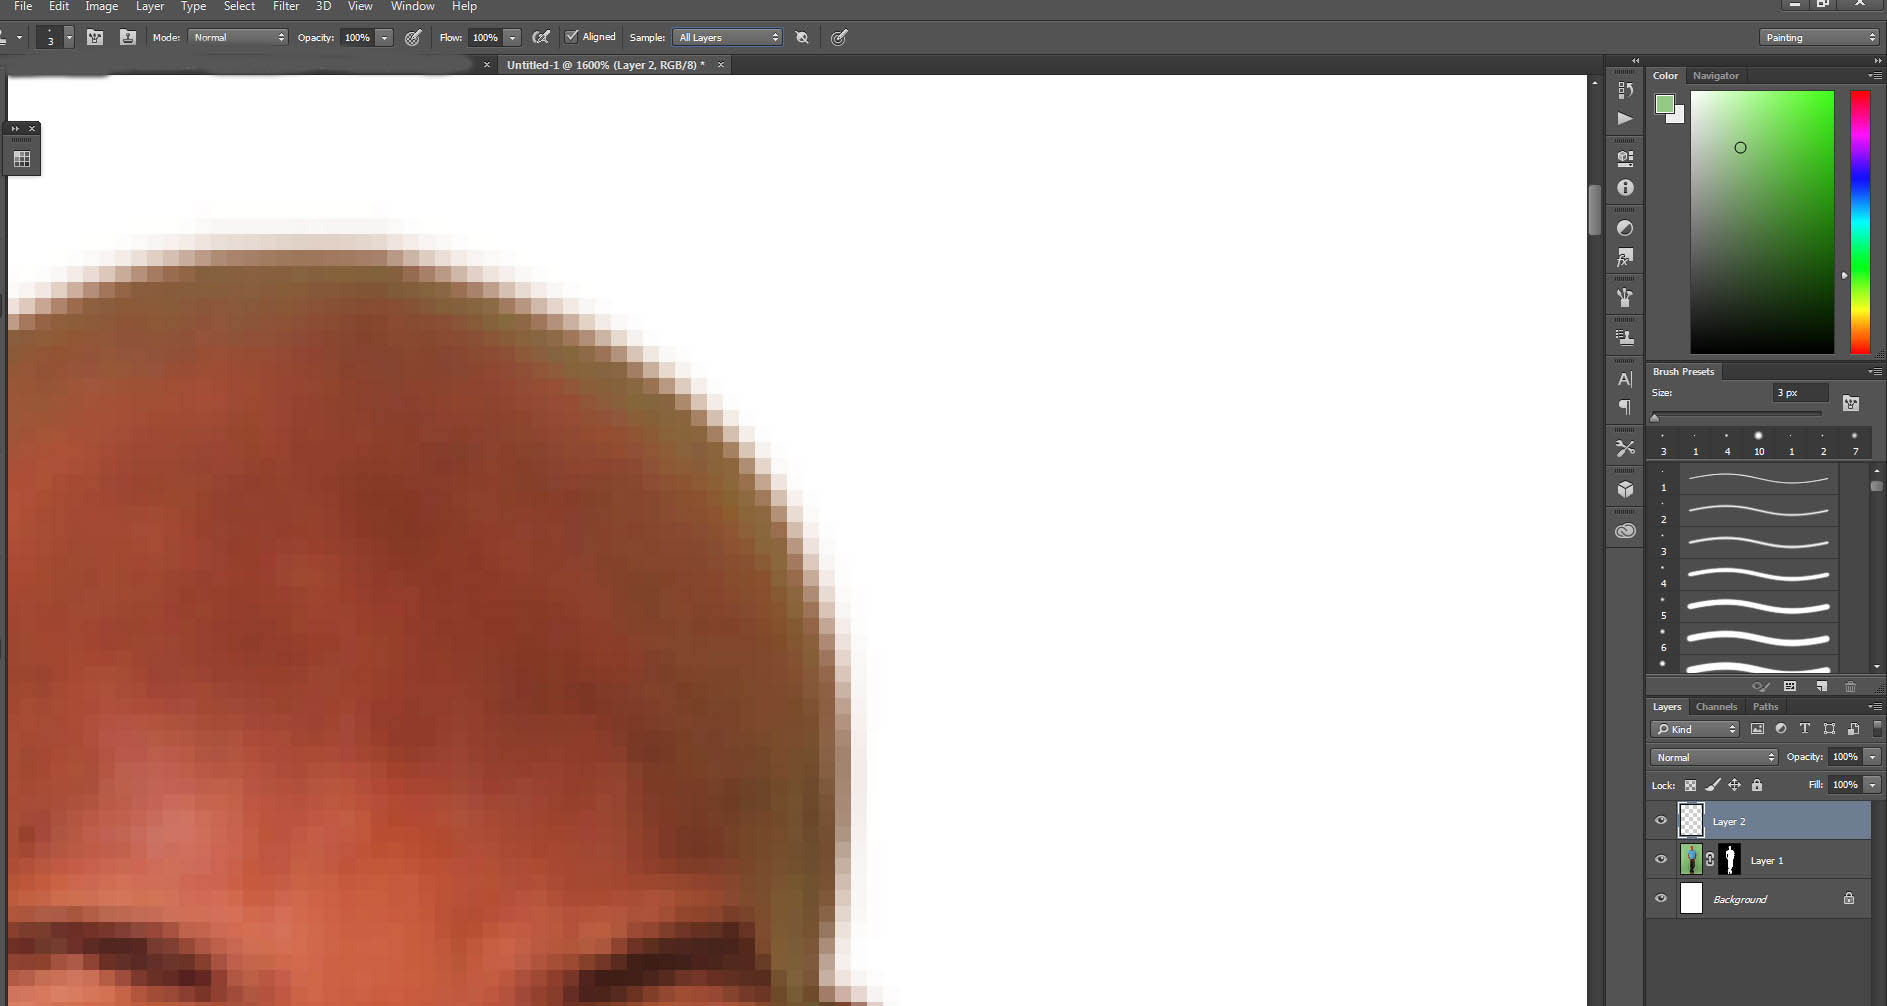
  1. Time to get dirty with manual fixing. Create a new layer.
  2. Select Clone Stamp S
  3. Make sure it's set to Sample All Layers on the top:

Stamp 1

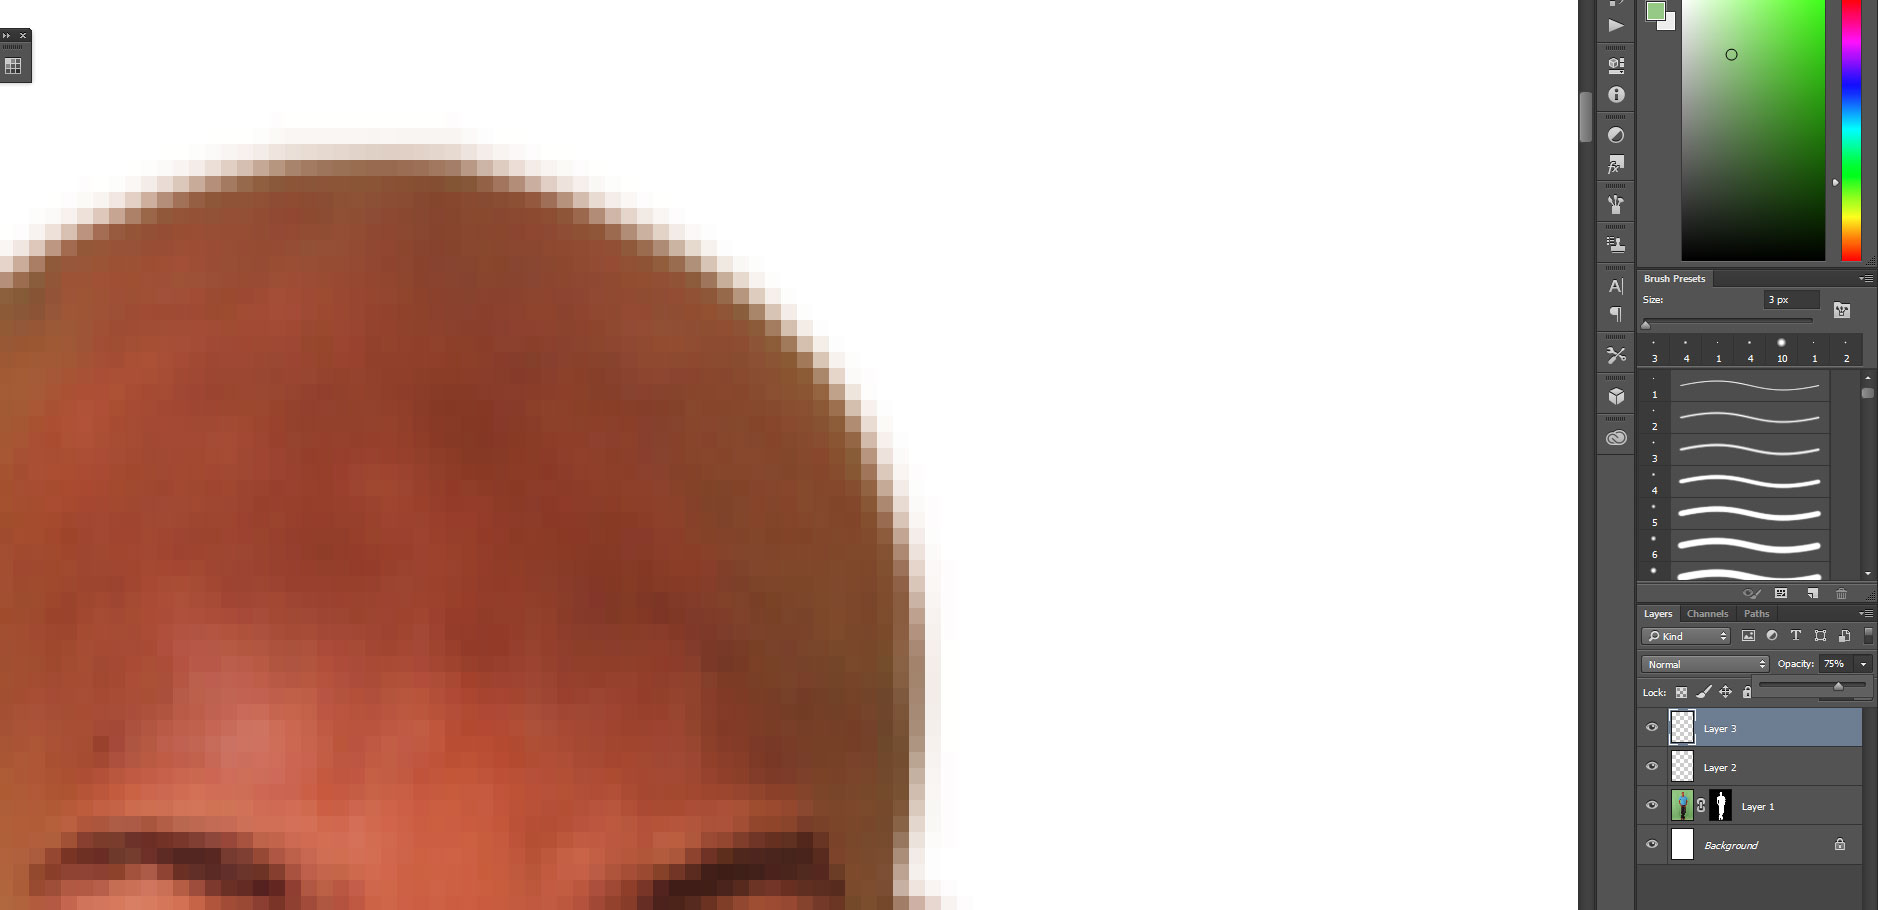
  1. Using a soft brush (I use around 65% Hardness with Wacom pressure for size) touch up the problem areas on the face. I'd suggest using new layers for different areas so its easier to manipulate and gives you more control later:

Stamp 2

  1. I only did the top right of the head so obviously there's still quite a bit of green in other portions, but here's a quick look at how it can get:

enter image description here


You might want to look into Professional Portrait Retouching for Photographers by Scott Kelby. It's a great resource for stuff like this.

2

Unfortunately I don't have access to Photoshop at the moment, so I can't make screen-grabs to illustrate this technique. Hopefully words will suffice.

For the green skin:

Make a Hue/Saturation adjustment layer, and adjust the hue until you're happy with the results around the top of his head. Then create a layer mask and hide all. Carefully paint white onto the mask where you want the effect applied, adjusting your brush size, edge softness and opacity as needed.

A stronger version of this technique may be needed on the greenest portions, using a new adjustment layer/mask. Sometimes several layers with subtle changes are required. And Hue/Saturation may not be the only type of adjustment layer you use. I mostly use Levels, Hue/Sat, and in drastic situations, replace color. But all require careful masking.

For overall skin-tone correction:

Add yet another Hue/Saturation layer without a mask, and adjust the reds toward the green side and slightly less saturated. You may need to adjust overall hue/saturation, and possibly the yellows, too.

For the future:

Blue backdrops will give a more natural looking reflection, since we're used to sky colors reflecting on skin. But if green must be used, have your subject stand further from the background to avoid reflections (but you probably already figured that out). :)

2

An alternative:

Do all the steps Ryan mentioned about the layer mask or simply create a layer mask as you normally do; don't use a brush that has too little hardness or your edges will look blurry. I personally like using a 85-89% one depending on the size of the image. Stop at the step about the matting or stamp tool and read the suggestions below. (How to create a layer mask.)

To modify the colors, instead of using the clone stamp, you can also select each hue individually and desaturate them. With this method, you won't need to modify the pixels, only their colors.

Note that for this, it would be better to isolate the top of the head on another layer and blend it again with the rest of the image once you're done! Otherwise this will change the colors on the whole picture. You can see I didn't do this on my picture, and half the face of the subject has a different color. If you decide to simply do this on the whole picture because that green glow is everywhere, you'll need to adjust your levels again. If you have a well calibrated display, that's not a big deal and anyway you'll probably need do it anyway to adjust your contrasts and adjust the colors. In this case you should use this trick and then adjust the colors of your total image as you normally do.


Selective color replacement

For this, you can go in the menu "image" and then "adjustment", and then select "selective color". There it's possible to select the green hue, and lower the blue and yellow there. You can also select the "neutrals" to remove that green from the midtone equally. If that green appears on the darker tone or lighter white tones, you can also modify it on these.

I only did the change on the right part of the picture.
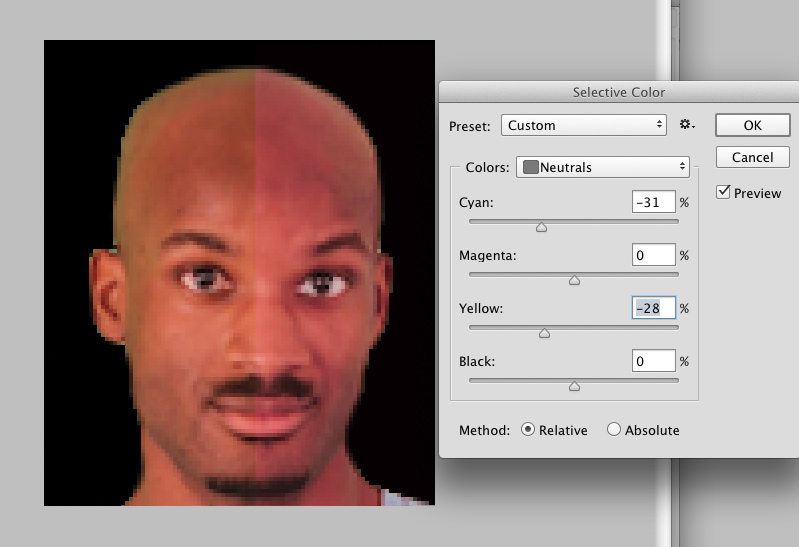
How to use selective color in Photoshop


Replace color

You can also use, combined with the above or not, the "replace color" in the image/adjustment menu. Once you open this feature, you can select with the color picker what part of the image you want to modify only, and adjust the "fuzziness" of that selected part; this is a bit like selecting all the anti-aliasing around that selected color to blend it better. I couldn't take a screenshot with the black and white preview but usually it shows you what part of the picture will be changed.

Then you can simply carefully adjust the hue, saturation and brightness of that area only. On my example, I only adjusted the hue and saturation a little bit.

Be careful with this though, it only gives good results if you don't dramatically change the hue! Otherwise you will see a sharp difference between that new skin stone and the rest of the forehead.

I only did the change on the right part of the picture and used the "replace" color after using the previous suggestion "selective color."
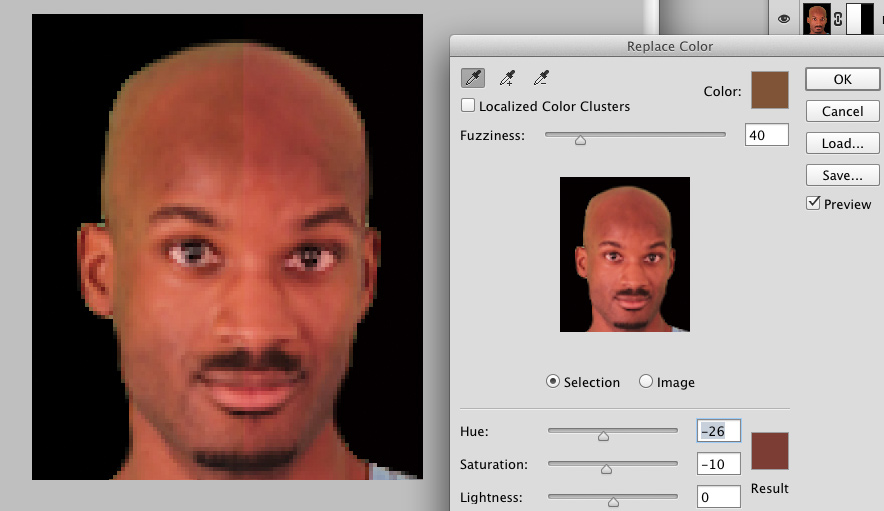
How to replace a color on a picture in Photoshop

2
  • If you're going to use Selective Color Replacement then it would probably be better to do it as an Adjustment Layer than on your actual image.
    – Ryan
    Commented Jun 24, 2015 at 19:04
  • That's why I suggested to isolate parts of the image on another layer to make it even easier to blend with the layer below. But if he needs to adjust the levels anyway (which is usually required after a photo shoot), and needs to do this adjustment on the whole body, then an extra layer or layer adjustment isn't really an option. It might be easier sometimes to desaturate the green from the edges and then adjust all the levels. He could simply add back the values of yellow+blue he removed. That really depends on how comfortable the designer is with his display calibration and adjusting colors.
    – go-junta
    Commented Jun 24, 2015 at 19:29
2

For this single photographs the answers provided will help solve the issue. But, I think the source of the problem is in the original lighting and the placement of the model. It is important to prevent light spill from the background to the subject. To that end, you may move the subject farther from the background and use strategically placed gobos between the background and the subject to further minimize and ultimately eliminate the contamination.

1
  • expanding on this, if you light the subject separately and have decent distance, then turning off the subject lighting can yield a shot of the background with a silhouette of the subject. This can be converted to a greyscale layer mask, bypassing what is normally thought of as "color keying"
    – Yorik
    Commented Jun 24, 2015 at 18:45
0

Moving forward, if you can light the subject and the backdrop separately, you will get better results.

Bring the subject e.g. 6 feet forward. Set up some blinders behind and off to the sides of the subject and place the lights for the backdrop there.

Place a second set of lights to light the subject.

Adjust the lights so that the backdrop will be overexposed by at least 2 stops when the subject is exposed correctly.

The distance will prevent bleed-over.

With this setup, you can take a shot with all lights on, and then quickly toggle the subject lighting for a silhouette shot you can use as a mask.

If you can get a decent mask, then you don't need color keying at all: shoot on white and drop the silhouette onto a mask layer.

Your Answer

By clicking “Post Your Answer”, you agree to our terms of service and acknowledge you have read our privacy policy.

Not the answer you're looking for? Browse other questions tagged or ask your own question.