12

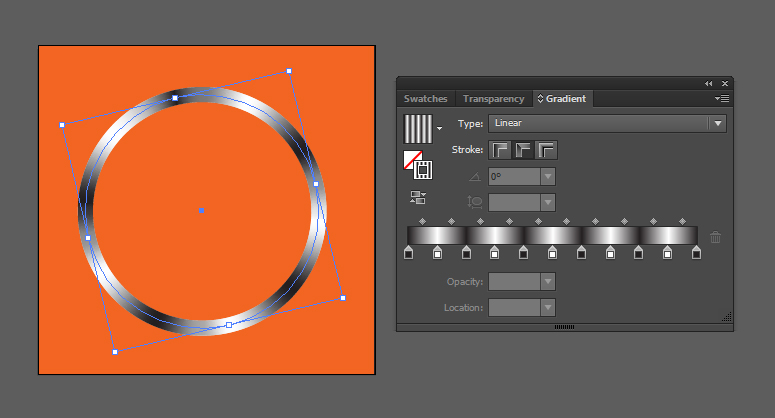
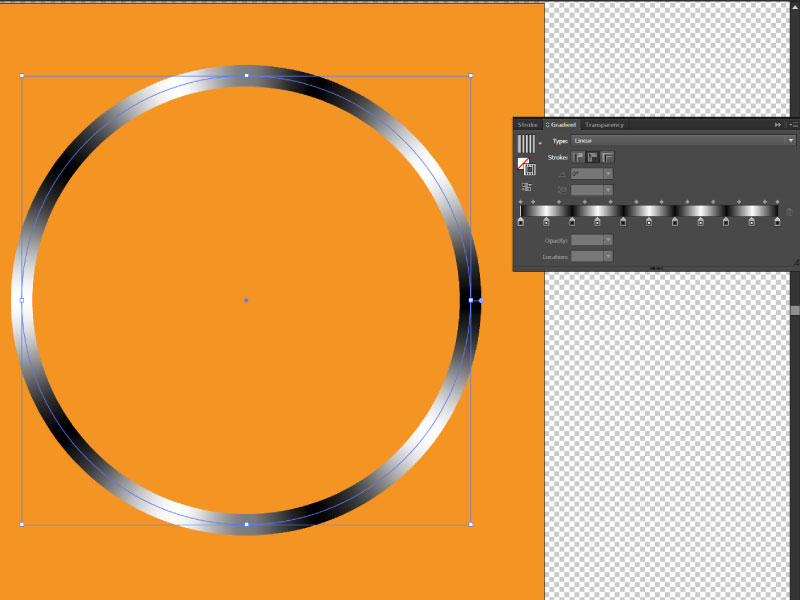
How to repeat a gradient 'n' times, for example, repeating black to white gradient 5 times (along the path of stroke) like I've done manually in below example image.

Is there a way to automate it to multiply 'n' times, like 50 or 100, without manually copying the gradient slider?

Gradient repeated multiple times manually

1
  • Vishnu, Have you just tried turning it into an action & recording it to do the same thing as often as you wish. No fuss No muss.
    – Sean
    Commented Jul 22, 2016 at 22:37

6 Answers 6

7
+50

Use scripting!

As others have answered, you should use scripting. But some of the other solutions here only use RGB, whereas mine uses colours you choose from your document. Also some solutions didn't produce even colour at the wraparound point, or had too many and/or overlapping gradient stops, so my script addresses those issues.

To use it, select 2 or more paths that are filled with colours intended for the gradient, then when prompted enter the number of times to repeat the gradient.

http://pastie.org/10924009

Edit: pastie site not working, so I've included the code below:

// select two paths, then run this script
if (app.activeDocument.selection.length < 2) {

    alert("Please select two or more paths with fills.");

} else {

    var cycles = Number(prompt ("Repeat the gradient how many times?")) || 5;  
    var myselection = app.activeDocument.selection;
    var colors = [];

    for (var i = 0; i < myselection.length; i++) {
        var newColor = myselection[i].fillColor;
        colors.push(newColor);
    }

    var stops = colors.length * cycles - 1; // “stops” does not include default 2 stops
    var interval = 100 / (cycles * colors.length); // ... the distance between stops

    var newGradient = app.activeDocument.gradients.add();  

    newGradient.type = GradientType.LINEAR;     // asymmetric, for 3 or more colours
    //newGradient.type = GradientType.RADIAL;   // symetric, for 3 or more colours

    //  the default 2 gradient stops (at beginning and end)
    //  should be the same colour, so that the gradient smoothly wraps around:
    newGradient.gradientStops[0].color = colors[0]; 
    newGradient.gradientStops[1].color = colors[0]; 

    // now add stops between beginning and end stops:
    for ( i = 1; i <= stops; i++ ) {

        var thisStop = newGradient.gradientStops.add();
        thisStop.rampPoint = i * interval;
        thisStop.color = colors[i % colors.length];

    }

    // to get a even result, the first and last rampPoints cannot be 0 and 100:
    newGradient.gradientStops[0].rampPoint = 0.1;
    newGradient.gradientStops[stops + 1].rampPoint = 99.9;
}

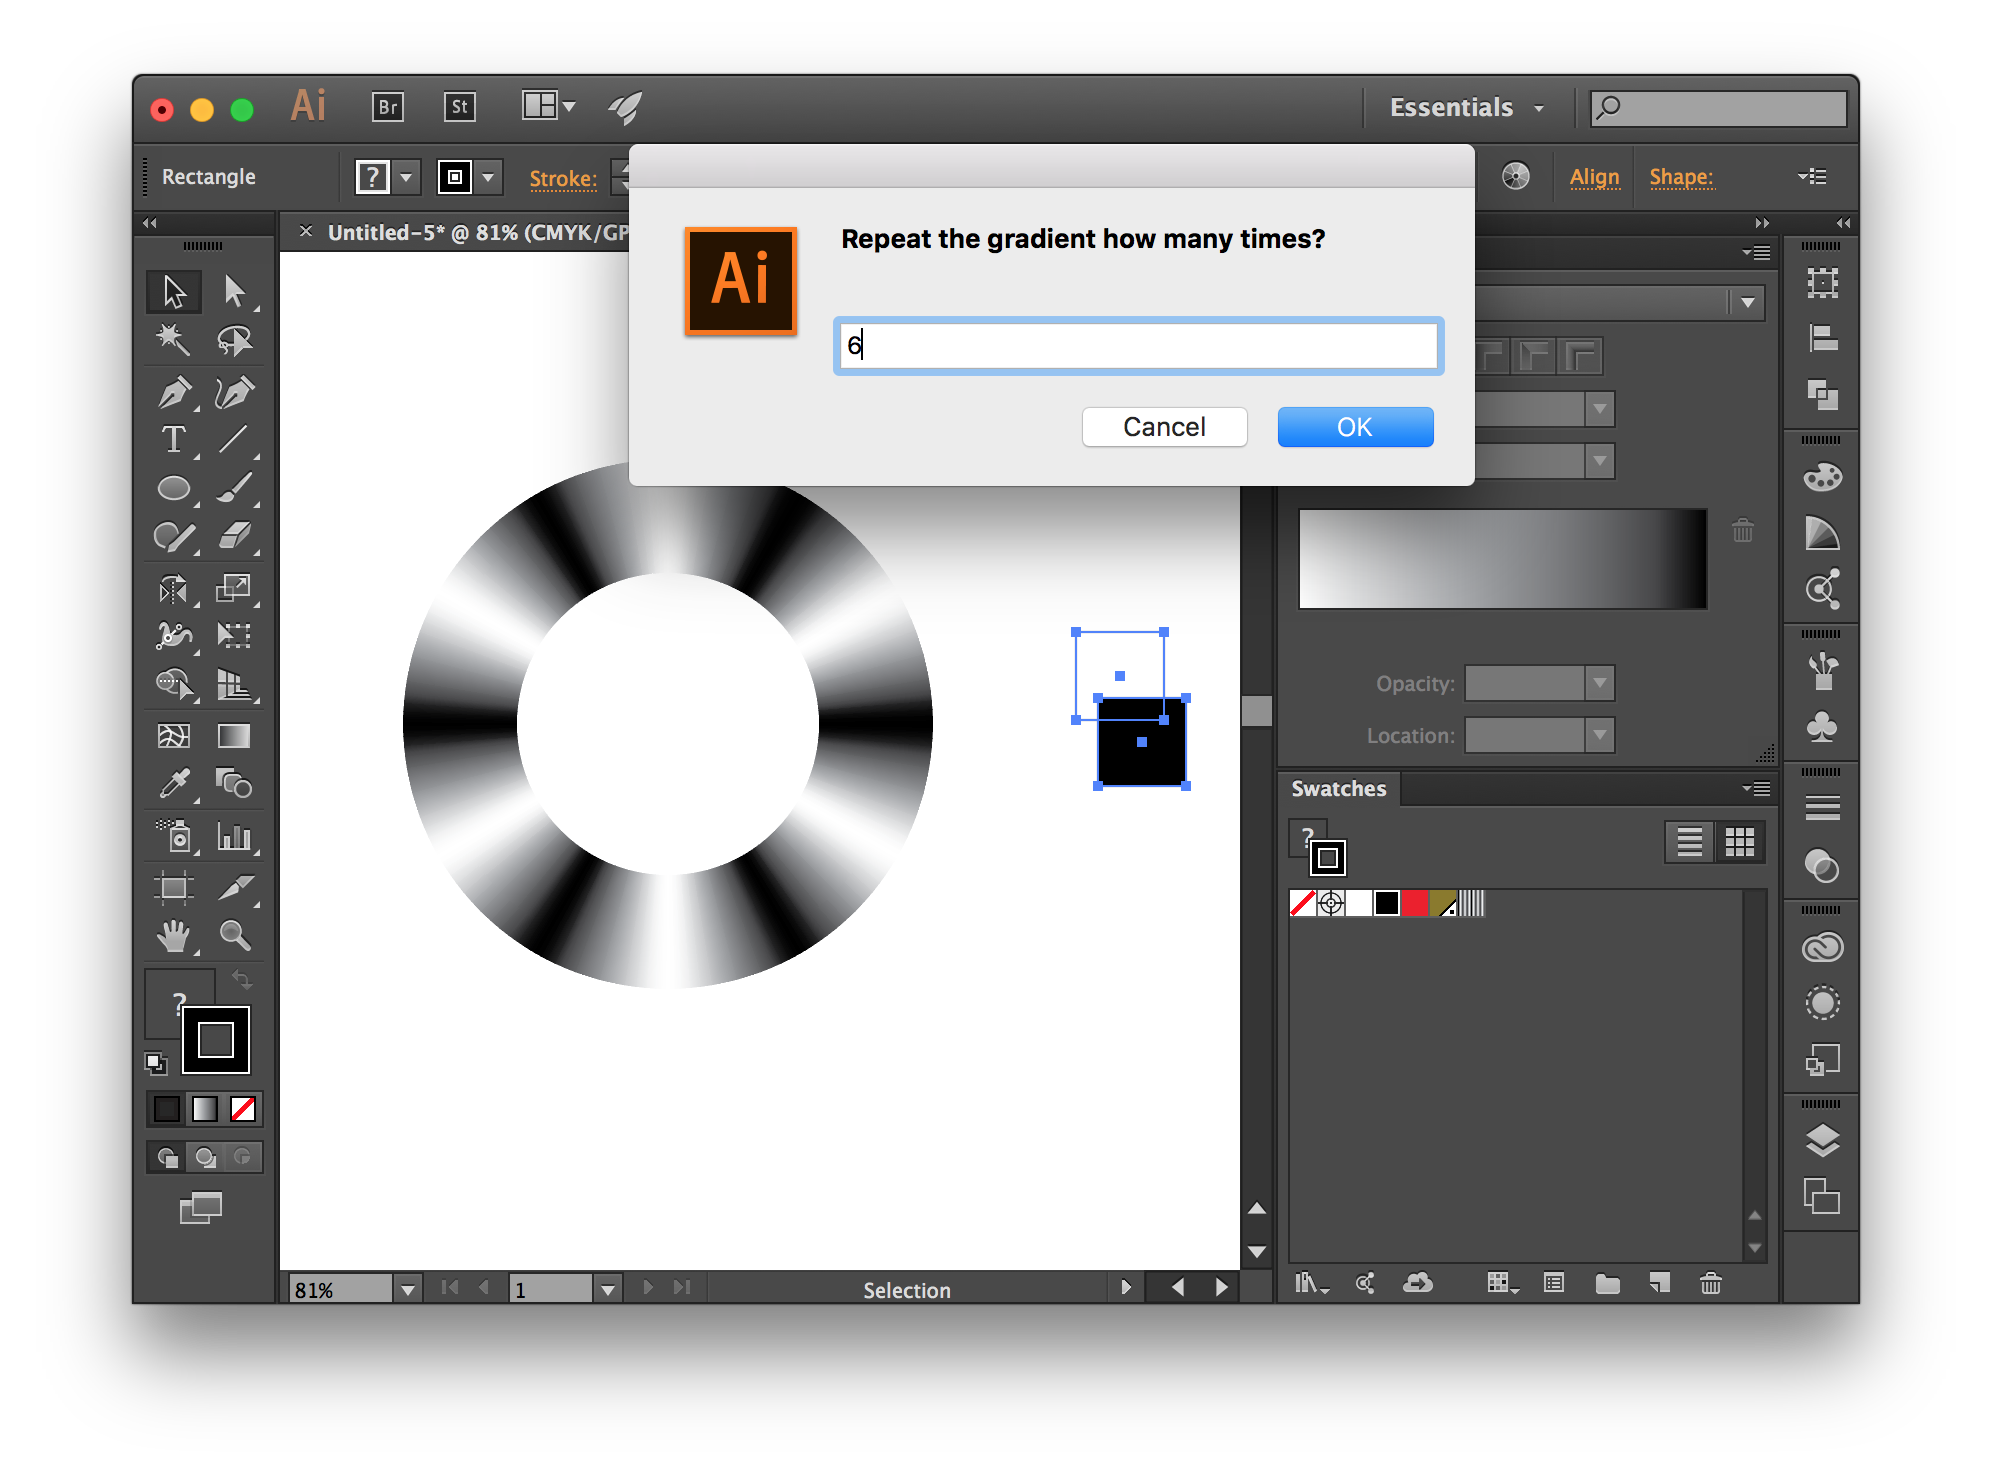
Example 1: black and white, repeats 6 times, CMYK document:

example 1

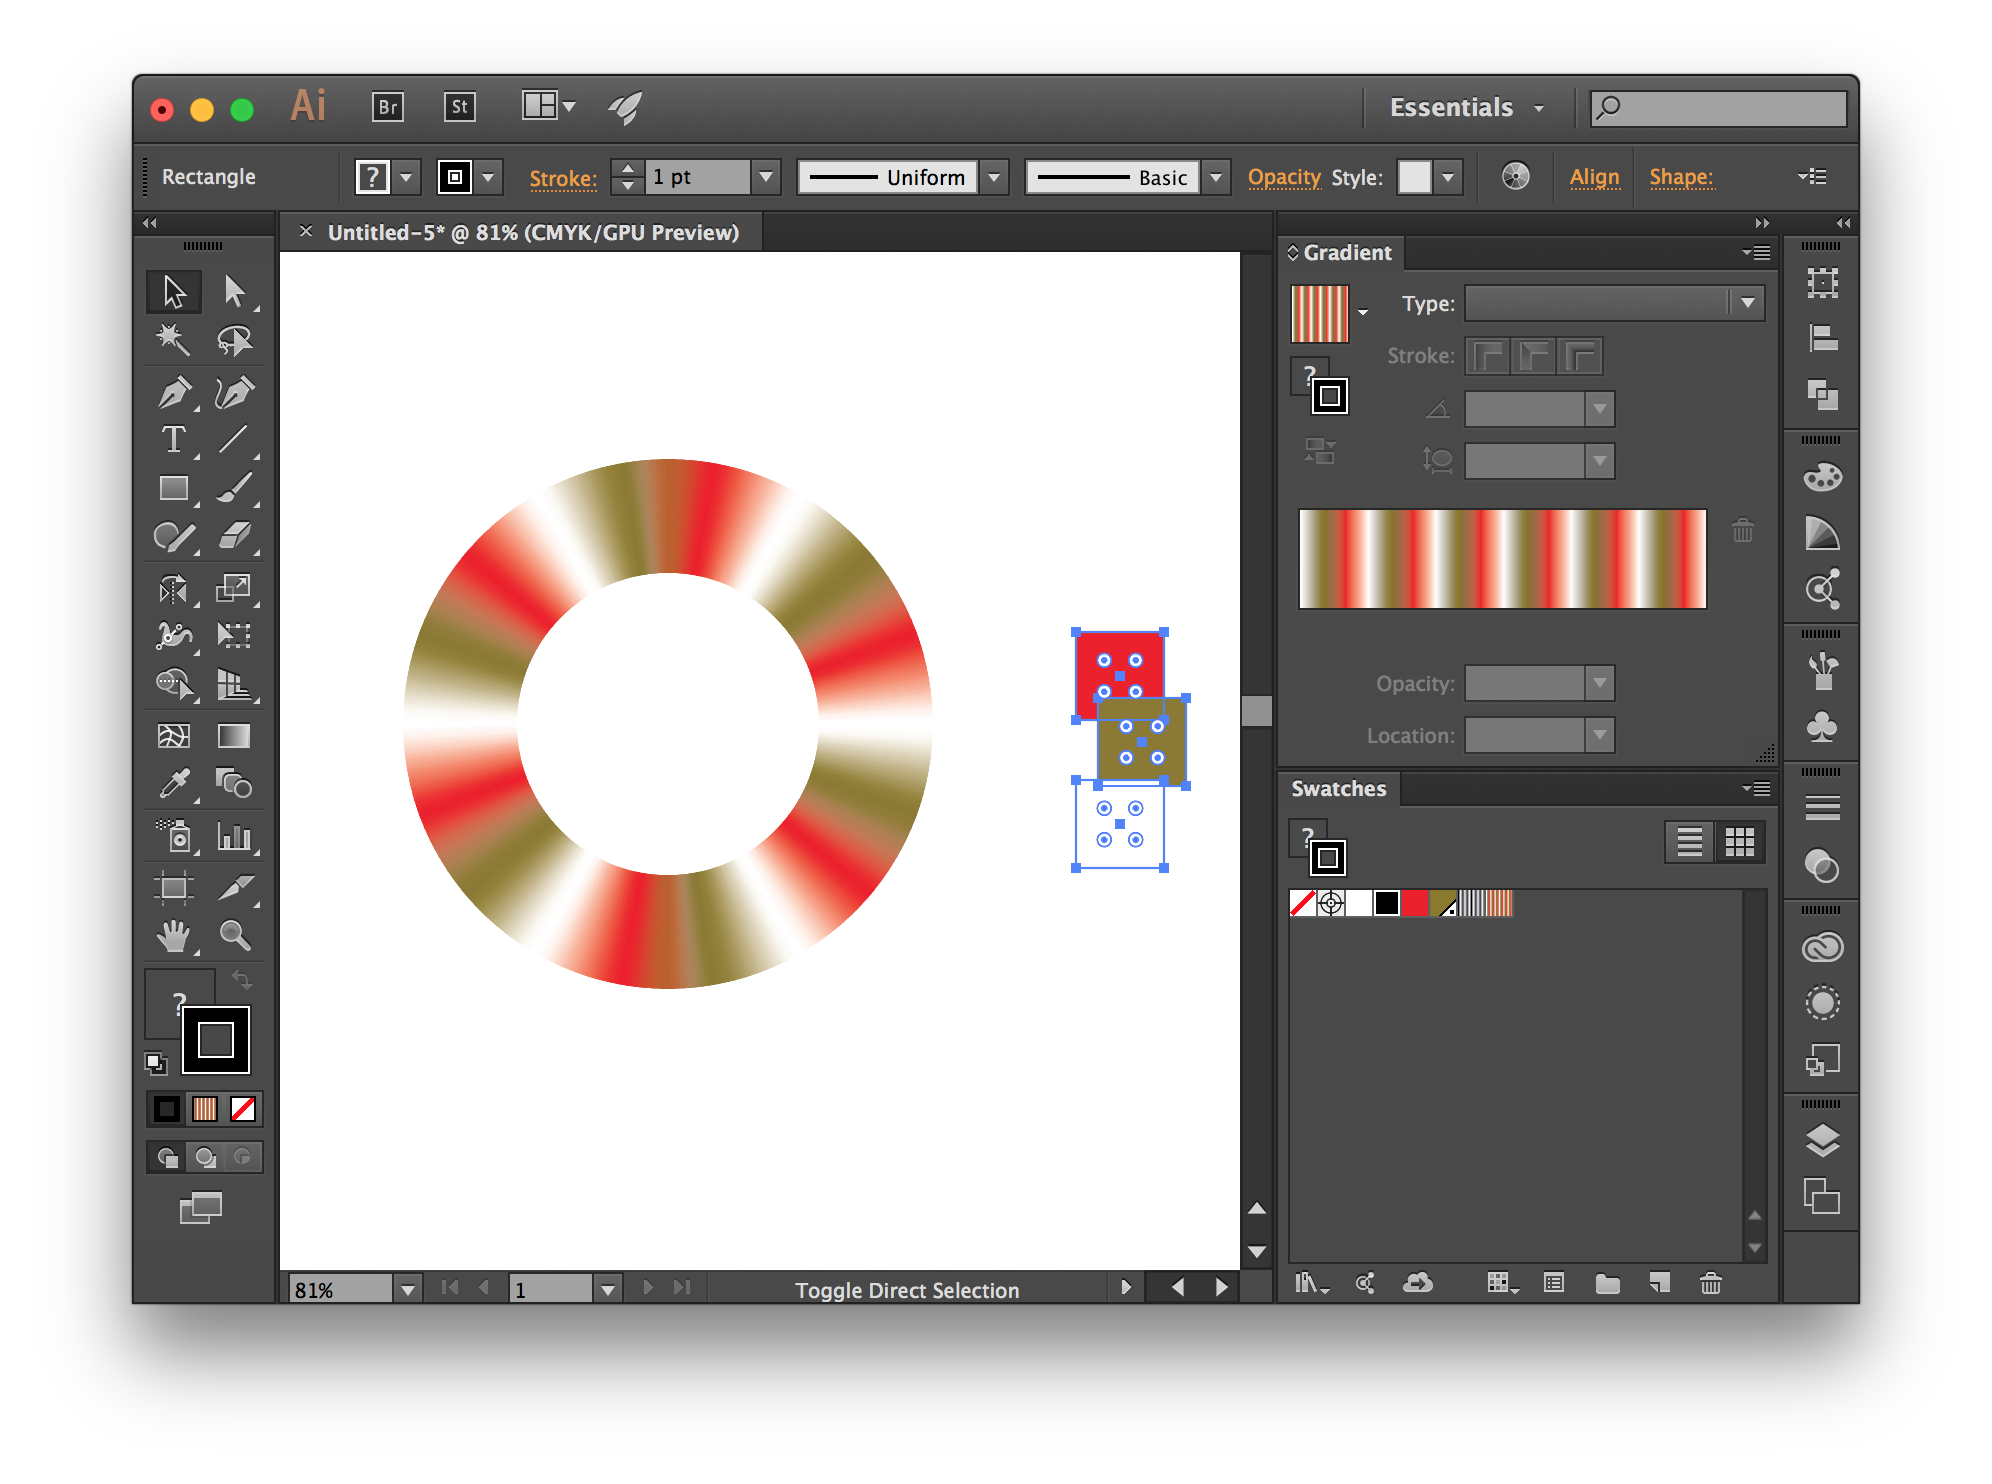
Example 2: 3 colour gradient, 6 repeats:

example 2

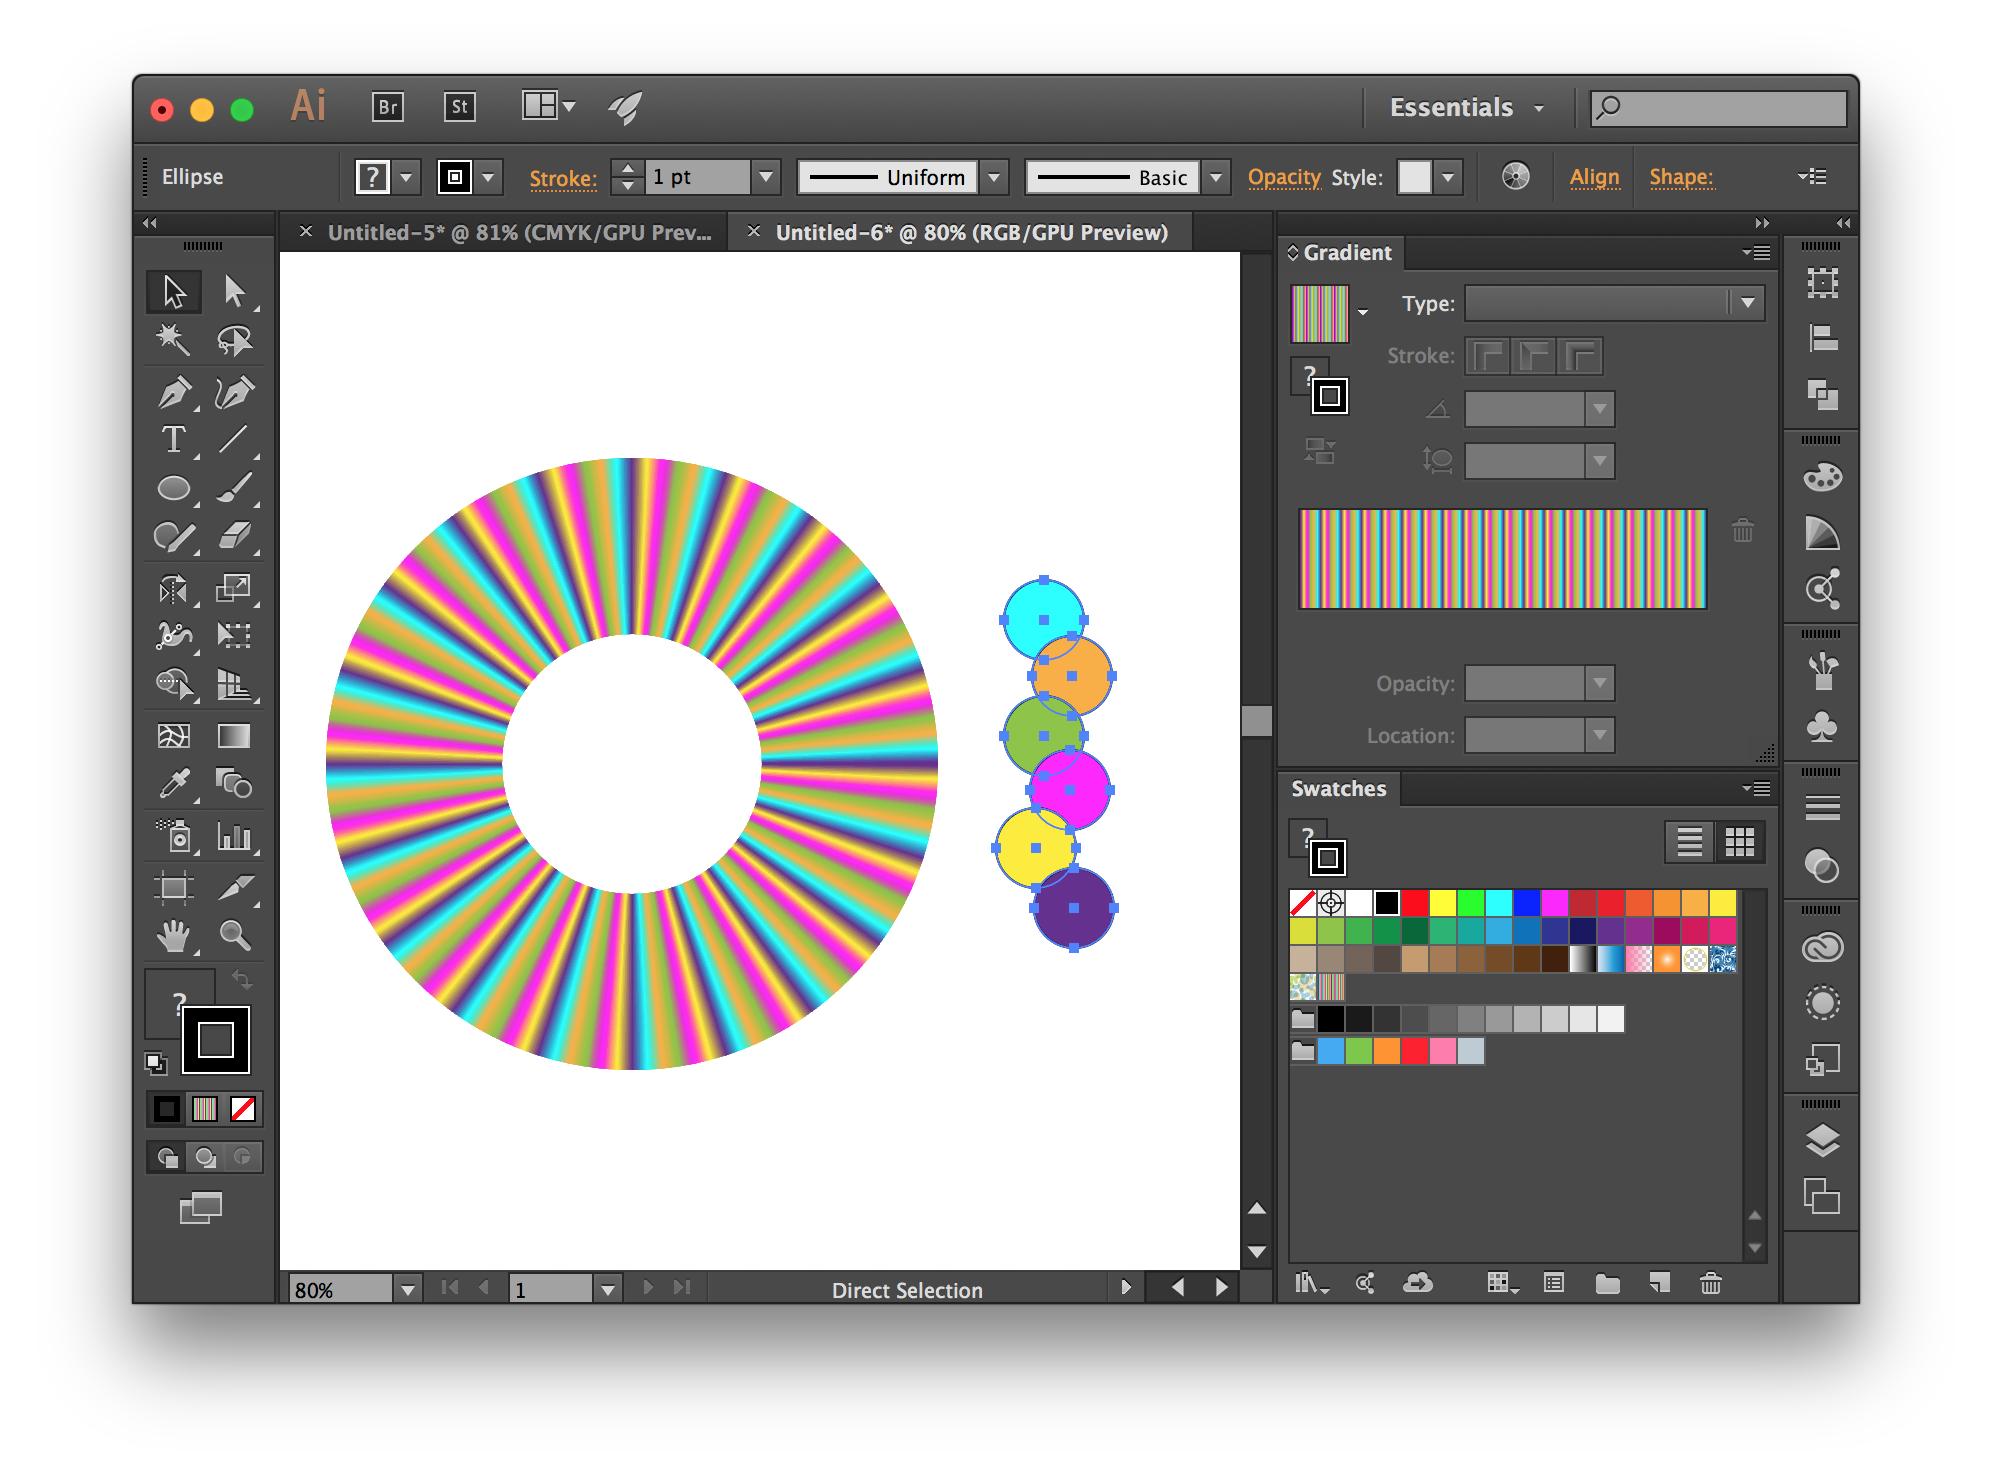
Example 3: RGB doc, 6 colours, 20 repetitions. Notice how the filled paths are overlapping? That stacking order (front to back) determines the order of colours in the gradient.

example 3

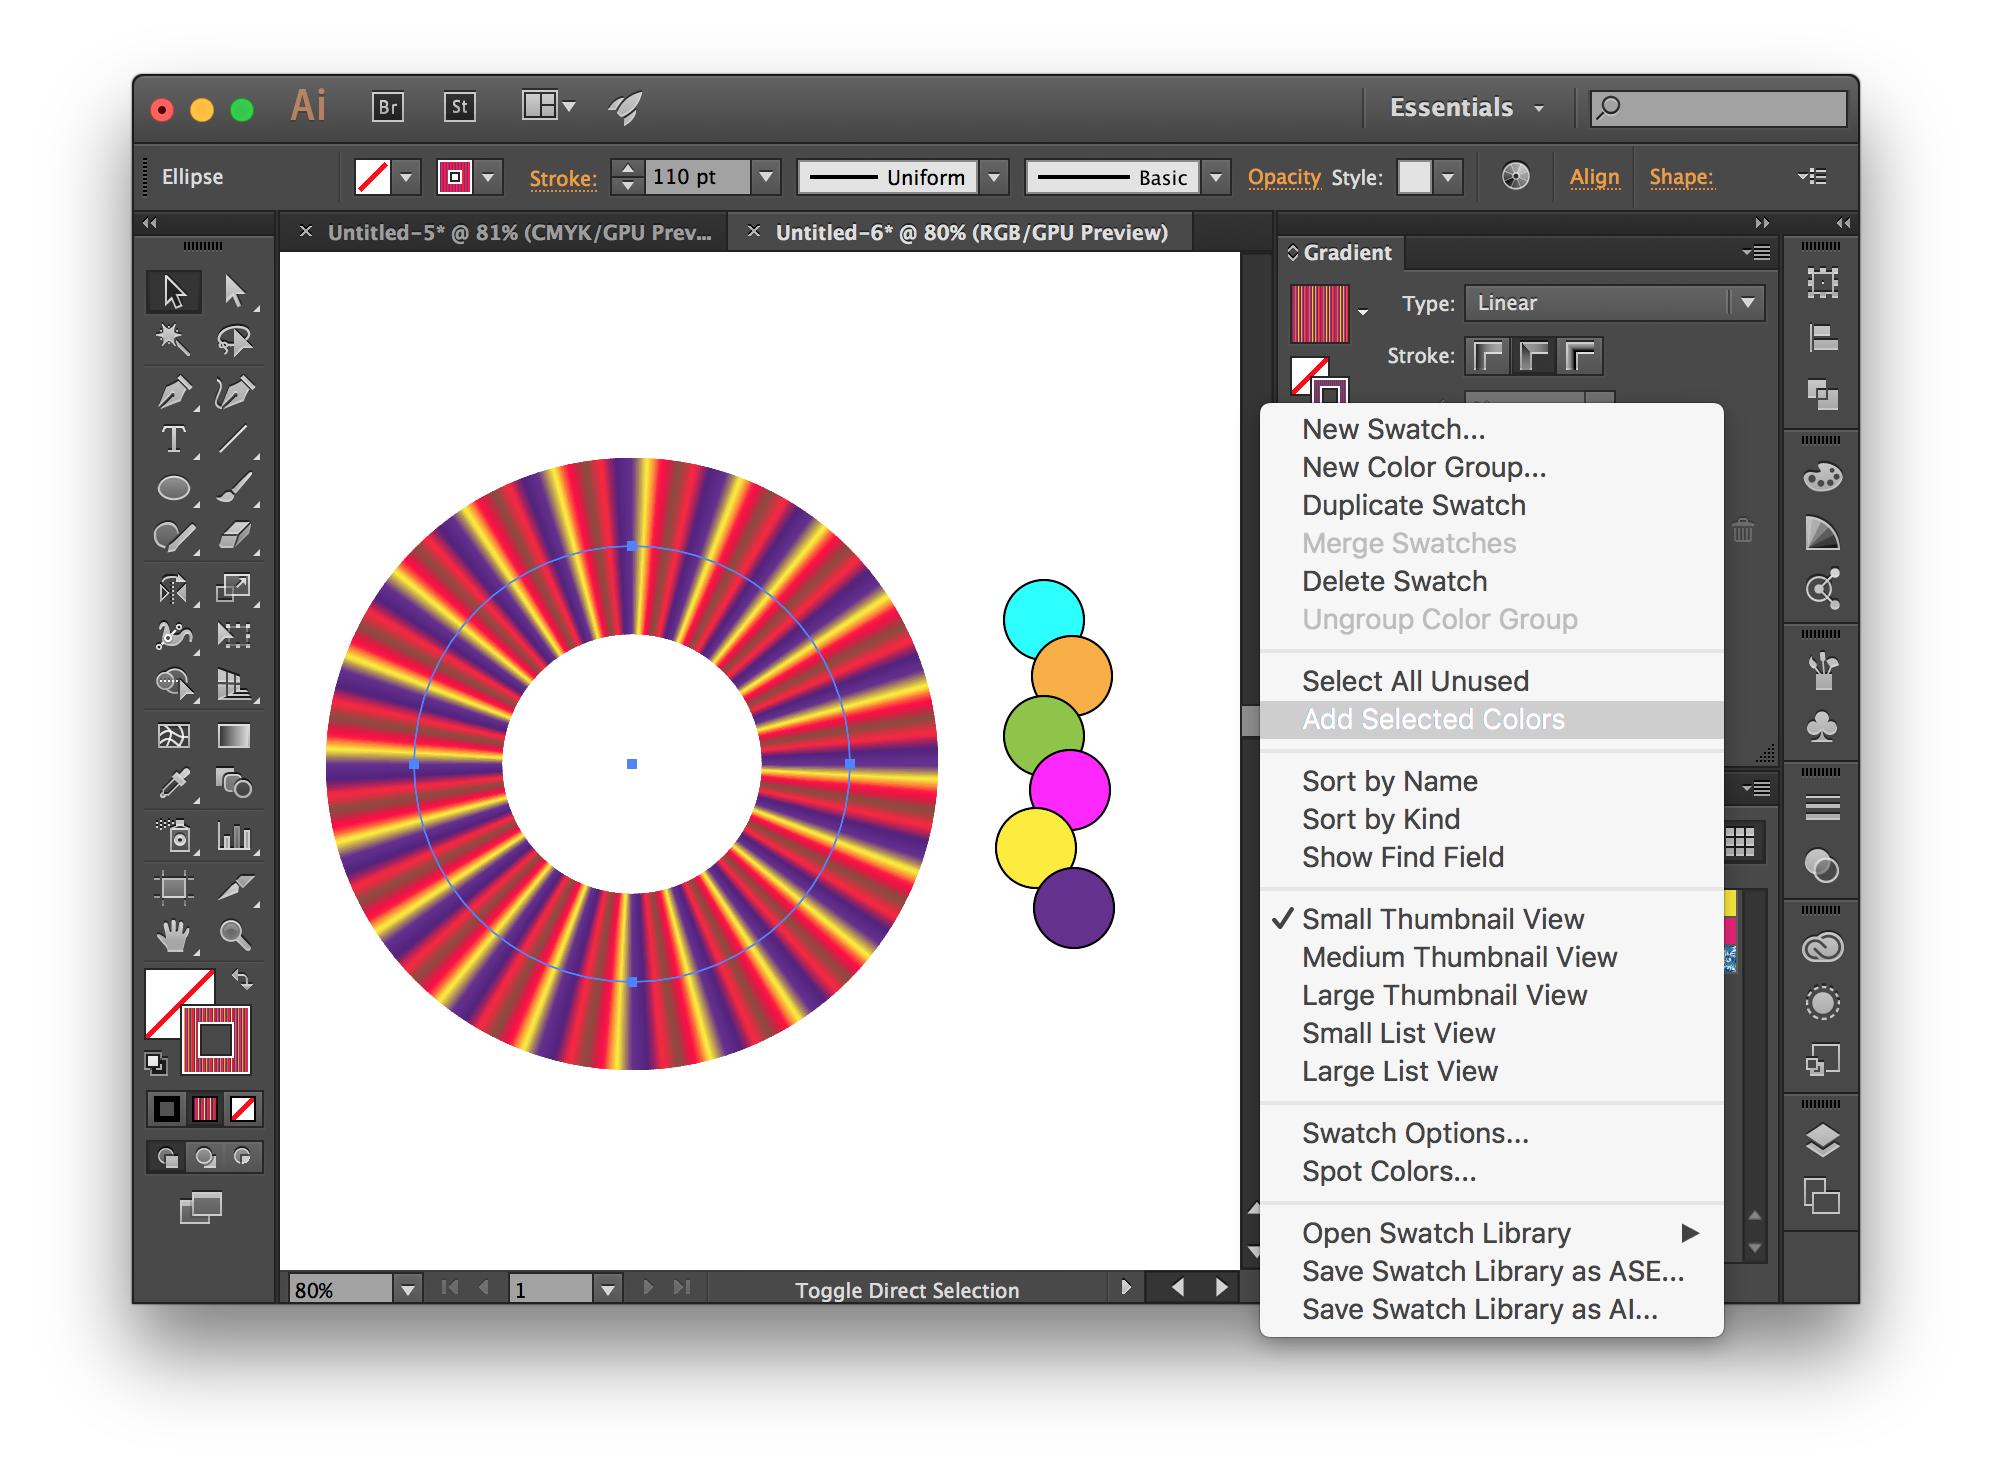
Changing colours in the gradient: Select a path with the gradient applied, then choose the Swatches Panel fly-out menu → Add selected colors. New global swatches will be added to the swatches panel, and when you edit one, it is updated everywhere it appears.

example 4

3
  • Very Nice. I like the fact that you get the colours from the selection. Hadn't thought of that.
    – PieBie
    Commented Jul 30, 2016 at 16:34
  • Awesome! But the paste.org link not working. Please check and Update.
    – vishnu
    Commented Aug 31, 2016 at 5:49
  • 1
    @Vishnu: seems like the whole pastie server is down. I'm guessing you'll just need some patience until it comes back up again.
    – PieBie
    Commented Aug 31, 2016 at 6:59
6

You can achieve this with Illustrator scripting. Checking the documentation for CC15.3 in the JavaScript Reference PDF under Gradients on page 68.

Create the colors:

// Create the colors
var startColor = new RGBColor();  
startColor.red = 0;  
startColor.green = 100;  
startColor.blue = 255;  

var middleColor = new RGBColor();
middleColor.red = 252;  
middleColor.green = 238;  
middleColor.blue = 33;

var endColor = new RGBColor();  
endColor.red = 220;  
endColor.green = 0;  
endColor.blue = 100;  

Create the gradient:

var newGradient = app.activeDocument.gradients.add();  
newGradient.name = "new_gradient_75097";  

Create a linear gradient:

newGradient.type = GradientType.LINEAR;  

or Create a radial gradient:

newGradient.type = GradientType.RADIAL; 

Where you would want to build the multiple types of the gradient would be in the GradientStops:

// Modify the first gradient stop  
newGradient.gradientStops[0].rampPoint = 0  
newGradient.gradientStops[0].midPoint = 20;  
newGradient.gradientStops[0].color = startColor;  
// Modify the middle gradient stop  
newGradient.gradientStops.add();
// Modify the last gradient stop  
newGradient.gradientStops[1].rampPoint = 70;  
newGradient.gradientStops[1].midPoint = 80;  
newGradient.gradientStops[1].color = endColor;

My apologies, it was noted I didn't fully explain how you could create a gradient n times so I modified the script further to include a prompt and loop.

Call the number of times:

var countgradient = Number(prompt ("Enter Gradient Count"));  

Create a loop and further add the amount of gradients:

for ( i =0; i < countgradient; i++ ) {
    var origCount = newGradient.gradientStops.length;
    var lastStop = newGradient.gradientStops[origCount-1];

    var firstStop = newGradient.gradientStops.add();
    firstStop.rampPoint = lastStop.rampPoint;
    lastStop.rampPoint = lastStop.rampPoint - 1;
    firstStop.color = endColor;

    var secondStop = newGradient.gradientStops.add();
    secondStop.rampPoint = lastStop.rampPoint;
    lastStop.rampPoint = lastStop.rampPoint - 2;
    secondStop.color = startColor;
}

Code above a mixture of what is on page 65-71 from the link at the top:

Example with 1 time:

enter image description here

Example with 5 times:

enter image description here

You can modify lastStop.rampPoint - n to adjust where they land. Hope this helps.

0
5

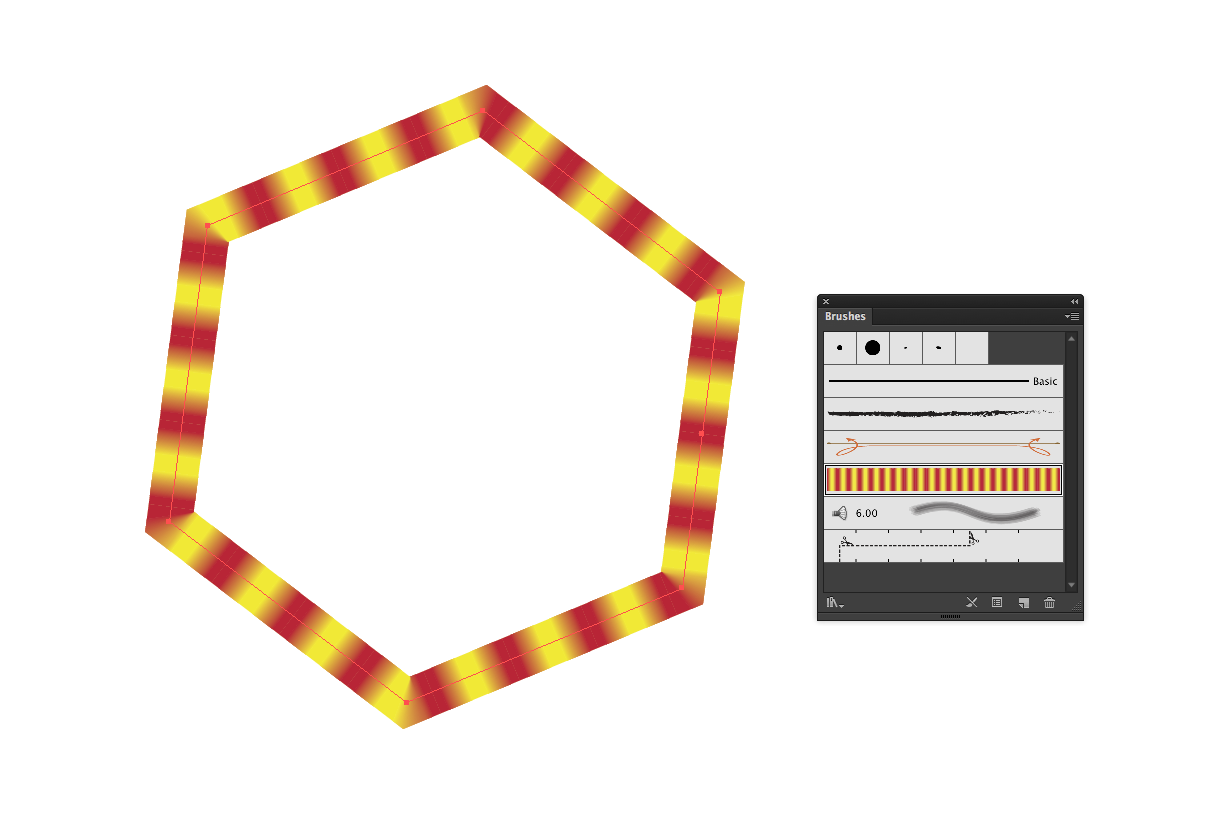
This will only work if you are using the gradient as a stroke (as in your question). If you want to repeat the gradient endlessly (as opposed to a specific number of repeats) then you can skip steps 2 and 3 and use a pattern brush instead of an art brush. In CC you can now use images in brushes so you may be able to rasterize the gradient instead of expanding it but I'm using CS6 so I can't test that.

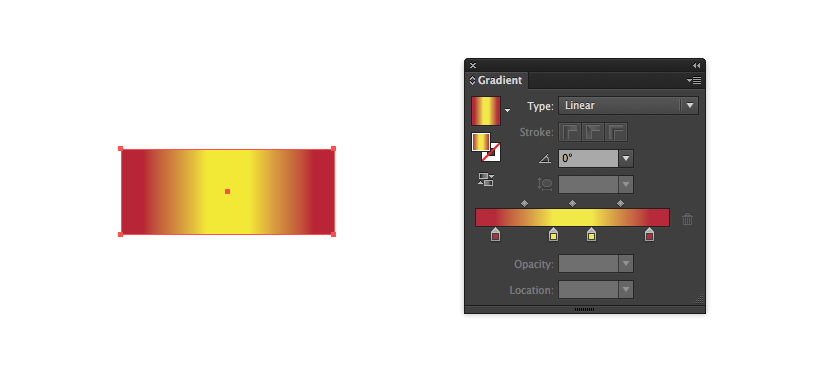
  1. Set up a single rectangle filled with the gradient you want to repeat.

enter image description here

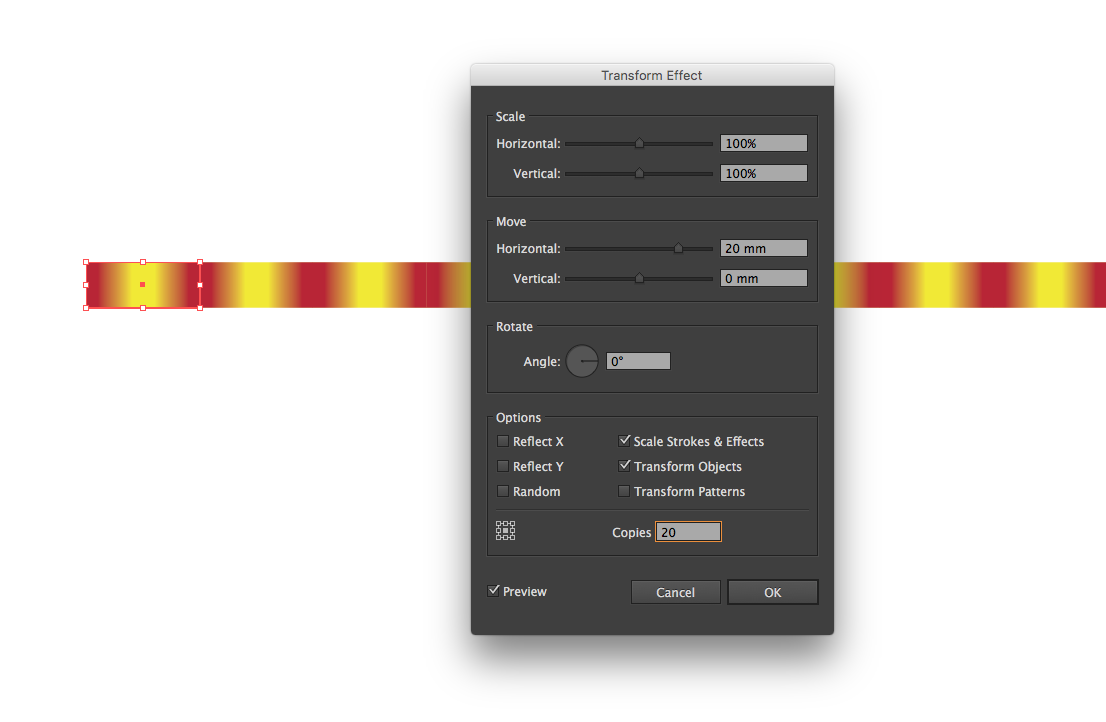
  1. Use a transform effect (Effect → Distort & Transform → Transform...) to duplicate your rectangle. Set the horizontal move to the width of your rectangle and set as many copies as you need.

enter image description here

  1. Expand the transform effect (Object → Expand Appearance).

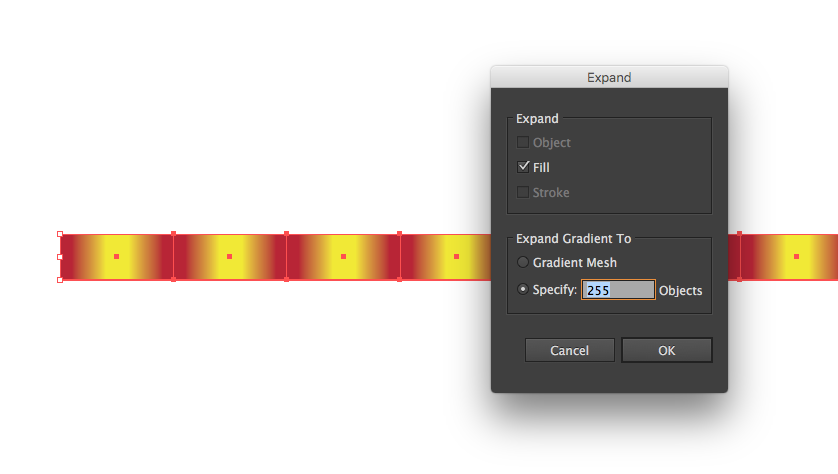
  2. You can't use gradients in brushes so you will need to expand the gradient (Object → Expand), choose a number of objects to expand your to under "Expand Gradient To".

    Expanding the gradient will leave you with some clipping masks in the expanded gradient, you will need to go through the layers and delete those (or keep right clicking and "Ungroup" then "Release Clipping Mask" till there are no more masks).

enter image description here

  1. Drag your expanded gradients to the Brushes panel and select "Art Brush". The default options for your brush will most likely be ok so just hit "OK". You can always go back and adjust the brush options later.

  2. Apply your new brush.

enter image description here

5

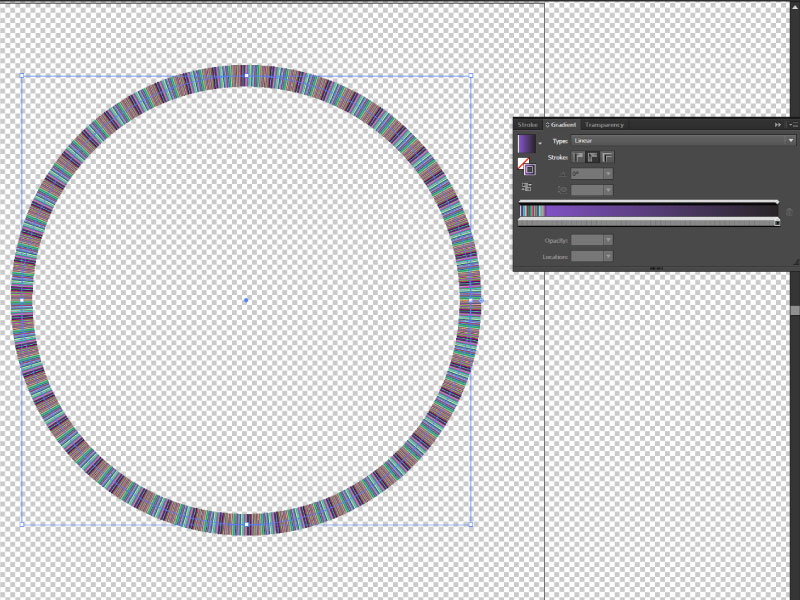
Based on the Illustrator JS manual I've come up with the code below. This code does exactly what you want:

  • Creates a gradient with two color stops: black and white
  • Repeats it five times
  • Applies it as a stroke to the active (selected) element

A more generalistic version can be found below the line.
enter image description here

(1) First we set the desired number of colors and the desired times the gradient needs to iterate:

//Change these
var numberOfColors = 2; //Change this to the desired number of colors in the gradient
var iteration = 5; //Change this to the desired times you want to repeat the gradient

(2) Then we set some variables to be used later. The GradientInterval calculates the percentage position each point needs to be set at. totalNumberofStops is pretty self-explanatory. The colors array will be used later.

//Don't change these
var i,j;
var gradientInterval = 100 / numberOfColors / iteration;
var totalNumberOfStops = numberOfColors * iteration;
var colors = [];

(3) Then we can define our colors. You need exactly as many colors as set in the numberOfColors at the beginning. Missing colors will default to black.

//Don't forget to push the colors to the colors array!

var color1 = new RGBColor();
color1.red = 0;
color1.green = 0;
color1.blue = 0;
colors.push(color1);

var color2 = new RGBColor();
color2.red = 255;
color2.green = 255;
color2.blue = 255;
colors.push(color2);

(4) Time to create our gradient and give it a name. We can also now set the type.

//Let's initiate the gradient & name it
var newGradient = app.activeDocument.gradients.add();
newGradient.name = "new_gradient";

//Choose the gradient type here
//newGradient.type = GradientType.RADIAL; //Uncomment the one you need
newGradient.type = GradientType.LINEAR; //Uncomment the one you need

(5) Now for the good part. First we'll loop over the totalNumberOfStops so we can create each stop and add it to the gradient. We create a new stop and set it one further than the last one. Now we need to get the right color from our colors array. When the modulus of the loop index divided by the number of colors is 0 we know that we've had every color and we need to start again, so we reset our color index.

Example Say I've got six colors that I want to loop 5 times. We've got thirty stops. We loop over all the colors using j. When j becomes 6 there are no more colors (six is the seventh color in the array but there are only six colors in the array). So each multiple of six we start again at 0. Else we just move on to the next color.

Now we only need to add the final color stop at 100%.

//Now here is where the magic starts
for(i=0;i<totalNumberOfStops;i++){
    var newStop = newGradient.gradientStops.add();
    newStop.rampPoint = i * gradientInterval;
    var modulus = i % numberOfColors;
    if(modulus === 0){
        j = 0;
    }else{
        j+=1;
    }
    newStop.color = colors[j];
}
var lastStop = newGradient.gradientStops.add();
lastStop.rampPoint = 100;
lastStop.color = colors[colors.length-1];

(6) The final step: applying the gradient to the stroke. Done. Party!

//Apply gradient stroke to selected object
var colorOfGradient = new GradientColor();
colorOfGradient.gradient = newGradient;
var topPath = app.activeDocument.pathItems[0];
topPath.stroked = true;
topPath.strokeWidth = 140;
topPath.strokeColor =colorOfGradient;

(7) You might have to set the stroke to 'Apply gradient along stroke' manually, because I haven't found the code to do this.
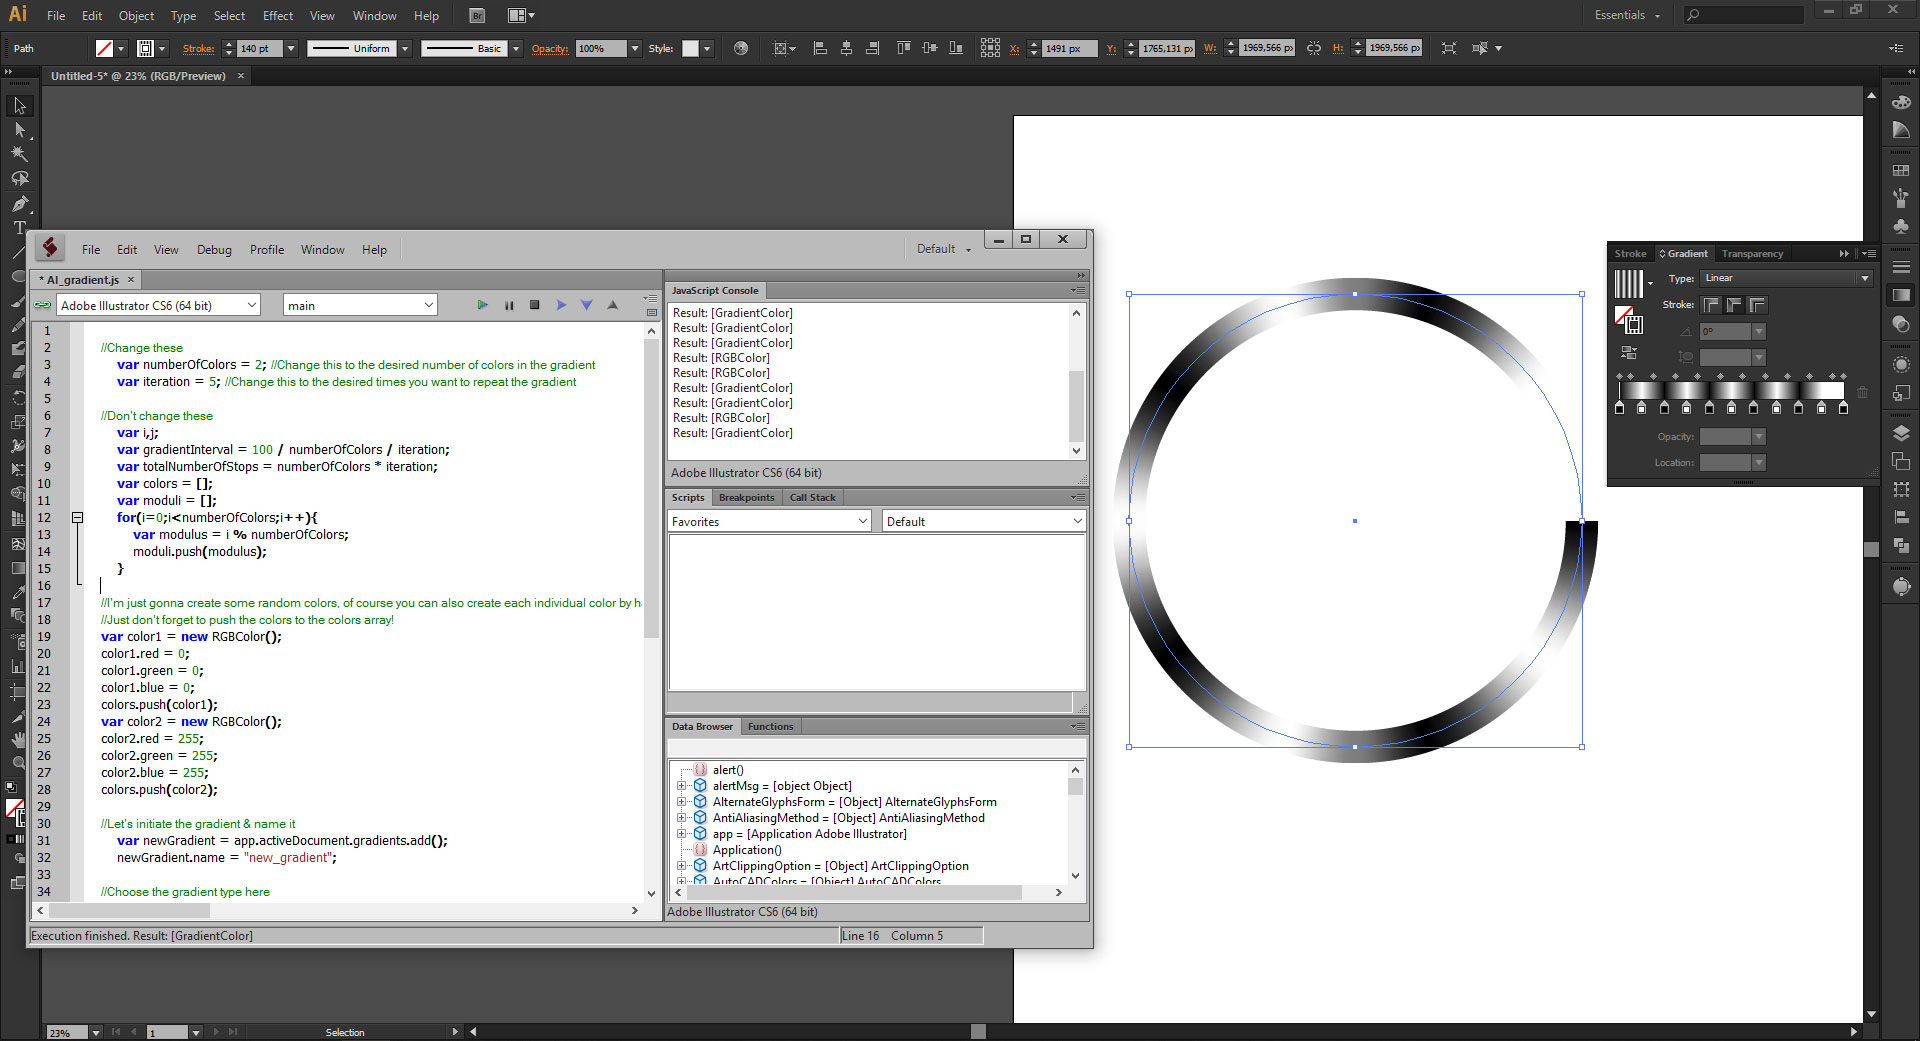
gradient stroke


This code was specifically made for your case. A more generalistic version can be found here: http://pastie.org/10921740

Some examples:

A gradient with two colors, repeating twice: enter image description here
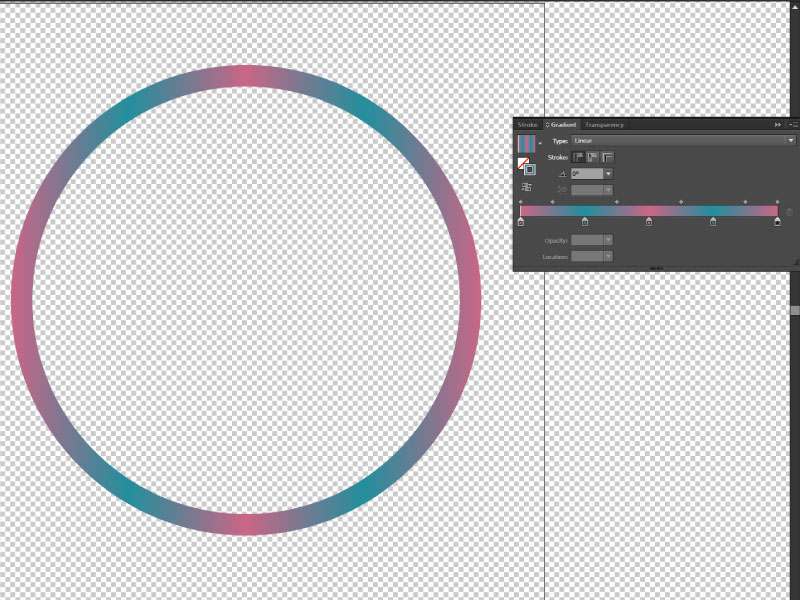
A gradient with five colors, repeating 10 times: enter image description here
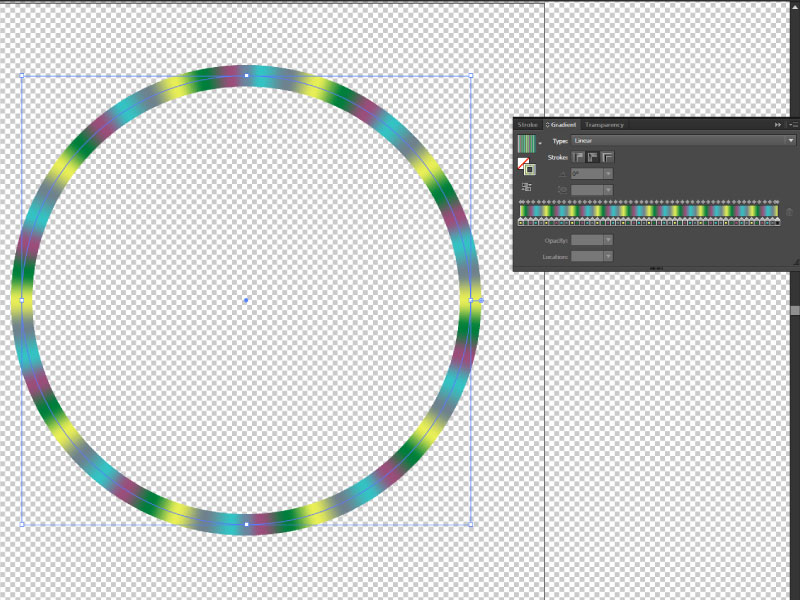
A gradient with two colors, repeating 50 times: enter image description here
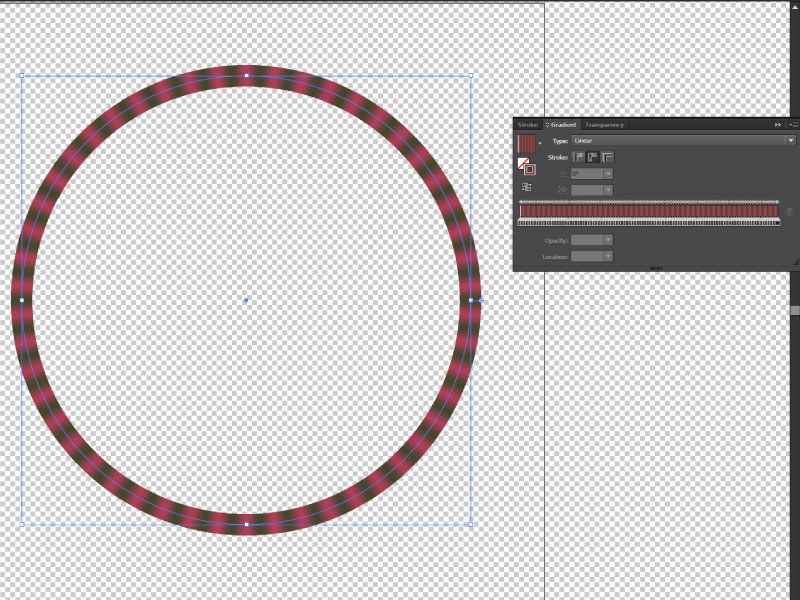
A whopping gradient with 50 colors repeating 50 times: enter image description here
3
  • This script is good, except that there's two extra gradient stops – one at the start and one at the end – that prevent the gradient from being completely seamless. When you create a gradient, there are two stops by default.
    – MG_
    Commented Jul 28, 2016 at 13:00
  • Yes Illustator always adds a color stop at 100% when generating from a script, even if you don't specify one. But if you don't specify it, the color is set to black. My workaround was to add an extra color stop at 100% with the startcolor. It's not seamless, but it's the best I could come up with.
    – PieBie
    Commented Jul 28, 2016 at 13:03
  • Oh no, I see now, the pastie link is an older version, I'll update.
    – PieBie
    Commented Jul 28, 2016 at 13:10
0

I had the very same issue, and that answer by MG_ was just what I needed!

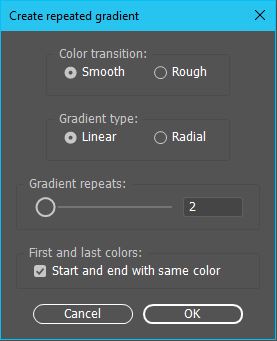
However, after a while, I noticed that every now and then I need also non-smooth gradients, and also non-seamless gradients. It was a bit painful to find a good solution, so I'm sharing the modified script here for others with the same issue. I also included simple UI to setup everything.

var run = true;
if (app.activeDocument.selection.length < 2) {
    alert("Please select two or more paths with fills.");
} else {
    var dlg = new Window("dialog{text:'Create repeated gradient'}");

    dlg.location = [500,50];
    (dlg.alertBtnsPnl1 = dlg.add('panel', undefined, 'Color transition:')).helpTip = "Smooth or rough transition"; 
    (dlg.alertBtnsPnl1.selectS = dlg.alertBtnsPnl1.add('radiobutton', [15,15,95,35], 'Smooth' )).helpTip = "Smooth color transition"; 
    (dlg.alertBtnsPnl1.selectR = dlg.alertBtnsPnl1.add('radiobutton', [15,15,75,35], 'Rough' )).helpTip = "Sharp color transition"; 
    dlg.alertBtnsPnl1.orientation='row';
    dlg.alertBtnsPnl1.selectS.value = true;

    (dlg.alertBtnsPnl3 = dlg.add('panel', undefined, 'Gradient type:')).helpTip = "Linear or radial gradient"; 
    (dlg.alertBtnsPnl3.selectL = dlg.alertBtnsPnl3.add('radiobutton', [15,15,95,35], 'Linear' )).helpTip = "Linear gradient"; 
    (dlg.alertBtnsPnl3.selectR = dlg.alertBtnsPnl3.add('radiobutton', [15,15,75,35], 'Radial' )).helpTip = "Radial gradient"; 
    dlg.alertBtnsPnl3.orientation='row';
    dlg.alertBtnsPnl3.selectL.value = true;

    (dlg.alertBtnsPnl2 = dlg.add('panel', undefined, 'Gradient repeats:')).helpTip = "Gradient repeat count"; 
    (dlg.alertBtnsPnl2.slide = dlg.alertBtnsPnl2.add('slider', [25,15,165,39], 'Set repeat count for gradient:')).helpTip = "Use Slider to set a repeat count"; 
    dlg.alertBtnsPnl2.slide.value = 2; 
    (dlg.alertBtnsPnl2.titleEt = dlg.alertBtnsPnl2.add('edittext', [100,15,160,35], dlg.alertBtnsPnl2.slide.value)).helpTip = "Enter a repeat count value"; 
    dlg.alertBtnsPnl2.titleEt.text = Math.ceil(dlg.alertBtnsPnl2.slide.value); 
    dlg.alertBtnsPnl2.orientation='row';

    (dlg.alertBtnsPnl4 = dlg.add('panel', undefined, 'First and last colors:')).helpTip = "Define type of gradient loop";
    (dlg.sameStartAndEnd = dlg.alertBtnsPnl4.add('checkbox', [25,25,235,39], 'Start and end with same color')).helpTip="Use this for seamless gradient"; 
    dlg.sameStartAndEnd.value = true; 
    dlg.alertBtnsPnl4.orientation='column';

    dlg.btnPnl = dlg.add('group', undefined, 'Do It!'); 
    dlg.btnPnl.orientation='row';
    dlg.btnPnl.buildBtn1= dlg.btnPnl.add('button',[15,15,115,35], 'Cancel', {name:'cancel'}); 
    dlg.btnPnl.buildBtn2 = dlg.btnPnl.add('button', [125,15,225,35], 'OK', {name:'ok'}); 
    dlg.alertBtnsPnl2.slide.onChange= sliderChanged;
    dlg.alertBtnsPnl2.titleEt.onChanging = eTextChanged;
    dlg.btnPnl.buildBtn1.onClick= actionCanceled;
    dlg.show();

    if(run){
        var smooth = (dlg.alertBtnsPnl1.selectS.value) ? true : false;
        var cycles = dlg.alertBtnsPnl2.slide.value;
        var myselection = app.activeDocument.selection;
        var colors = [];

        for (var i = 0; i < myselection.length; i++) {
            var newColor = myselection[i].fillColor;
            colors.push(newColor);
        }

        var stops;
        var interval;
        if(dlg.sameStartAndEnd.value && !smooth){
            stops = colors.length * cycles - 2;
            interval = 100 / ((cycles * colors.length)+1);
        }else{
            if(smooth && !dlg.sameStartAndEnd.value){
                stops = colors.length * cycles - 2;
                interval = 100 / ((cycles * colors.length)-1);
            }else{
                stops = colors.length * cycles - 1;
                interval = 100 / (cycles * colors.length);
            }
        }

        var allStops = stops;
        var newGradient = app.activeDocument.gradients.add();  

        newGradient.type = (dlg.alertBtnsPnl3.selectL.value) ? GradientType.LINEAR : GradientType.RADIAL;

        newGradient.gradientStops[0].color = colors[0]; 
        if(dlg.sameStartAndEnd.value) newGradient.gradientStops[1].color = colors[0]; 
        else newGradient.gradientStops[1].color = colors[colors.length - 1]; 

        if(!smooth){
            var thisStop = newGradient.gradientStops.add();
            thisStop.rampPoint = interval-0.1;
            thisStop.color = colors[0];
            allStops++;
        }

        for(i = 1; i <= stops; i++){
            var thisStop = newGradient.gradientStops.add();
            thisStop.rampPoint = i * interval;
            thisStop.color = colors[i % colors.length];

            if(!smooth && i<(stops+1)){
                var thisStop = newGradient.gradientStops.add();
                thisStop.rampPoint = (i+1) * interval - 0.001;
                thisStop.color = colors[i % colors.length];
                allStops++;
            }
        }

        if(!smooth && dlg.sameStartAndEnd.value){
            var thisStop = newGradient.gradientStops.add();
            thisStop.rampPoint = 100 - (interval*2);
            thisStop.color = colors[colors.length-1];
            allStops++;
            var thisStop = newGradient.gradientStops.add();
            thisStop.rampPoint = 99.9 - interval;
            thisStop.color = colors[colors.length-1];
            allStops++;
            var thisStop = newGradient.gradientStops.add();
            thisStop.rampPoint = 100 - interval;
            thisStop.color = colors[0];
            allStops++;
        }

        newGradient.gradientStops[0].rampPoint = 0.1;
        if(dlg.sameStartAndEnd.value)newGradient.gradientStops[allStops + 1].rampPoint = 99.9;
    }
}

function actionCanceled() { 
    run = false;
    dlg.hide();
}

function sliderChanged() { 
    dlg.alertBtnsPnl2.slide.value = Math.ceil(dlg.alertBtnsPnl2.slide.value);
    dlg.alertBtnsPnl2.titleEt.text = Math.ceil(dlg.alertBtnsPnl2.slide.value);
}

function eTextChanged() { 
    dlg.alertBtnsPnl2.titleEt.text = Math.ceil(dlg.alertBtnsPnl2.titleEt.text);
    dlg.alertBtnsPnl2.slide.value = Math.ceil(dlg.alertBtnsPnl2.titleEt.text);
}

So basicly it works the same way as the answer I linked, but has couple extra options: enter image description here

-3

Well, I would not use gradient all the way. First create a gradient like the one you have, then fill a canvas with it and define pattern (edit > define pattern). Then you go to Layer . new fill layer and choose pattern. You can use existing layer as a clipping mask. Now, the "n" is "scale" so 100% is 1, 50% is n=2 and so on. The smaller scale the more repeatable the pattern, and gradient, will become.

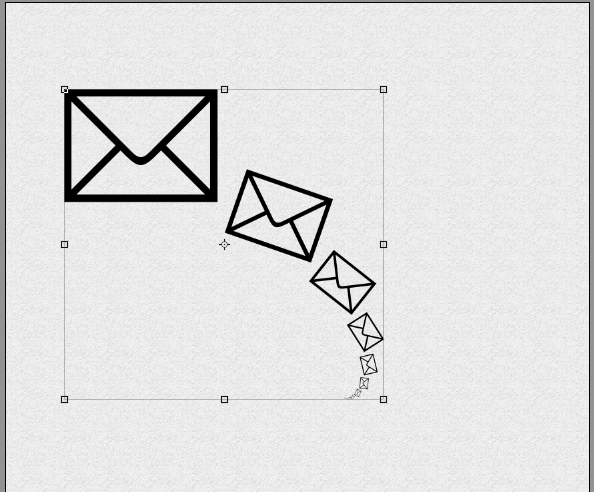
The second approach I would take is "step and repeat". I don't know where and how you want to use this multiple "wavy" gradient but the "S&R" is very handy for multiplying things in photoshop. Just hit "ctrl(cmd)+alt+t" do your thing (scale, move, rotate object), hit Enter, and then use "shift+ctrl(cmd)+alt+t" and photoshop will replicate what you did. If you rotate, move and scale an object Ps will do that as many time as you hit the repeat shortcut. enter image description here

Here I just played with second biggest envelope and then repeated the step.

Your Answer

By clicking “Post Your Answer”, you agree to our terms of service and acknowledge you have read our privacy policy.

Not the answer you're looking for? Browse other questions tagged or ask your own question.