0

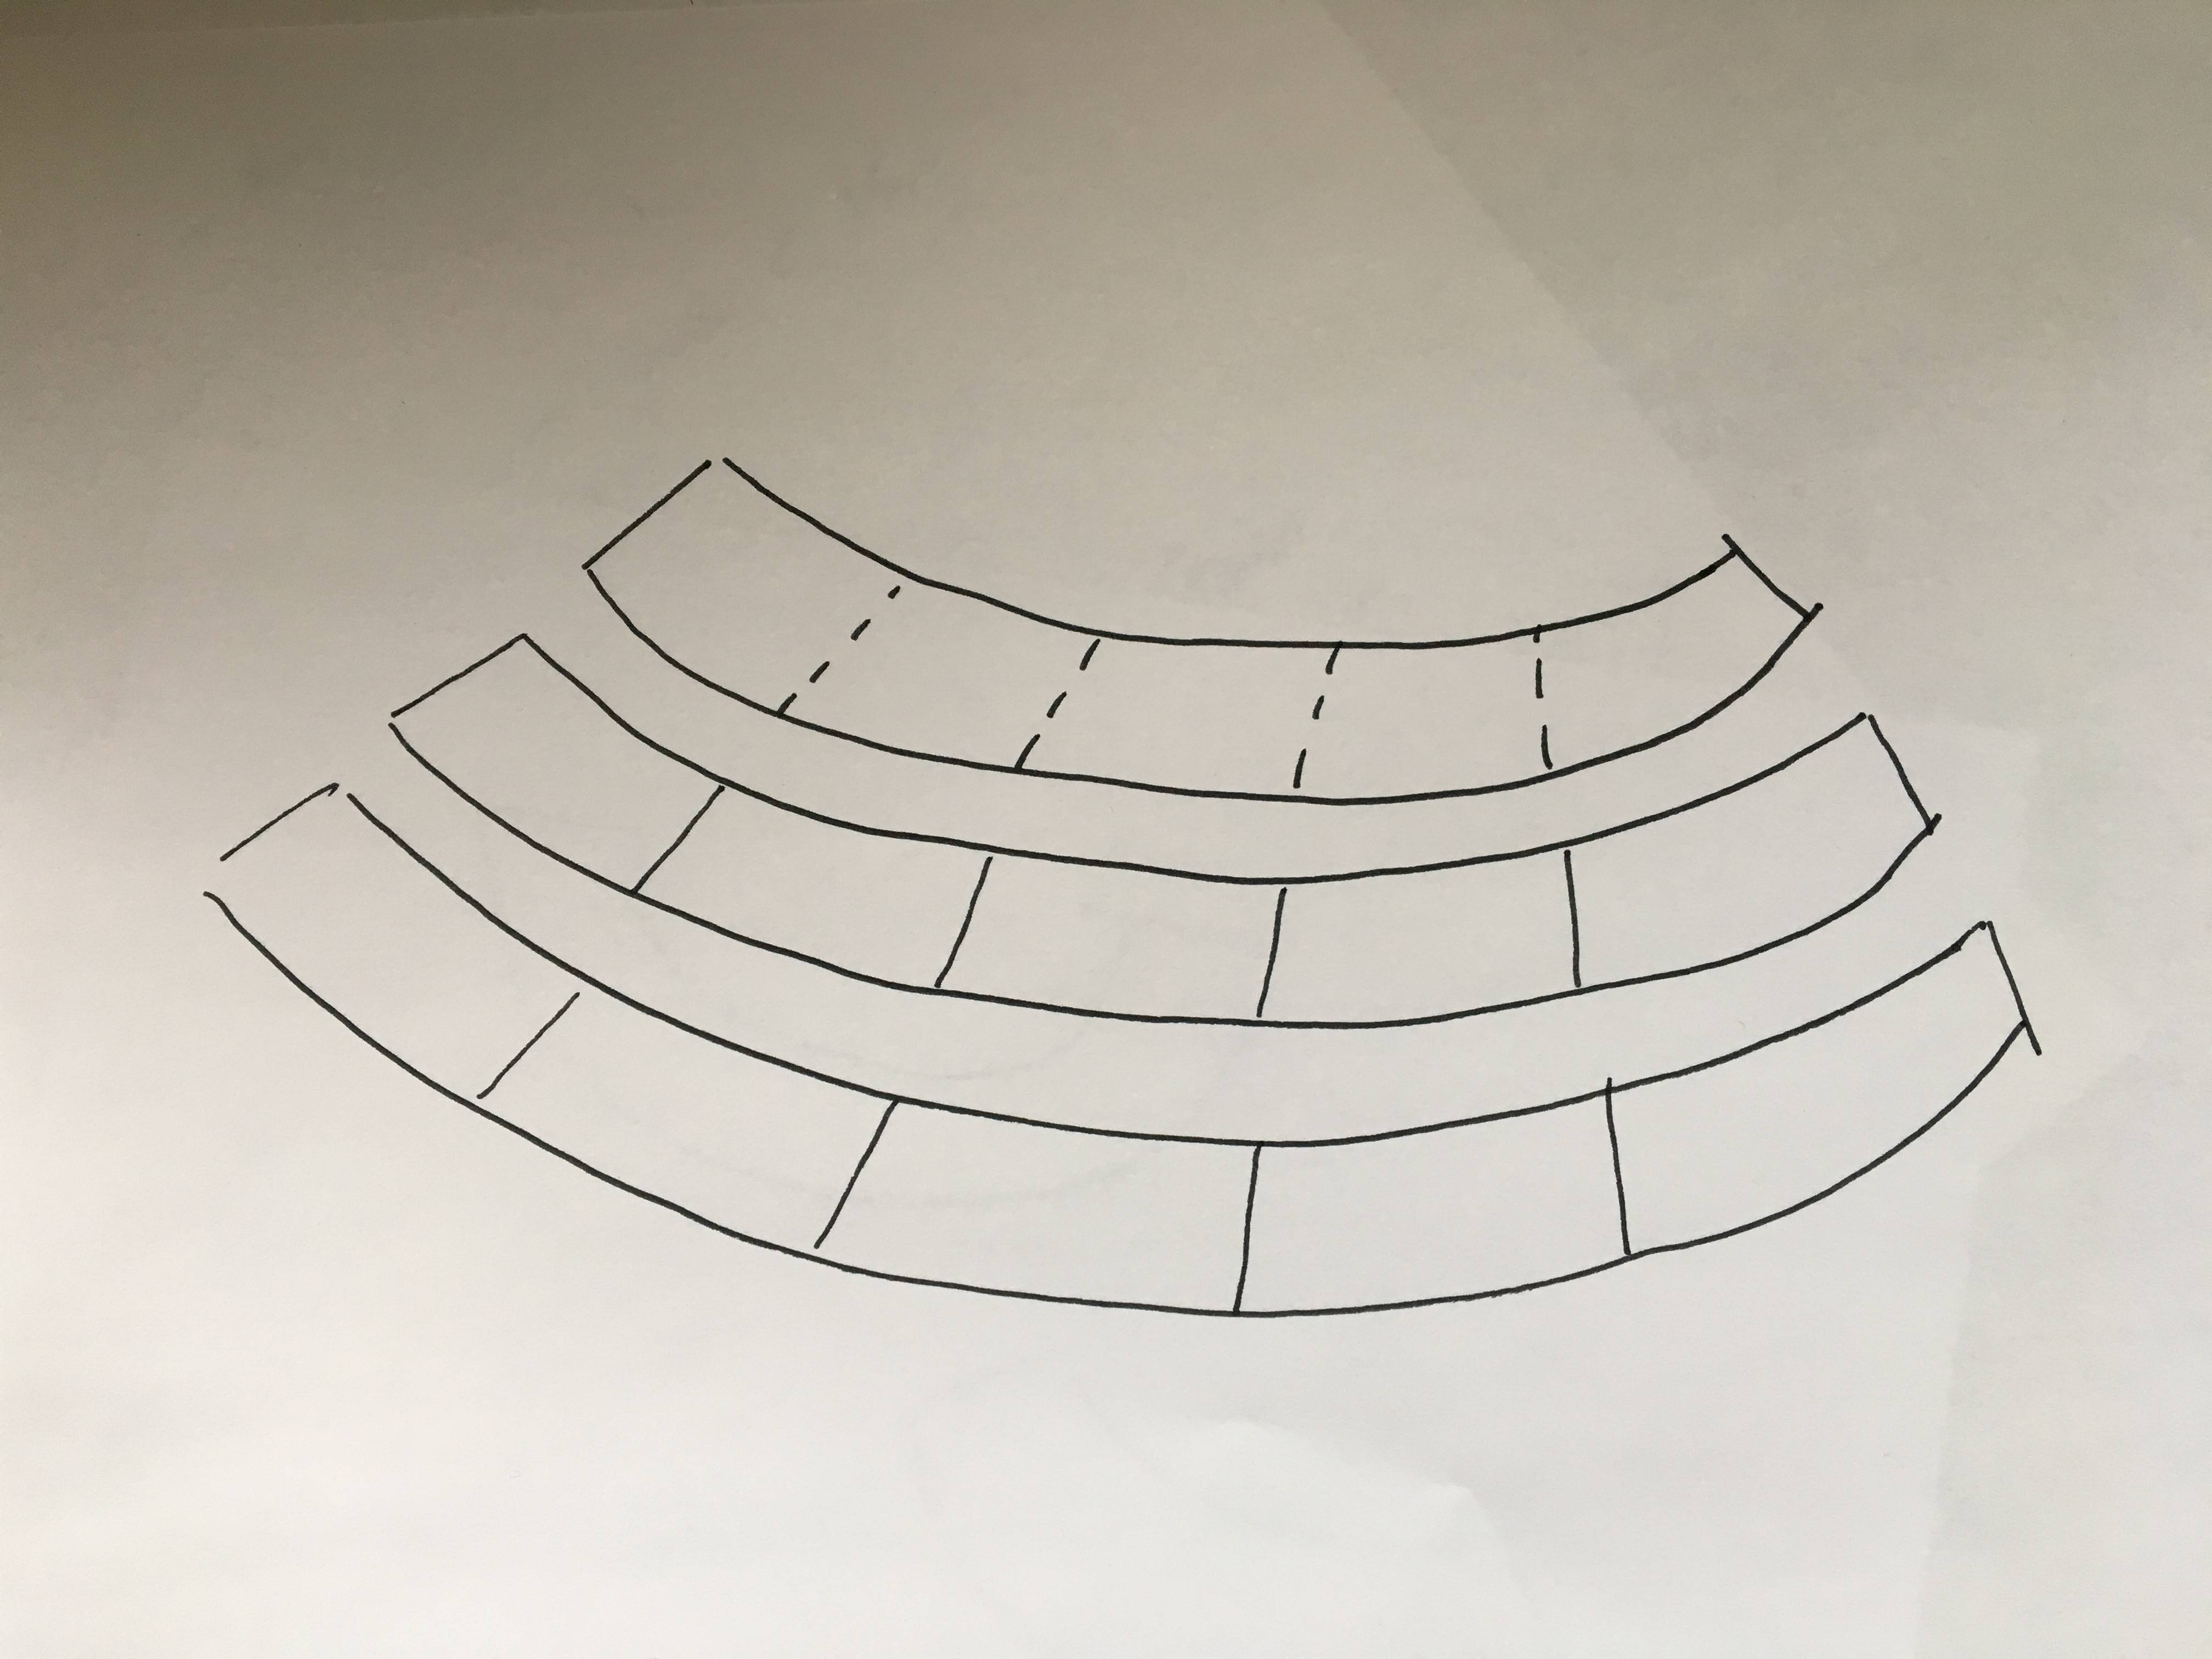
How to create the following shape in illustrator or Sketch?

Whenever I try to create a circle, copy this circle and work with smaller circles in it, it does look a bit odd. Is there any other way to create this shape and to make sure every part has the same width and height?

Rounded shape divided into different parts

2
  • This is unclear. Do you plan an auditorium which is like a circle sector and has equally wide seats with equal spaces between the rows? Maybe one seat more in every row when stepping outwards? For ex. 90 degrees sector would in that case need row space = seat width x (2/pi)
    – user82991
    Commented May 17, 2019 at 10:35
  • No, it doesn't need to have equally wide seats but does need to have equal spaces between the rows. It has to look like the lines separating the seats are running through. Each row needs to have 5 seats. Commented May 17, 2019 at 10:50

1 Answer 1

2

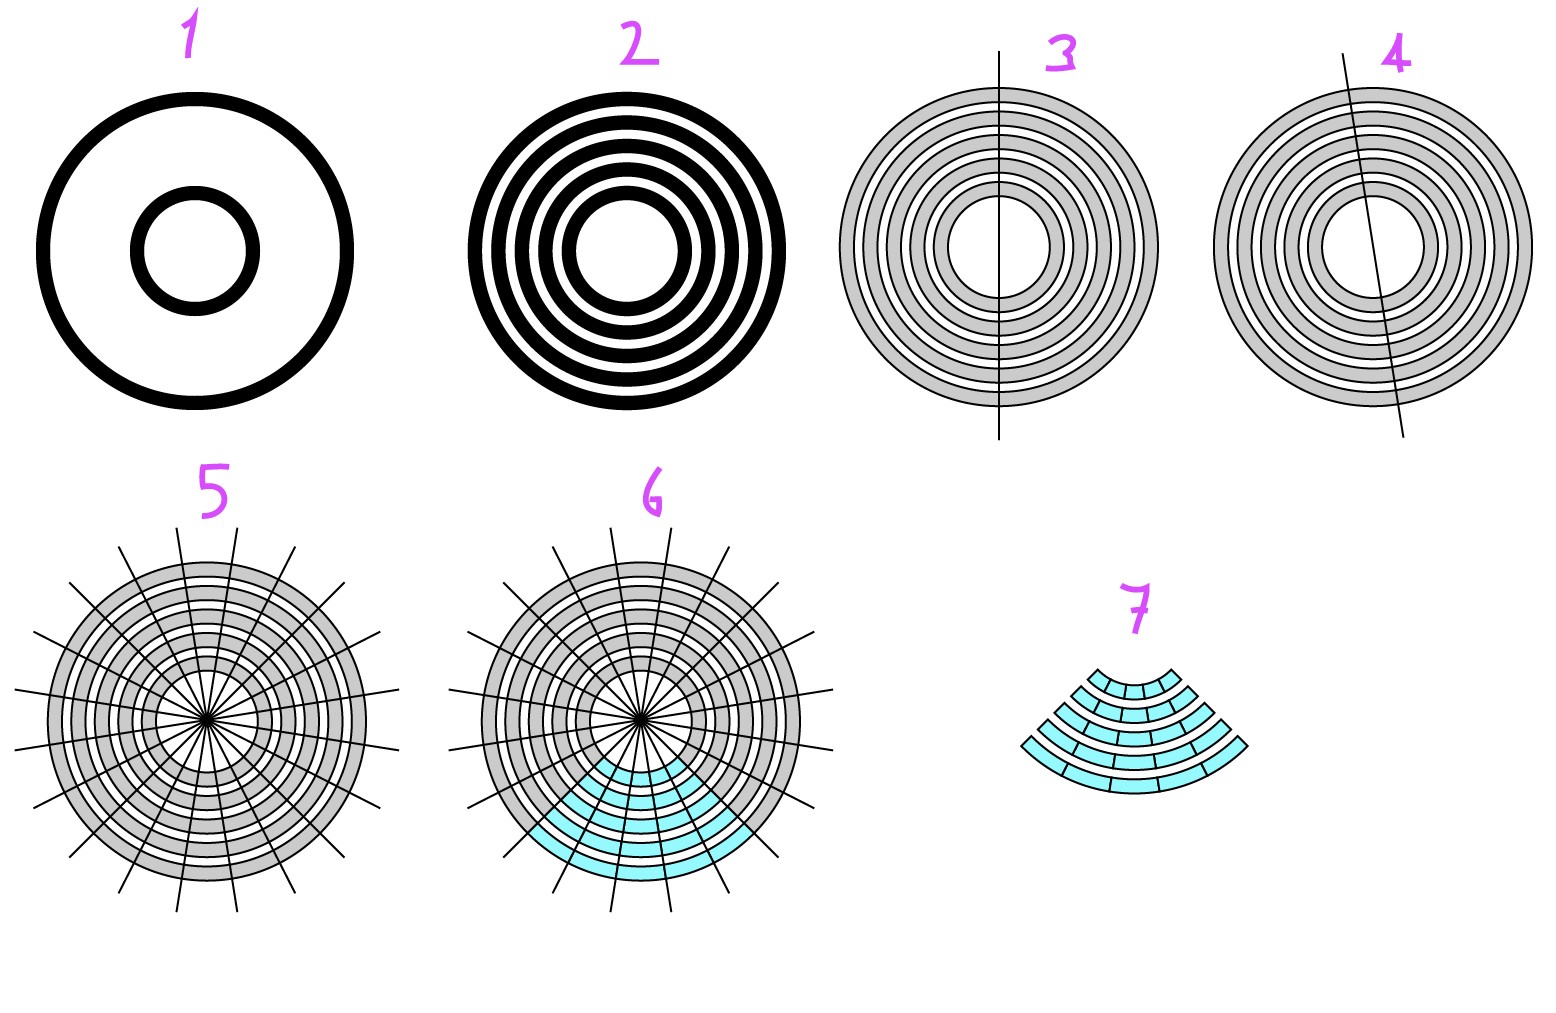
You get equally spaced circles with blending and you can make equally wide subsectors by rotating-copying a line:
enter image description here

  1. Draw two circles, same stroke, align them

  2. make a blend with a selected number of steps, expand the blend and ungroup to get free separate circles

  3. Object > Expand or Outline strokes to get rings which are filled areas, not single strokes. I gave to them grey fills and black strokes to show the difference. Draw a vertical line, align all.

  4. Rotate the line with Object > Transform > rotate 9 degrees

  5. Rotate with copy the line 18 degrees, press Ctrl+D until you have full round of lines.

  6. Select all, fill the wanted areas with the Shape builder to get separate shapes. I selected cyan fill color to make the result visible.

  7. Select the new shapes and move them apart (=select one, then Select > Same > same fill color)

This method gives full control over the final dimensions. If that's not essential, there's shorter ways to the result:
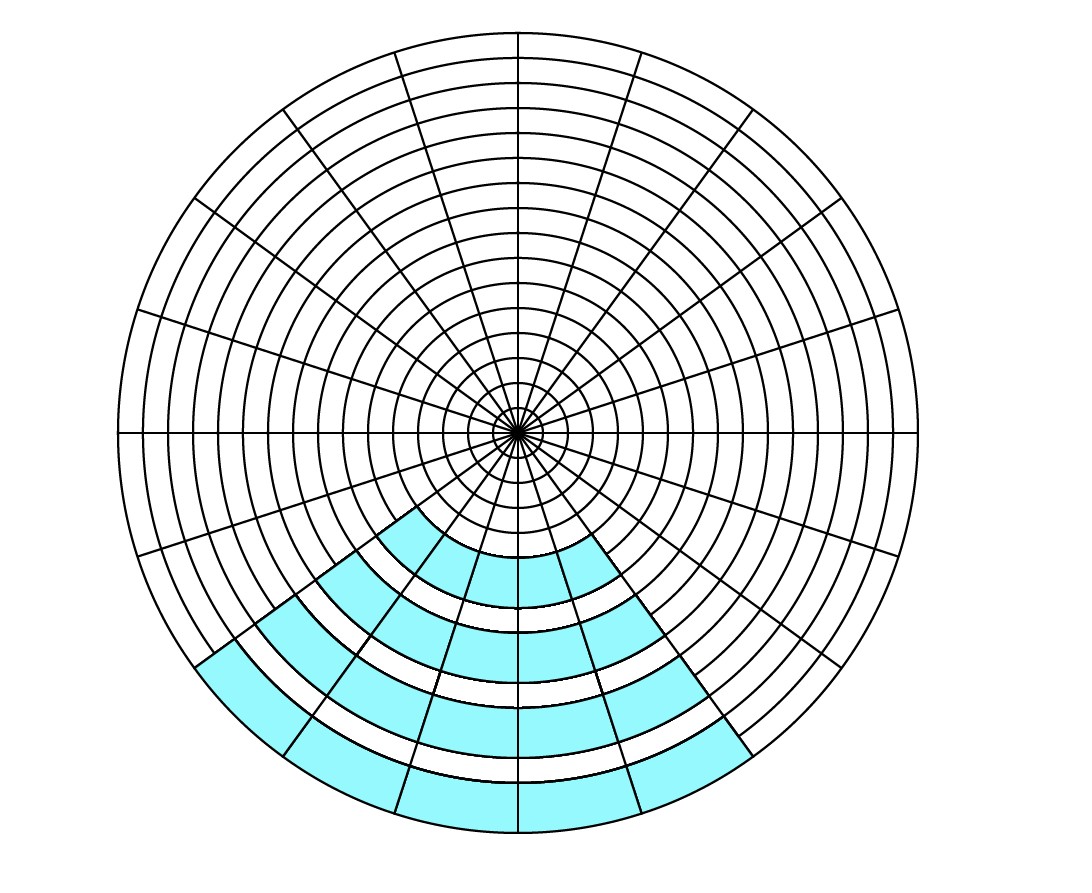
  • Polar Grid

enter image description here

Here the areas are filled again with the Shape Builder. To get the same as in the first version the result must be rotated 9 degrees before deleting the exessive parts

  • Use Envelope distort > Make with warp > Arc:

enter image description here

1
  • For me the envelope distort did the trick. Thank you very much for taking the time to form such a complete answer. Commented May 17, 2019 at 12:07

Your Answer

By clicking “Post Your Answer”, you agree to our terms of service and acknowledge you have read our privacy policy.

Not the answer you're looking for? Browse other questions tagged or ask your own question.