0

Photoshop CC 2018 Windows

I have been trying to get this to work for two weeks before posting on here as I am trying to learn how to do this.

In the colour image example I have included on this post - I want to remove the wood background but keep the branded style text together with the burnt shading, make it grey-scale and place it all on a white background.

If I simply de-saturate the image to turn it into grey-scale the burnt shading disappears. See grey-scale example.

I have the wood background as a layer and then the text is on a different layer together with various filters that give it the wood burn / branded effect.

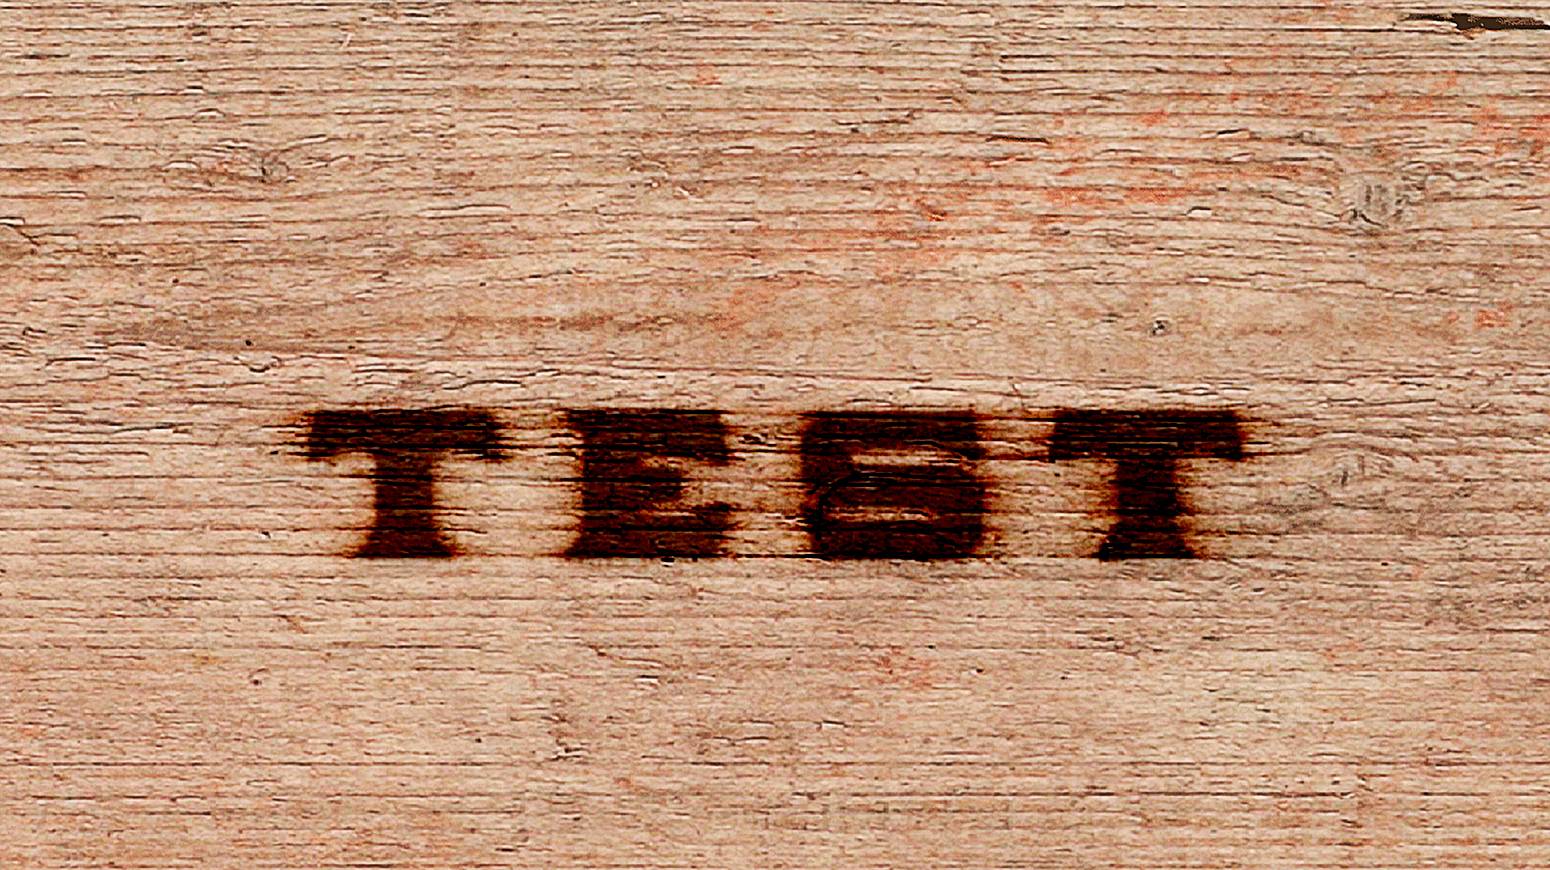
Any help of suggestions greatly appreciated. Colour Example

Grey-scale Example

3
  • 1
    Does this possible help? graphicdesign.stackexchange.com/a/121973/3270
    – Scott
    Commented Jul 3, 2019 at 23:19
  • 1
    You ask how to remove the wooden background, but you already have it on a separate layer. Why can't you just turn it off? Is it because you need the wood texture to erode the text? Just a guess, but it might be easier to add the wood on top of the text with the correct blending options.
    – Wolff
    Commented Jul 4, 2019 at 0:14
  • 1
    Can you add a screenshot of your layers' setup? It's really subtle but it looks like the burnt shading is done with a colorize effect, so it would make sense it disappears when the image is desaturated.
    – curious
    Commented Jul 4, 2019 at 3:54

2 Answers 2

1

Again layer mask is answer :D

since you already have wood layer separated i tried to reproduce same situation but it not such exact though anyway this answer will help you for sure!

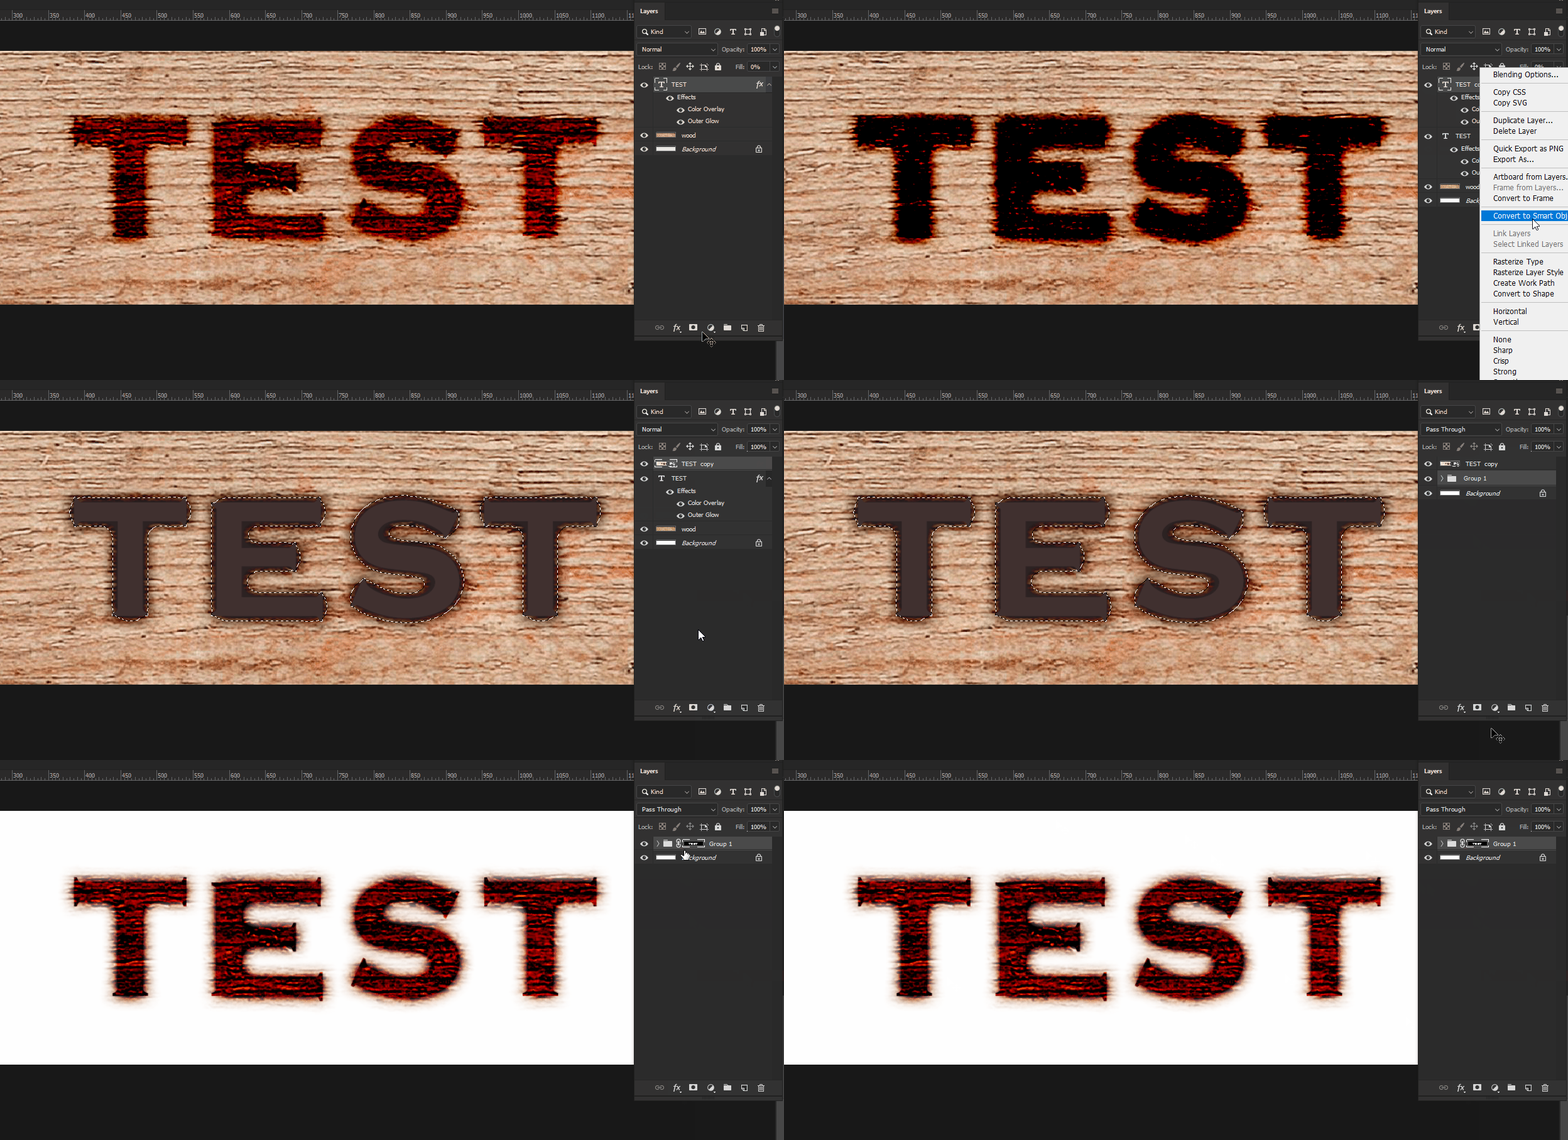
=> Create duplicate of your layer by pressing ctrl/cmd+j and then make group by pressing ctrl/cmd+g. now right click on group and convert group into smart object.

=> now ctrl/cmd+click on thumbnail of smart object to select it's bound.

=> make group of your background and text layer and after that just click on 'create layer mask' and voila :D you got what you need! below is gif to explain my method!

enter image description here

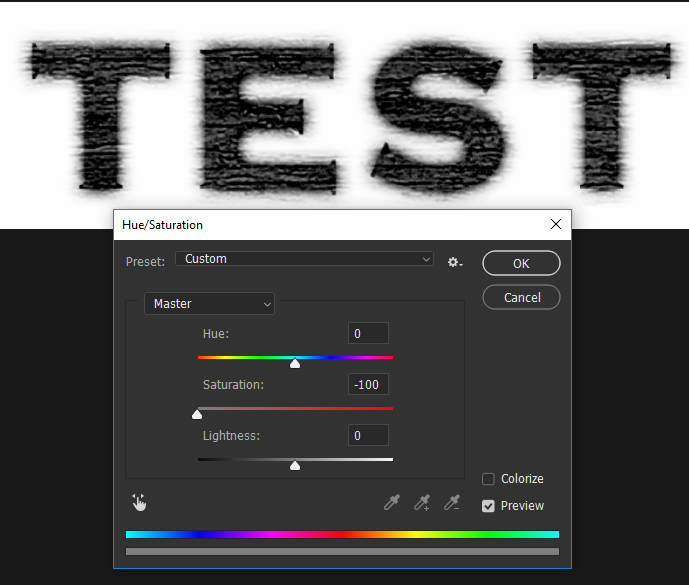
=> enter to making it grayscale there is many way to do it but you can try Hue/Saturation; press ctrl/cmd+u and then make saturation slider to minimum and you can see grayscaled image :D

enter image description here

0

I guess it's useless to try to fade the wood totally, it's so thoroughly a part of your writing. As well you could insert an outer glow to a brand new writing.

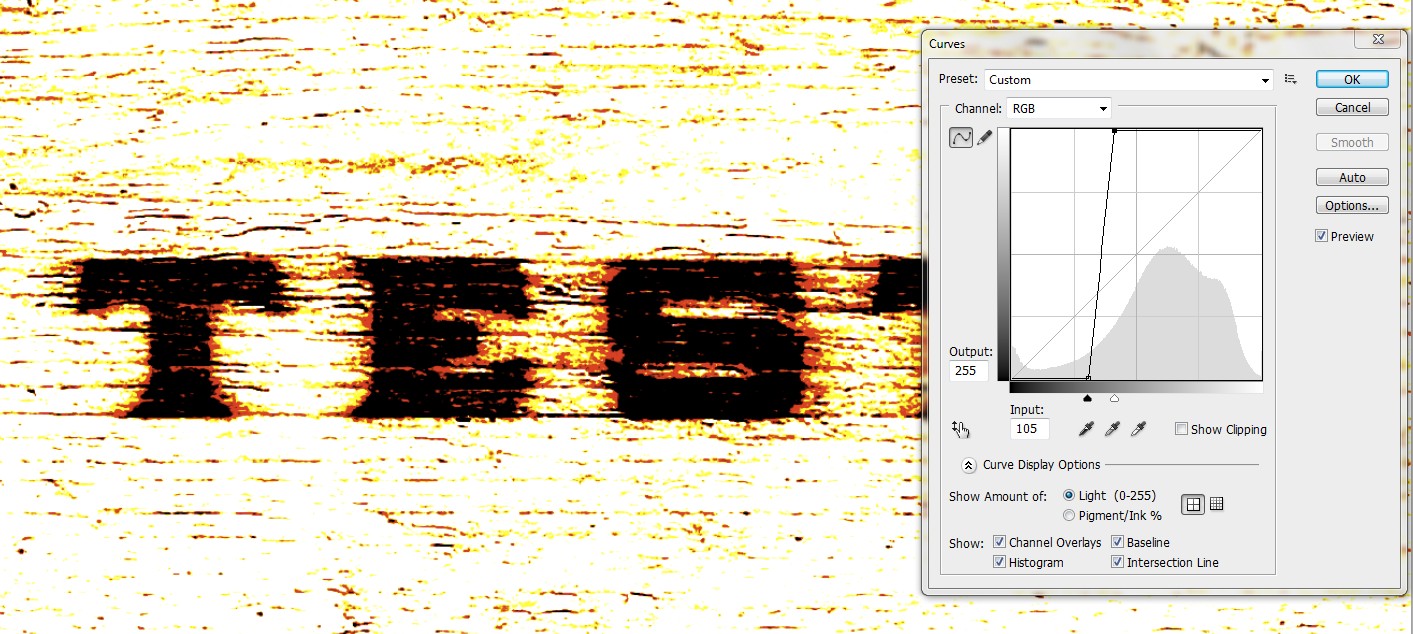
This is started from a version which has only a single layer + a white background. At first increase the contrast radically with the curves:

enter image description here

Make a heavily feathered selection (here feather=20px) around your writing, invert it and delete the most of the wooden plate:

enter image description here

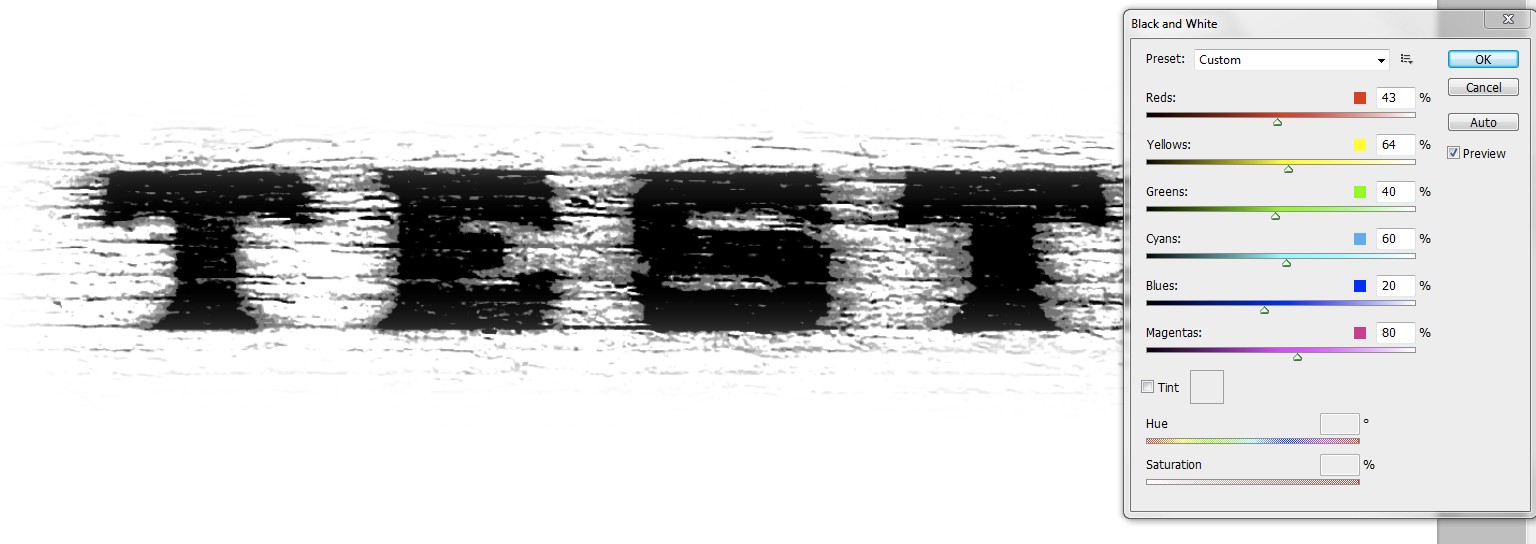
Make a BW mix to get greys:

enter image description here

Select the white with the magic wand or by selecting a color range, delete all white and nearly white. The latter can make some smoothness if wanted. I used the magic wand. Have few levels wide tolerance to remove enough. The white background is now also useless, so it's removed.

enter image description here

There's some transparency here and there inside the letters. If that bothers you, select the dark kernel of the letters with the quick section tool or with the polygonal lasso or use both and paint some black to the selection:

enter image description here

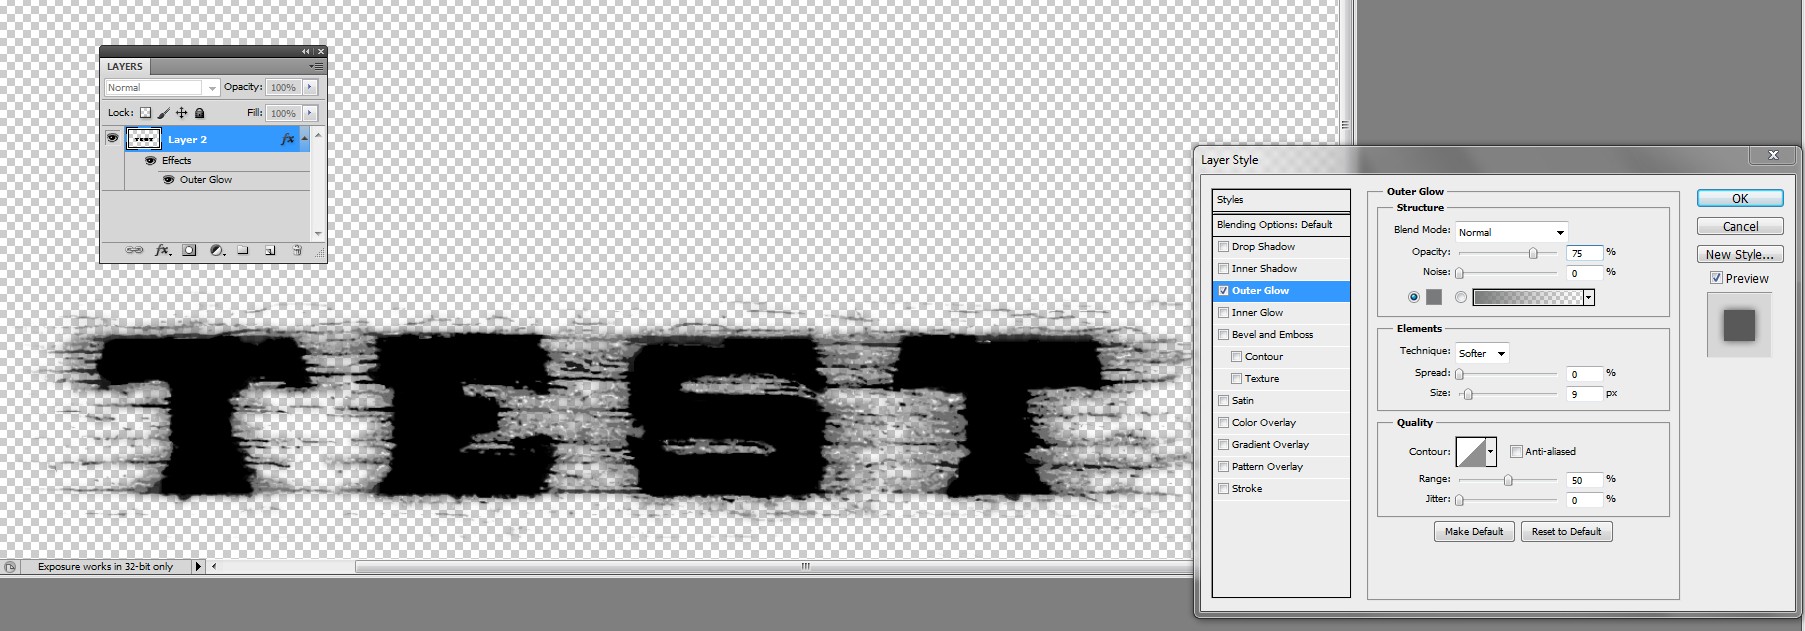
You can make the grey around the black more solid with layer style Outer Glow. Here's grey glow added with normal blending:

enter image description here

Your Answer

By clicking “Post Your Answer”, you agree to our terms of service and acknowledge you have read our privacy policy.

Not the answer you're looking for? Browse other questions tagged or ask your own question.