5

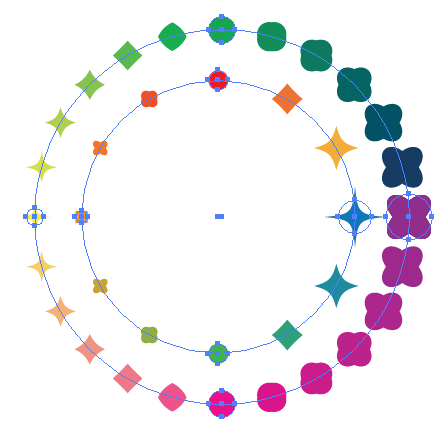
Sorry if the title isn't quite accurate, i was having trouble describing this idea with words. Here's an example:

enter image description here It's fairly easy to approximate with the Transform effects, but it's not quite the same. Actually it's perfect until you adjust the scaling parameters, then it's forever skewed and all symmetry of the whole is lost. That is it becomes more like a coil/spiral; the edges will never meet like it would as a ring/circle.

enter image description here

Also I tried to make a brush based on this pattern, thinking i could just draw a circle and set the stroke to the brush, but I couldn't seem to pull it off.

Another thing is the hue that gradually changes with every iteration, but I might be able to approximate it with the blend tool. Any solution that can do this will be preferred, but the real goal is just to achieve the pattern.

Obviously it could be done manually, but I find myself doing this kind of (and similar) pattern(s) quite often, be it for art & illustration or technical diagrams. It would be nice if I could find a quick, clever, (accurate/precise would be a bonus) way to do it.

1 Answer 1

10

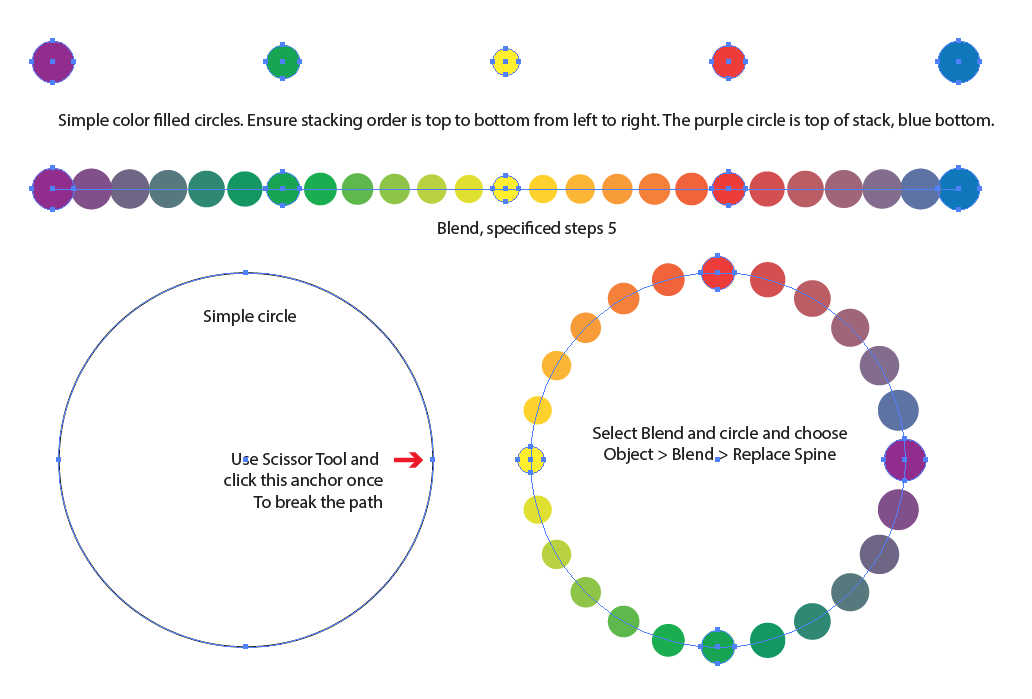
This can be done with a simple Blend in Illustrator.

You can use the Replace Spine command and get the blend to follow a circle. You merely have to cut the circle at one anchor point for the blend to space correctly.

Note that I selected the 5 base circles and distributed horizontal spacing so they were all equally spaced before creating the blend. This helps the blend space iterations a bit better.

enter image description here

Note that in the blend, the first and last circles actually overlap. That blue circle is underneath the purple circle. Coloring may need adjustment due to this fact. It is not a good idea to remove that blue (or purple) circle because it will cause the blend to change.

And it is still a blend.. so changes to those base circles will alter the entire blend.

enter image description here

5
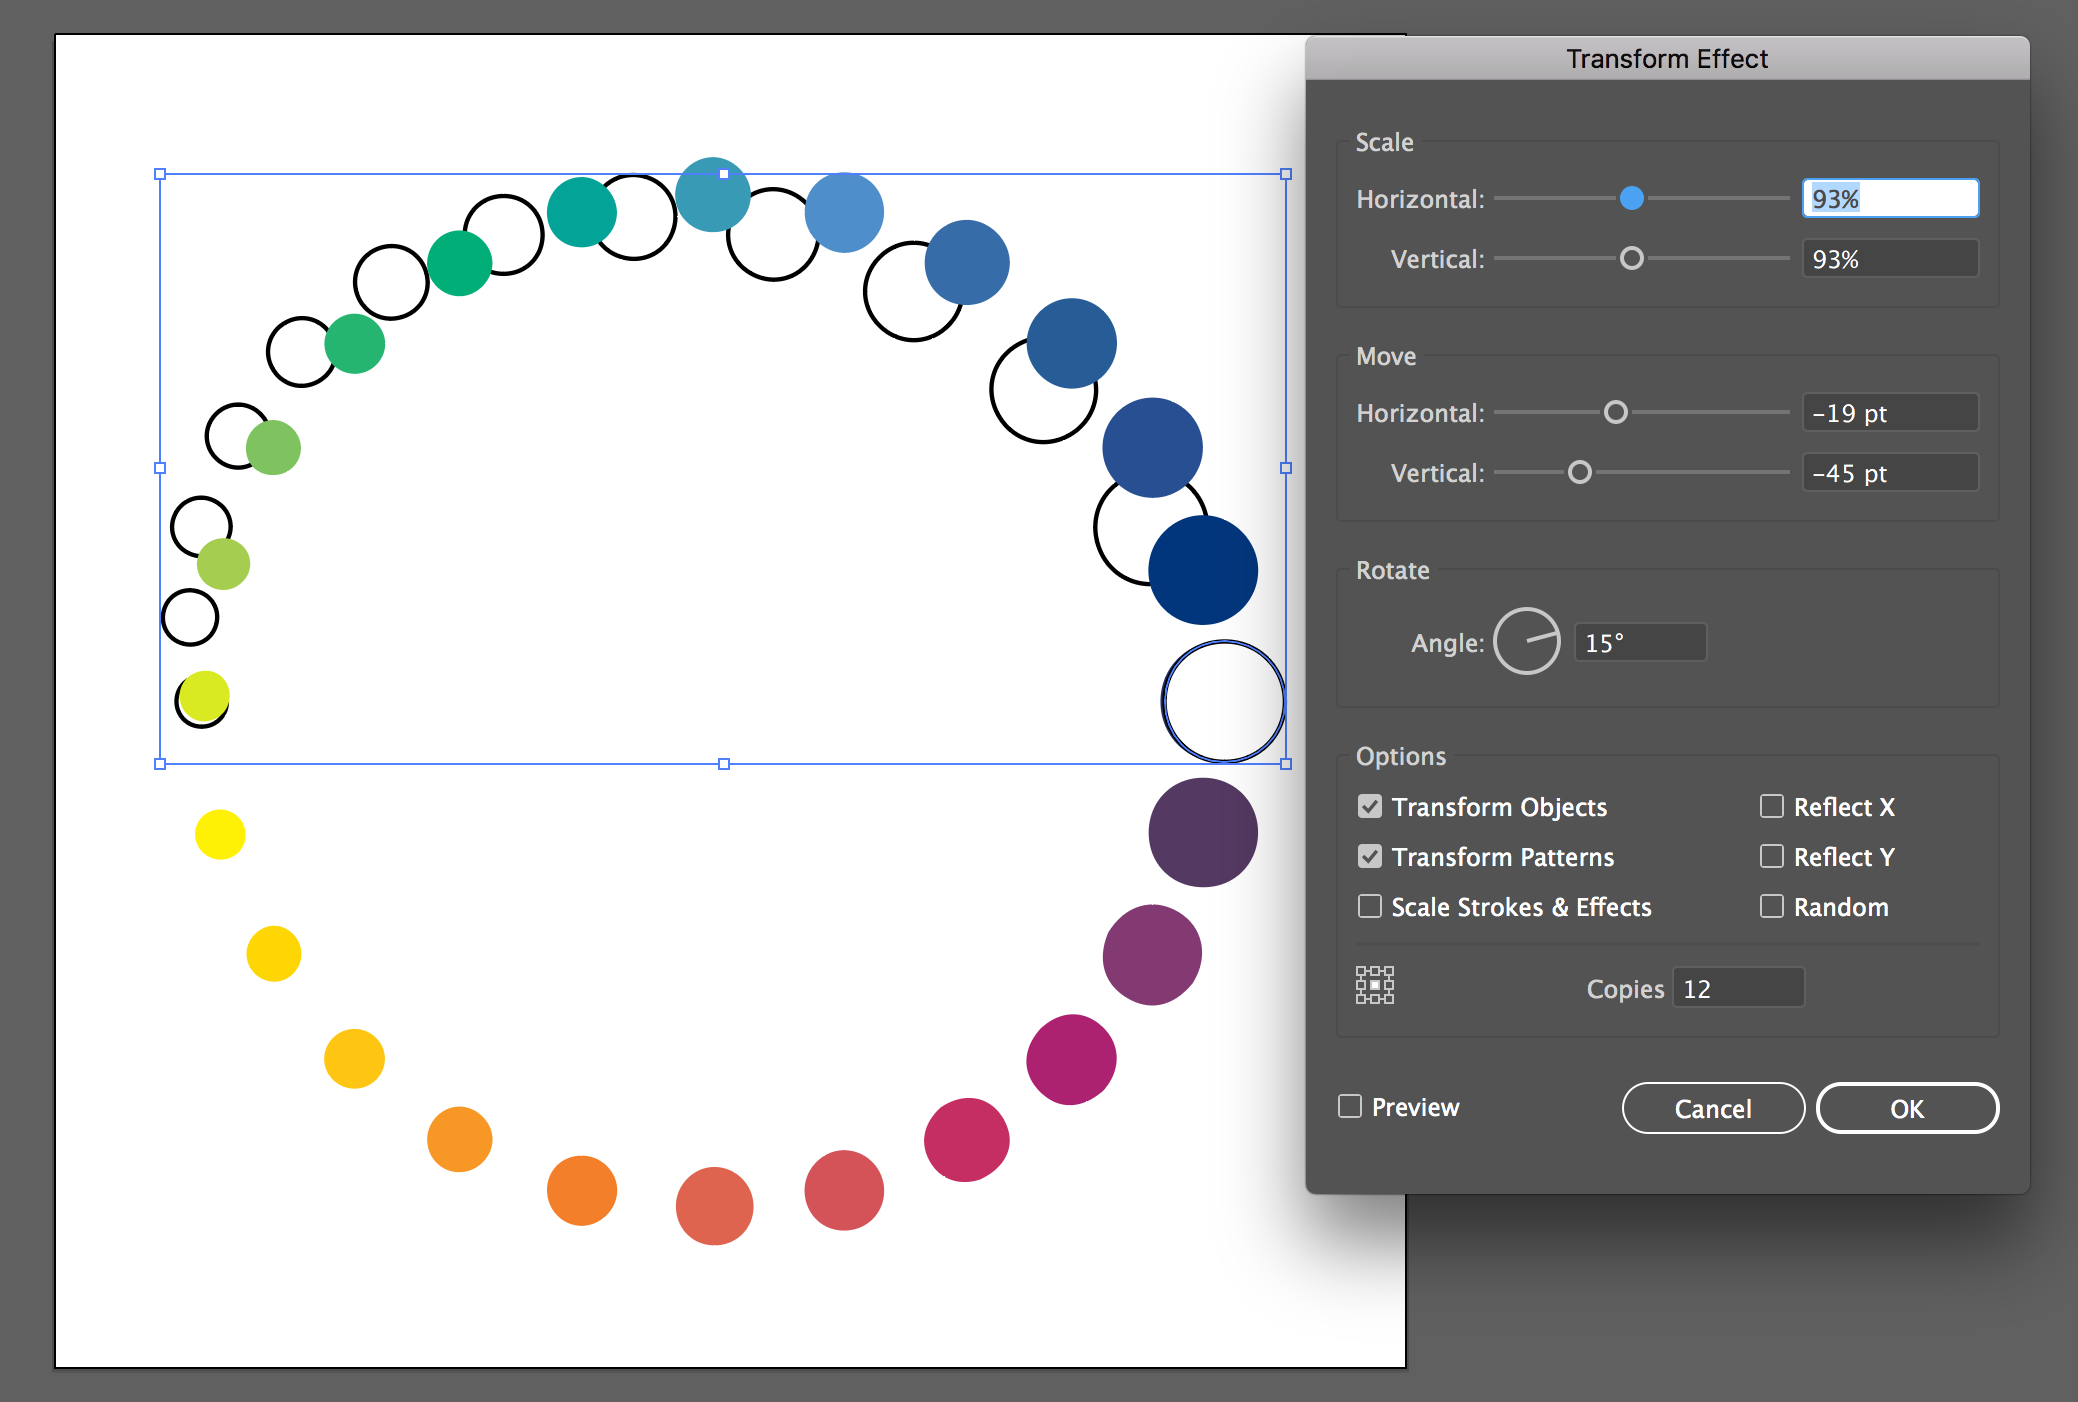
  • Nice. Mine came out weird though. i.sstatic.net/nfQkT.png
    – voices
    Commented Jul 22, 2019 at 6:23
  • Not sure how you accomplished that. The first two white images don't seem to make sense tome. they aren't needed. All you need are the various "steps" you want to blend between. No clue what those white circles indicate. Did you cut the circle? You will get odd spacing if the circle isn't' cut.
    – Scott
    Commented Jul 22, 2019 at 6:32
  • The white circles aren't really supposed to indicate anything. I cut the east anchor point where you indicate with the red arrow.
    – voices
    Commented Jul 22, 2019 at 7:30
  • You might try distributing vertical space between the 5 base circles before making the initial blend. That way that space is even. All I can guess is that the initial spacing isn't consistent.
    – Scott
    Commented Jul 22, 2019 at 14:23
  • Sorry.. meant to distribute horizontal space, not vertical.
    – Scott
    Commented Jul 22, 2019 at 15:46

Your Answer

By clicking “Post Your Answer”, you agree to our terms of service and acknowledge you have read our privacy policy.

Not the answer you're looking for? Browse other questions tagged or ask your own question.