0

I would like to use Gimp to prepare files for riso printing and for this I need to convert each individual color layer from opacity (x%) to greyscale ((100-x)% luminosity).

Precisely, this is the conversion I need:

  • [color] at 100% opacity -> black
  • [color] at 75% opacity -> grey (25% luminosity)
  • [color] at 50% opacity -> grey (50% luminosity)
  • [color] at 31 % opacity -> grey (69% luminosity) etc.

And [color] can be replaced by any existing color. I have one layer per color.

Would you know how to do this? In Photoshop, there is a shortcut to do this at seen here: https://youtu.be/UrFq5KliP04?t=263 This is exactly what I would like to reproduce.

Thanks in advance for your help.

2 Answers 2

1

This is very similar to xenoid's Lock Alpha method, but using some shortcuts, and a change to the workflow so you can keep the original colour image unaltered.

Before beginning, make sure you have saved your original colour XCF document.

  1. Hit Ctrl+D to duplicate the document, so that any changes you make won't affect your original colour document. The duplicate document will open in a new image tab

  2. Hit D to set the default foreground and background colours, i.e. black FG, white BG

  3. Engage the Lock Alpha Channel* button for the layer

  4. Do Edit > Fill with FG colour, or use the shortcut Ctrl+, <---- that's the comma key

Repeat steps 3 and 4 for each layer you want to convert

When you have finished, save your separations XCF file with a new file name so you don't overwrite the original colour document.

*Note: The Lock Alpha Channel function doesn't have a default keyboard shortcut, however it would be possible to set one up in Edit > Keyboard Shortcuts, perhaps something like Ctrl+Alt+A, so it would be possible to do this using shortcuts alone.

1

Simple solution

  • Add a white layer as background
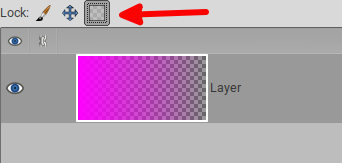
  • Alpha-lock the layer

enter image description here

  • Bucket fill the color layer with black

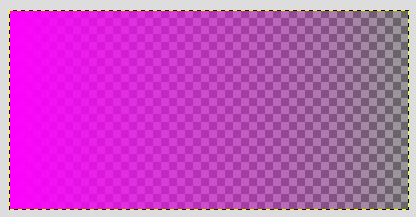
So, from this:

enter image description here

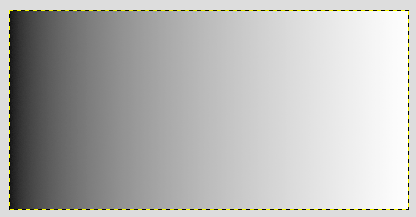
To this:

enter image description here

On the top image, alpha in the middle of the gradient is 50%, and in the result image, the color in the middle is (189,189,189) which is indeed the 50% luminosity gray.

A bit more complicated, but better to work with, solution

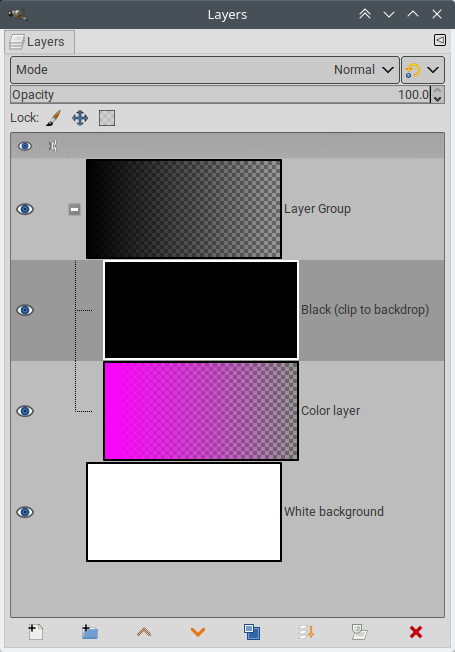
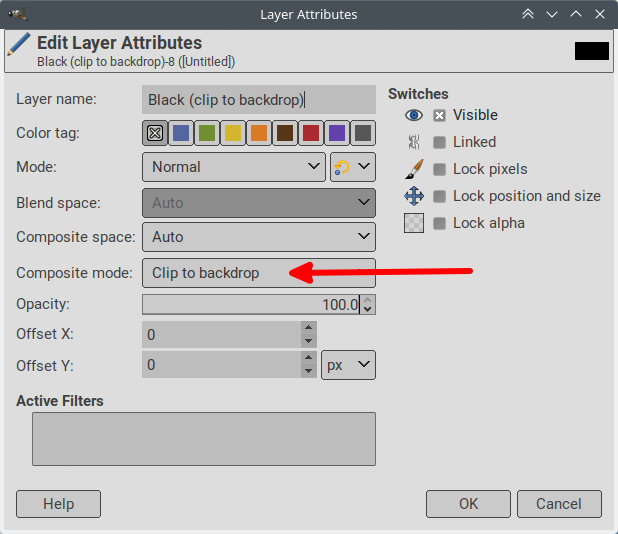
If you want to keep the color layers intact, there is a slightly more protracted way using layer groups. You keep the color layer with a black layer over it in a group (one such group per color layer), and set the black layer to Composite mode: Clip to backdrop. This has the same result as bucket-filling the alpha-locked color layers.

enter image description here

Clip to backdrop can be set in the layer attributes dialog, or directly in the right-click menu for the layer:

enter image description here

This is slightly more complicated to set up, but you can edit your color layers and see the result in real-time. And if you want to see the color, you just make the black layer invisible.

7
  • Thank you for you answer. However, I am confused as opacity in Gimp does not correspond to what I expected. In Photoshop, when you change "opacity", it does not change the tint whereas in Gimp, the tint changes. Here is an example: hslpicker.com/#005ed1,0.69/#fff The color I used is RGB(0, 94, 209) or TSL(59, 100, 41). When used in Photoshop with an opacity set to 69% on a white background, the result I get is RGB (79, 144, 223) or TSL(59, 69, 59) as in the hlspicker example above. In Gimp, I get RGB (151, 167, 225) or TSL(63, 55, 74). What did I get wrong? Commented Aug 7, 2023 at 18:38
  • @Purple_ghoost Depends if you have the "Sample merged" option or not... Without it, you get the values for the layer only, transparent pixels have the same RGB value than the other ones. With it, what you measure is the composition oft he layer with those under it in the stack so the more transparent the pixels, the more the result looks like the other layers. See here.
    – xenoid
    Commented Aug 7, 2023 at 19:00
  • It may correspond to what you describe. But I don't know what "Sample merged" is. How do I turn it off? Commented Aug 7, 2023 at 20:55
  • You didn't tell me how you measured... In the pointer dialog it's here.
    – xenoid
    Commented Aug 7, 2023 at 21:05
  • Ok, your different result depend on the layer blend mode variant, standard or legacy. With "legacy" you get the same as Photoshop.
    – xenoid
    Commented Aug 7, 2023 at 21:41

Your Answer

By clicking “Post Your Answer”, you agree to our terms of service and acknowledge you have read our privacy policy.

Not the answer you're looking for? Browse other questions tagged or ask your own question.