10

I'm quite new to printing graphics. I understand why crop marks are used when printing, and on the face of it, they seem quite straight-forward to use. However, when I went to trim a document I have printed using the crop marks that were added (using Illustrator), I came across an issue that has me confused.

enter image description here

Take the example above. If I was to trim the top of the document, using the two horizontal crop marks, then I would also remove the two vertical crop marks indicating the left and right edges of the final document. As a result, when I go to trim say the left-hand side of the document, there is no crop mark to use as a guide at the top.

My question therefore is: how is a document trimmed using crop marks such that when a cut is made in one direction (eg. horizontally) the crop marks necessary for trimming the document in the other direction (eg. vertically) are not removed? Or is there something else I am missing?

2
  • Hi anpro, welcome to GDSE and thanks for your question. If you want to know more about the site, please see the help center or ping one of us in chat once your reputation is sufficient (20). Keep contributing and enjoy the site!
    – Vincent
    Commented Feb 18, 2015 at 9:36
  • 2
    I have the same issue, but my solution is just to take a ruler and a pencil and draw straight lines. So instead of cut-marks i have cut-lines
    – user37657
    Commented Feb 18, 2015 at 9:45

3 Answers 3

10

I found this on YouTube: Removing Crop Marks.

I guess you are not meant to use them for cutting thing out with scissors but like she did. It's probably quicker to do it this way but I still do what JVS does.

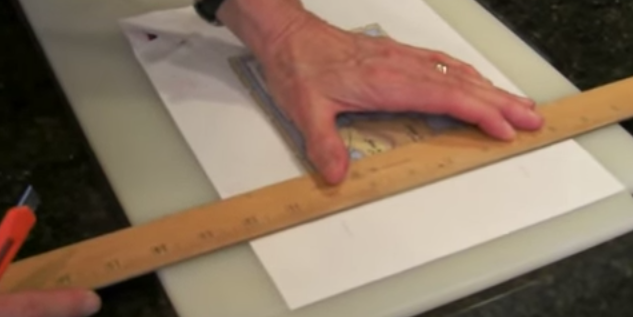
The video shows that the proper way to cut an image with crop marks is to use a ruler and a cutting knife. You line the ruler up with the marks and then run your knife between them (not cutting the ends of the paper) you can then still see the other lines and you can do the same for the other corners.

Removing Crop Marks Thumbnail

6
  • 1
    Yeah okay. But how do you actually do this with a guillotine?
    – joojaa
    Commented Feb 18, 2015 at 11:01
  • @joojaa With a guillotine, or paper cutter, either you don't cut all the way through the paper, or you have to make very light rules, as JVS comments above. Commented Feb 18, 2015 at 11:03
  • 1
    @joojaa I found this on an adobe forum, although I don't really agree its the best way "After the first cut with the guillotine, you'll still have one crop mark on either side. Since you want to have a 90° corner, use the guillotine's guide to line up the cut side, using the one available crop mark as a guide. After that, just use the graduations on the guillotine to position the remaining cuts, since you know the width and height of the art." Trim Marks Adobe Commented Feb 18, 2015 at 11:10
  • That sounds elaborate and prone to error. Then again, beggars...
    – Vincent
    Commented Feb 18, 2015 at 12:22
  • Not cutting right across the page makes sense. Not sure how much faith I'd have in the accuracy of the guides on my guillotine; but then I suppose having a decent guillotine might help.
    – rossorp
    Commented Feb 19, 2015 at 7:42
0

Assuming this is for a single print out (or not many), use a straight edge (ideally metal rather than a plastic or wooden ruler) and cut with a scalpel knife, or similar, with the image area inside (so you don't accidentally stray into the image if your knife goes off course), on a trimming mat.

The guillotine doesn't allow for this method unless you change the offset distance in print options to just inside the image area (e.g. offset -.5mm) so there is something left of the trim marks.

0

Comming from engineering, I would descripe the problem like that:

in most cases, the main interesst is in the size of the cutted final product, and so you know before ...(A4, or 4" by 3" or alike), therefore the crop marks are overdeterming the pitcure(1)! Although they are usualy put on all edges, in prinzip you only need one corner for X and one some how oposite for Y. Cut one on X the other on Y and the remaining to size.

ready.

You never should need to "mesure" the final size out of crop marks, because they are here to allow somhow tollerance (eg. +/- half a pt, +0/-1 mm or so depending on quality)

(1) that means, if your printout is 1% larger than expected (high humidity...) you have to decide who is correct the marks or the requiered size. There is always something "not exact"

Your Answer

By clicking “Post Your Answer”, you agree to our terms of service and acknowledge you have read our privacy policy.

Not the answer you're looking for? Browse other questions tagged or ask your own question.