0

I have Adobe Illustrator CS6 and the following icon that I want to use. The picture is in PNG format.

tire_pressure_icon

All I want to do is color in these dark lines to a different color (say, orange) and I have watched so many YouTube videos and Googled for so many tutorials on how to do this but have failed every single time. Live Paint Bucket only seems to want to color in areas but not able to color in the black areas. This is extremely frustrating to me because I know that a crappy program like Microsoft Paint can do this so easily but I can't quite use that because I need the background of this icon to be transparent.

Please, someone, educate me on how to do something that I feel should be so simple but haven't figured it out yet. All I want to do is make this black icon a different color (e.g. orange).

4
  • If this a raster image (JPG) and not made of paths, why not change the color in an image editing program like Photoshop or GIMP? If you want to quickly convert this to a vector icon then you can image trace the icon or just recreate the icon with the pen tool and shapes.
    – AndrewH
    Commented Jul 22, 2016 at 19:03
  • No, it's a PNG (I edited the question details). I will try Photoshop if Illustrator is not the way to go. Commented Jul 22, 2016 at 19:20
  • 1
    Check out - Changing hex color of a graphic. There are also numerous other posts on this website with the same topic. I would suggest using Photoshop or GIMP if you're sticking with a png image.
    – AndrewH
    Commented Jul 22, 2016 at 19:34
  • 1
    I used Photoshop and it was so much easier. I have successfully changed the color of my icon to the color that I want. Thanks for your help. If you'll write this out as an answer, I'll accept it. Commented Jul 22, 2016 at 19:38

2 Answers 2

4

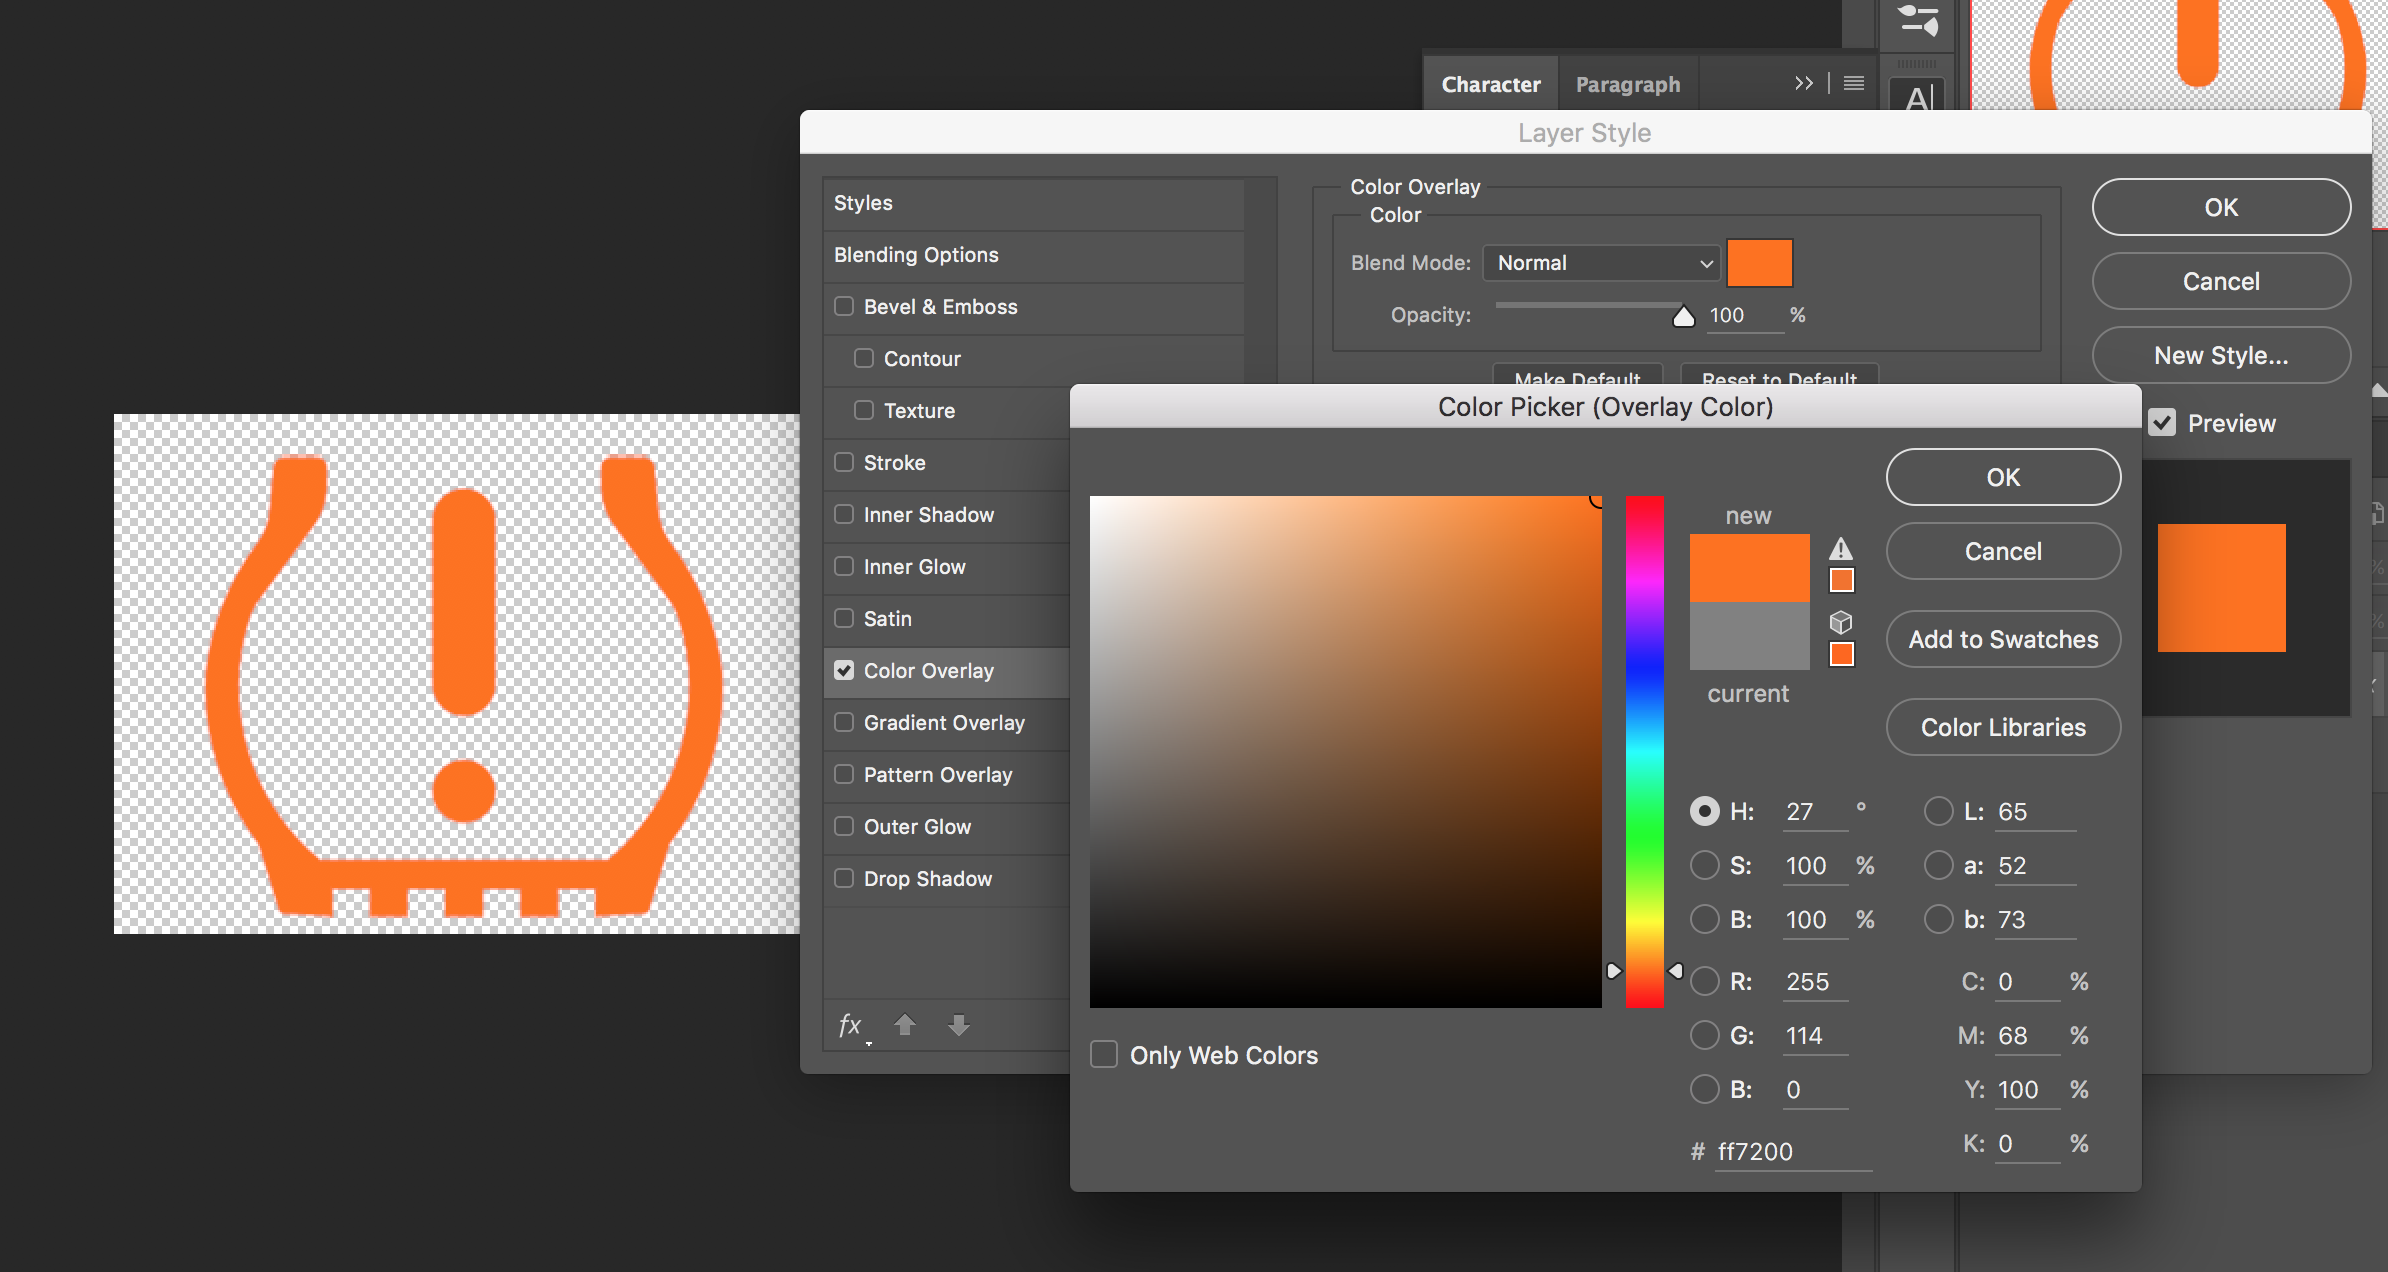
1) Open your PNG in Photoshop, not Illustrator
2) Double-click on your layer, to apply a style
3) Select Color Overlay
4) Choose your color and click OK

image

3

A bit late to the party, but there is a way to change the fill color for this PNG in Illustrator. I use CC, so the controls may be a bit different from what you see, but in case it helps, here is what I would use.

  1. "Object" » "Image Trace" » "Make"
  2. If needed, go to the "Image Trace Panel" to adjust things until you have what you need. The first thing I'd recommend is checking the "Preview" box, then selecting a "View" option that shows outlines. For this specific file, picking "Ignore White" may also help. There should be functional equivalents for these in CS6.
  3. When the outlines are in the right place, close the panel then go "Object" » "Image Trace" » "Expand"
  4. Check your Layers panel. You should now have a Group with your new outlines. Go into the Group and select the items whose color you'd like to change.
  5. Your normal controls for changing fill and outline color should show up (if not, make sure you are using the Selection Tool).

As other folks have said, Photoshop is definitely easier, but I'll just leave this here in case anyone else wants an Illustrator option~

Your Answer

By clicking “Post Your Answer”, you agree to our terms of service and acknowledge you have read our privacy policy.

Not the answer you're looking for? Browse other questions tagged or ask your own question.