2

I am designing for a friend who has an established graphic profile that she intends to keep. An important aspect of that is swooshes like these: enter image description here
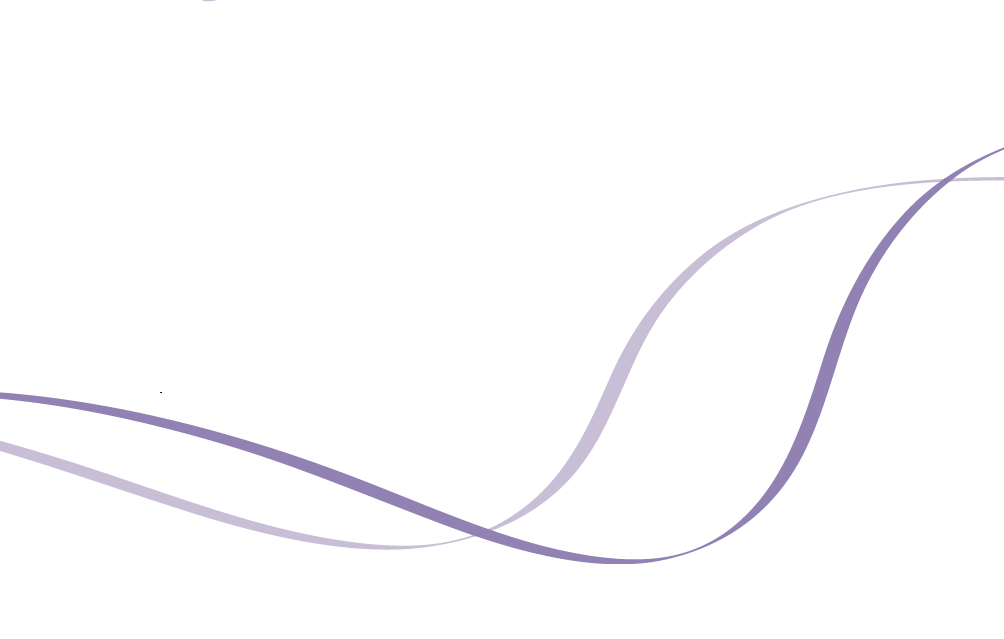
She is used to having several of these with variations. However, I am not sure how to make them. They have a distinctive look, and I am too much of a novice to replicate that. I need advice now. I assume some brush has been used and this is not that hard, but I am not sure what brush can make a swoosh that is flat in one direction and thick in a different. Here's another example

enter image description here

4 Answers 4

4

You can use the calligraphic brushes that come with Illustrator (you can get to them from the Brushes panel menu). Or you can create your own calligraphic brushes:

enter image description here

If you have a tablet with a pen you can create a new brush or set an existing brush to use the pen pressure to control the size (or angle or roundness) of the brush, which may help:

enter image description here

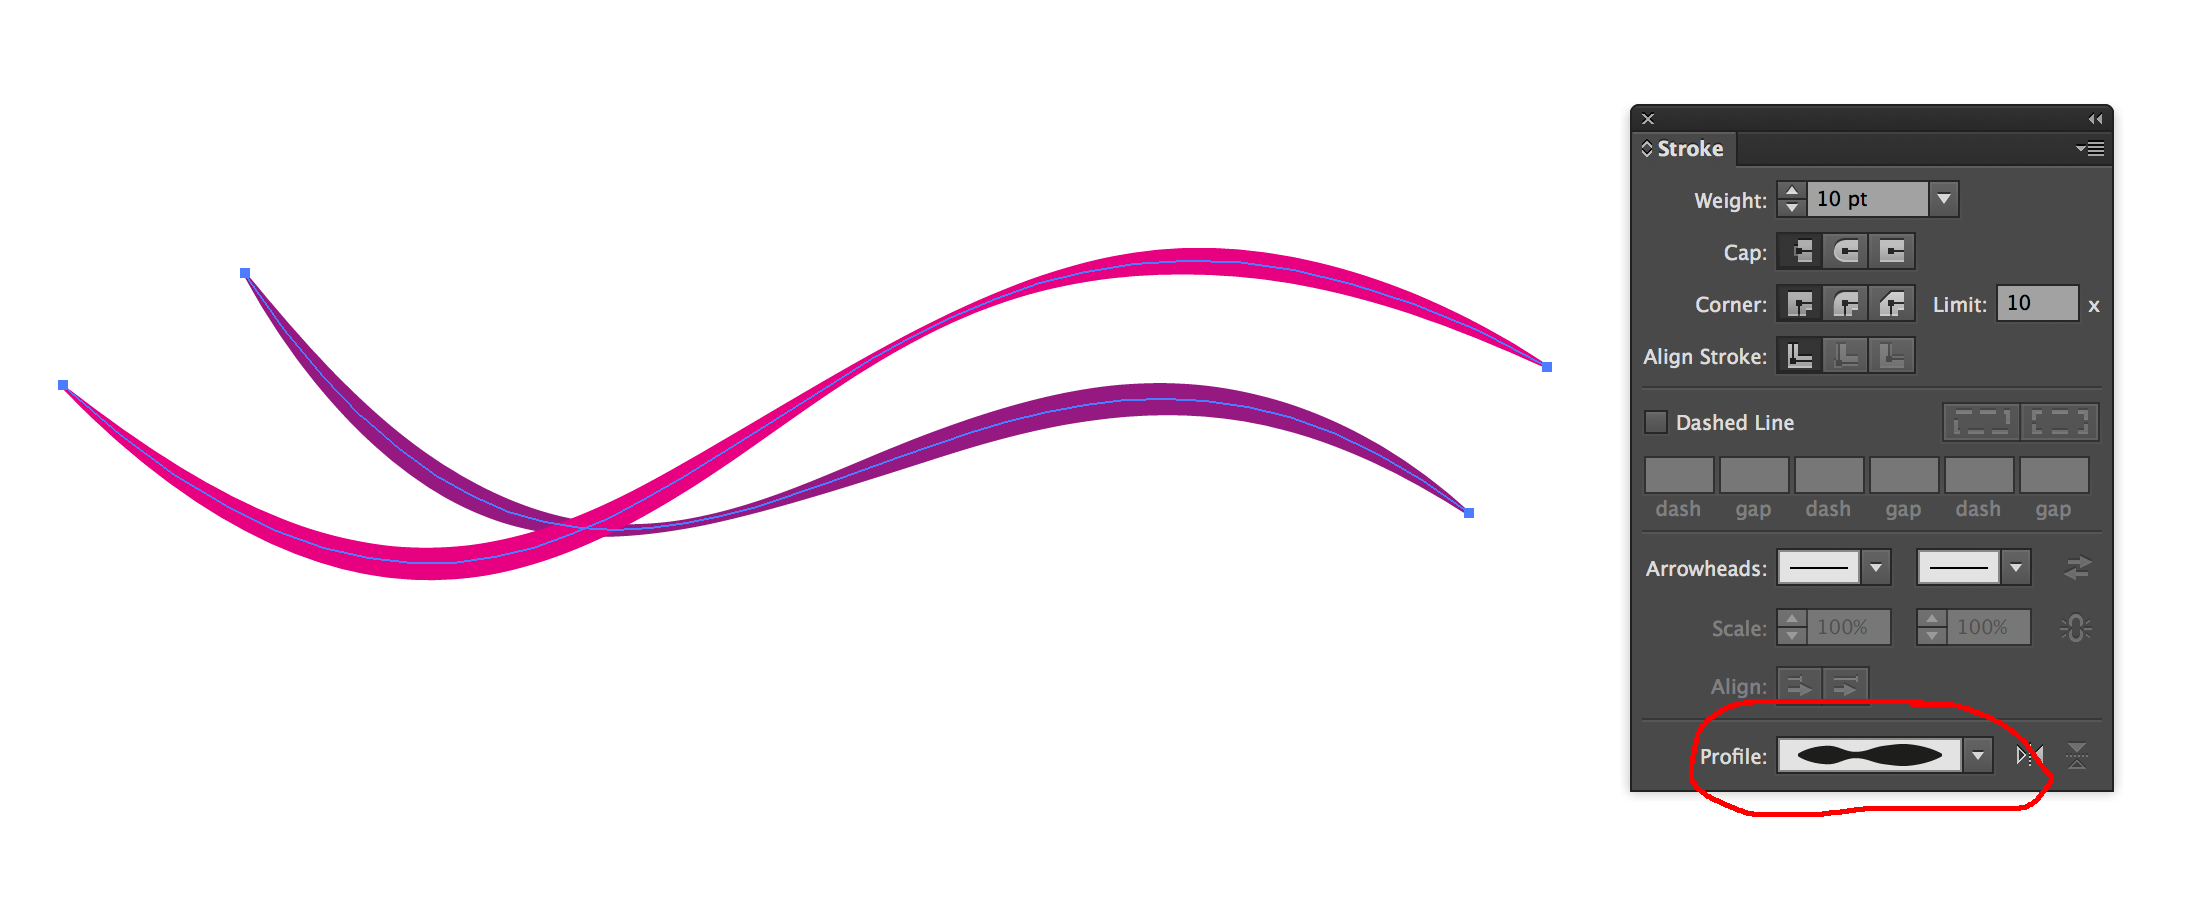
You can also achieve something similar with width profiles:

enter image description here

Or you can manually adjust your strokes with the Width Tool:

enter image description here

3

brush can make a swoosh that is flat in one direction and thick in a different

The best answer is that is not a brush. It's pen. Calligraphy pen to be exact. Found in illustrator under Brushes > brush library > artistic > Calligraphic. You just have to experiment with the existing ones or create your own.

But are you really sure you want to take over that design job?

1
  • I just realized I phrased that very poorly. My friend owns the company. She had a different designer earlier, but now she wants me to do the designs for her.
    – Avatrin
    Commented Mar 1, 2017 at 13:48
2

For Inkscape, I suggest the Power Stroke live path effect, rather than the calligraphy tool.

  1. Draw a line with the Bezier tool. (Don't deselect it!)
  2. Click on Path menu / Path effects. The Path Effects window will open.
  3. In the Path Effects window, click the + sign near the bottom and select Power Stroke from the list that pops up. This will add some pink nodes to your line.
  4. Press F2 to use the node tool, then drag the pink nodes to change the thickness at various points along the line. You can change the style of the start and end points in the Path Effects window, for example set Start cap and End cap to 'zero width' in the drop down box. This gives a line which tapers at both ends. If you need more nodes, press Ctrl and click on an existing pink node. This will create a new one which you drag to where you need it.

Inkscape power stroke example

I made a little video quickly that shows the kind of thing you can do with it. May not be the best looking swooshes you'll ever see, but it shows how easy it is to work with.

https://youtu.be/xuhytmNCngg

1

In Inkscape, there is a calligraphy tool too. If you happen to have a pen, and experiment with the settings, you will find out how to produce smooth lines with fast sketches.

With the mouse, it is harder to get those fluid movements, but it is possible.

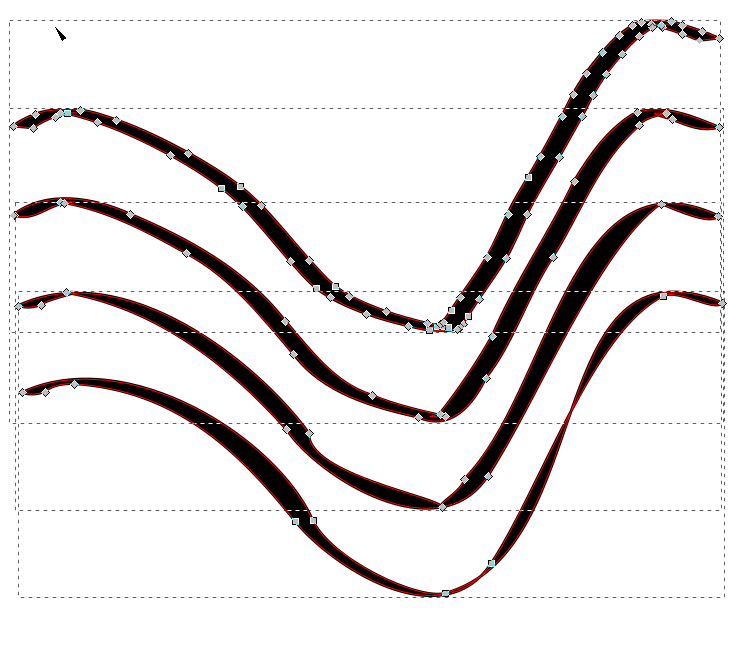
  • Draw your line with the calligraphy tool.
  • In node view, hit Ctrl-L multiple times to reduce the number of nodes, describing your path.
  • Eliminate more nodes individually by select & delete.
  • Move some of the nodes to increase the calligraphy effect and use the node rounding command to correct corners.

4 steps smoothing a calligraphy line, drawn by mouse

Your Answer

By clicking “Post Your Answer”, you agree to our terms of service and acknowledge you have read our privacy policy.

Not the answer you're looking for? Browse other questions tagged or ask your own question.