5

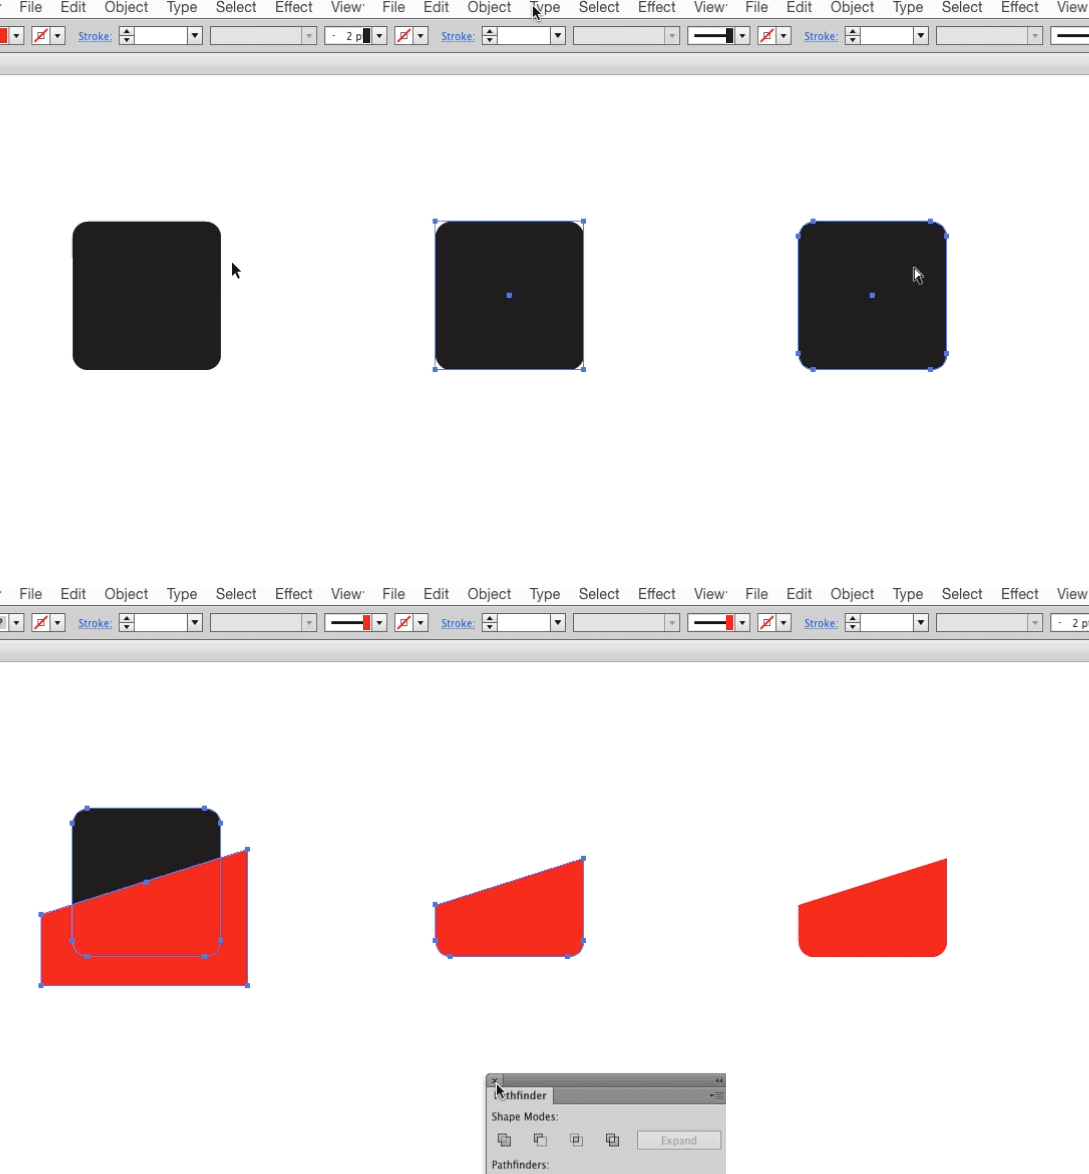
I have a rounded square which I created by using Stylize/Round Corners effect on a standard square as recommended here. Don't worry about the other three squares, we're just looking at the left hand one!

Now I want to take a portion, (roughly but not exactly half) of that square and make it a darker colour.

To do this I am drawing a shape with the pen tool, diving the object, then shading I would shade the newly created shape darker, but of course, when I divide it, the rounded corners "pop" onto the new portion!

I am pretty sure my workflow is completely wrong. I am NOT an Illustrator pro :(

Guidance appreciated!


Step 1 - Starting here: enter image description here

Step 2 - I draw the darker area as a kind of "mask"enter image description here

Step 3 - I divide so I can have a piece of square to shade darker, but rats! I am sunk all ways round. I can't even make the darker portion have rounded corners as I only need two!

enter image description here

3 Answers 3

5

Use Object > Expand Appearance on the rounded shape before performing Pathfinder operations. This will "bake in" the effect and make the rounding actually part of the shape rather than an effect. Note the change in the path after using the Expand Appearance command.

enter image description here

This does mean the rounding is no longer live and adjustable. Anchors and Beziers are created and the rounding becomes a standard path.

7
  • Thanks Metis that's exactly it. In fact shortly after the question I started to think that id I could "create layer" the effect (I do consider myself proficient with Photoshop, and that's the terminology there) then it would work! "Expand appearance" is a useful concept for me to work with, so thanks again. Commented May 16, 2017 at 17:05
  • When I divide a figure in two like this, I prefer having the original object at the bottom with a cut-out half on top. If I only use the two cut-out halves I sometimes get problems with trapping. The RIP simply can't detect that the two objects (colors) are touching and the trapping comes and goes along the intersection. At first I thought it was only due to small inaccuracies from Pathfinder, but I have seen the problems with seemingly perfectly aligned rectangles too. So I always try to make objects overlap instead of just touching. (This is all much easier with inDesign's "Paste Into" imho)
    – Wolff
    Commented May 16, 2017 at 19:14
  • @Wolff I also tend to copy the original shape.. then perform Pathfinder operations on the copy, then reposition Pathfinder results on top of the original. So I "stack" objects as well rather than merely aligning them.
    – Scott
    Commented May 16, 2017 at 19:24
  • @Metis do you know if this bad trapping behavior I'm talking about is a "bug" or is overlapping a prerequisite for trapping? I am very fanatic about overlapping everything. I make offset plates for my own and customers' designs and seeing everything up close kind of gives me too much knowledge :-). Even strokes on the inside of images can give problems because the stroke is not actually overlapping the edge of the image which can result in the image appearing outside the stroke!
    – Wolff
    Commented May 16, 2017 at 19:46
  • @Wolff Joojaa does a great job of explaining here: graphicdesign.stackexchange.com/questions/65058/… With knockouts you can get antialiasing gaps, which is what trapping is supposed to address. It's been quite a while since I've had to manually trap a file, but in the old days, we used to have to expand stokes or add additional strokes manually in AI to account for trapping issues. Or just remove knockouts entirely if feasible. I've not really been in a position to worry about trapping in many years. So I can't say if things have improved.
    – Scott
    Commented May 16, 2017 at 19:53
2

That is actually quite easy! The solution is using a "Clipping Path". There are several ways to do this. Here is one of them:

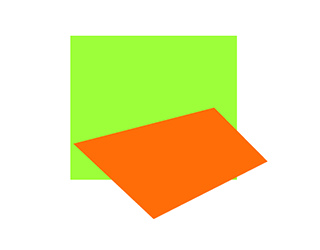
First draw the shapes that goes inside the rounded rectangle:

clipping path 1

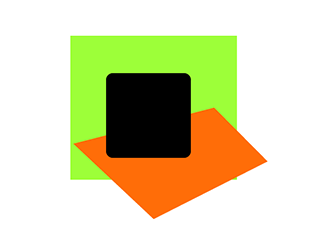
Then draw the rounded rectangle - the outer shape which will be used as a clipping path:

clipping path 2

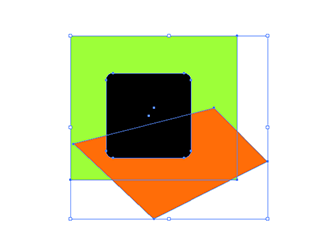
Select all the shapes:

clipping path 3

Choose Object/Clipping Mask/Make and that's it:

clipping path 4

0
2

I realise I am too late with this answer, but since I already worked on it, I'll post it here anyway.

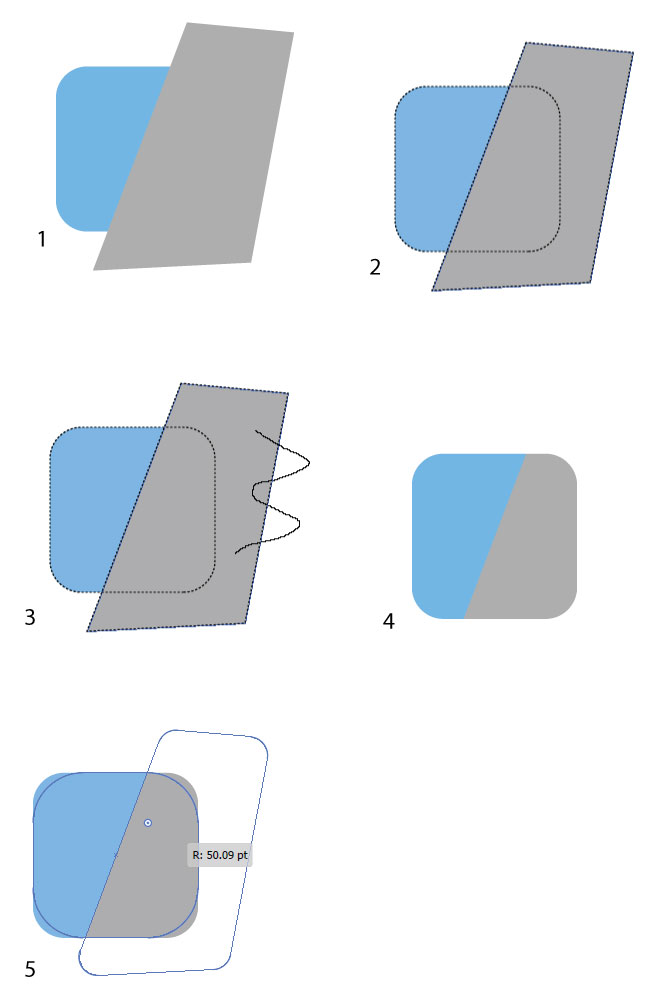
There are many ways to skin a cat so to speak. Illustrator is an amazing tool, and if you have access to the lastest CC 2017 version you could use the new Shaper Tool to create such an edit.

Here are the steps.

  1. Draw your rounded rectangle using the rounded rectangle tool (don't apply an effect to round the corners). Then draw the grey shape with the Pen Tool.

  2. Select the Shaper Tool in the tool box, mouse over the overlapping images and a dotted line will appear round them.

  3. With the Shaper tool draw a wavy line over the edge of the part of the shape you want to remove.

  4. The outer grey part is removed.

  5. The beauty of this method is that the Live Corners remain live, and can be re-rounded later.

Illustrated Steps using the Shaper Tool

1
  • That's really excellent, thanks very much! I am sure other people will fine that educative as well. Commented May 16, 2017 at 17:49

Your Answer

By clicking “Post Your Answer”, you agree to our terms of service and acknowledge you have read our privacy policy.

Not the answer you're looking for? Browse other questions tagged or ask your own question.