3

I'd like to create a brush of some kind in Adobe Illustrator that I can use to create the effect of a monster truck tire-track in the mud.

I'm close to what I want but I cannot get the pattern to be more "dense".

Generally speaking a typical monster truck tire has a tread pattern of two straight lines angled almost like a chevron, but not quite touching in the middle of the wheel. I have made a simple group of two black paths grouped together...
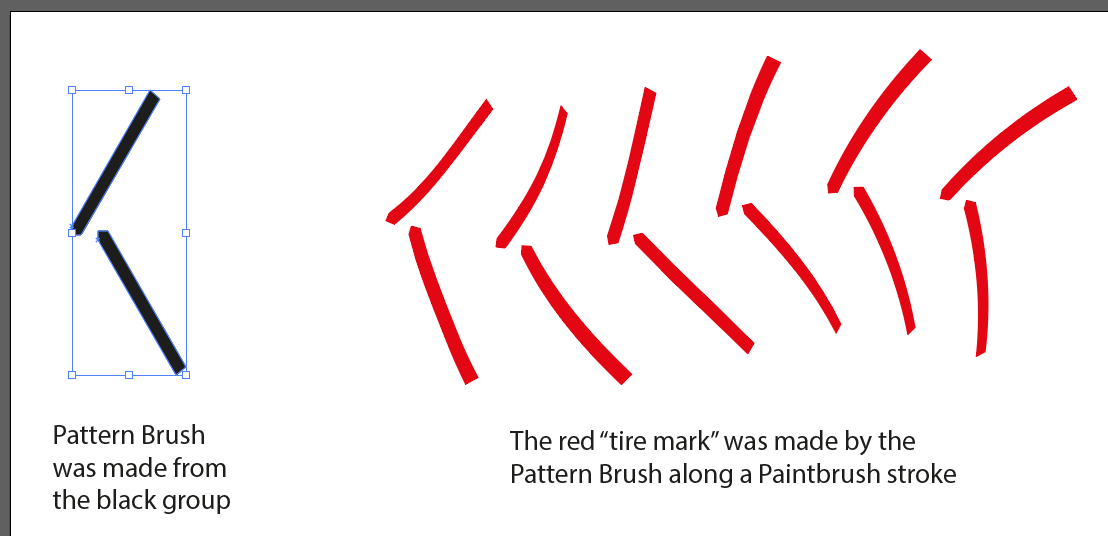
enter image description here This is almost perfect but I want to double the amount of "chevrons" for any given distance along the path (you can see 6 chevrons in the red path here, but I wanted at least 12 chevrons ideally). This would mean that the pattern brush overlaps itself by 50% but I cannot figure out a way to do that.

The scale slider in the Pattern Brush config menu bottoms out at 0% and I think I'd need -50% to make this work.

Is there a way to force Illustrator to draw double the number of red chevrons, effectively overlapping the brush on itself?

(Note: I'm only interested in slow, smooth, sweeping strokes. This doesn't have to work for 90 degree sharp turns)

2 Answers 2

4

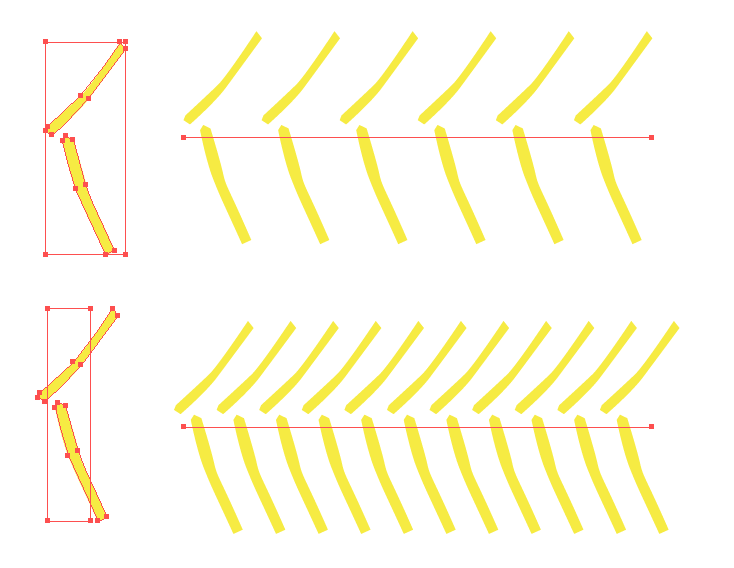
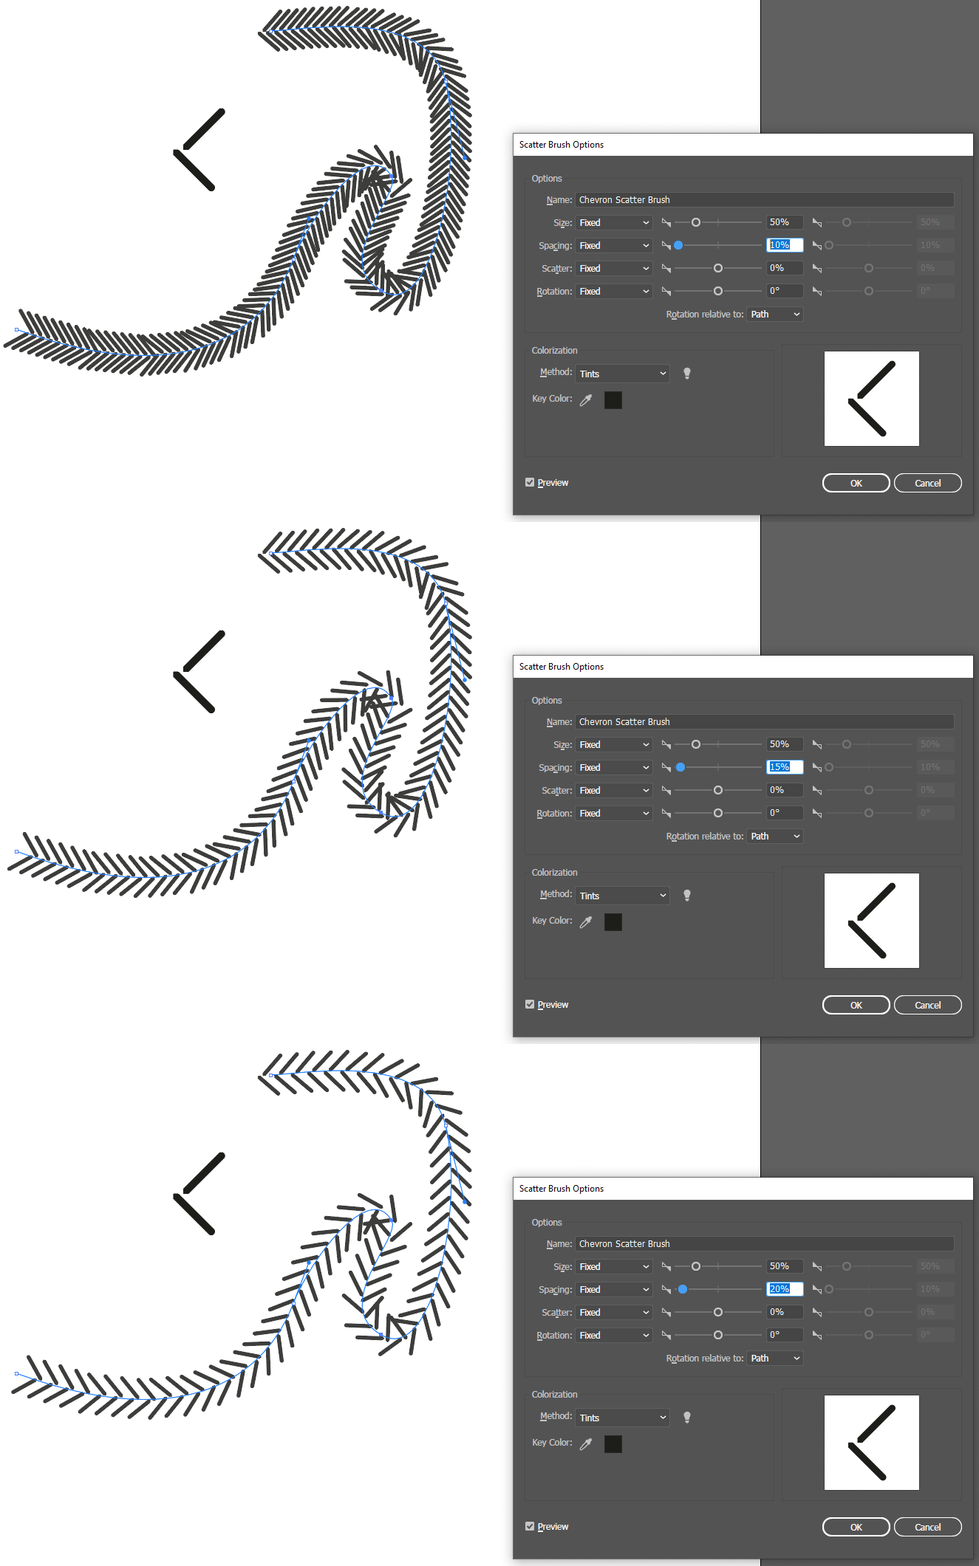
Instead of a pattern brush, you could create a scatter brush. With a scatter brush, you can precisely control the spacing between the chevrons. Be sure to set "Rotation relative to:" as "path". enter image description here

1
  • +1, that's just what I needed, many thanks. I did play with scatter brushes the other day (to create randomised "ocean wave" icons like those you might see on a pirate's map, along a shoreline), but I never made the connection that scattering could be set to zero to create an orderly line of shapes. That is awesome!
    – Wossname
    Commented Jan 24, 2020 at 20:39
4

For your needs the scatter brush suggestion may work. Be aware though that scatter brushes place each instance independently, You won't get the "skewing" and "distortion" on curves the same way a pattern brush distorts. So, it really depends upon the desired artwork.


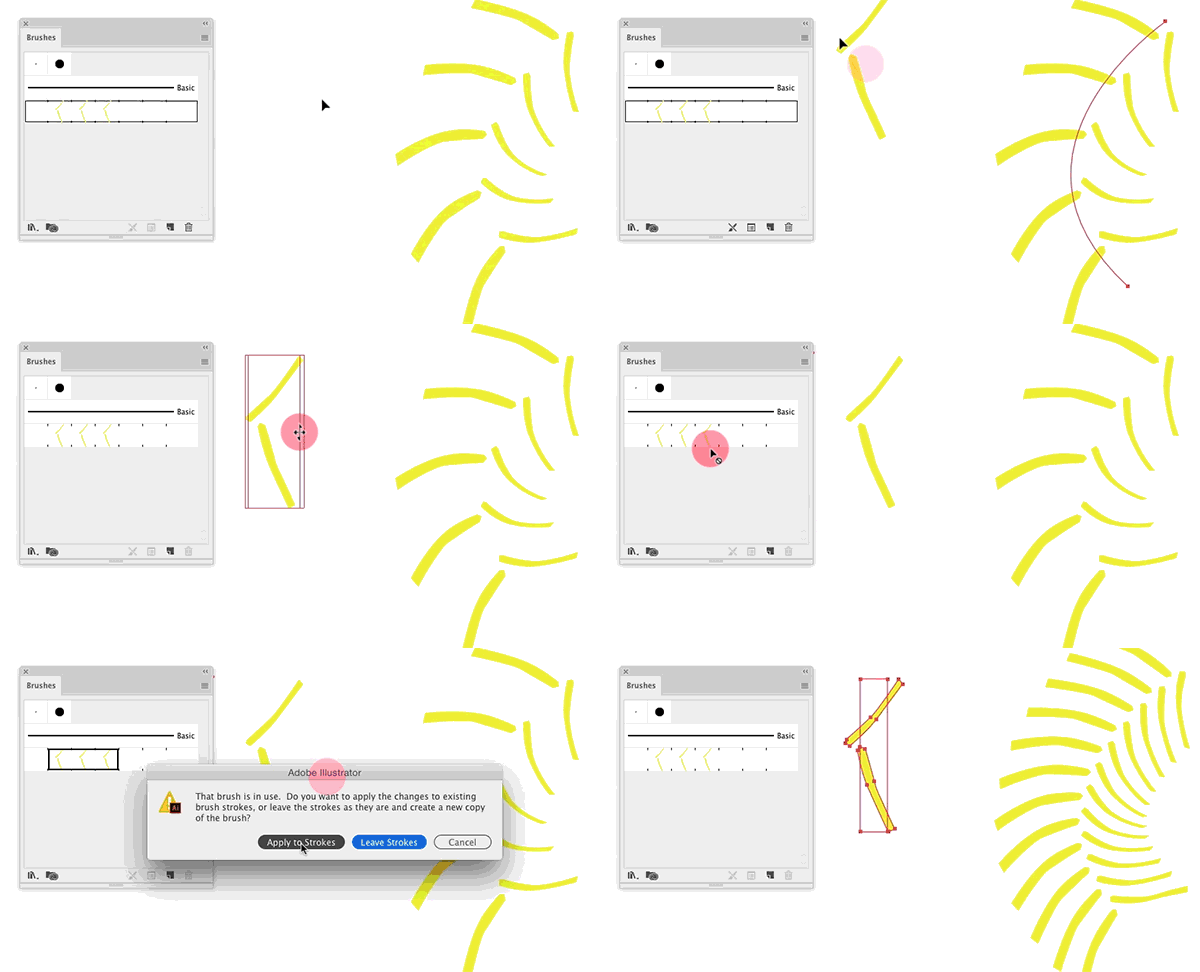
Adjust the defining rectangle for the pattern.

  • Drag the Pattern Brush artwork to the artboard.
  • Select the defining (hollow) rectangle and change its width.
  • Select this new art and its hollow rectangle, hold down the Option/Alt key and drag it to the Brushes Panel on top of the existing brush artwork. When you see a thick black outline on the brush in the panel, then let go.

This replaces the existing brush definition with the new art.

The more narrow rectangle will cause anything outside it to "bleed" into the next iteration of the pattern, or "overlap".

enter image description here

Here's an animation in AICC 2017 showing the steps outlined above.

enter image description here

or....


Adjust the pattern.

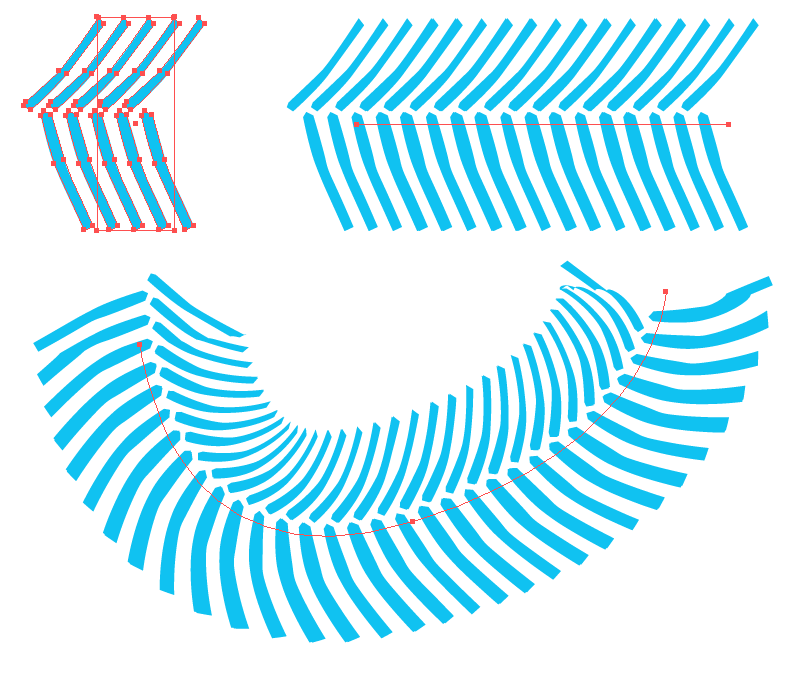
If you want more chevrons, create the pattern with the proper amount. One instance of a pattern is often not sufficient.

enter image description here

7
  • This does look like it produces a beautiful effect (better than the scatter brush), it seems to be able to create more fluid transitions between instances of the brush. But I'm afraid I couldn't replicate your steps properly, dragging the pattern brush back to the artboard did not resemble your example at all (hard to describe without a screenshot which I can't provide here). The pattern brush appears in the Brush dialog as a set of squares, dragging that back to the artboard just brings those squares back - it doesn't look like it's a coherent thing to do. I'm baffled tbh.
    – Wossname
    Commented Jan 24, 2020 at 20:57
  • Hi @Wossname what versions of AI are you using? Thing may have changed in newer versions.. I can check to a degree.
    – Scott
    Commented Jan 24, 2020 at 20:58
  • 24.0.2 (64-bit). I'm brand new to this software, I'm on the monthly subscription. :) I'd love to get your method working, that last blue path you showed looks like a fish skeleton - really lovely pattern.
    – Wossname
    Commented Jan 24, 2020 at 20:59
  • @Wossname Unfortunately the closest I can get is AICC 2017 (21) due to the OS I'm currently booted into. But I did add an animation showing the steps. If your brush has multiple parts, then you will get squares for each part. Merely alter the section you want to change, and drag that back to it's location in the Brushes panel. They may have altered things slightly in the last couple releases. Sorry, I can't verify that at this time.
    – Scott
    Commented Jan 24, 2020 at 21:12
  • I'd say that the GUI has changed a lot between our respective versions. I can only select the entire brush row at once (whereas you appear to be able to grab a three-square-wide subset of your brush and drag it back to the brush line).
    – Wossname
    Commented Jan 24, 2020 at 21:20

Your Answer

By clicking “Post Your Answer”, you agree to our terms of service and acknowledge you have read our privacy policy.

Not the answer you're looking for? Browse other questions tagged or ask your own question.