6

In a few operations, how can I crop closed paths and have the result be a set of open paths? It's important that the solution be as few operations as possible, and not rely on point and click. (I'm looking for something scalable to perform operations on very complex map images.)

Someone asked the same question here: https://www.reddit.com/r/Inkscape/comments/75xjfa/intersection_with_open_paths_or_equivalent/

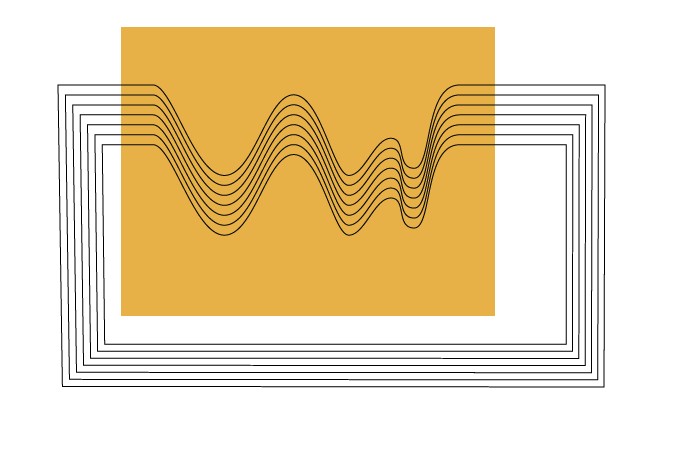
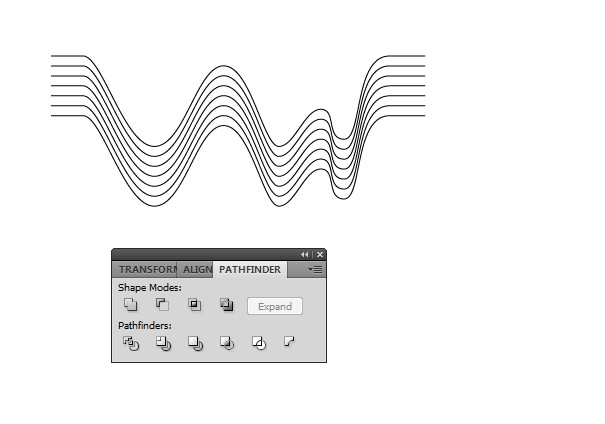
Here's a very simple example of the objects I'm starting with: start
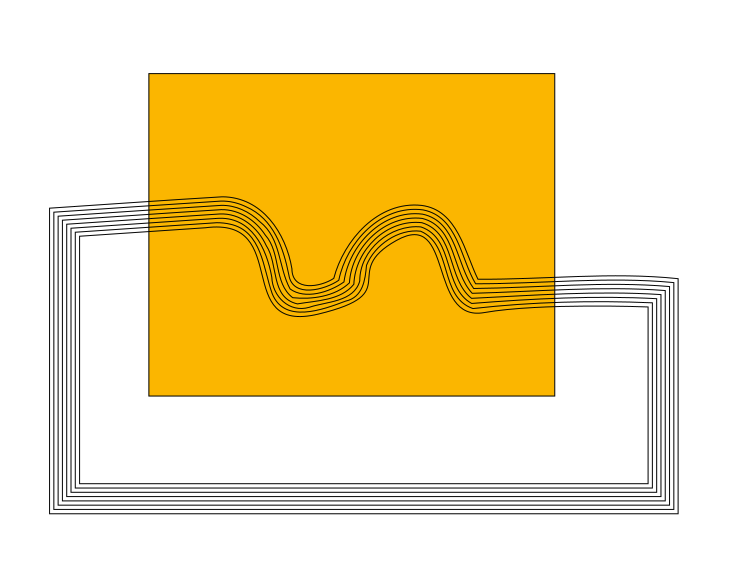
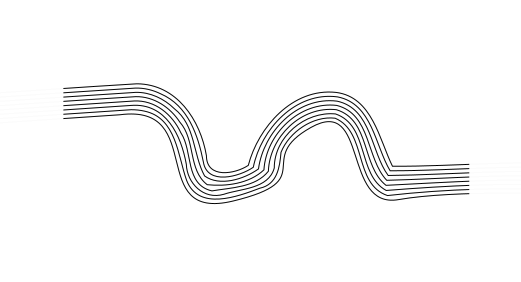
The orange area is a closed path that I want to crop to, and the black lines are a bunch of closed paths that I want to be cropped. This is what I want the result to look like:

end

The lines must be open in the final result. That is, each line is just that - a line with no fill. (Ideally, they'd keep the stroke I've set initially, but not required.)

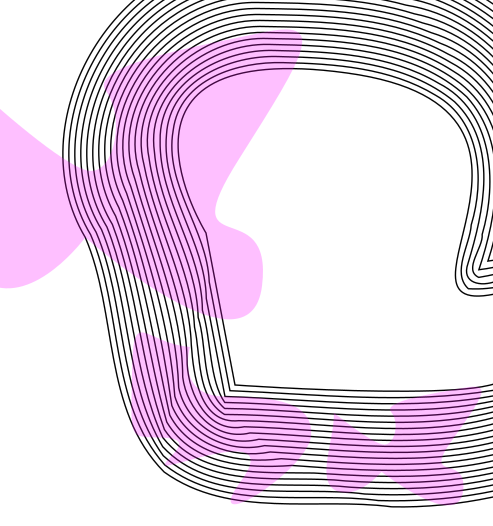
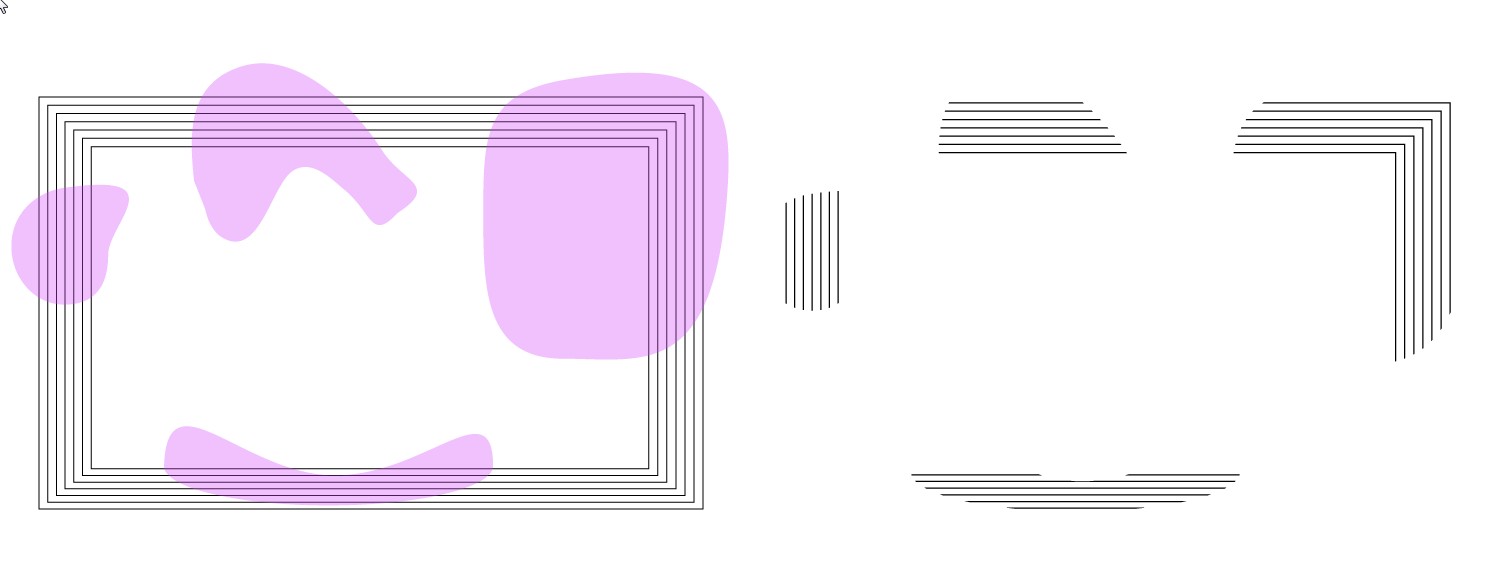
It's important that this solution applies to much more complex scenarios too. For example, I'd want to crop the lines in this example down to the purple areas:

more complex example

The images I'm working with are extremely large, and can have thousands of islands to crop out. (Point and click with a mouse to delete paths won't work...)

I'm open to using any software available, but I'd prefer something open source / scriptable. Illustrator or Inkscape would do.

3
  • Well you could write your own intersection routines. Cad applications also do booleans with open paths unlike graphic tools. So consider testing something like autocad
    – joojaa
    Commented Jun 28, 2020 at 23:03
  • I've considered something like that, but I've not found a specific combination of tools that will do the job. Any suggestions for how it would be done in Autocad at scale? Commented Jun 29, 2020 at 0:41
  • Google for pomax bezier info
    – joojaa
    Commented Jun 30, 2020 at 16:38

4 Answers 4

6

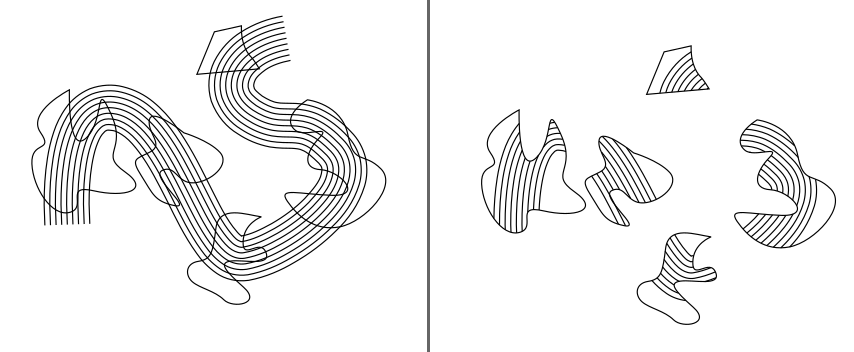
In Inkscape, as long as the curved parallel lines are a compound path, and the squiggly shapes are another compound path on top, then you can use the Path > Cut Path boolean operation. However the operation will consume the upper path, so if you want to keep it, copy it before you do the Cut Path, then Paste in Place after you've done it.

Example, before (left), and after manually deleting the cut paths (right).

enter image description here

13
  • Thanks - this is the closest thing I've found, but unfortunately it's that "manually deleting the cut paths" part that won't work. Is there a way to remove all the cut paths in a single operation? Commented Jun 28, 2020 at 20:01
  • @saucewaffle Sorry I can't think of a way to automate the deletion. Why do you need to do this? Wouldn't it be simpler to make a clipping path?
    – Billy Kerr
    Commented Jun 28, 2020 at 20:17
  • Yeah. A clipping mask definitely produces the visual result I want, but unfortunately the important part is the underlying xml path definitions. Is there a way to “flatten” it into individual open paths? Commented Jun 28, 2020 at 20:36
  • In Illustrator you can expand and crop Clipping Masks @saucewaffle But you'll still need to manually delete things.
    – Scott
    Commented Jun 28, 2020 at 20:56
  • @saucewaffle - No, you can't flatten it into individual paths. Why do XML path definitions matter? Is this not for a graphic? You still haven't said why you need this functionality.
    – Billy Kerr
    Commented Jun 28, 2020 at 21:04
5

One (Illustrator) method...

With the art you have...

  • Select all
  • Grab the Shape Builder Tool
  • Hold Down the Option/Alt key and click-drag across the lines outside the rectangle to remove them

(After question edit) -- This will work for all your shapes. Just select all and then Option-Click-Drag with Shape Builder to remove what you don't want.


Another (Illustrator) method....

  • Move (or copy) the rectangle so it is on top of the paths.

  • Select the lines and this top rectangle.

  • Click the Divide button on the Pathfinder Panel (Window > Pathfinder)

  • Simply delete what you don't want.

4
  • 1
    Unfortunately, the divide function creates closed paths... Commented Jun 28, 2020 at 19:12
  • @saucewaffle Yes it does, but with the Direct Selection tool, you can merely select and delete those end paths leaving original paths. The Shape Builder method is faster (which I edited to add).
    – Scott
    Commented Jun 28, 2020 at 19:14
  • Thanks - you're right that this approach would work, but I realized that I wasn't clear in my question. Something like Shape Builder won't be scaleable for the type of work I'm doing. I'm looking for something that's either a single operation or a combination of 2-3 ish. I've updated the question to clarify this Commented Jun 28, 2020 at 19:31
  • 1
    Well, not everything has a 1 or 2 step processes to get to desired results. I'm afraid I can't offer anything more because I don't know the full breadth of the workflow or desired results.
    – Scott
    Commented Jun 28, 2020 at 19:52
3

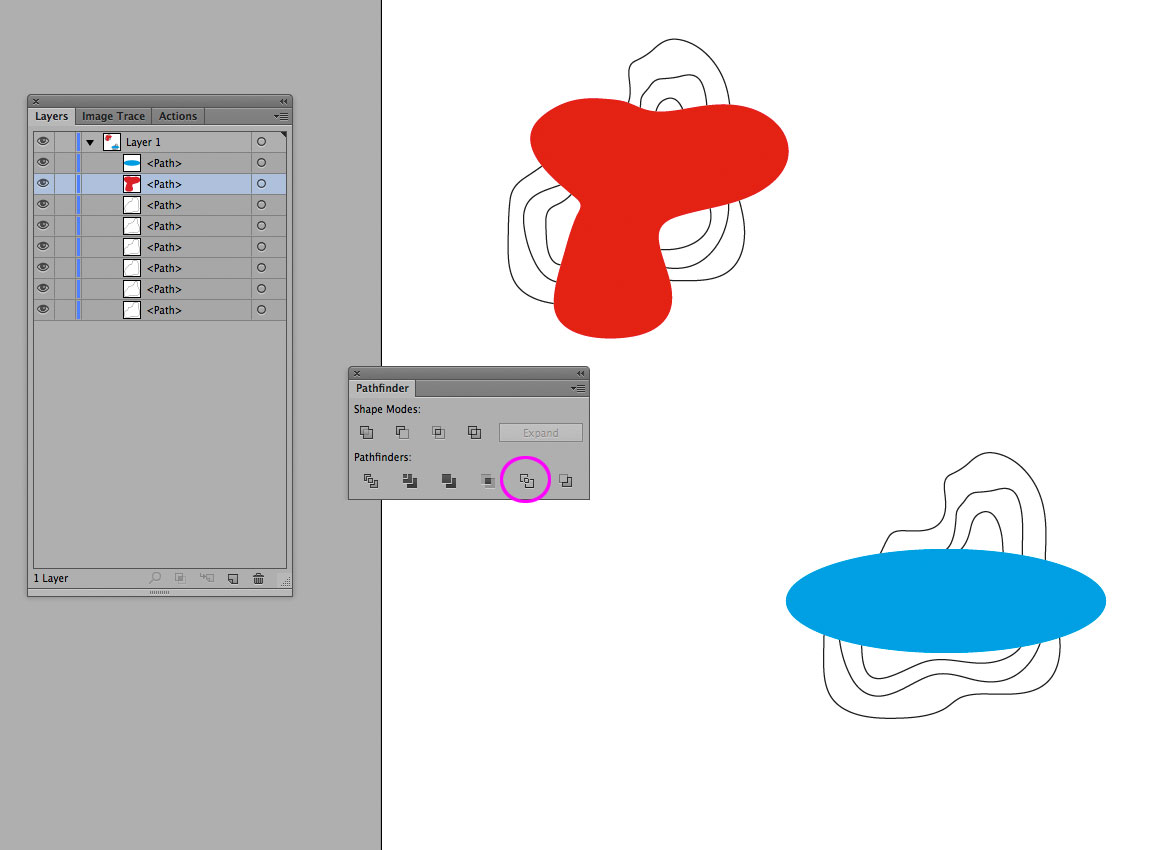
You have this:

enter image description here

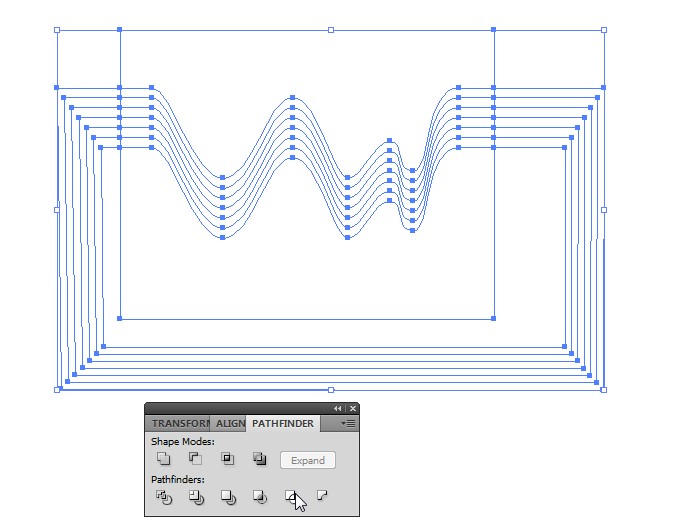
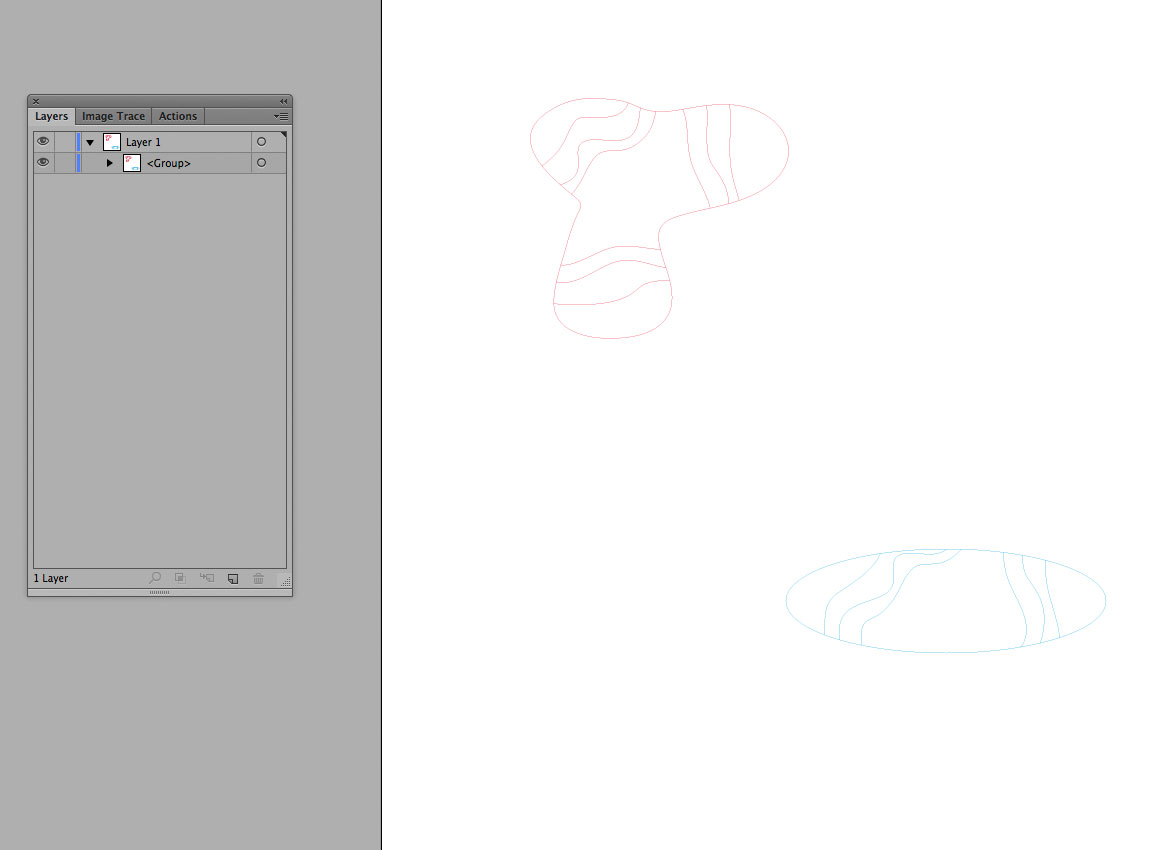
Select all, apply Pathfinder panel's Outline. You get this:

enter image description here

Every path is split at every crossing, all colors are removed and all is grouped.

Ungroup, select the wanted parts and copy them to the clipboard to keep them in safe.

Select all, Delete, Paste in Place the content from the clipboard and insert some stroke color and thickness to get this:

enter image description here

ADD after the question was edited:

The presented method is quite useless if there's hundreds of shapes for the areas which are wanted to stay. In this case I recommend to use them as a clipping mask. Select the colored shapes for ex. by using Select > Same > Fill Color, make an union and use it as a Clipping Mask. It only makes the unwanted parts invisible, the curves between the islands are not deleted. By using a clipping mask one can make the following:

enter image description here

If the intermediate parts of the black curves must be deleted you can expand the black curves by selecting them and applying Object > Path > Stroke to Path. They can be made to one by applying Object > Compound path > Make.

The pink islands can be selected (maybe by layer or the same color) and also combined to compound path.

The visually right result is achieved by applying Pathfinder panel's Intersect. But the result is a group of expanded strokes which are thin closed shapes, not simple open curves.

The same can be got by expanding the curves which have a clipping mask and by applying pathfinder panel's Crop.

If you are a programmer you surely find a way to remove or ignore the unwanted parts of the expanded curves.

5
  • Thanks for the answer, but unfortunately it won't scale for what I need. Any way to perform these operations in bulk as a single operation on a very large file? Commented Jun 28, 2020 at 19:43
  • Alternatively, is there a way to select all the wanted content in a single operation? I’m imaging something like pasting a copy of the crop area shapes and selecting everything within that region. But I’m not aware of any way to do this... Commented Jun 30, 2020 at 13:13
  • Many of us have hoped and still hope something like "select everything below". No easy to use methods have been shown.
    – user82991
    Commented Jun 30, 2020 at 16:33
  • Could you clarify that this is for Adobe, and not Inkscape?
    – chicks
    Commented Jun 30, 2020 at 19:36
  • Ok. But unfortunately I am not sure what is that "this" which should be clarified to be for Adobe, not for Inkscape. My answer is written for Illustrator.
    – user82991
    Commented Jun 30, 2020 at 19:40
2

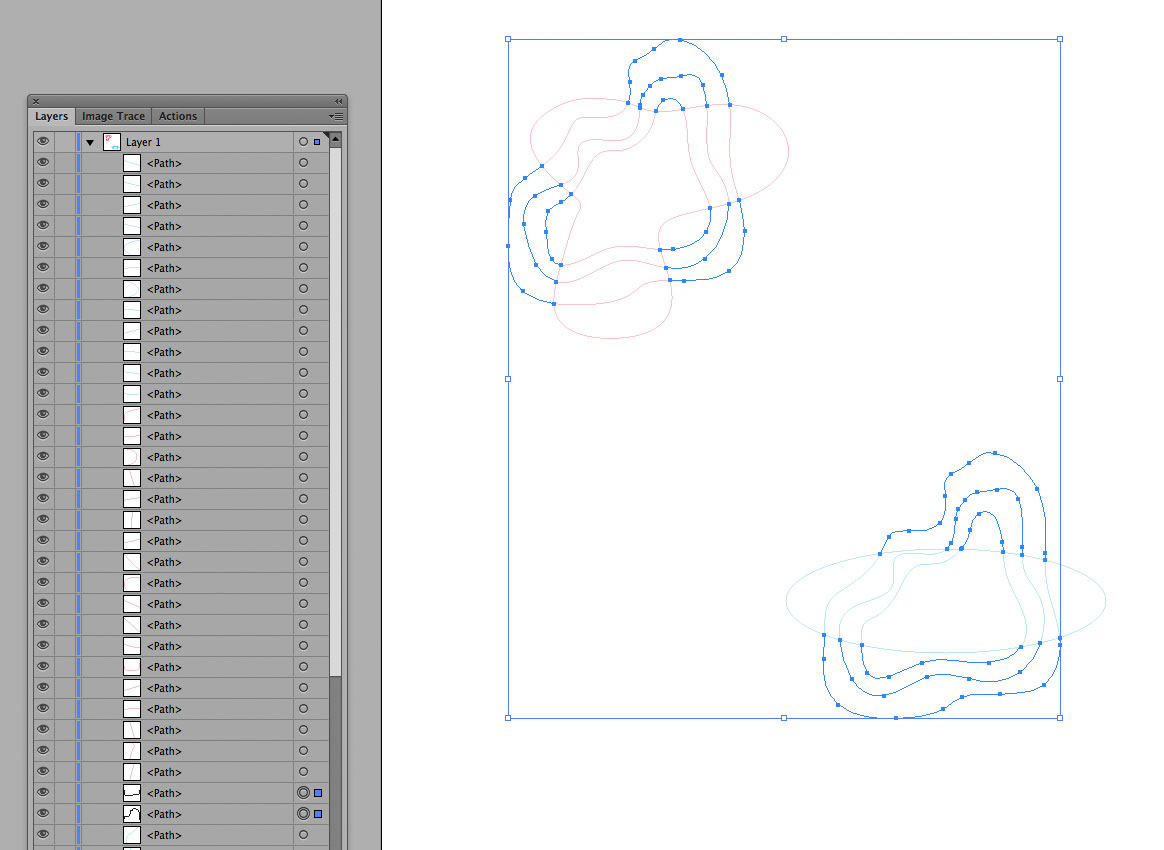
Let's start with this... Notice that shapes used for trimming are in front of objects that need to be trimmed. stage-1 starting situation

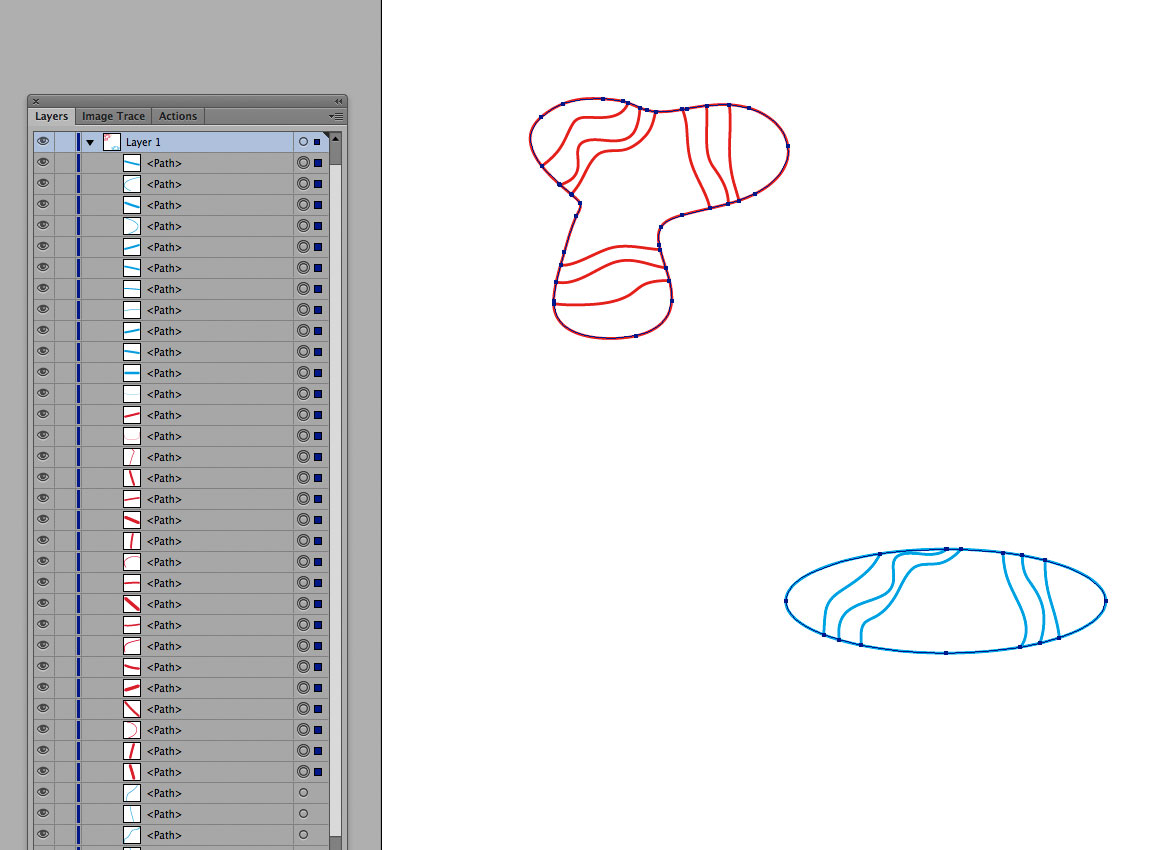
Select All then apply Pathfinder / Outline. stage-2 result of Outline filter

Ungroup everything. Select any line that doesn't have any stroke (those are the lines outside of trimming areas). Then select objects with same stroke color and delete them. stage-3 selected objects without strokes

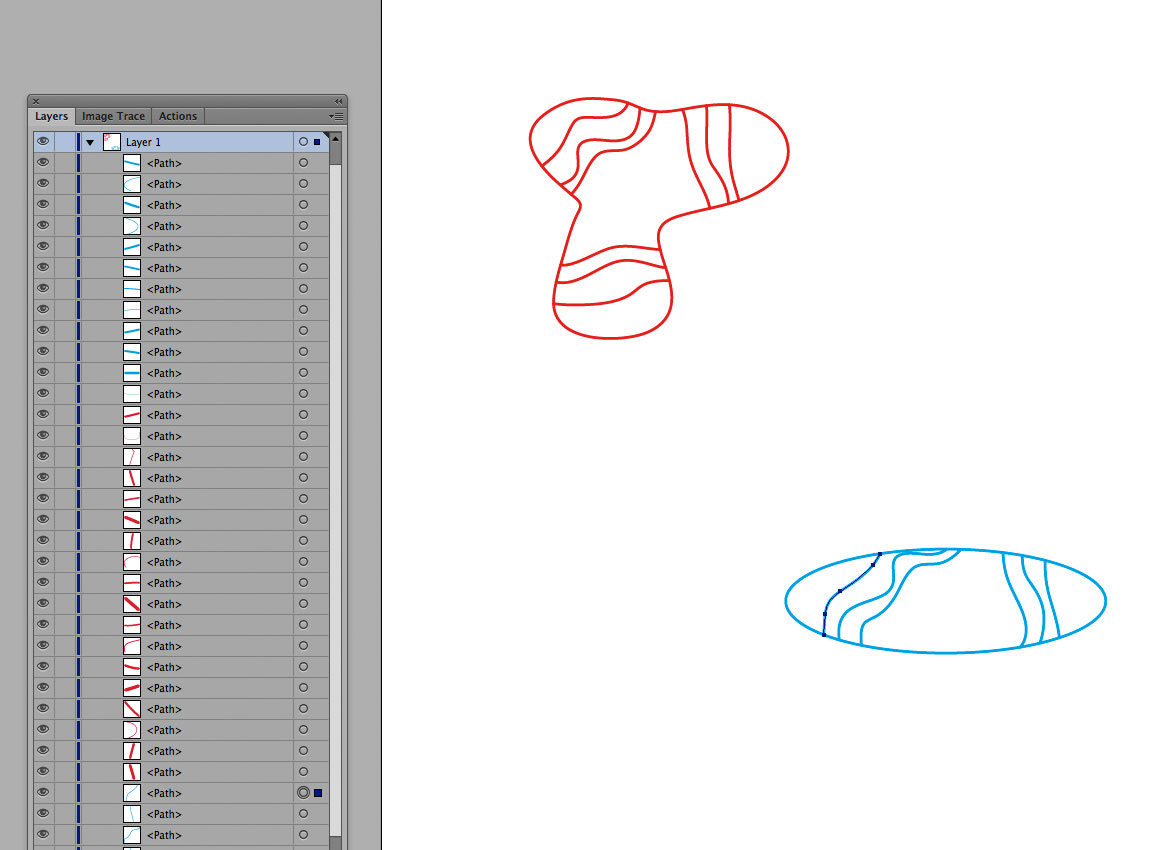
Now, we are left with ALMOST what we need. We should still get rid of the lines of original trimming shapes. Here I have changed the width of the strokes so it is more clear. On the Layers palette we can see that all of these lines are on top of all others. stage-4 selected objects on the edges

We should locate the first one that is not on the edges: stage-5 located first object not on the edge

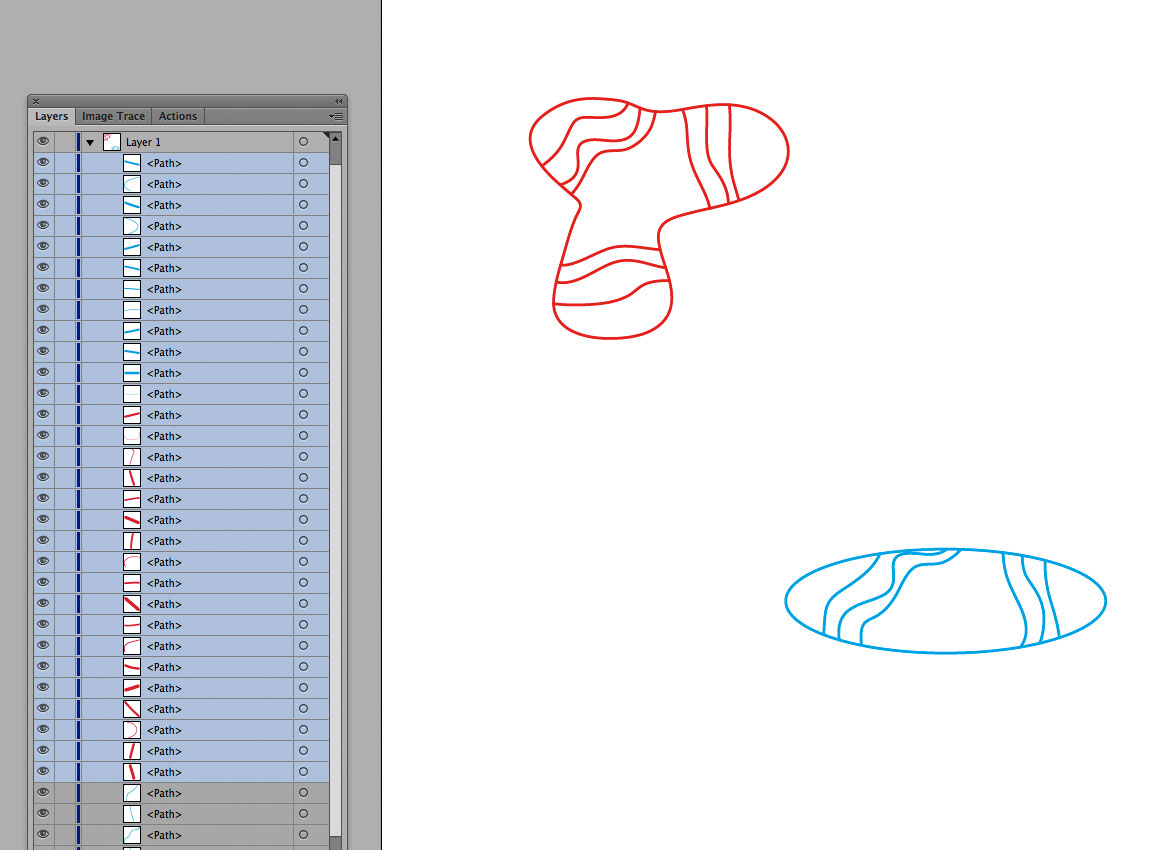
Now, just select (in Layers pallete, using Shift key) all above it and delete them through Layers palette. stage-6 objects above it selected in Layers pallete

1
  • Amazing!!! I didn't realize that the top items in the stack were the outlines! Commented Jul 3, 2020 at 0:12

Your Answer

By clicking “Post Your Answer”, you agree to our terms of service and acknowledge you have read our privacy policy.

Not the answer you're looking for? Browse other questions tagged or ask your own question.