0

I have extracted texture files from a game that I intend to use in Unity. In doing so, I have one texture map labeled "Multi" that is intended to be overlaid on top of the Diffuse texture. Problem is, I have found few details about "Multi" texture maps online, so I decided I would manually overlay it onto the Diffuse texture itself.

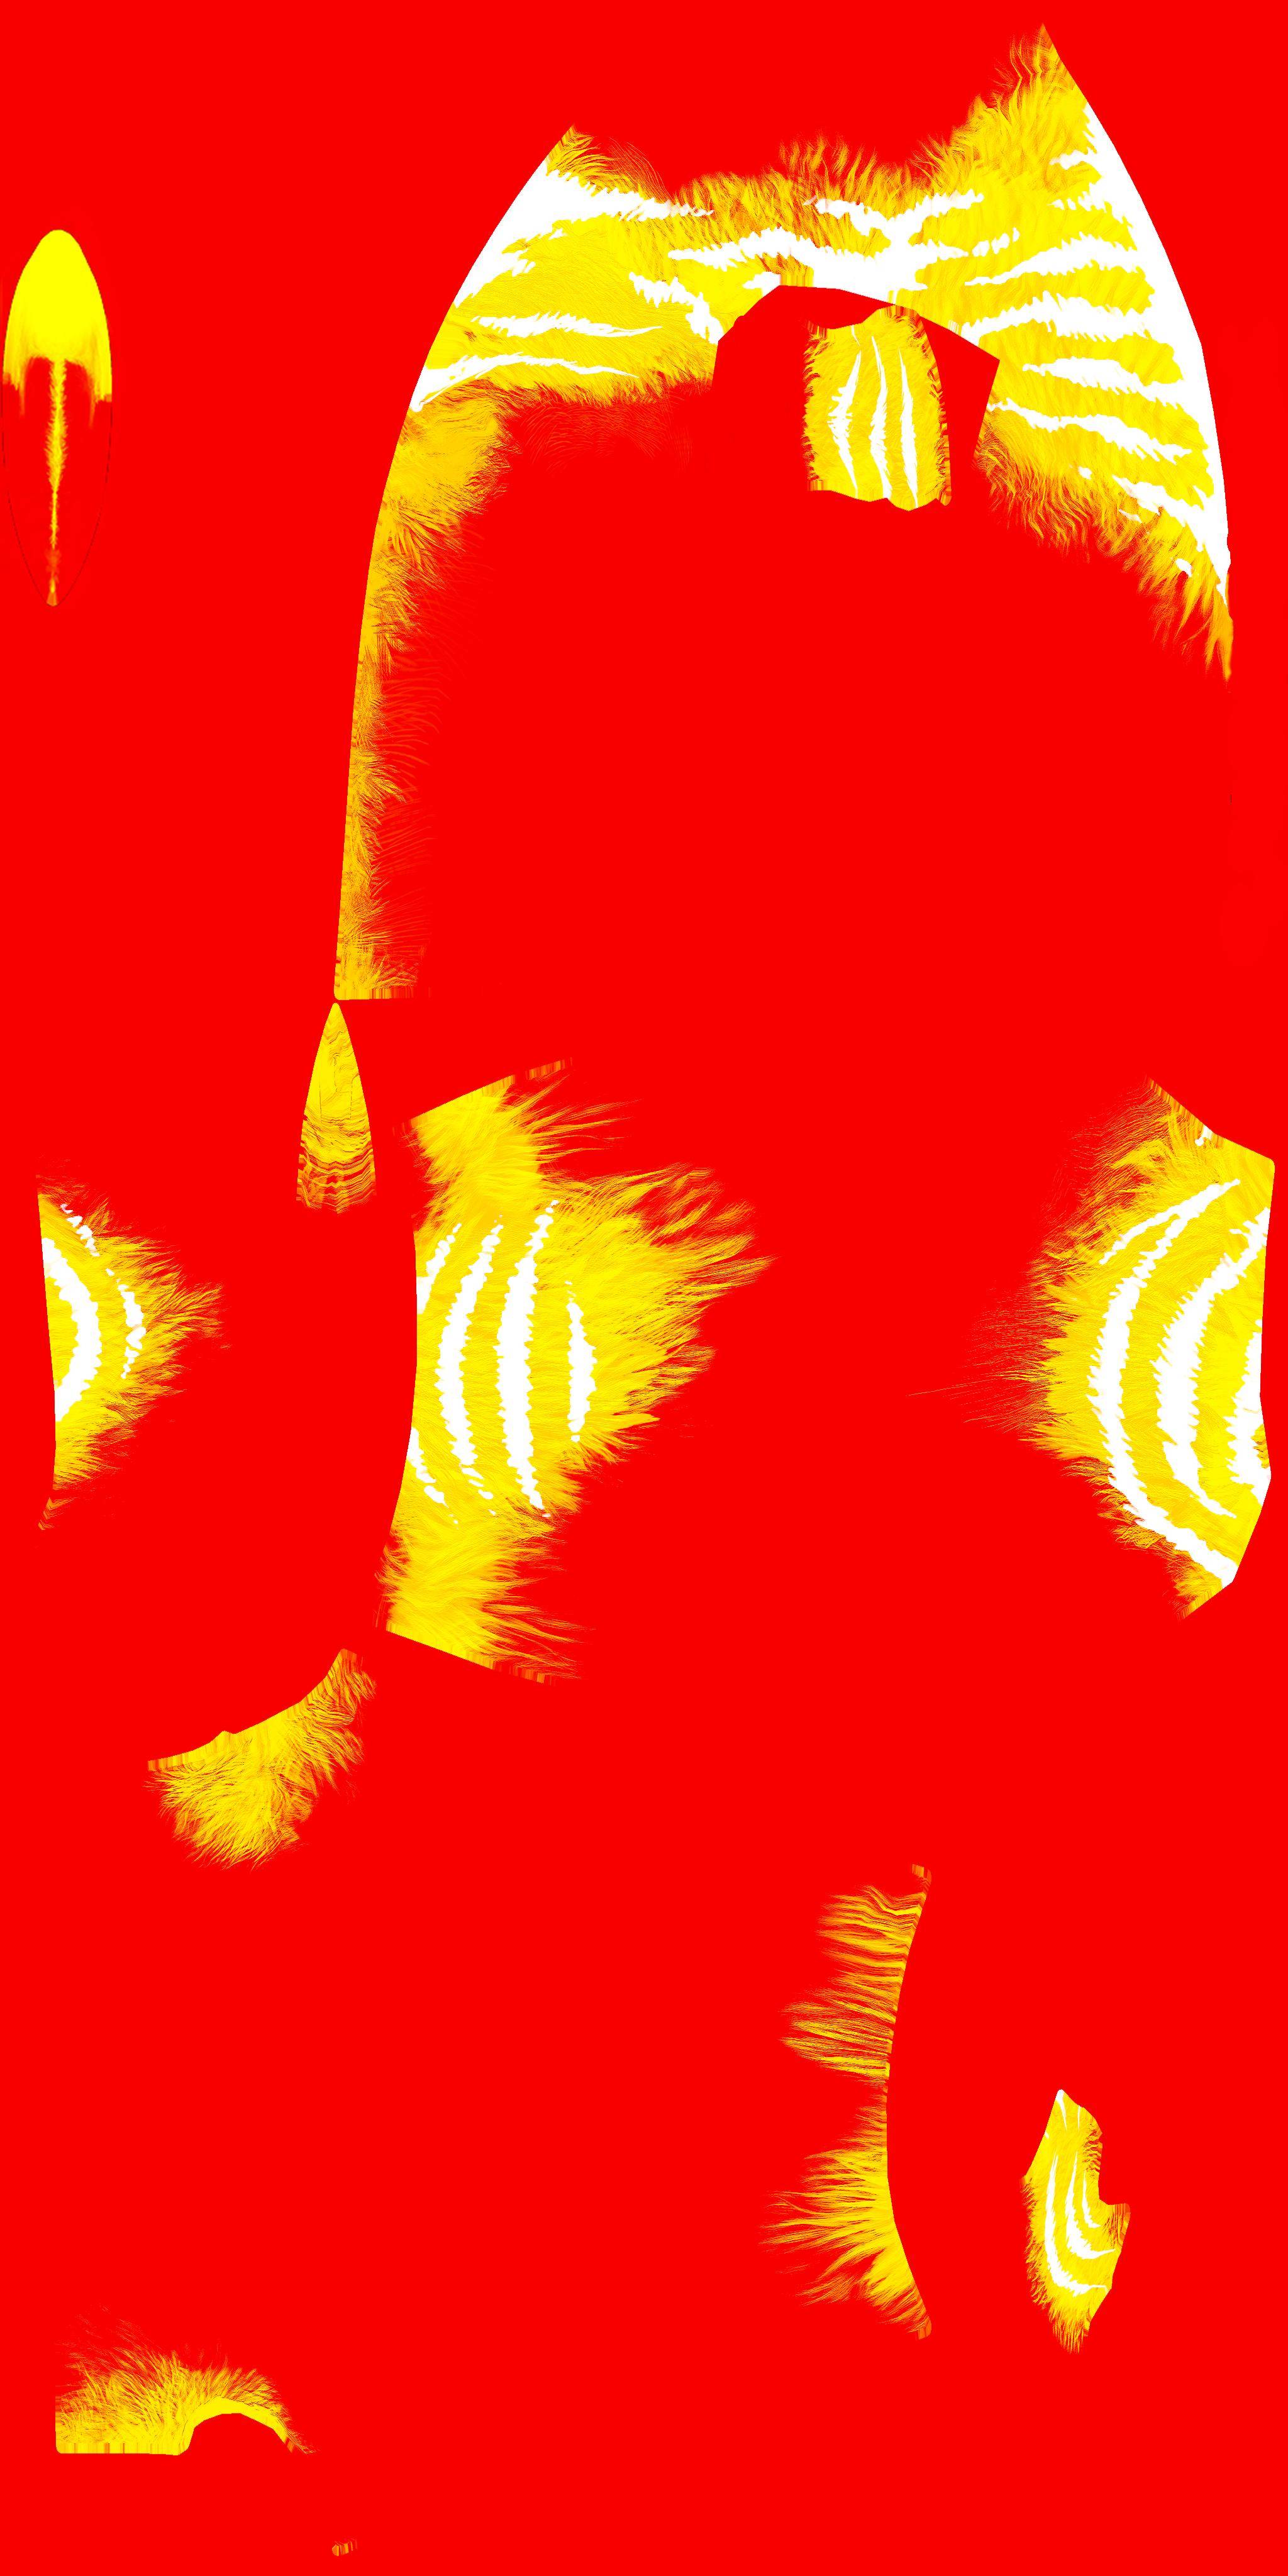
That brings me to my current issue: the Multi texture map has a red background. The foreground transitions from red to yellow, and has certain white spots. As I understand it, everywhere it is red should be transparent. Places where it is yellow should be a colour (we'll denote it A). White areas should be another colour (denoted B). This corresponds pretty neatly with the image's colour channels:

  • Red -> Colour A
  • Green -> Opacity
  • Blue -> Colour B

There is a slight complication in that the Blue channel shouldn't simply represent Colour B directly. Since Red is maxed everywhere Blue is, it should somehow represent the "spectrum" from A to B.

How can I take the image of this texture and convert it as described? I have access to photoshop.

Here is the texture in question.

The "Multi" texture

4
  • Welcome to GDSE. It sounds doable, but it's pretty impossible to help without having access to the image. To answer this I would test if the method I had in mind really worked and perhaps illustrate the answer. I can't easily find an image that fits your description and I might misunderstand you. (But there might be a copyright issue - you say you have extracted the image from a game?)
    – Wolff
    Commented Feb 3, 2021 at 23:32
  • @Wolff Thank you for the welcome! I've uploaded the image here. Hopefully that'll do. Commented Feb 3, 2021 at 23:47
  • If it's yours to share you should edit and add the image to the question itself.
    – Wolff
    Commented Feb 3, 2021 at 23:54
  • @Wolff I've edited it as you requested. Commented Feb 4, 2021 at 0:01

1 Answer 1

0

The red channel is almost white, but has a slightly grey tone and some details here and there. I'll ignore that here. Some of it might just come from image compression.

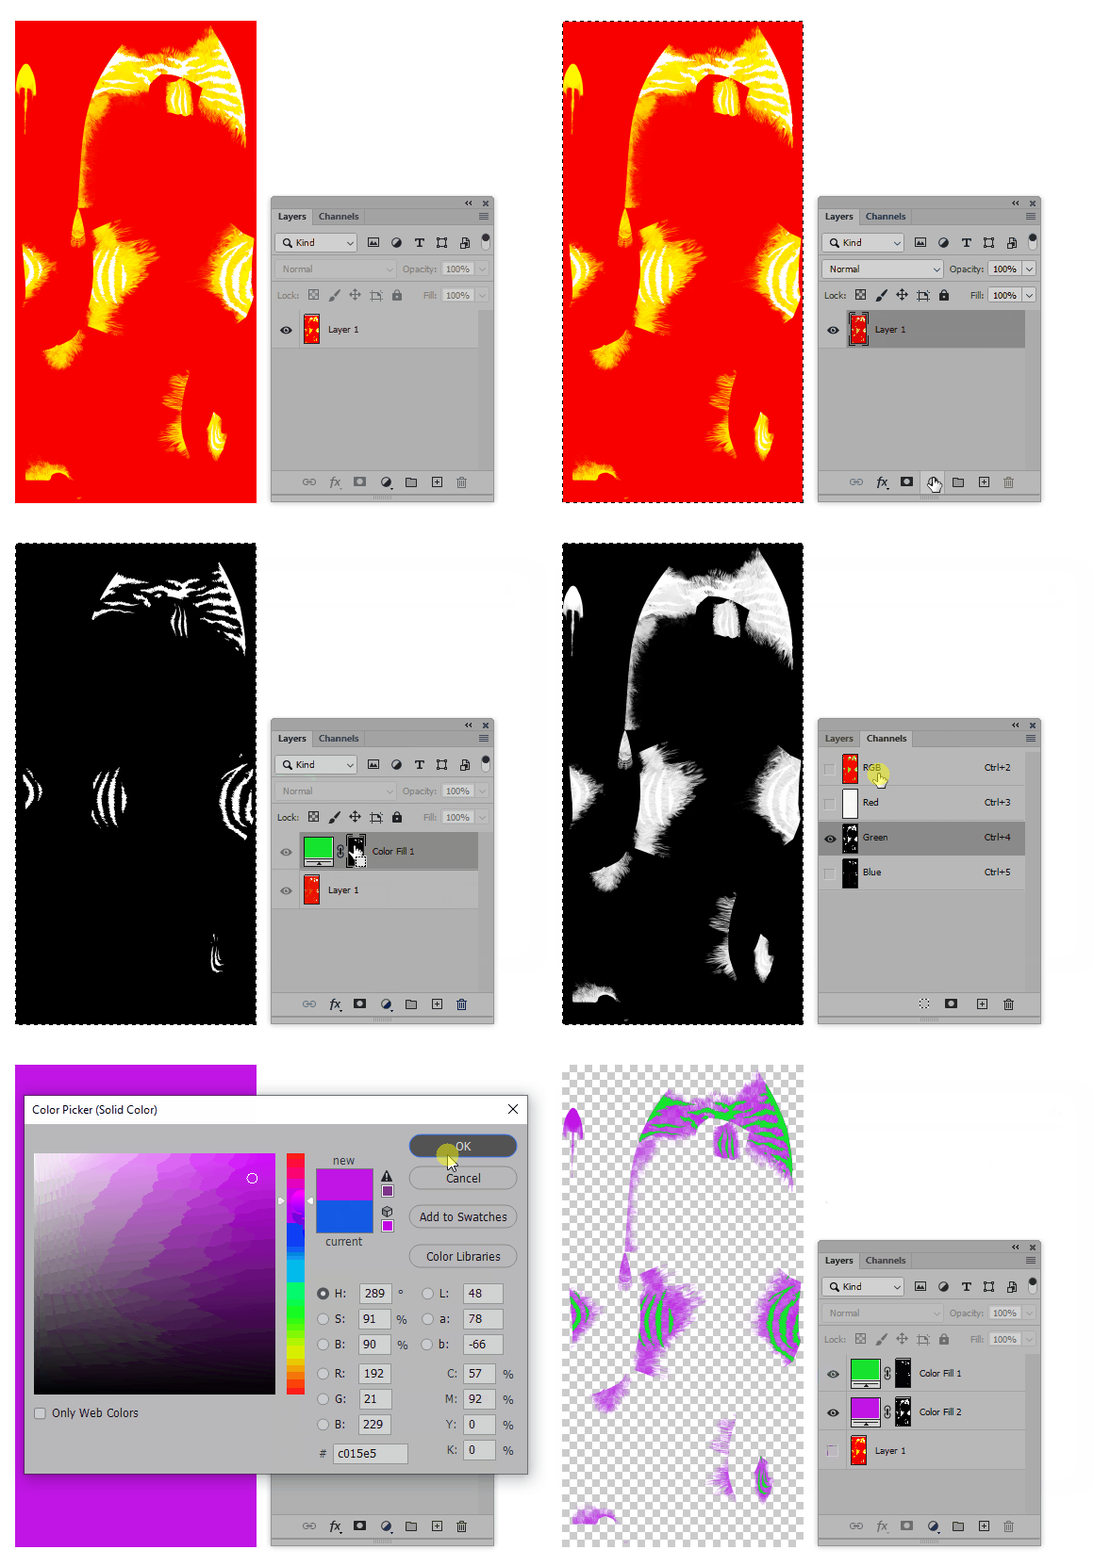
  • Select the layer with the original image.
  • Enter the Channels panel.
  • Click the Blue channel.
  • Press Ctrl /Cmd + A to Select All.
  • Press Ctrl /Cmd + C to Copy.
  • Click RGB to select all channels.
  • Enter the Layers panel.
  • Create a new Solid Color layer and select the color you want for the white areas.
  • Alt + click the Layer Mask of the Solid Color layer to enter it.
  • Press Ctrl /Cmd + V to Paste.
  • Click the Solid Color layer's icon to exit the mask.
  • Turn off the Solid Color layer.
  • Select the layer with the original image.
  • Enter the Channels panel.
  • Click the Green channel.
  • Press Ctrl /Cmd + A to Select All.
  • Press Ctrl /Cmd + C to Copy.
  • Click RGB to select all channels.
  • Enter the Layers panel.
  • Create a new Solid Color layer and select the color you want for the yellow areas.
  • Alt + click the Layer Mask of the Solid Color layer to enter it.
  • Press Ctrl /Cmd + V to Paste.
  • Click the Solid Color layer's icon to exit the mask.
  • Turn off the layer with the original image.
  • Turn on the first Solid Color layer.
  • Press Ctrl /Cmd + D to Deselect.

(The chosen colors can be changed later by double-clicking the icons of the Solid Color layers.)

Your Answer

By clicking “Post Your Answer”, you agree to our terms of service and acknowledge you have read our privacy policy.

Not the answer you're looking for? Browse other questions tagged or ask your own question.