0

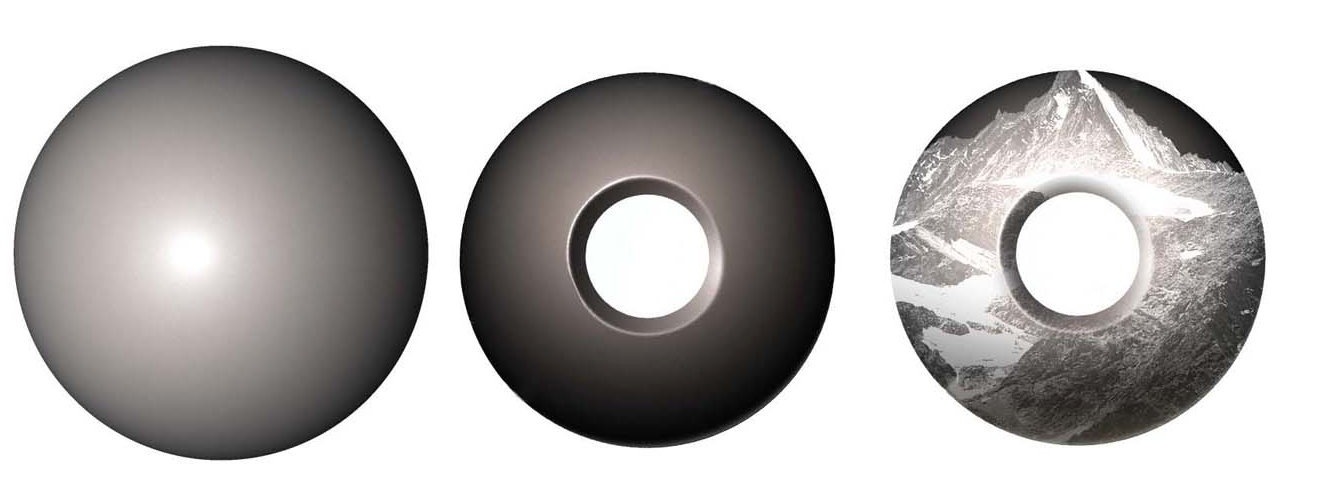
I want to create this effect (the second one)
enter image description here

using the first one as a source, ultimately to create the last one. I'm trying to learn some stuff, following a tutorial but the guy is using a tool that's no longer in Photoshop (he's using CS 3). Is there any other way I can do this?

His original instructions.

Open smooth sphere.jpg (the first sphere). In the Liquify filter (Cmd/Ctrl + Shift + X), make small circles with the Mirror tool (M) over the centre to create a depression. Press OK. Erase part of this, leaving a bevel, and darken the whole in Curves (Cmd/Ctrl + M). Copy Mountain.jpg into this image and create a clipping mask with it over the shape.

Thanks!

4
  • 2
    Tell it that nobody likes it :)
    – Dom
    Commented Aug 22, 2014 at 6:58
  • Which tool no longer exists?
    – MG_
    Commented Aug 22, 2014 at 7:53
  • @MrE.Upvoter lol. If only it were that easy. Commented Aug 23, 2014 at 5:28
  • @MG_ The mirror tool in the liquify tool. Commented Aug 23, 2014 at 5:29

1 Answer 1

1

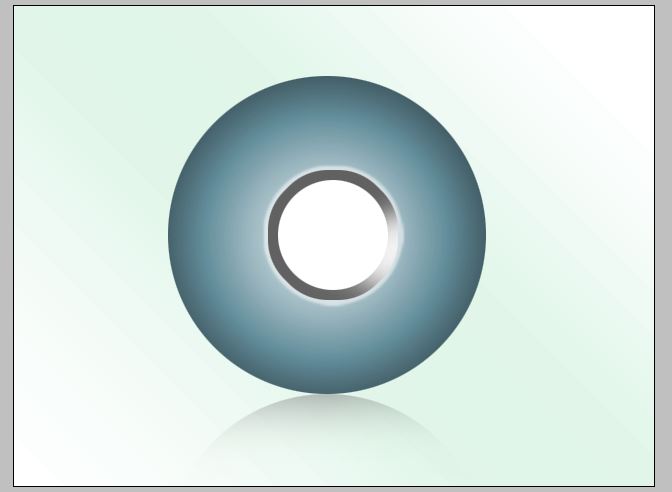
If you just take a look at the picture, its too easy to do it without any tool. Here's how I do it.

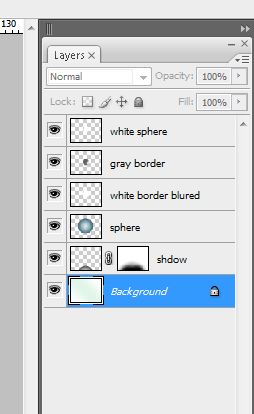
  1. You need to have a sphere to start with
  2. Contract your selection & make a new sphere that's half the size of the original.
  3. Fill it with white color in a new layer
  4. Make a selection of this new layer, CTRL+click & go to Select, Modify->Expand
  5. Make it like 10
  6. Fill this with dark gray color inside a separate layer (you can create a highlight using the dodge tool)
  7. Place this layer below the white sphere
  8. Using the similar steps, select the white sphere you created in step 3, & make a sphere bigger then it
  9. Place this sphere below the gray border sphere
  10. Fill it with white color, use Filter-> Gaussian blur & adjust opacity of the layer

Update:

To add your background image do this,

  1. Select your main sphere, blue sphere in this case (Ctrl + click to make a selection.
  2. Make a new layer, drop your image in this layer.

  3. Now press ctrl+shift+i (invert selection) to select everything except the sphere

    1. Press delete on your image layer
    2. Set the image layer to darken, or overlay and reduce its opacity.
    3. You may also use filter, distort-> spherize on your image first (to give it a spherical look)

Use this tutorial as a reference & apply the same technique to get your desired result How to make your own planet in Photoshop

There you have it =)

Sample settings

4
  • Perfect ! Thanks. I'm trying to improve my skills here and I loved how you did it. Cheers Commented Aug 23, 2014 at 5:30
  • One question though, this method doesn't exactly give the final result when I need to make the picture (mountains) a clipping mask. Commented Aug 23, 2014 at 18:38
  • @MartinPowletteJr I updated my answer, you may upvote my answer if you found it useful. If it solves your problem please mark it as an answer. Thank you !
    – Zo Has
    Commented Aug 25, 2014 at 5:06
  • @MartinPowletteJr Just a note, in my image the center sphere is white, it should always match the background color to give it as a hole in the middle. I just did it on a whim...
    – Zo Has
    Commented Aug 25, 2014 at 5:08

Your Answer

By clicking “Post Your Answer”, you agree to our terms of service and acknowledge you have read our privacy policy.

Not the answer you're looking for? Browse other questions tagged or ask your own question.