I have some jpg images and I need for each of them to have a transparent background.
I have GIMP as a graphic tool.
I need to put them in a web page and I need to see just the main element and have a transparent background.
To expand on utopicam's answer, sometimes your image might contain areas, such as shadows, that you'd want to be semitransparent. For example, let's say you have a photo shot in a lightbox, such as this nice and freely licensed picture of a Swedish wooden toy horse courtesy of Creative Tools:
In general, the first step would be to adjust the levels of the image until the background really is solid white, except for the shadows and reflections we want to keep. (You can use this technique with a gray or colored background too, but it's a bit trickier to get good results that way.) In this case, the image is already nicely adjusted, so we don't have to do anything about that.
The next step is to select the background. This was quite easy to do with the magic wand tool, although I had to fix some bits where the white stripes on the object blend with the background with the lasso tool. Also, once I had the background nicely selected, I expanded the selection by a few pixels (at full resolution) to avoid leaving a whitish halo around the object due to aliasing. (You can't see it in this scaled-down screenshot, but I really managed to do a pretty nice job with the selection, if I may say so myself.)
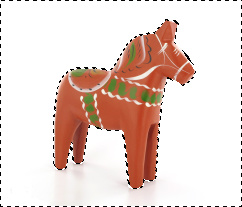
Now, here's the trick: instead of simply cutting out the background, I used Colors → Color to Alpha to change the background color (white) to transparent. (You could also use bucket fill with the Color Erase mode as utopicam suggests.) If applied to the whole image, this would make the object look semitransparent too, but since only the background is selected, the shadows become translucent while the object itself stays opaque:
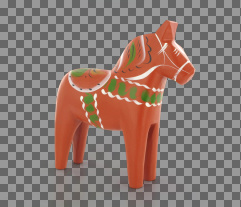
And here's the same picture on a pale blue background, to show the semitransparent shadows and reflections better:
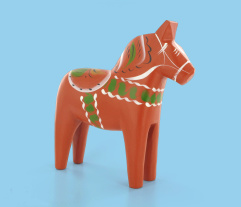
One extra trick I didn't show is that it's often more convenient to make two copies of the image layer, convert the selection to a layer mask on the upper one, and apply Color to Alpha to the lower. This lets you fine-tune the edges of the object by editing the mask, while seeing live how the result will look. (Tip: make a few background layers filled with different colors, so that you can easily check how the picture looks on different backgrounds.) In particular, sometimes making highlights near the edges of the object just slightly translucent can make the result look nicer and more natural, since it mimics the background reflecting off the object.
the first step would be to adjust the levels of the image until the background really is solid white - should how to do this exactly be included for us dummies? Or should I ask a separate question on how to do that?
Commented
Jan 13, 2013 at 1:49
Note: This tutorial is also available in PDF.
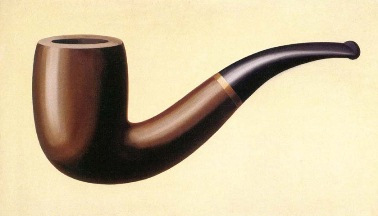
Some image types lack a transparency channel; JPG for example. If this is the case, add an alpha transparency channel.
This is done by selecting Layer → Tranparency → Add Alpha Channel.
The next step is optional and consists in filling the area that should become transparent with a plain colour first. Select the bucket fill tool or hit Shift+B. Within the Bucket Fill toolbox options, select Fill transparent areas only when necessary. Do select BG colour fill and Sample merged and run a few tries while adjusting Threshold for best results. In between, hit Ctrl+Z to undo.
Some colour mixing will be inevitable and even desired. (In this respect, Adobe Photoshop is no different.) Hence, choose a colour which is compatible with the background on which the resulting picture will eventually be used.
Click on the background colour rectangle in the upper half of the Tool Options toolbox window to change the background colour.
Here, I used f3f3e9 as a background colour for plain colour filling.
However, one can also use the eyedropper tool to pick a colour from anywhere on the desktop.
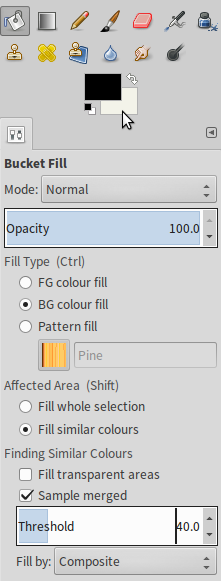
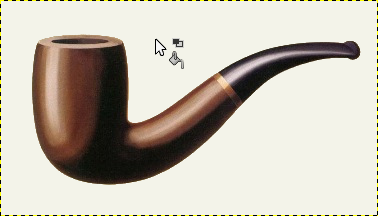
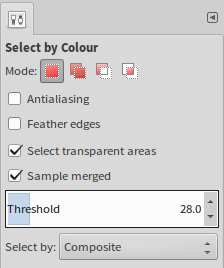
The right thing to do now is Select → By Colour.
It might be tempting to perform Colour to Transparency, however this would also change semi-transparent areas within the desired image area.
This time around, do select Fill transparent areas as well as Sample merged. For this particular example I chose not to apply Antialiasing nor Feather edges. Nonetheless, do experiment with these settings and choose what looks best. Again, run a few tries while adjusting Threshold for best results. In between, hit Ctrl+Z to undo.
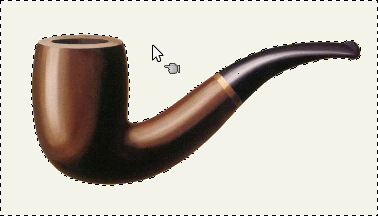
At times, it proves difficult to get the colour selection exactly right. Some of the desired image area might be selected as well because the colour matched. In this case, and barely visible, nine desired pixels in the middle of the pipe were also selected for deletion. When this happens, use Ctrl+Drag with a Select tool of your choice to select a subtractive selection area.
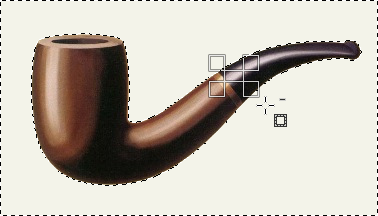
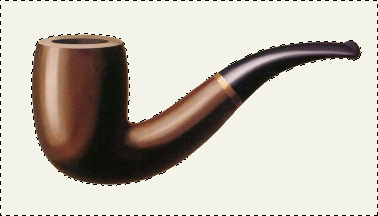
At the rim of the desired image, some shades of the background my still remain unselected. If this is the case, grow the selection with a pixel using Select → Grow… → 1px.
Once the desired transparency area is selected, simply hit Delete.
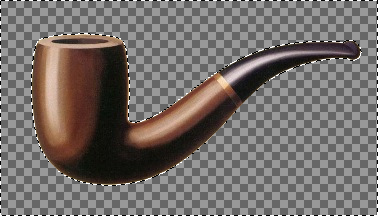
Finally, export the transparent image with File → Export As... to a file format which supports transparency. That would be preferably PNG, but GIF would work as well.
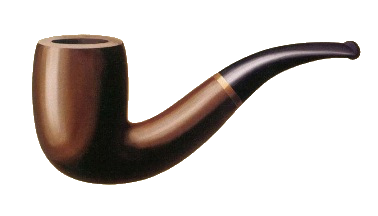
Feather option in selection is also helpful for images with edges blurred against whitespace.
Sounds like you need to crop certain parts of the jpgs (the main figure, for example) and delete the "background". You can do so using the lasso tool.
The gimp website has lots of tutorials and explanations. Check this http://docs.gimp.org/en/gimp-painting.html#gimp-concepts-selection and this out: http://docs.gimp.org/en/gimp-tool-free-select.html
The polygonal selection creates an anchor point every time you click. Then moving the mouse pointer draws a line with a new anchor point that you can move as long as you don't click again.
You can access the Lasso Tool in different ways:
From the image menu bar Tools → Selection Tools → Free Select,
by clicking on the tool icon in the ToolBox,
by using the keyboard shortcut F.
To make the solid background of an image transparent, add an Alpha channel, and use the Magic Wand to select the background. Then, use the Color Picker tool to select the background color, which becomes the foreground color in Toolbox. Use the Bucket Fill tool with the selected color. Set the Bucket Fill mode to “Color Erase”, which erases pixels with the selected color; other pixels are partially erased and their color is changed.
A modern way of achieving this effect in your specific case is opening your image in the latest version of Gimp and from the top menu go to Colors -> Color to Alpha. Within that panel is Color is set to white, Gimp will attempt to replace all the white pixel areas with transparency. It's at least worth trying out.
fn-deleteafter magic wand select ;) delete doesn't work by itself.