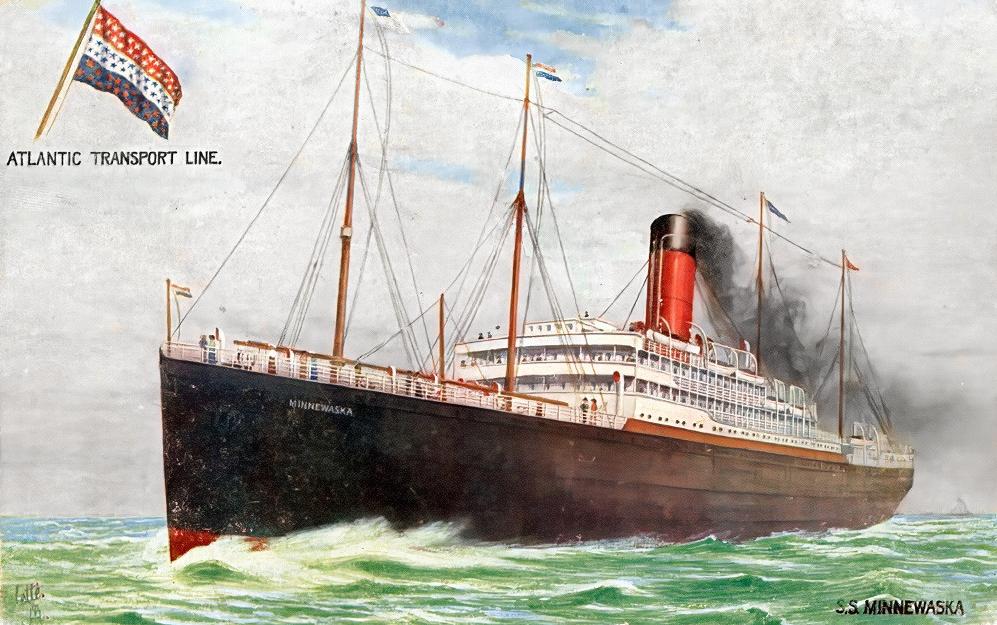
I have been restoring some old pictures using GIMP, and watching heaps of youtube videos. I purchased Topax DeNoise Al, which I found really great for removing noise. However, as you can see from the attached image, there is alot of discoloration in the sky. I have spent hours trying different things with Wavelet Decompose, tried selecting the area by colour, tried heal tool, clone tool, rubber tool, but I'm not having too much luck. I'm fairly new to this, and hope this question isn't too beginner for the forum. Thanks in advance, Lee.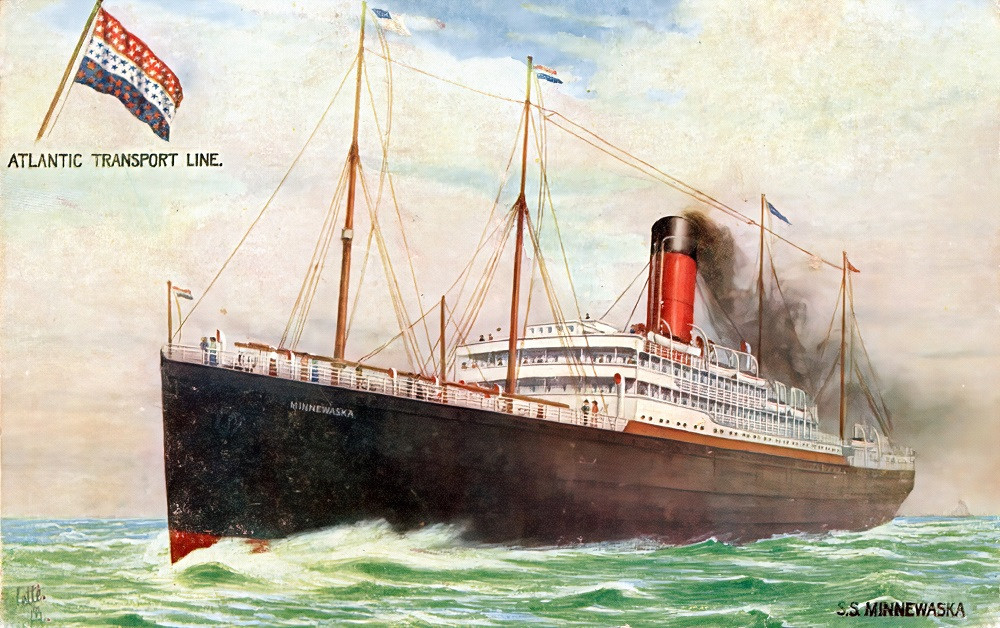
-
Sorry, but we know virtually nothing useful of your problematic image. It's got all degradation that websites generally offer without asking and imgur is no exception. Insert a link to non-processed scanned PNG if you expect something else than guesses.– user82991Commented May 25, 2021 at 10:39
-
thank you I will– LeeCommented May 25, 2021 at 18:49
-
That's a painting. I would speculate that the artist intended the colors in the sky. The warm tones of the clouds play off the green tones of the sea. While others have very adeptly shown ways to remove the warm tones, I would argue that the image itself is much less impactful with them gone.– ScottCommented Jun 24, 2021 at 17:27
-
Yes, it is a picture of a painting. It is over 100 years old, and I think there is a bit of brown discoloration from dirt, dust and age in the sky. I have slowly been teaching myself Gimp, I am trying to restore these old images and blow them up as prints. But you know I've been thinking, they are old, so it's ok if they look old. I have mainly been having issues with the grain in many of the pictures, but have been having some success with wavelet decompose. Thank you for your comment.– LeeCommented Jun 25, 2021 at 21:21
2 Answers
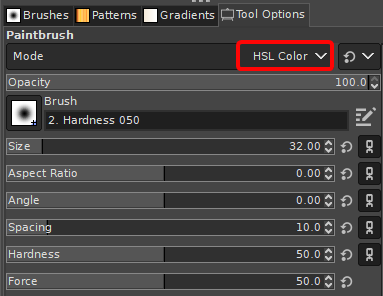
You could use a soft edged paint brush, with the colour mode set to HSL Color in the Tool Options
Then use white as the foreground colour, or Ctrl+Click on an areas to select the colour you want, and paint over the areas which are discoloured. You might also want to reduce the Opacity of the brush so you can do it in a more controlled or gradual way.
Here's a very quick example. I'm pretty sure with a little more care and attention you could do better.
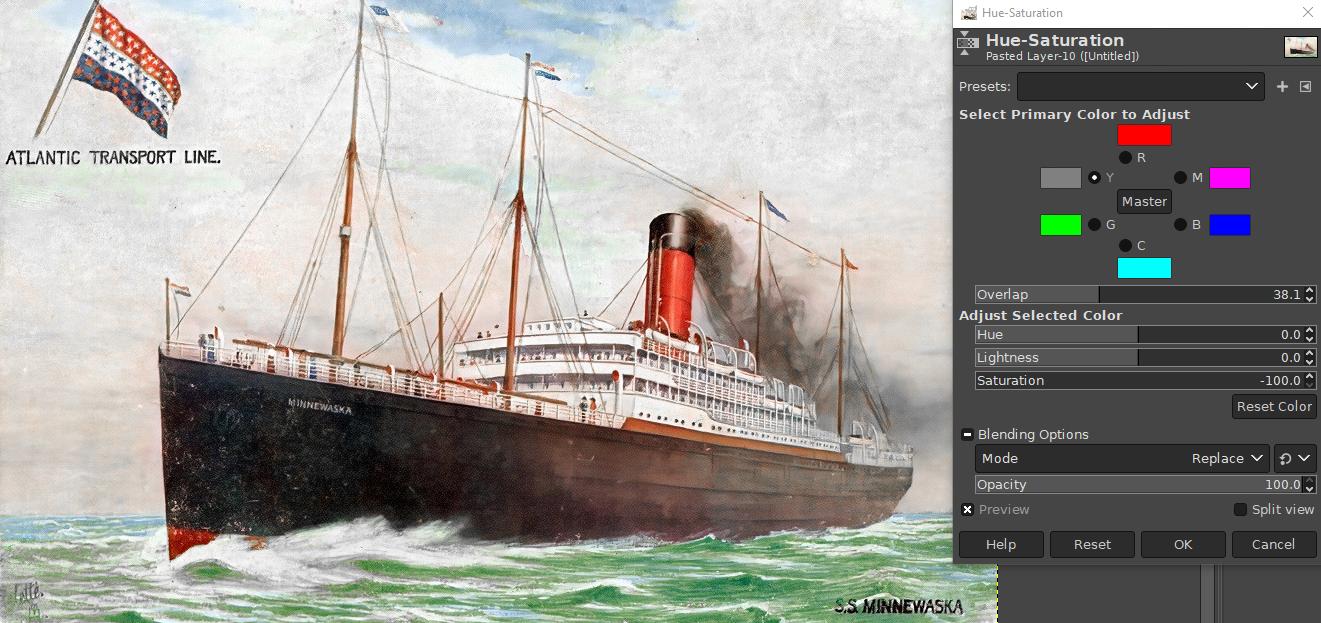
Another quicker, less manual approach, would be to remove the yellow colour-cast using a Hue-Saturation adjustment. Obviously this method might not work for other images where there are actual yellow objects. But with the example image it works quite well.
For example
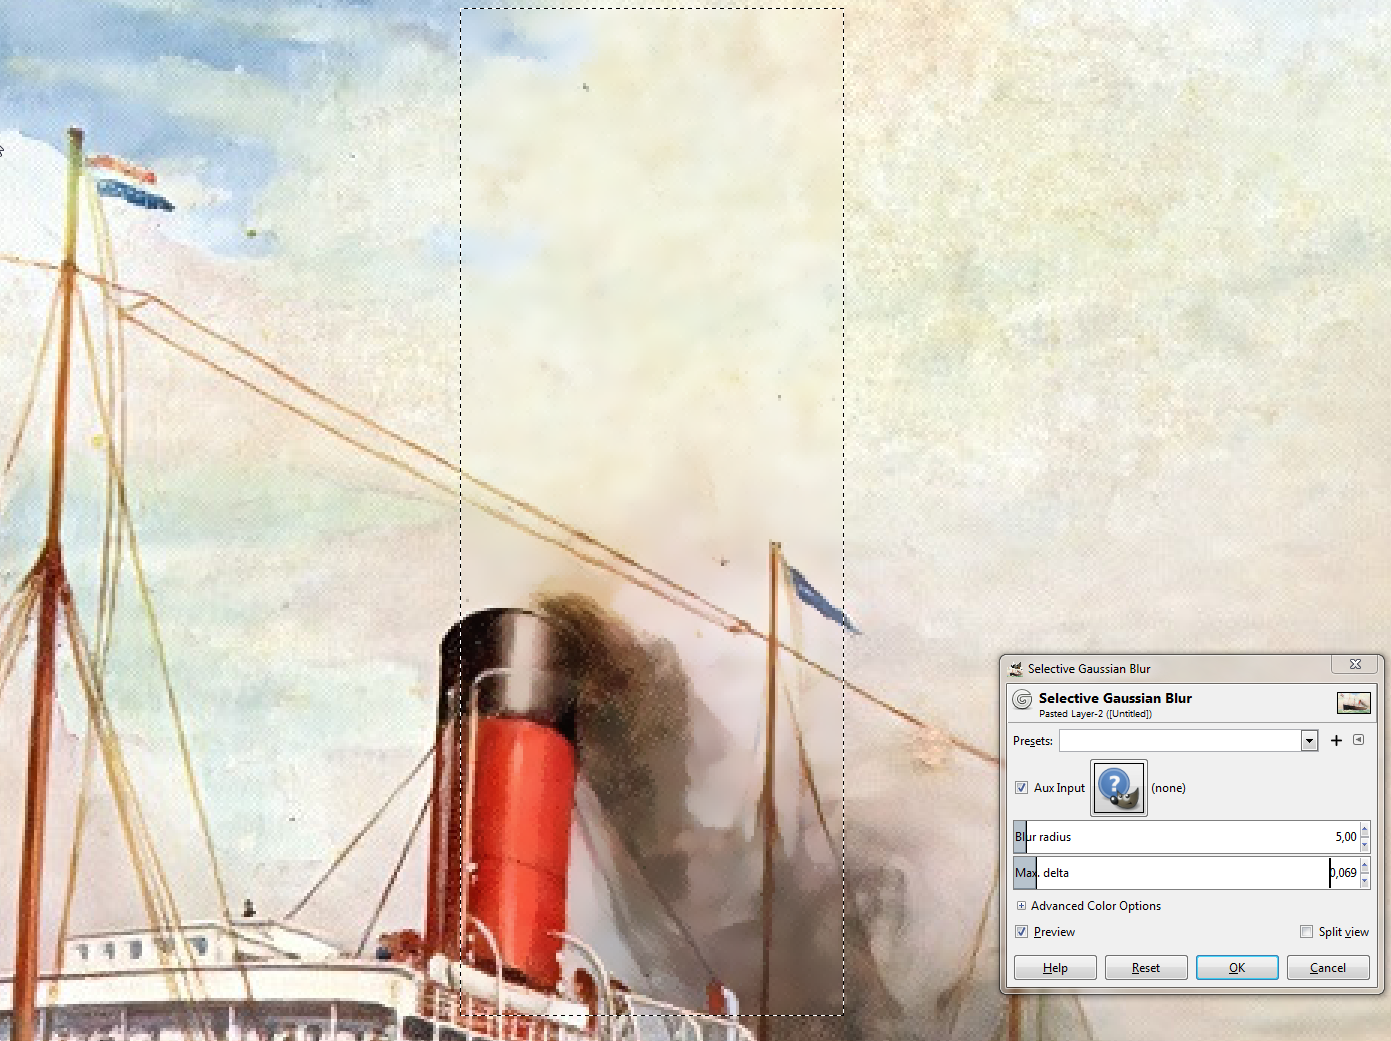
Here's a guess (no idea of the original image, only the attached one with very bad compression noise is available):
Apply Selective Blur. Here it's applied to the shown selection in the middle:
That blur makes the edges of the apparent dirt unsharp.
Different areas of the images need different settings, so make in different layers different versions and paint to the layer masks to make the wanted blurred versions visible in the wanted areas.
-
cool I'll try that thanks, the original is worse than what I uploaded– LeeCommented May 25, 2021 at 18:50

