Any insight on how to achieve an effect like this in Photoshop or Illustrator? Like an ojbect is being pressed into the lines from behind to create curves around contours on the object. I've tried using displacement maps in Photoshop but don't love the result. I'm experimenting with envelope mesh in Illustrator but figured I'd see if anyone has any thoughts.
-
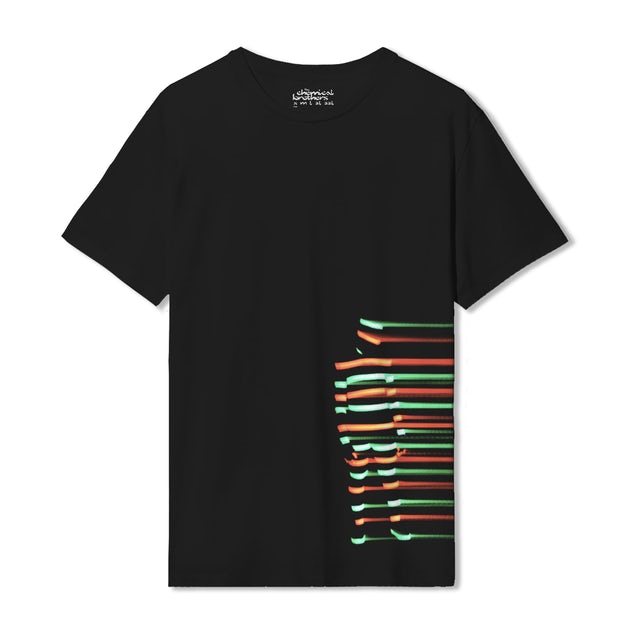
1Hi and welcome to GDSE! This doesn't necessarily look like a Photoshop effect to me. Could be an analogue effect with some lightning/fluorescent bands on a live model in black outfit photographed on long exposure. See the back of the Chemical Brothers t-shirt here. And see how they use the same visual in their live show here.– WolffCommented Dec 29, 2020 at 22:30
1 Answer
A few days have gone and no clever tricks have appeared. Here's one method which is far away from anything clever.
The base shape between your color stripes and the black fabric seems to be a standing man. Not much details is left, so you can use quite coarse drawing. A 2D drawing is enough and a real artist, who can imagine all details by himself, needs no predrawn base shape as a crutch.
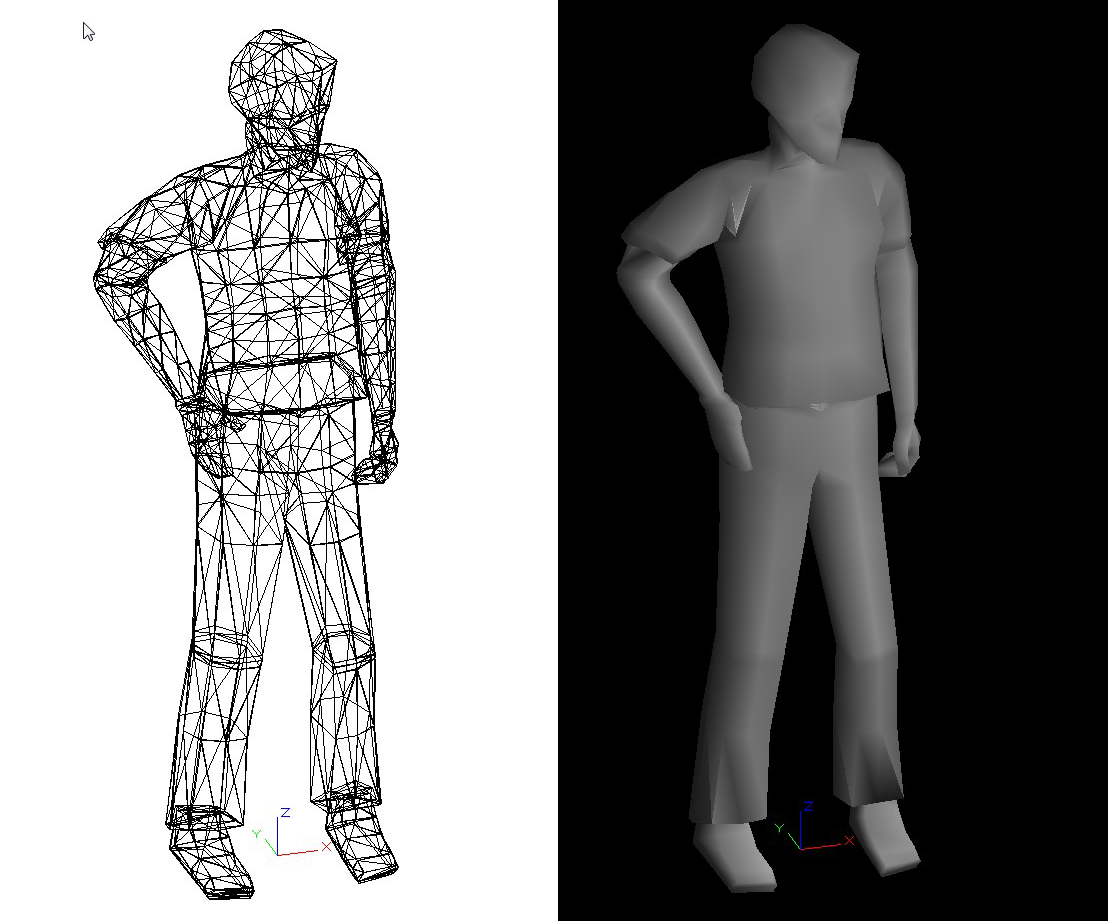
I found a simple enough image as 3D model. The 3D model is copied from Trimble SketchUP's 3D warehouse. NOTE: Not everything there is free and many available items have very low quality.
In a 3D program one can render the same model in different ways. We use rendering settings which make it as grey on a black background. The polygon pattern is smoothed and there's no edge strokes.
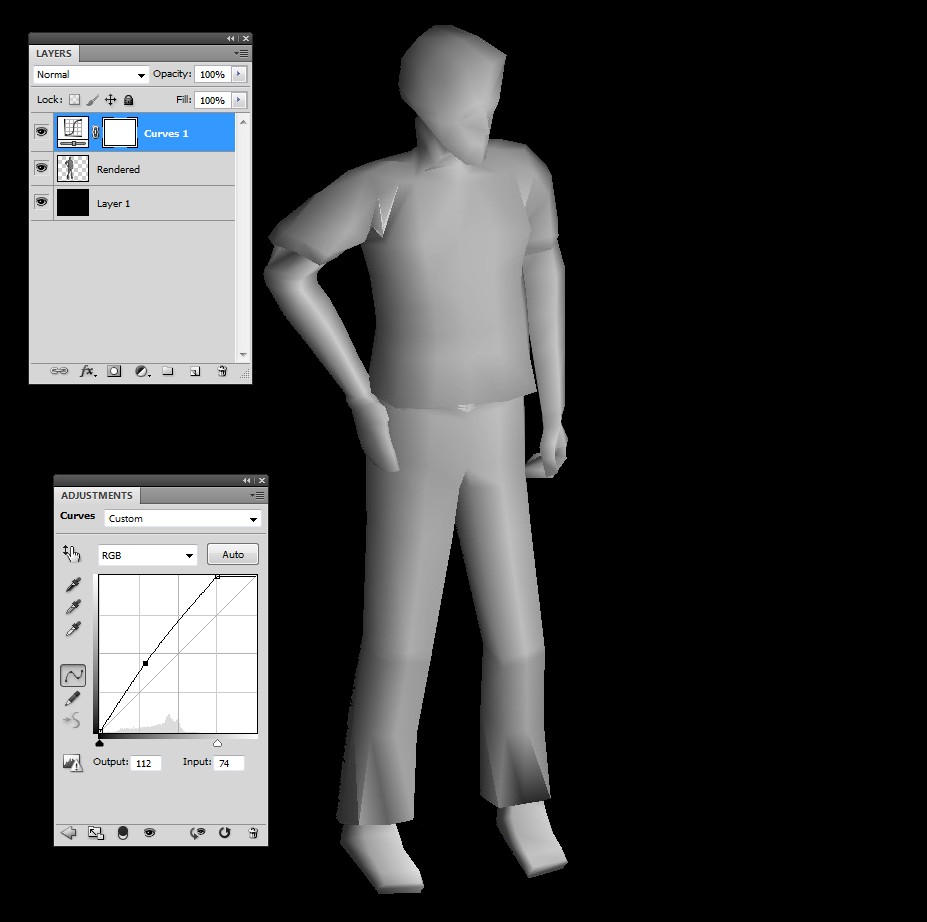
Unfortunately I have beginner level 3D CAD program which has poor light adjustments and no transparent background. I pasted the 2D rendering to Photoshop and deleted the black background. A new black background layer is inserted and there's a curves adjustment layer for higher contrast:
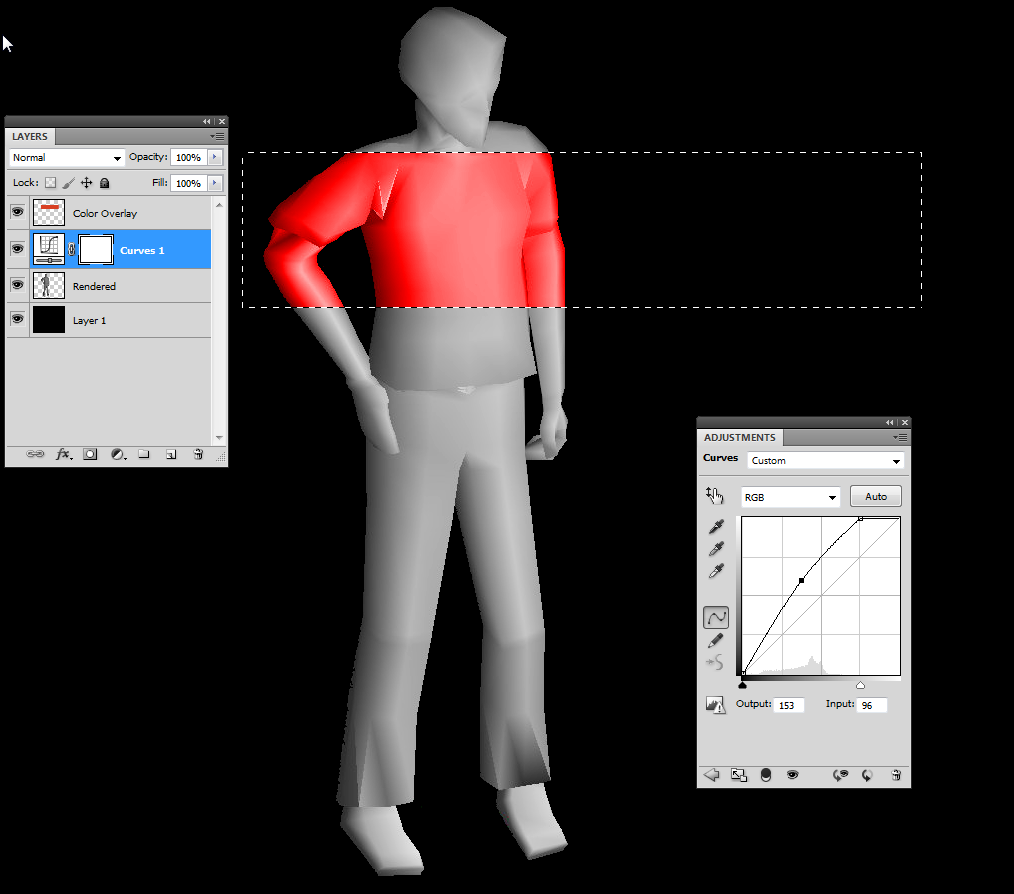
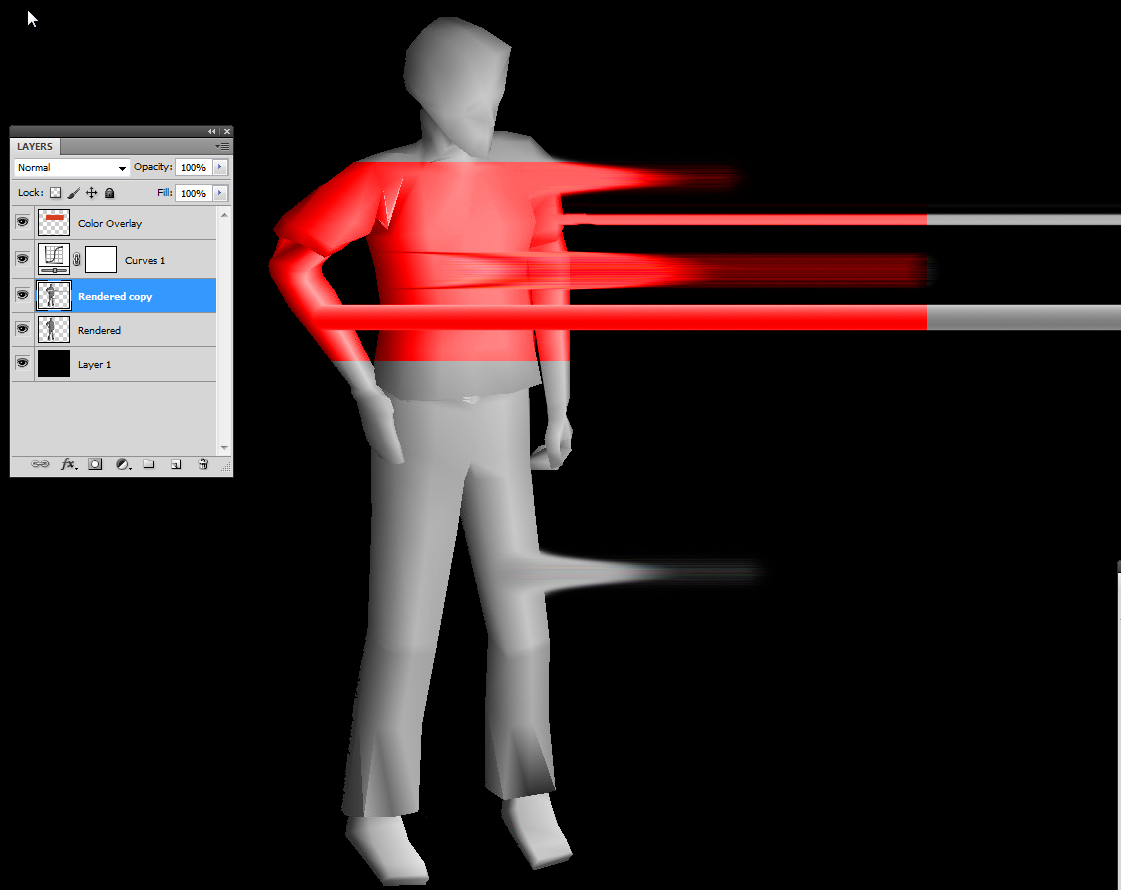
The grayscale must be adjustable because it affects radically how the shape can be easily colored. In the next image there's a new layer with blending mode Overlay. A rectangular selection is filled with red RGB=255,255,0. The brightest red is on 50% bright grey. Black and white get no color with blending mode Overlay. Adjustment layer makes possible to search a good balance:
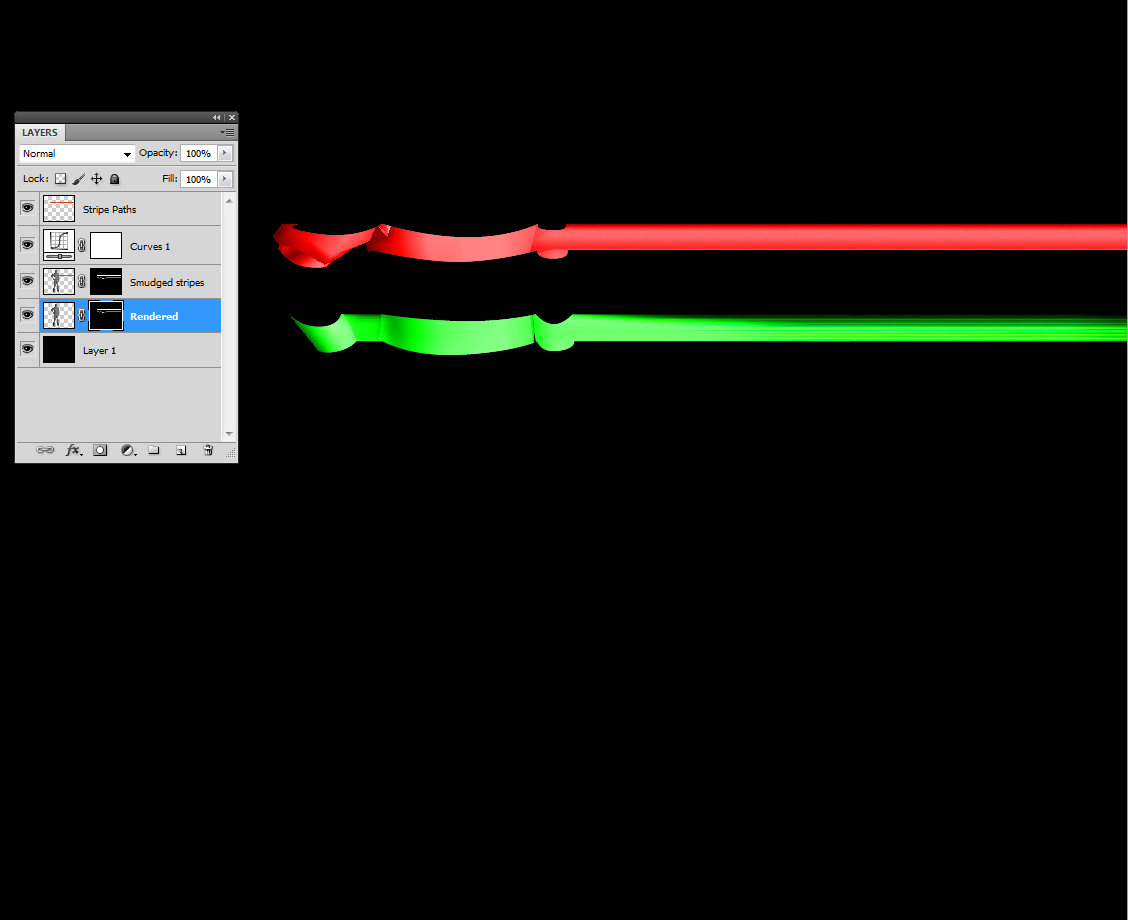
The grey area under the color overlay can have several layers. Here the grey shape is duplicated and the copy has got strokes with the smudge brush which spreads the original color. The brush width and the smudge strength setting varies:
This isn't enough for making the stripes like the ones in your example. The base shape is turned off between the stripes and what's left has different colors and they are drawn geodetically like they were in the 3D model before rendering. In an advanced 3D program one could insert them to the model, but I skip it.
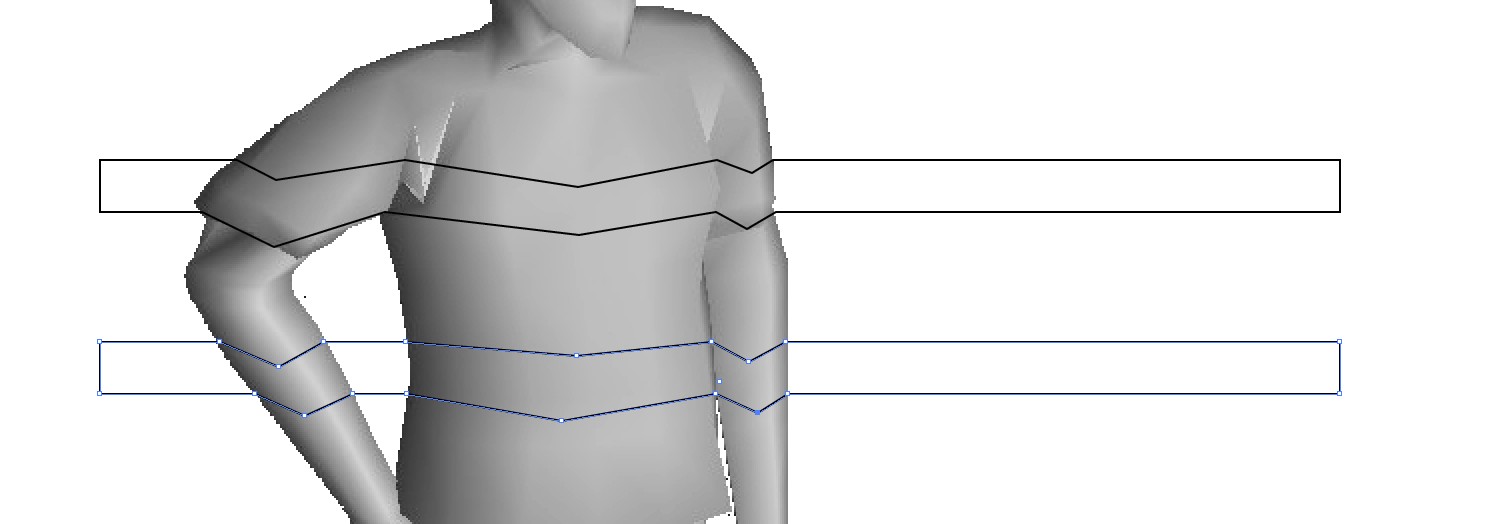
You can draw paths. They can be made in Photoshop, but Illustrator has more flexibility. A copy of the man shape is pasted to Illustrator and a couple of rectangles are drawn. A few extra anchors are inserted and dragged with the direct selection tool downwards to get coarse geodetic curves:
NOTE: single open strokes do not work, they behave badly in the corners.
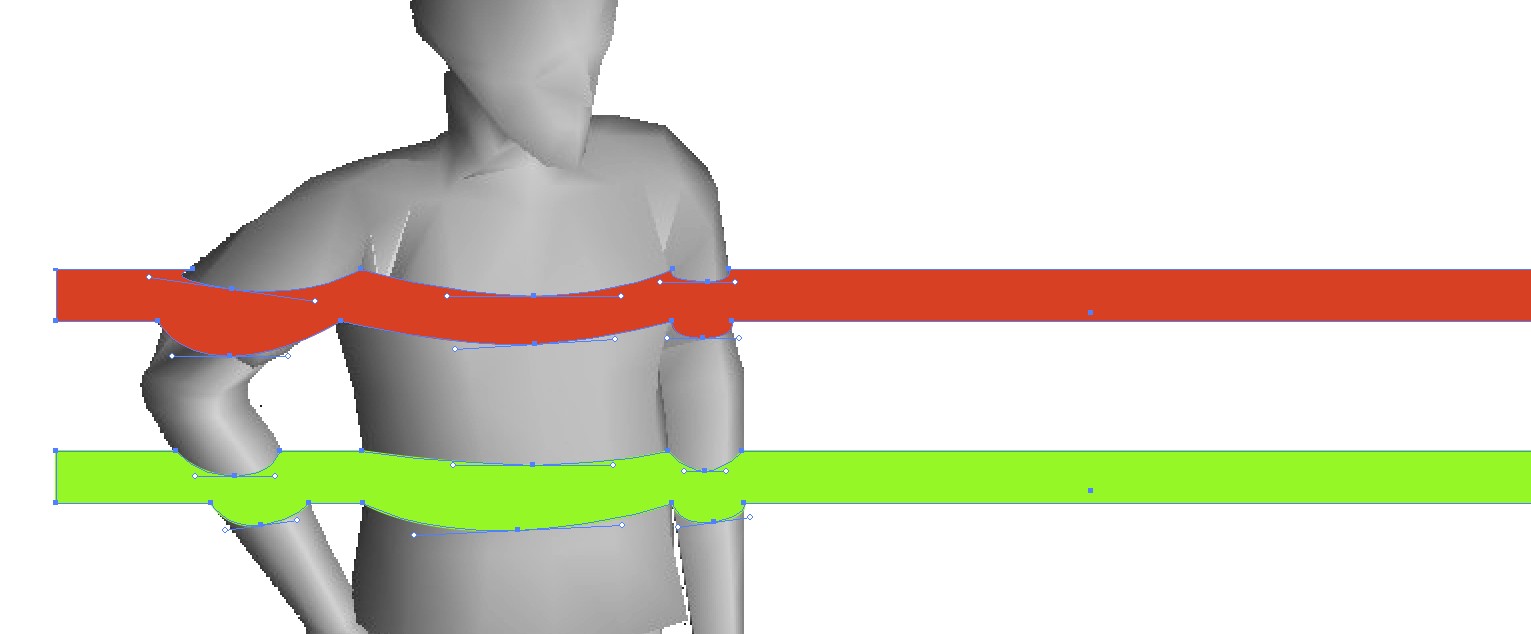
The dragged nodes are converted from corners to smooth ones and fill colors are inserted:
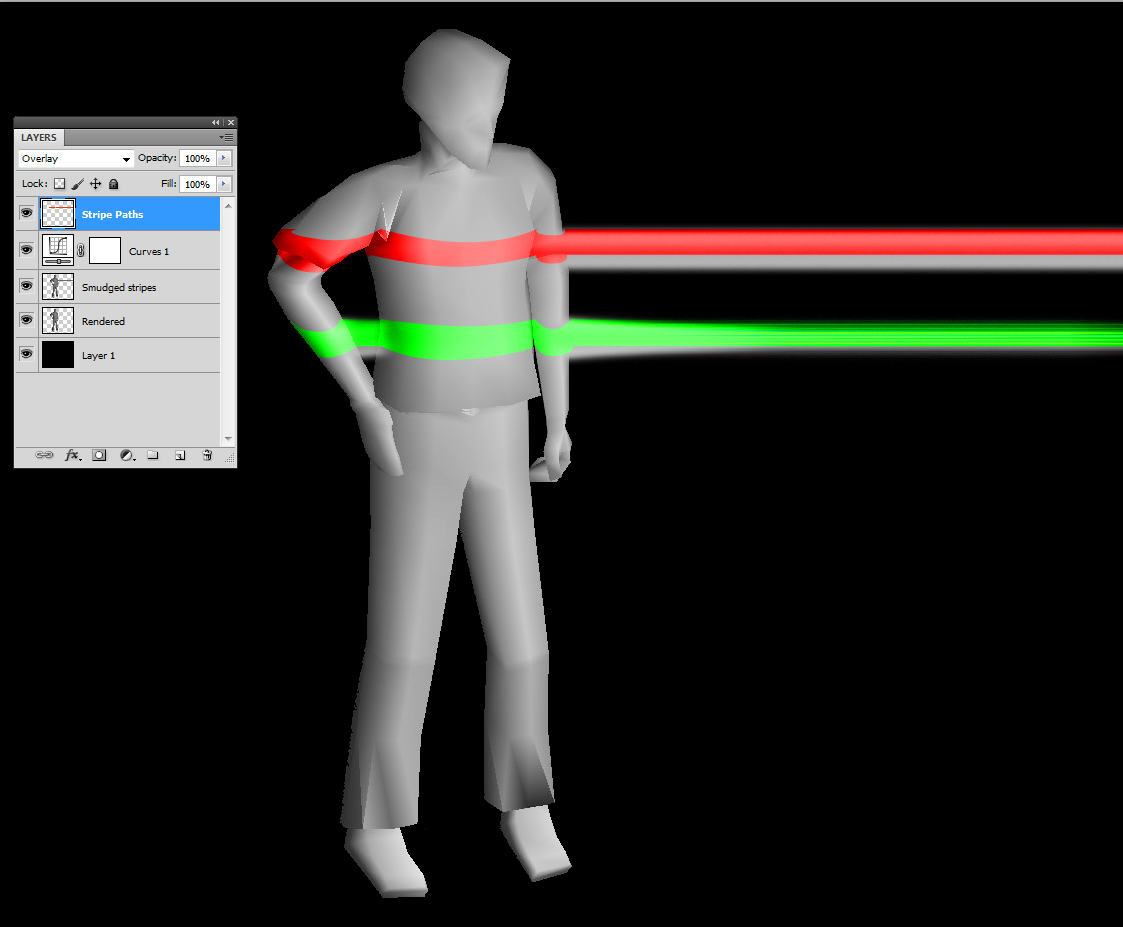
The drawn paths are pasted to Photoshop and replace the test color overlay. There we have a smudged copy of the man shape. The smudges are not especially well aimed but at least they intersect the colored stripes.
NOTE: As well one could continue the whole job in Illustrator. The man shape should in that case be imported as PNG because pasting to Illustrator inserts a white background. Illustrator doesn't have adjustment layers, so adjusting the contrast is difficult in Illustrator.
The grey man shape is not needed elswehere than under the color stripes. By Ctrl+Click the layer icon in the layers panel one can make a selection which contains the pasted color stripes. By having that selection ON a right layer mask is built to man shape layers if the mask is inserted:
NOTE: There's no need to keep 2 man shape layers, but smudging is error prone, a spare is welcome. In addition thinning a stroke is easy with the eraser tool if there's a copy which gets all of the abuse.
In the example there's smaller color stripes in the head, hands an shoes.

