A workaround: Type on Path.
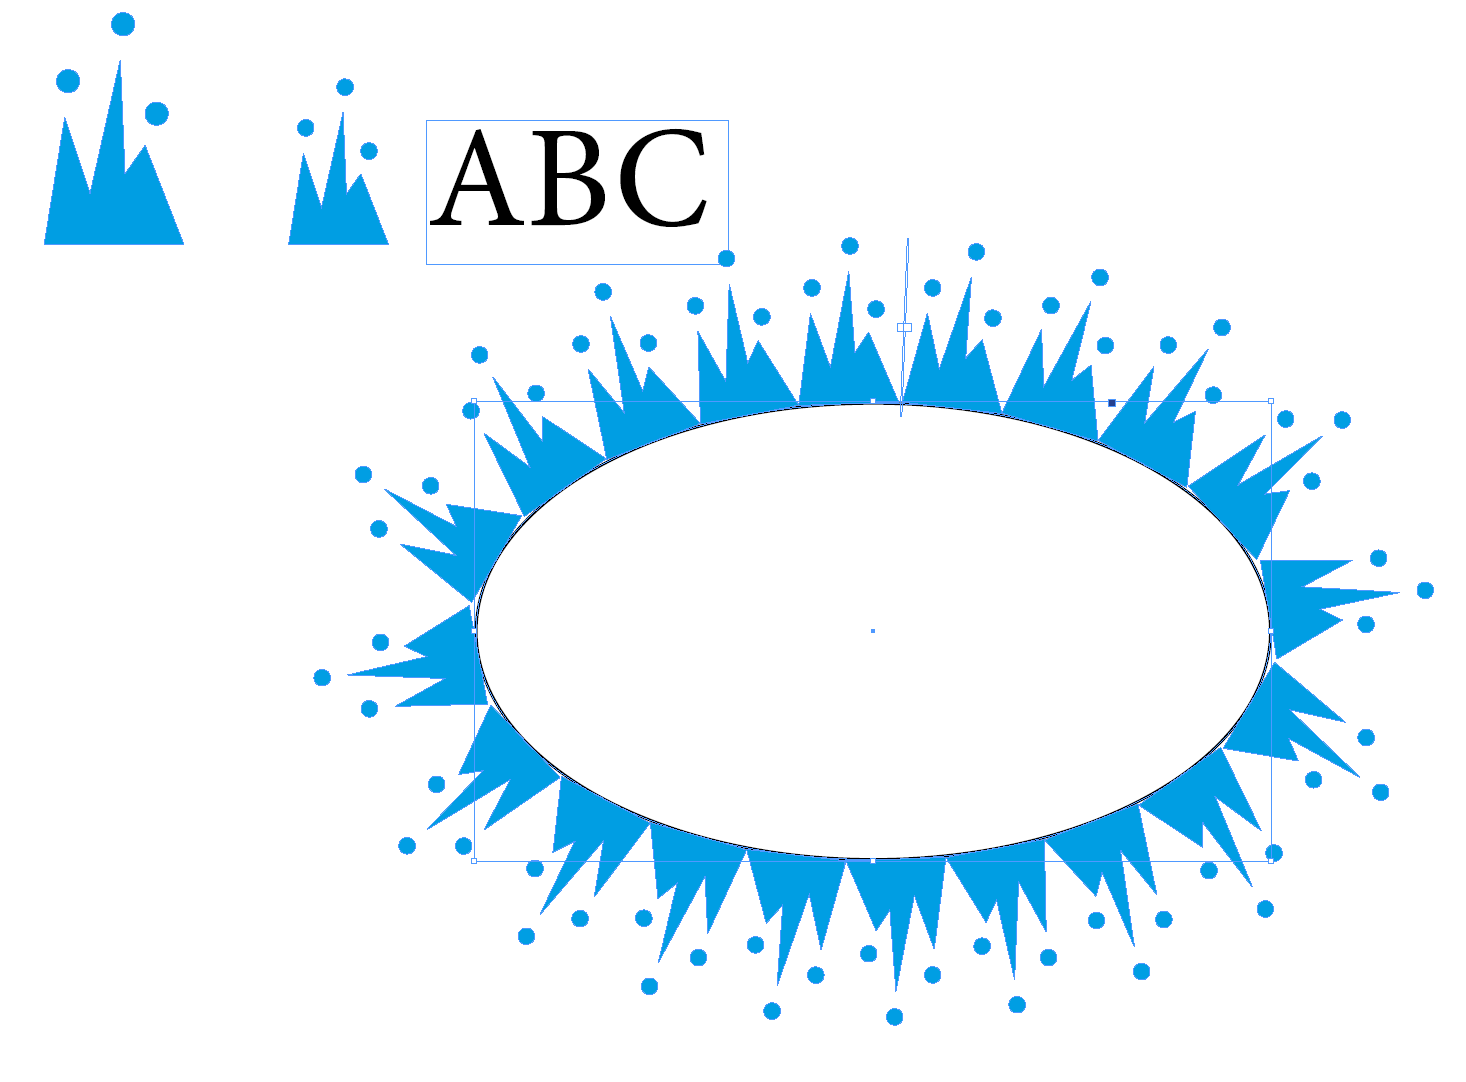
I made a scaled copy of the blue shape - approximately as wide as letters which would fill exactly a full ellipse curve when they were written with Type on Path tool.
Instead of typing text I pasted from the clipboard copies of the shapes as inline graphics. Only a minor adjustment of the ellipse size was needed for the shown result.
Unfortunately this didn't work at all in my legacy Illustrator, so I used InDesign. That's why I call it workaround.
If the ellipse dimensions must stay untouched you can adjust the tracking and baseline shift parameters in the Type > Character panel. Have Type on Path tool ON and select with it the placed shapes at first.
As you see, it's not symmetric. If it must be symmetric, place the shapes on a half or quarter ellipse and make rotated or reflected copies.
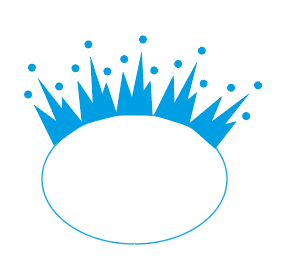
In the next image there's a version which has separate upper and lower halves. There's also inserted an extra ellipse curve to hide the flat bottoms of the shapes:
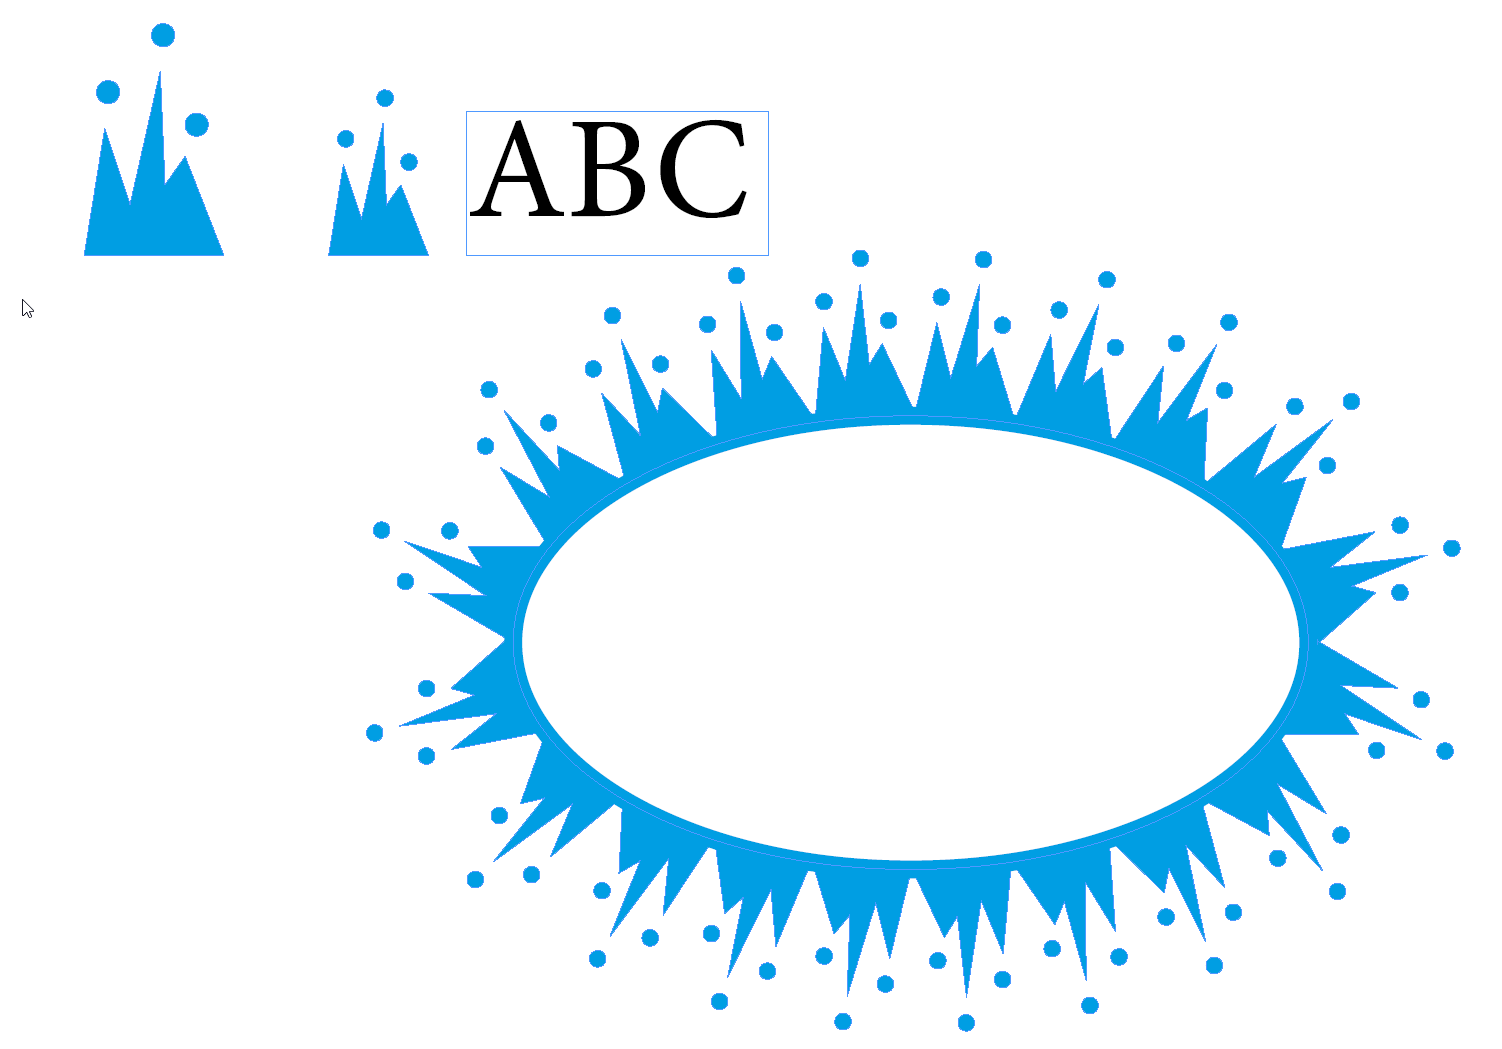
BTW.I needed only to visit in InD for the job. The shapes can be pasted forth and back between Illustrator and InD - I only removed the clipping mask after returning to Illustrator.
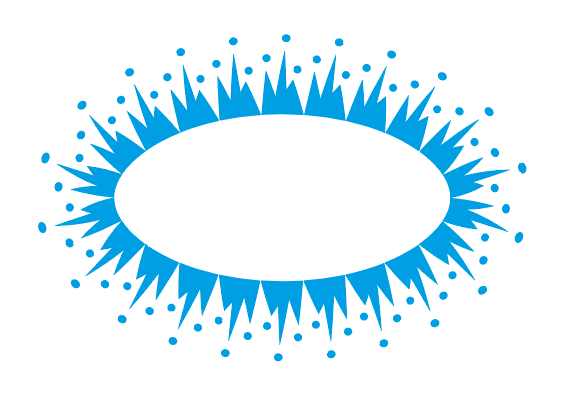
Making it to look quite regular is easy in Illustrator. Move the bottom corners of the shapes to good places with the direct selection tool, make an union with pathfinder panel's Unite and subtract an ellipse for round interior:
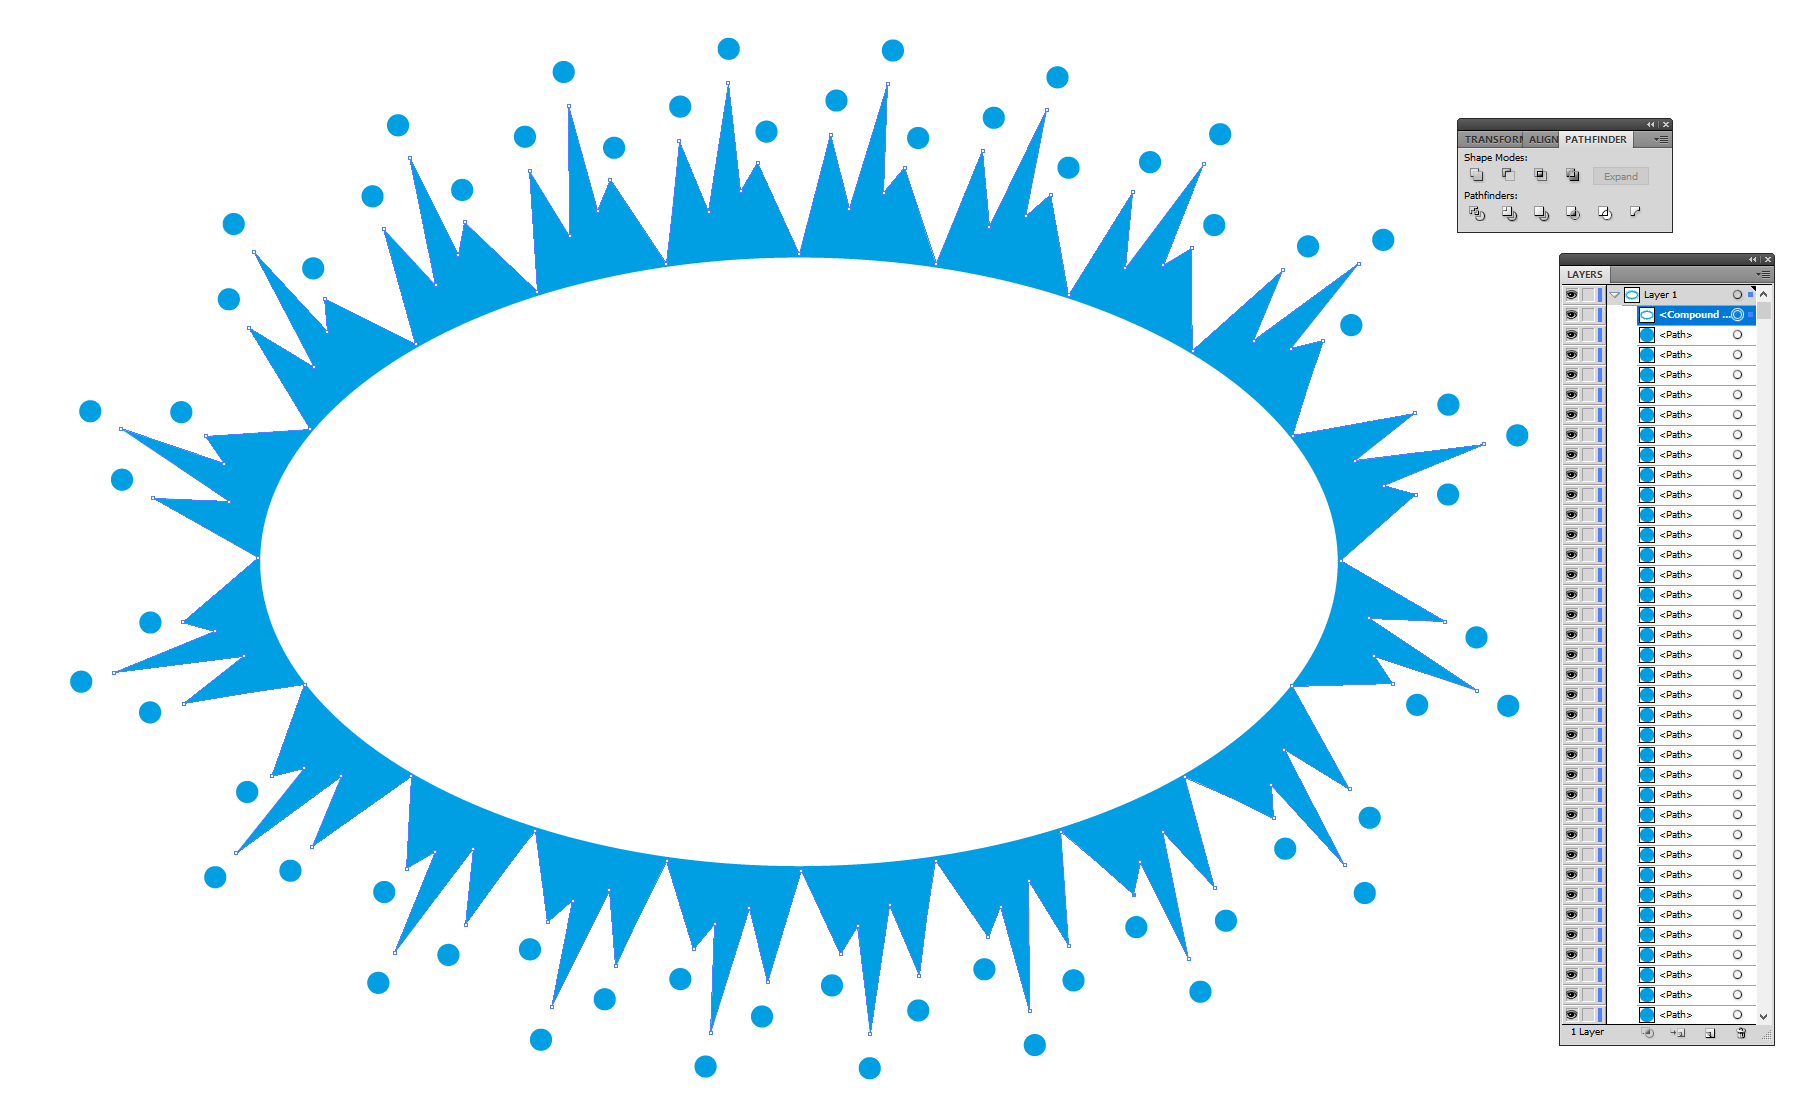
Of course, it's not regular, but it can still look well done because the rotation angles are right.
I'm afraid a competent programmer is needed to write a script which automatically rotates and places the shapes exactly. I am not one, but I can let Excel calculate the rotation angles of the shapes so that the shapes fill the ellipse curve exactly when they are moved manually side by side:

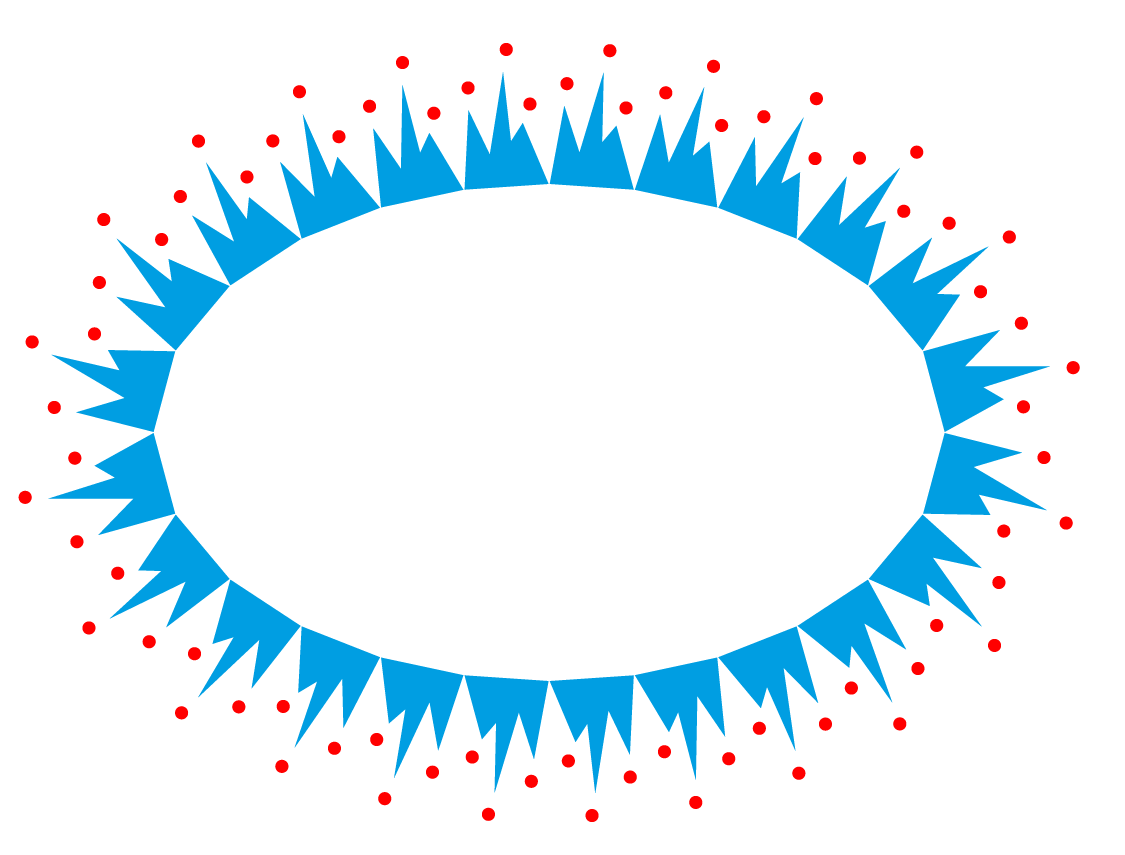
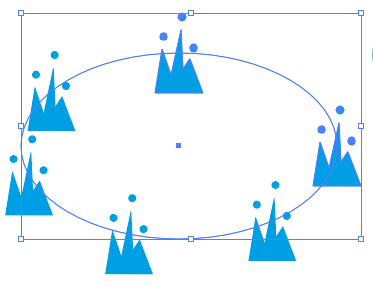
Only a quarter of ellipse is used for symmetric result. The ellipse half axles are a=3 and b=2. The curve is divided to 5 segments. The rotated shapes are drawn in the next image:

In the next image the rotated shapes are moved side by side so that their corners snap. 3 rotated and reflected copies are made to get a full ellipse. Finally a red ellipse curve was inserted to see if the tiled shapes really are placed along an ellipse:
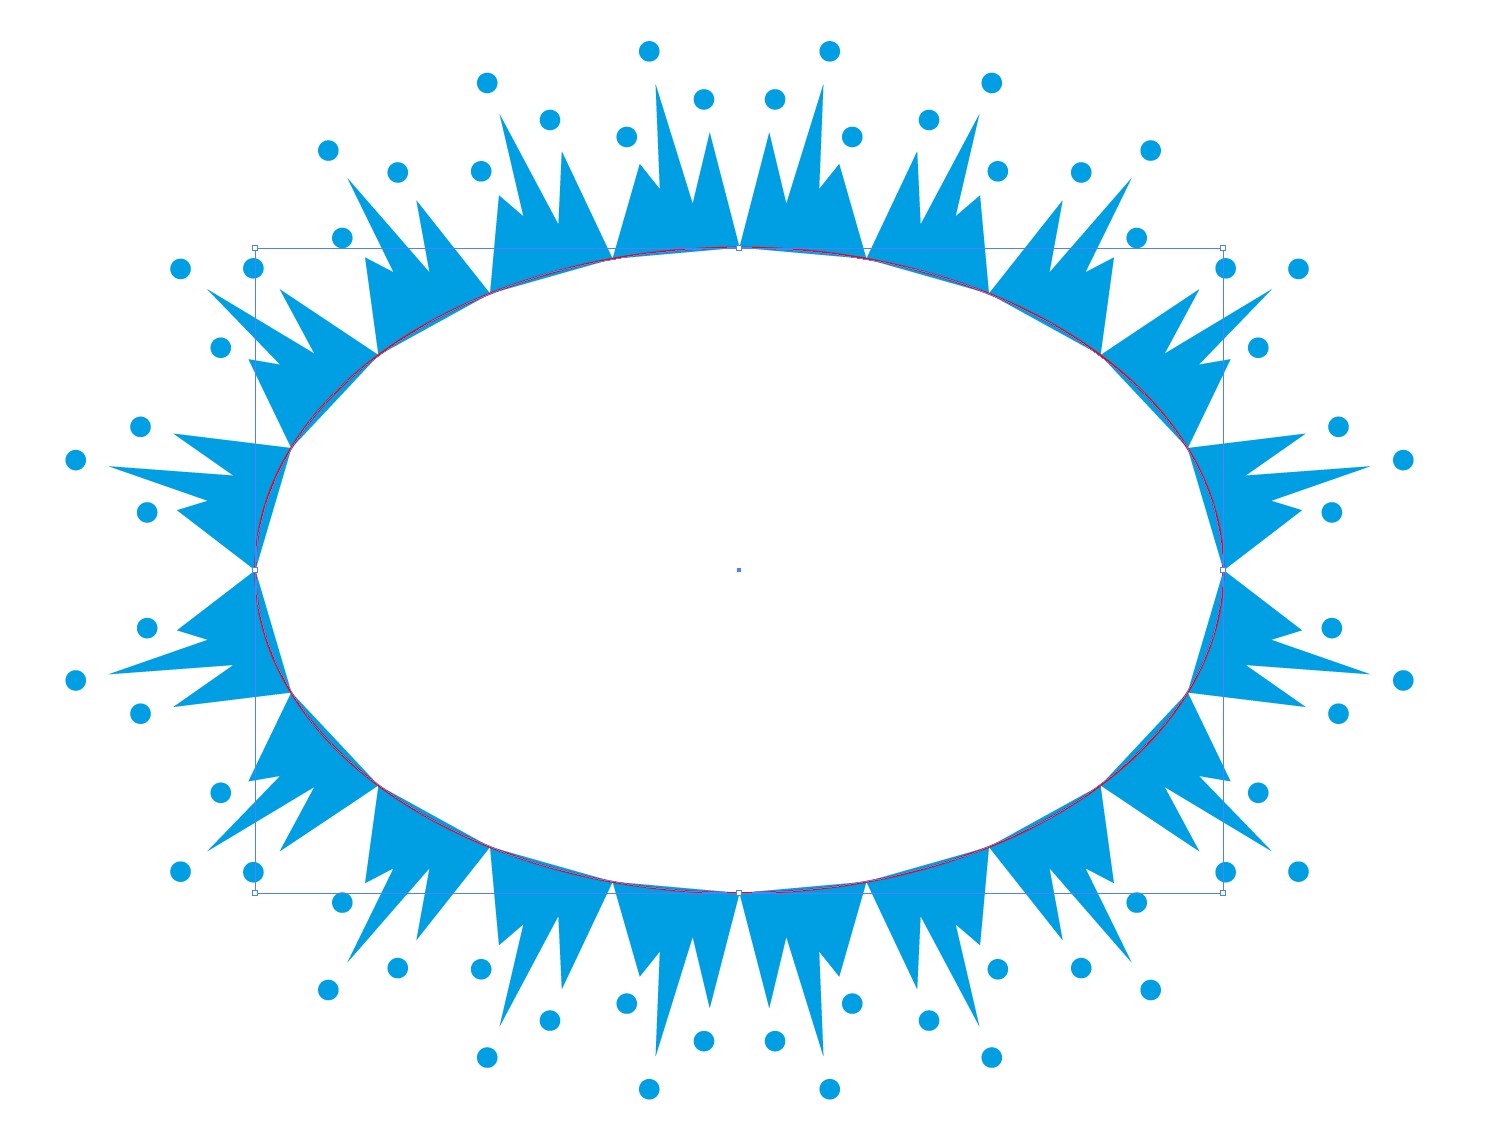
The spreadsheet uses Excel Solver to find numerically a polyline approximation of the ellipse curve. The Solver minimizes the mean deviation of the lengths of the polyline segments. The spreadsheet is elementary. I guess that programming a drawing script with the same numerical iteration would be not so elementary, but I'm sure it's still no problem for a competent programmer.
Using pattern brush
I guess you would use pattern brush if it didn't distort the circles. I guess you also want to keep the rest of the shapes with straight edges. Both of them are possible without tiling anything manually. You can place well-formed circles easily afterwards and you can straighten the shapes which became bended by the pattern brush.
The method is based on the properties of your shape. It should be considered to be more a trick than something generally usable.
The shape used as pattern brush must have a couple of modifications:
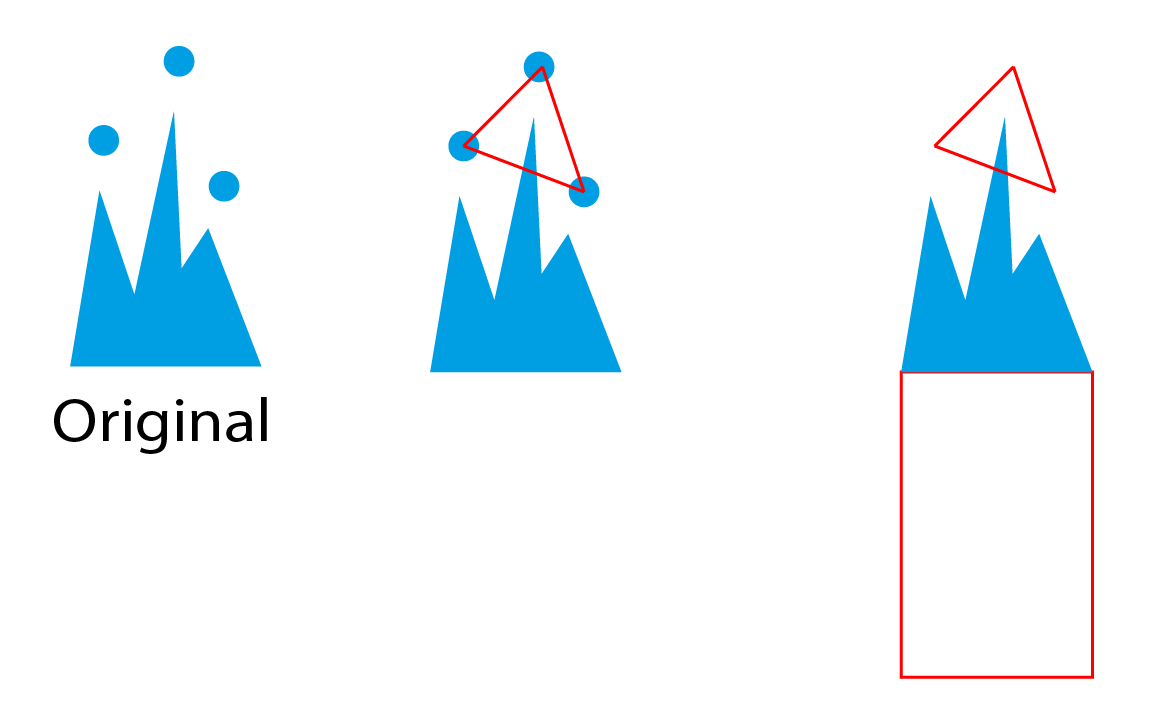
The pattern brush shape is in the right. The circles are replaced by 3 separate marker lines which are drawn between the centerpoints. The lines must be separate, but they all are drawn by walking clockwise around the triangle. The directions are essential!
The rectangle in the bottom only ensures that the midline of the brush will be the base edge of the original shape.
Applying the pattern brush to an ellipse gives this:
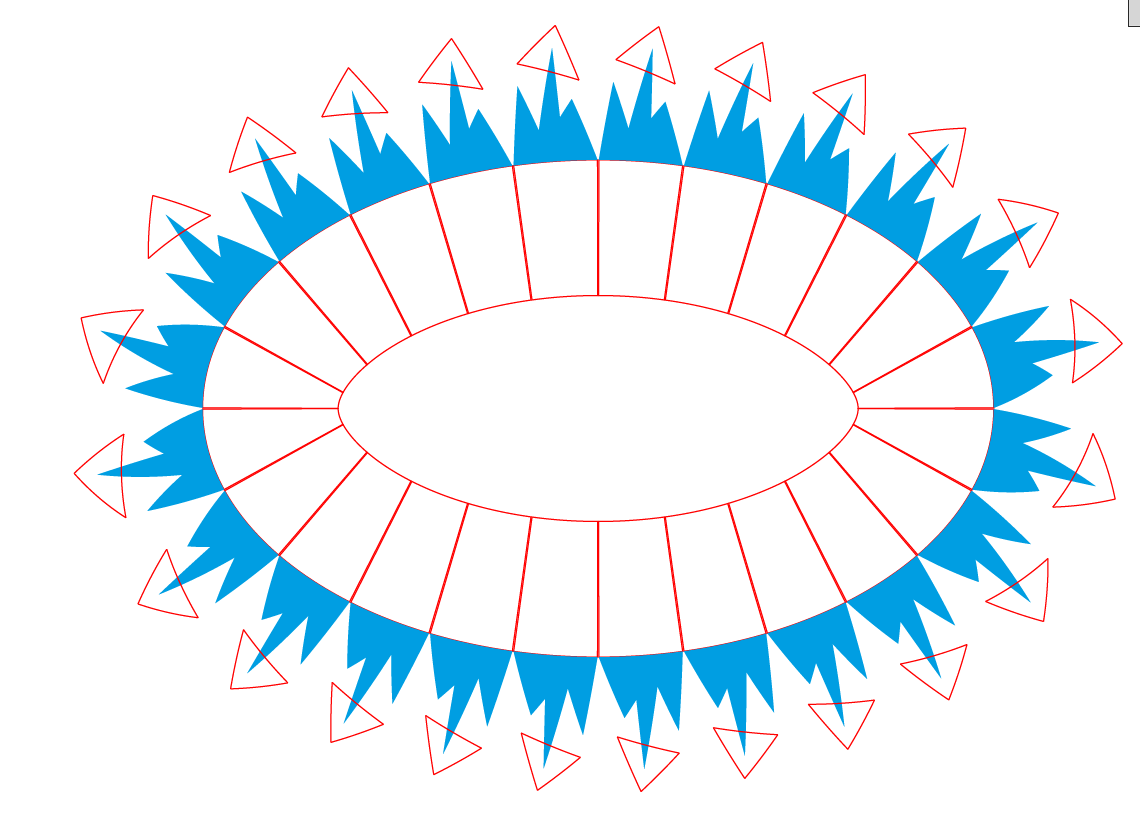
Apply Object > Expand Appearance and then ungroup 3 times to make it freely editable. Select the distorted rectangles and delete them. Select the blue shapes and apply Object > Path > Simplify > Straight lines to restore the straight edges (you can select one and use the Select > Same > Fill color):
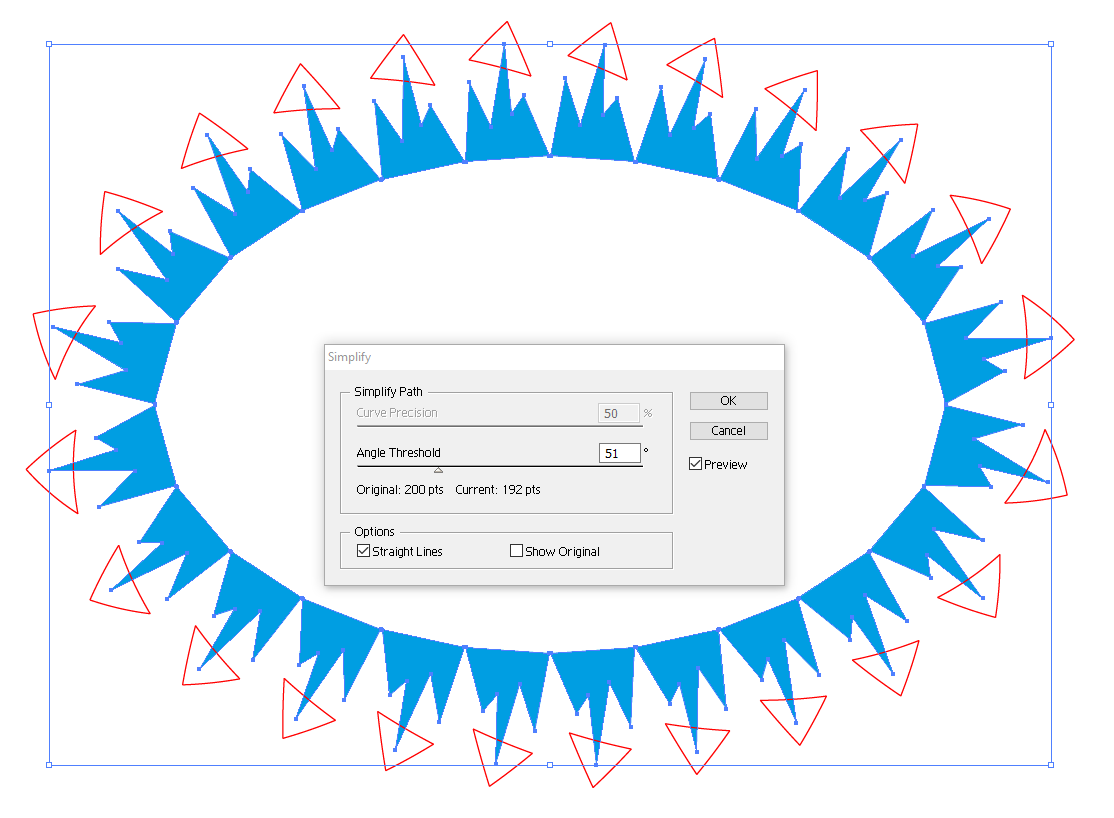
Angle Treshold -slider is used to remove the extra corners caused by the curvature and straightening.
Select the red triangles (use select same) and give to every line segment a round arrowhead. Set its place to be the starting point and adjust its scaling:
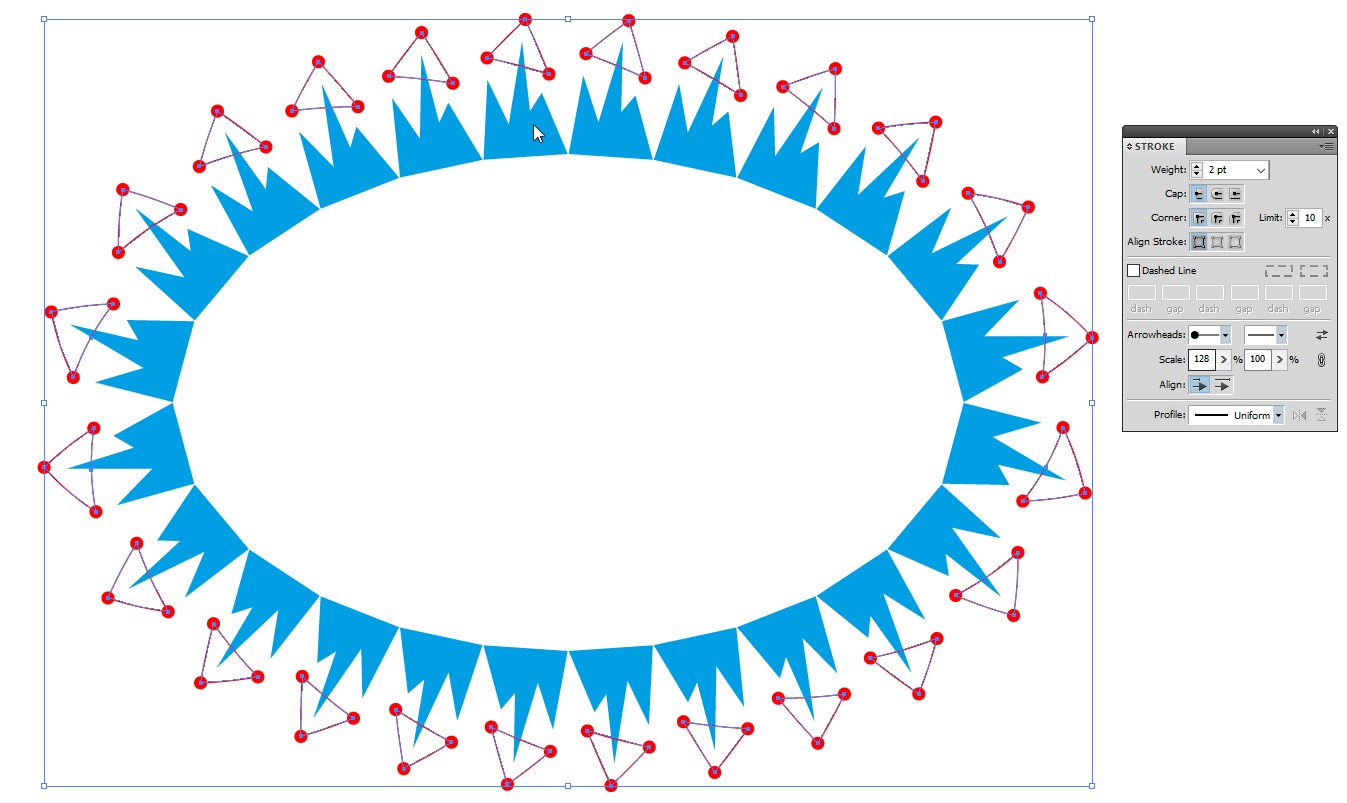
Expand the appearanceof the red parts, ungroup twice to make the parts freely editable, select the line segments (use select same) and press DEL. You have the marker circles ready for recoloring:
