0

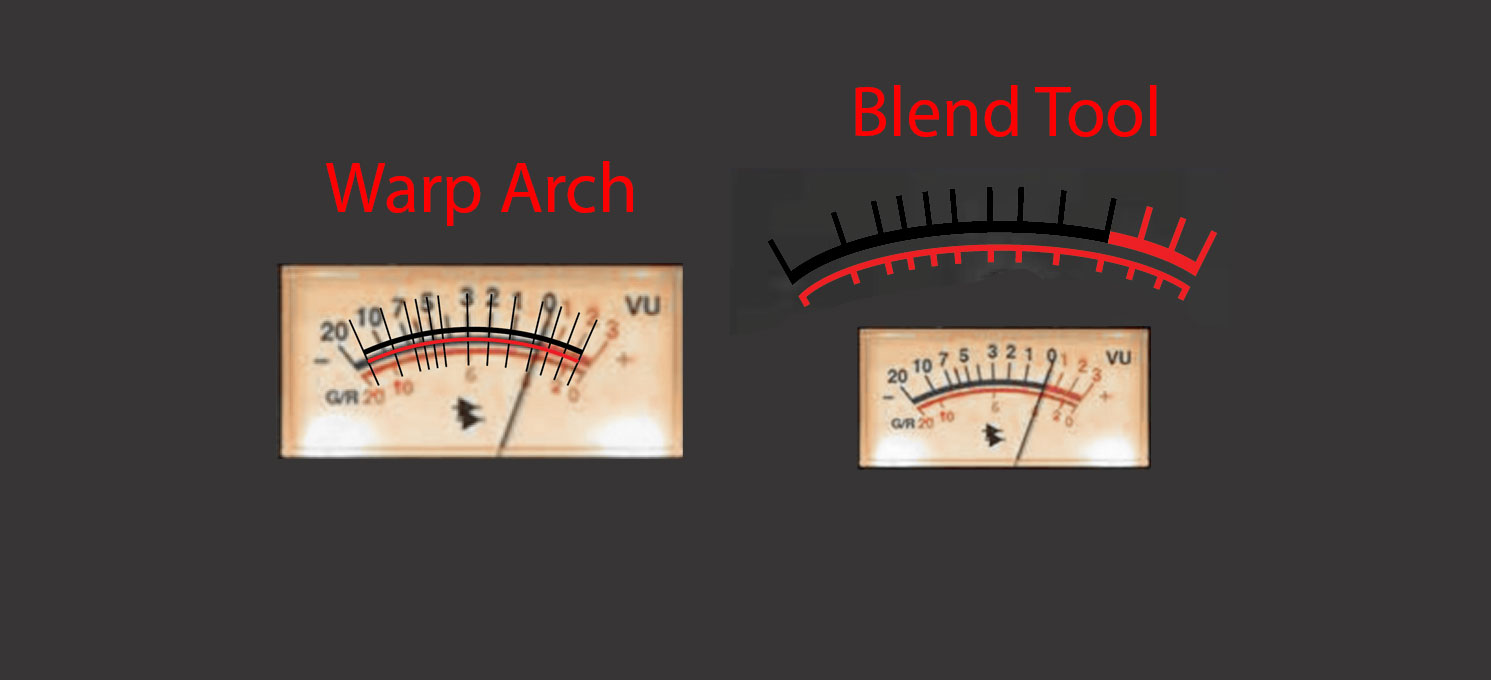
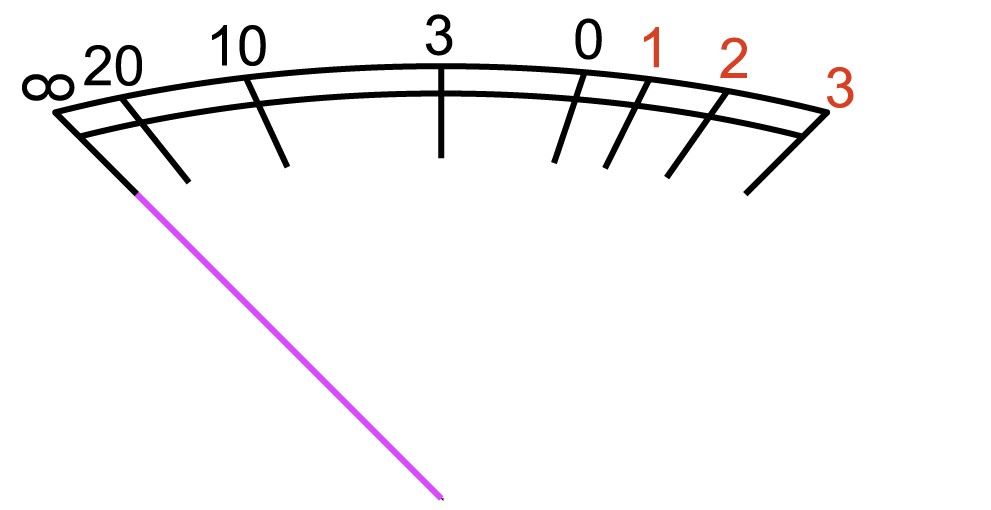
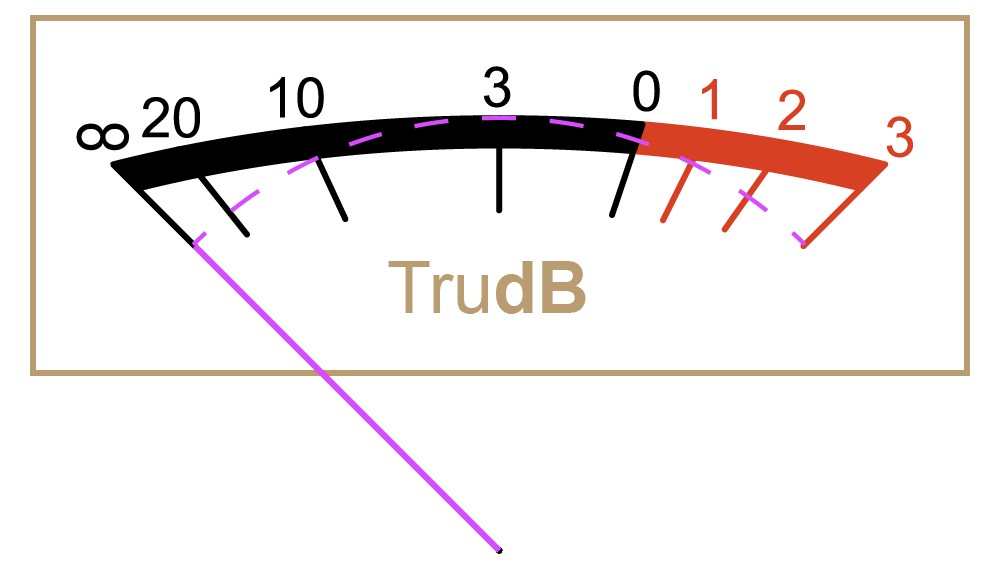
I'm trying to create a VU meter in Illustrator. I've tried various methods but cannot achieve the result I like. (I tried blend tool method, and also warp Arch method as seen in my example attached.) I got a response from another Illustrator user, but I must admit it's a bit confusing. I'm stuck on the 1st step, which has to do with the transform pallet

  1. Place the original on a Template Layer at the largest possible size that can be easily scaled to the final size, and start on a new Layer above it, and work at a zoom level that allows precise fitting;

1) With the Line Segment Tool Click Drag between the ends of the visible part of the indicator, then in the Transform palette select the top right Reference Point and multiply the W or H value by a sufficient number (maybe 1.5) and press Ctrl/Cmd+Enter to extend past its centre of rotation;

  1. With the Ellipse Tool create an ellipse that fits the upper scale nicely and has its centre on the line from 1);

  2. Object>Path>Offset Path with a negative Offset that gives a fit on the lower scale; you may use Undo for just 3) or for both 2) and 3), depending on the accuracy of the original, to get the best overall fit (if any, I would weight the upper higher in this); copy all the marks and lock the originals;

  3. Select the upper scale ellipse and Object>Path>Offset Path with a positive Offset to fit the upper ends of the upper marks, then Object>Path>Offset Path with a negative Offset to fit the lower ends of the lower marks

  4. For the upper scale, with the Line Segment Tool ClickDrag from the upper end of each mark (at the upper ellipse) to the centre (of rotation/the ellipses), then extend beyond the upper ellipse as in 1) if needed (see below);

  5. Repeat 4) only for the lower scale;

  6. Increase the Stroke Weight of all parts to match the originals;

8 ) Cut all parts as desired, either

8a) Cut the upper/lower marks at the intersections with 2)/1) and the upper/lower end ellipse and hide/delete the unneeded parts, and also cut the scales, and extend the upper mark at 0 to reach the bottom of the upper scale; or

8b) Select all the parts and Object>Path>Outline Stroke and use the Pathfinder operations to cut;

  1. Set the colour of all parts; cut the upper scale so it switches from black to red just to the right of the upper mark at 0;

  2. Add the numbers, letters, and signs.

Thank you.

enter image description here

2
  • 1
    Alternative idea draw the meter straight asif not wrapped. Make it a brush then apply the brush on a arc. Its less errorprone than usung warp arc
    – joojaa
    Commented Jul 16, 2020 at 10:18
  • @joojaa good idea, it's just a bit more work to adjust the lines after the brush is applied, since you can't do it on top of the original image like in Andrew's answer.
    – Luciano
    Commented Jul 16, 2020 at 11:59

2 Answers 2

2

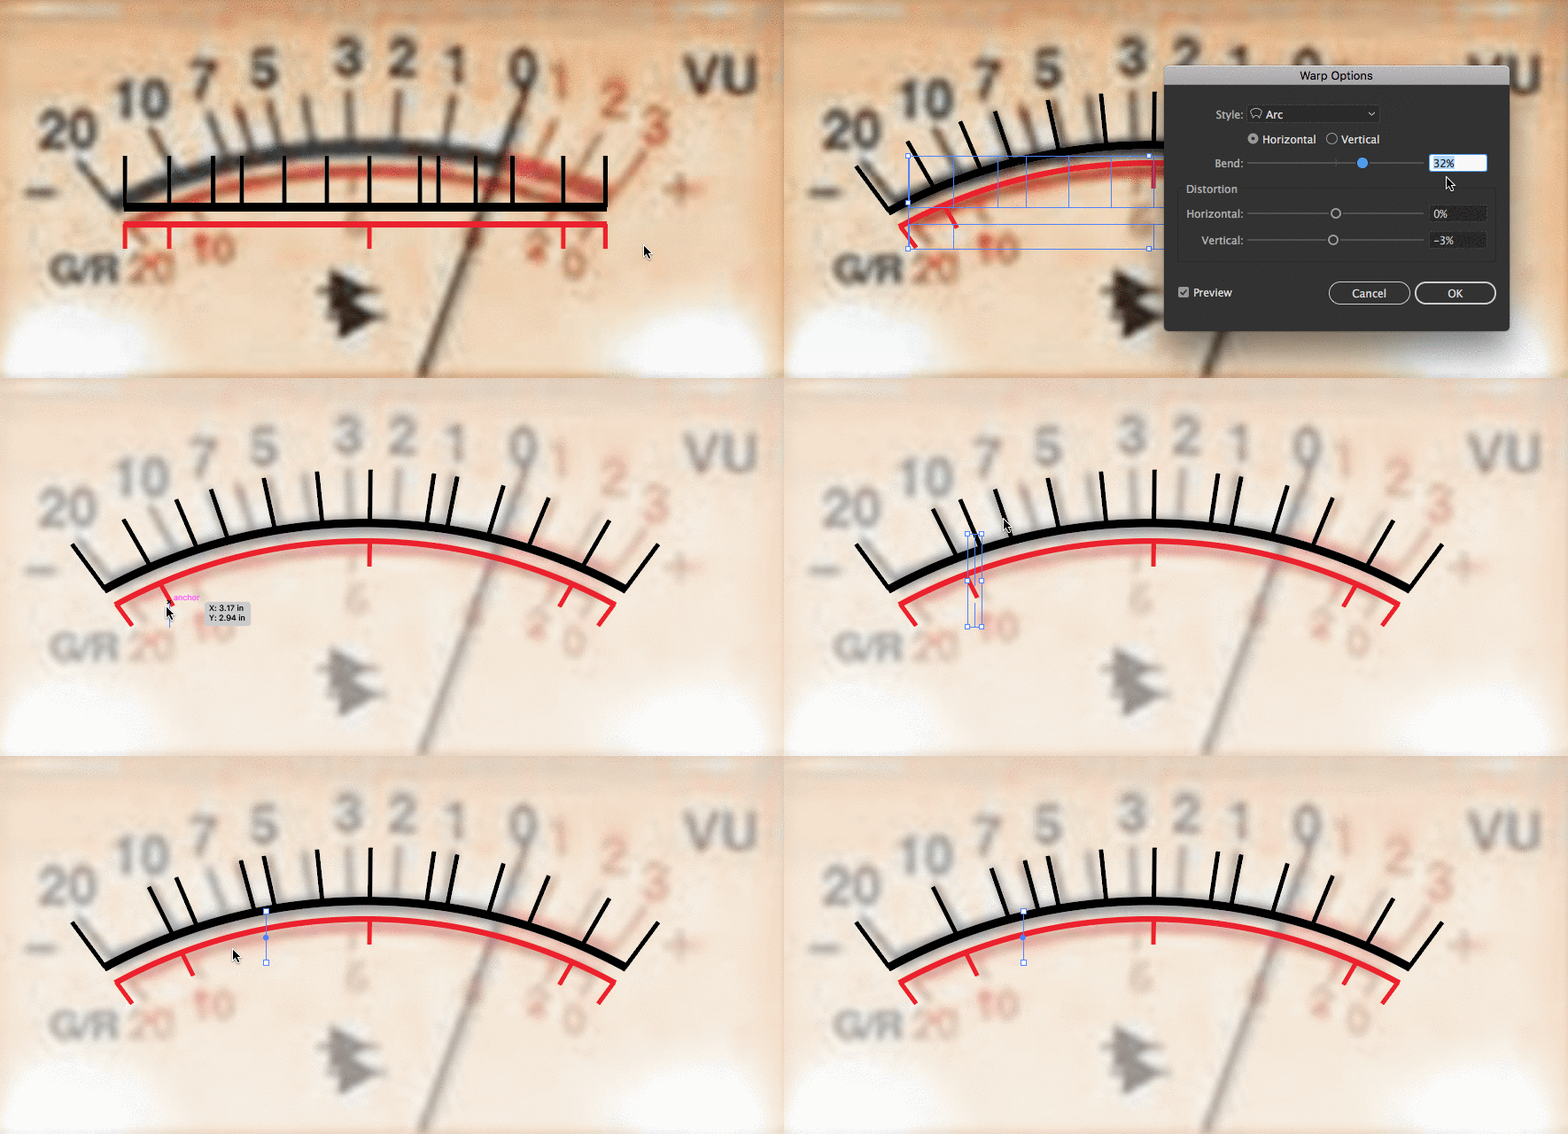
I think the Warp Arc Effect still works, you just need to refine the settings to get a closer match. Selecting the objects and adding a Warp Arc of 32% Bend and -3% Vertical Distortion worked for my object. If you add a small negative vertical distortion, it helps sell the effect. Then you can move the lines around to line them up.

Warp Effect

If you spend more time, I'm sure you could get almost an exact match.

1

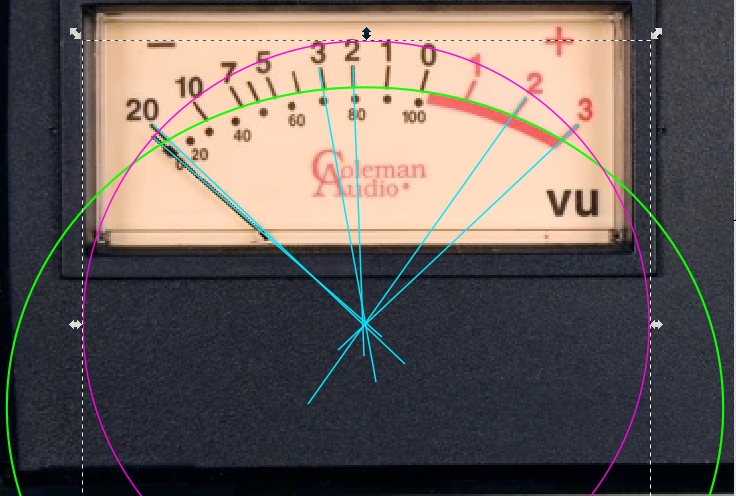
The arc where the dB marker lines and number reside is not at all circular. The needle of the meter rotates around a fixed axis but its rotation center is totally different. This is typical in audio devices, round meter scale is rare.

The meaning of the scale in VU (=volume unit) meters has some standards but in consumer devices good looks laid out by artists override technical requirements. So, in consumer devices one should compare the readings only to the readings in the same device.

Having an artistically refined custom "volume unit" scale is not a fraud as long as no claim of obeying a certain standard nor scale division as decibels isn't presented.

The next image hopefully gives some idea of non-round VU-meter designs:

enter image description here

The green ellipse is matched (by eye) to the arc of the numbers and marker lines. The markers point to the axis of the needle. The cyan lines are drawn to find approximately the axis of the needle.

The needle is the radius of the magenta circle, but the revolution range is typically only 90 degrees in consumer devices.

How to calculate the exact needle positions is actually off-topic here but the formula is simple for meters which get their signal from perfectly designed analog circuits which rectify the signal linearly without the original diode rectifier non-linearity. If we say the needle position for totally silent signal i.e. far left is zero degrees and for maximum (=+3dB) signal it's +90 degrees we have the following formula:

the needle position angle = 63,64 degrees * 10^(D/20)

D is the number of decibels.

That 60,64 degrees in the formula is actually 90 degrees divided by sqrt(2) as persons who know decibels surely see.

The ideal needle positions for 90 degrees max. deflection are in the next Excel table. The calculation accuracy is 0,1 degrees or better:

enter image description here

The smallest commonly shown number is -20dB in VU-meters. The needle position for it is 6,4 degrees. As you see, in my previous image the -20dB marker is placed at less than 6,4 degrees apart from zero angle and the -3dB marker is far from 45 degrees. It's not possible to decide here is it an attempt to compensate not so perfect (=non-linear rectifier) measuring electronics or is it an artistic decision for better look. At least there's no mention of decibels.

A rudimentary design example:

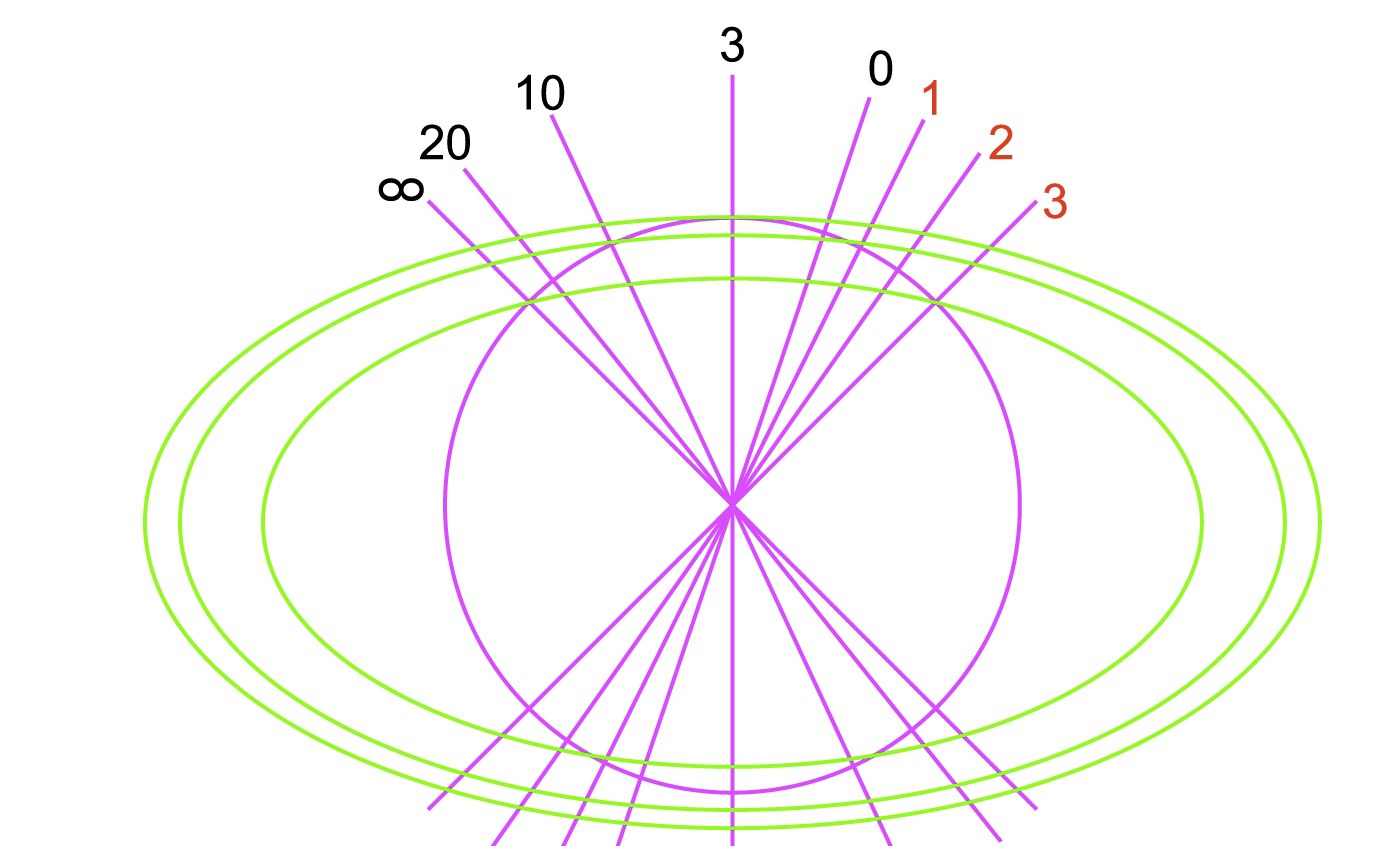
The next image has green "artistic" ellipses, a magenta circle to show the actual rotation path of the needle and some magenta lines for a few needle position markers.

enter image description here

The green ellipses are made by scaling the smallest to 2 bigger sizes. They have a common center but they are aligned only horizontally with the needle parts.

In the next image the all lines and curves are are selected and Pathfinder panel's Outline is applied:

enter image description here

Pathfinder panel's Outline splits every line and curve at every crossing and removes all colors. The result is a group. After ungrouping the splinters are recolored and the extras are deleted. The numbers are inserted manually.

In the next image the overdrive area and non-distorting area are colored with the Shape Builder + by selecting the stroke colors, the intended device front panel hole is drawn and the needle and it's possible path are shown as magenta:

enter image description here

Your Answer

By clicking “Post Your Answer”, you agree to our terms of service and acknowledge you have read our privacy policy.

Not the answer you're looking for? Browse other questions tagged or ask your own question.