0

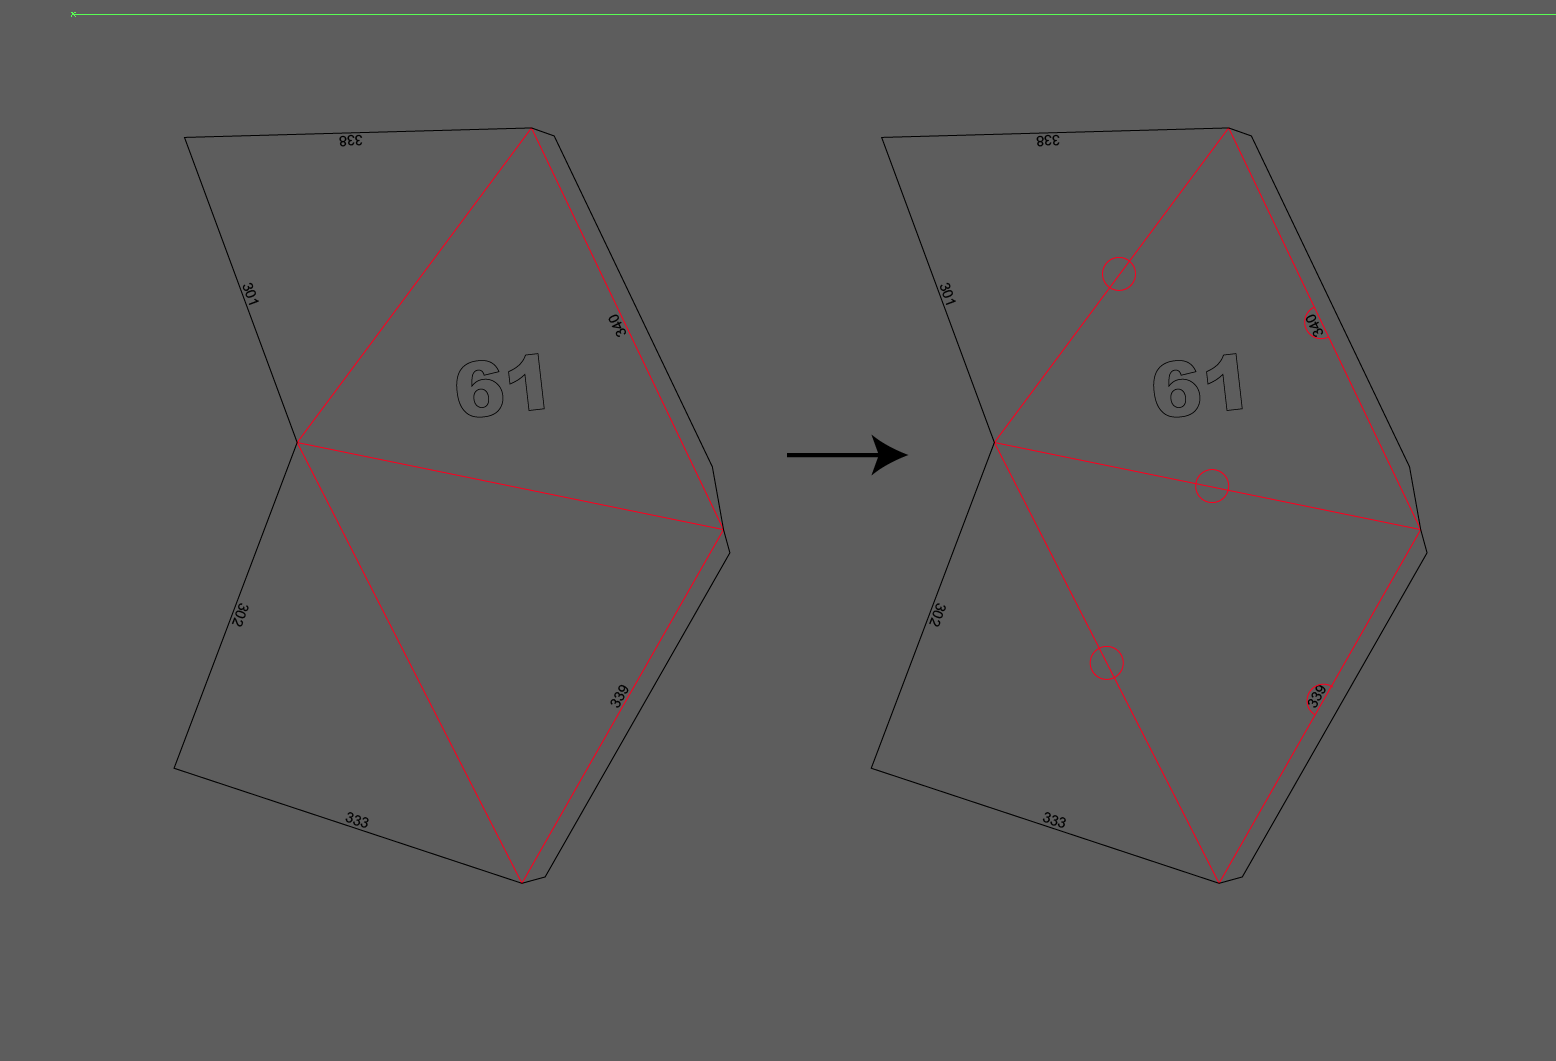
I have a design I'd like to laser cut and need to put a circle in the center of the red lines.

Is there a way to place a circle in the center of each line without having to do it manually and keeping the thickness editable?

For instance, if I change the thickness of the red line, the thickness of the circle would also change.

enter image description here

2
  • So I see you're using a Pepakura generated pdf. What have you done to prepare the file so far? Have you created all of your "die-lines" for the cuts? Are each of the lines closed into shapes? Commented Feb 26, 2018 at 19:08
  • I've done quite a lot already :) I redid all the numerotation so the pieces are easier to assemble, so you wouldn't find tabs starting at 100's on the piece n°1 for exemple.. That already was quite exausting. Otherwise, each line is a separated path. I can select individual lines and change the stroke thickness but can't find a way to add a circle in the center and make it a custom profile. Seems I can only modify the thickness for creating a custom stroke profile. Commented Feb 26, 2018 at 19:21

3 Answers 3

3

For a line the following holds true (but not many other shapes). Center of bounding box is equal to center of line. Now if we simply modify this script:

#target illustrator

var doc = app.activeDocument;
var sel = doc.selection; 
var rad = 10;

for(var i = 0; i < sel.length; i++){
      if(sel[i].typename == "PathItem"){
          var obj = sel[i];
          var center = obj.position;
          center[0] += obj.width/2.0;
          center[1] -= obj.height/2.0;  
          doc.pathItems.ellipse(
              center[1]+rad,center[0]-rad,
              2*rad, 2*rad, 
              false, false
          );
      }
}

Select red lines and run (with extendScript Toolkit).

Or you can do this fully automatically without a script just select the red lines:

  1. (optional, see below) duplicate them
  2. apply convert to shape ellipse, set values to absolute.
  3. (optional) Expand

done. Alternatively you can just add another stroke on the line with a ellipse conversion, then no duplicate is needed

1
  • @TruongDavid once enough time has passed then you might wanyt to accept one of the answers usnig the chackmark, otherwise the question will linger as a zombie forever.
    – joojaa
    Commented Feb 27, 2018 at 8:44
1

You could try this:

  1. Select a red line.
  2. select>same>appearance
  3. Open the Appearance palette.
  4. Add a new stroke (button at the lower left of the palette)
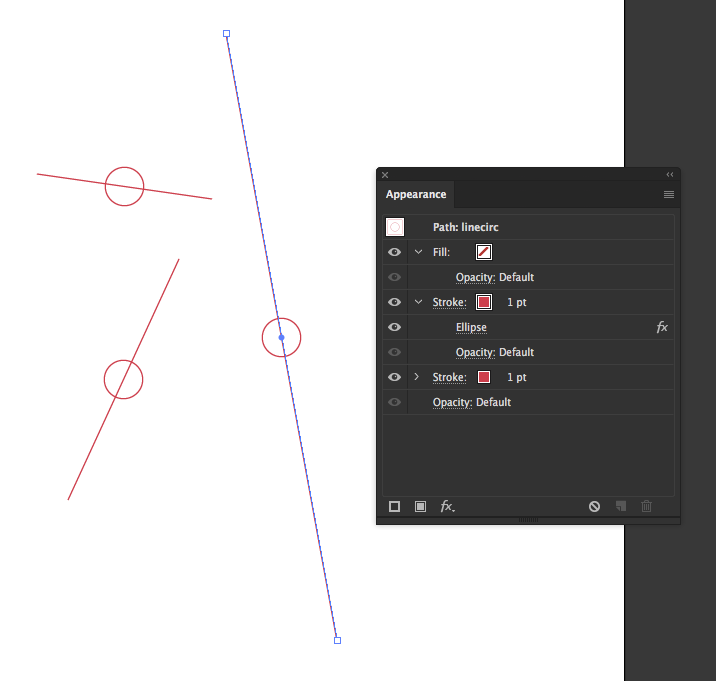
  5. effect>convert to shape>ellipse, change the size to absolute, then enter whatever numbers you want for the actual size
  6. Open the Graphic Styles palette and create a new style.

a screengrab of the Appearance palette and some paths drawn with the above-described Graphic Style

You can now change the weight of every line and circle drawn with this style:

  1. click on the style you made in the Graphic Styles palette, or select a path drawn using this style
  2. visit the Appearance palette and select the individual strokes to modify them
  3. open the Appearance palette's menu, do "redefine graphic style", everything linked to this style should change to match

This won't work if some of your lines that need a circle in their middle are curved.

1
  • Didnt i say this? Anyway more thoroughly explained by you. Here have some reputation?
    – joojaa
    Commented Mar 1, 2018 at 16:31
0

The following solution is not automatic, but it will get your circles in the exact position.

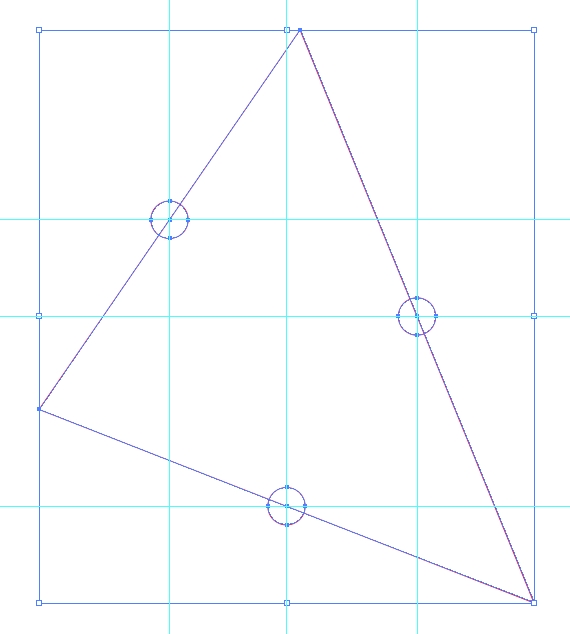
  1. Select your triangle or lines (whether a closed shape or not). Click Object > Path > Add anchor points. This will add an anchor at the exact centre of each line.

  2. With Smart Guides enabled position horizontal and vertical guides at the anchors so that they intersect.

  3. Use these guides to position your circles. With Smart Guides on, the circle centre will snap to the intersection.

enter image description here

  1. To change all the line weights at the same time, select one red line, and click Select > Same > Stroke Color

  2. Change the stroke thickness as desired.

2
  • Thanks, but I needed an automated solution, as I've hundreds of lines to edit :) @Jooja gave me a simple yet effective solution ! Commented Feb 26, 2018 at 19:57
  • 1
    @TruongDavid Yes, I saw that, aren't you lucky!
    – Billy Kerr
    Commented Feb 26, 2018 at 21:50

Your Answer

By clicking “Post Your Answer”, you agree to our terms of service and acknowledge you have read our privacy policy.

Not the answer you're looking for? Browse other questions tagged or ask your own question.