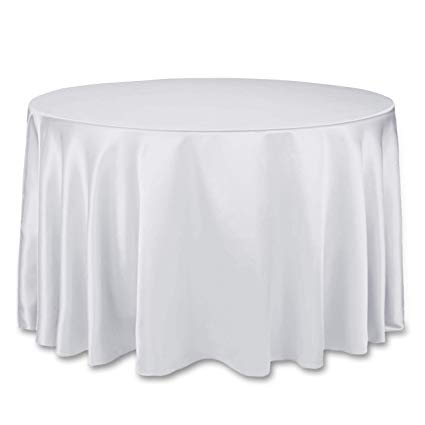
Is there a way to apply gradient effect to the path drawn by curve tool ?
I am trying to make silky cloth shown as below. For that I need to draw gradient on path. How can I draw this in gimp ? Or other way to achieve this effect?
Is there a way to apply gradient effect to the path drawn by curve tool ?
I am trying to make silky cloth shown as below. For that I need to draw gradient on path. How can I draw this in gimp ? Or other way to achieve this effect?
There's a comment which tells the (not so comfortable) truth: To draw this in GIMP or other drawing and painting software you must develop some painting skills. No effect will do the trick, the needed shading is far too complex.
The most difficult thing is to see beforehand where lights and shadows should be placed. The only way to decide it is to think the geometric forms and the light. Its details are told in drawing and painting books and tutorials. Get them!
The problem of "seeing beforehand" is removed if one tries to redraw an existing image. That's definitely the way how the beginners must start their practicing.
Software allows experimenting and tweaking - you can click undo infinitely. Software can make stable brush strokes regardless how shaky are painter's hands. In addition you have shortcuts such as gradients, color adjustments, cloning etc...(=the whole effect and adjustment repertoire). Thus painting it in software is easier than with traditional tools. But it doesn't remove the need of seeing "how it should be".
You hoped that something like a gradient guided by a path would do the trick. Unfortunately there's no such thing in GIMP and even less if it should know how the shading should be in your silky cloth when it's placed over the table.
I guess the nearest thing which does the job with effort such low as you expect is to let 3D software do the hard work (=the actual painting), you define only the geometric form and you do it quite loosely, the software decides the details. We see one example. At first one must draw some lines and curves on a plane:
The hanging edge of the tablecloth is drawn as a curved spline. The lines and the biggest circle are drawn only to help drawing the spline which is done by clicking the points where the spline should go through. The spline isn't based on any physics, it's a pure guess.
The two smaller circles will be used to make the top part. Before inserting the surface the smaller rings are lifted to their final elevations:
Even quite simple 3D modelling programs have function named Loft or Blend which creates a surface between curves and caps the ends if needed. That function is used to get this:
Only delete or make invisible the original form curves and you have something to export.
Advanced 3D modelling programs allow coloring, light adjustments and photorealistic materials. Unfortunately I have only entry level 3D software which has a few preset shading modes with very little control. This is called "metallic". I selected it because I've seen the glosses on silk resemble metal. The only possibility to make fine color and shading adjustments is to import the result as 2D image to a drawing program - GIMP, for example - and continue there manually.
Advanced (and complex) 3D software like Blender can do even more. There's a comment "use cloth simulation in Blender and no lofting is needed". That's true. Blender can simulate physics and find how a cloth would take its place when it was dropped over a table.
Without 3D software the things get complex. Fortunately also a simpler shading can create apparent forms well enough. We'll see how the foldings can be made one by one in pieces without actual painting with brushes.
At first one must make the outline shape and fill it with solid grey. I do not draw full cloth, only a little piece with no realistic proportions:
As you see, I don't use GIMP because it hasn't adjustment layers. Photoshop isn't a must. This is Affinity Photo. In GIMP one must keep a spare copy or layer duplicate for a later a need to readjust. Here's used nothing which isn't in GIMP.
To get the bottom edge right you can for ex. draw a path like in my 3D example and squeeze it vertically for the right view.
For shading the foldings you can make a selection and insert a gradient to a new layer:
Normal simple gradients are compromises. A little more flexible way to make complex enough gradients for the shading is to blur colored areas. Here's painted black and white to a new layer and the layer has got Gaussian blur. The inserted colors must be well over the border because blurring makes the edges thin:
The previous folding masks the new one, which is useful. We have a sharp border automatically.
You must make a selection with the pen or lasso and the outline shape to delete the excessive coloring. Here the possibility to combine and invert selections is valuable:
You can reduce the depth of the foldings gradually by inserting a copy of the outline shape with gradient mask. As well you could group all folding coloring layers and insert a mask to the group:
As the last trick of this story is the fake metallization with solarization. I have merged the layers as you must do in GIMP altough in Affinity Photo it's optional because One can use adjustment layers:
Solarization is an old darkroom trick. One adds a little white light during the development. It causes partial greyshade inversions.
The same, but with more control is achieved with curves, only insert some bumps. In this case the effect is subtle.
Done.