0

I'm using Adobe Illustrator (27.8.1)

How do I make this kind of shape, so that the whole shape is symmetrical both vertically and horizontally, but each corner is elongated along one side but not the other? It's not a regular ellipse, it's not a regular rounded rectangle.

elongated shape between round corner rectangle and long ellipse

1

2 Answers 2

1

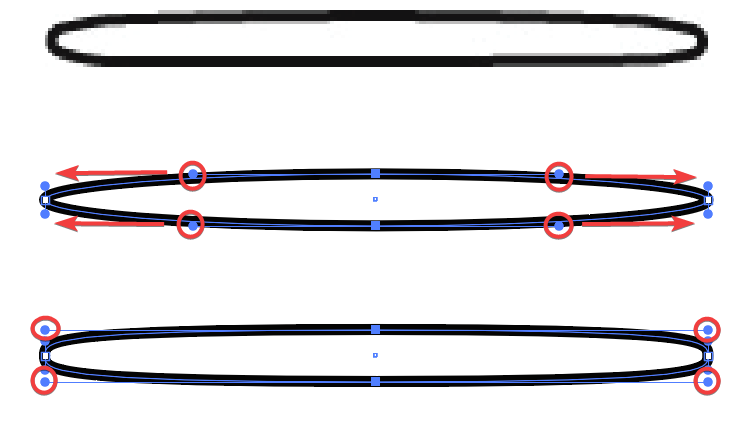
Start with a long ellipse, and pull out the Bézier handles at the top and bottom anchors to flatten the curves. Hold down Shift as you click and drag to constrain the handle movement horizontally, and pull them until they line up with the edge of the ellipse.

Here's an example. Your sketch is at the top, ellipse in the middle, and flattened ellipse at the bottom. The handles to pull are circled red. Move them in the direction of the arrows.

enter image description here

3
  • Thanks @Billy. However it is really hard to make it all symmetrical if you move them one at a time. Is there any way to do it so that all four corners move together?
    – Rhia
    Commented Jan 16 at 17:55
  • 1
    @Rhia- No, you cannot move more than one Bézier handle at a time. If you turn on smart guides (Window> Smart Guides- and make sure Alignment Guides are checked on in Smart Guides Settings/ Preferences). Then include the Shift drag as Billy mentions in the answer you can get (near) perfect alignment as you drag each Bézier handle individually. If you do not want to drag the handles all the way to line up with the sides of the ellipse (as suggested) then add some vertical guides to drag the handles on each side the same.
    – Kyle
    Commented Jan 16 at 21:28
  • Thanks for adding that @Kyle - yes, Smart Guides!!
    – Billy Kerr
    Commented Jan 16 at 21:44
0

enter image description here

In the left: A rounded rectangle is drawn, The corners are curves, it's not an effect any more!

In the middle: The rectangle is scaled vertically until the corners look good. They are all quarters of an ellipse. Unfortunately the shape is still too high.

In the right: All 4 anchors of the top end corners are selected with the white arrow. The anchors are moved downwards (with the arrow down key in this case) until the shape has a good height. As well one could type the wanted height to the H-field in the info bar. Or drag by holding Shift key all top end nodes at the same time until the top edge meets some reference shape or a guide.

If you already know exactly the wanted corner shape you can as well make 3 flipped copies of it and insert the rest of the rectangle. An example:

This is the wanted top left corner:

enter image description here

Note: The endpoint handles are exactly horizontal and vertical; they are drawn by using the pen and holding shift in this case. There can also be intermediate anchors for more tricky geometric forms. You need them if you want also continuous curvature. Now the new corner curve will meet the sides of the rectangle only tangentially; there's a curvature step in the joint like at the ends of the common circular roundings.

In the next image 3 copies are made and reflected (as copied) to the needed angles. The copies are one by one placed on the corners of the wanted size rectangle. Smart guides and snap to point make them snap exactly:

enter image description here

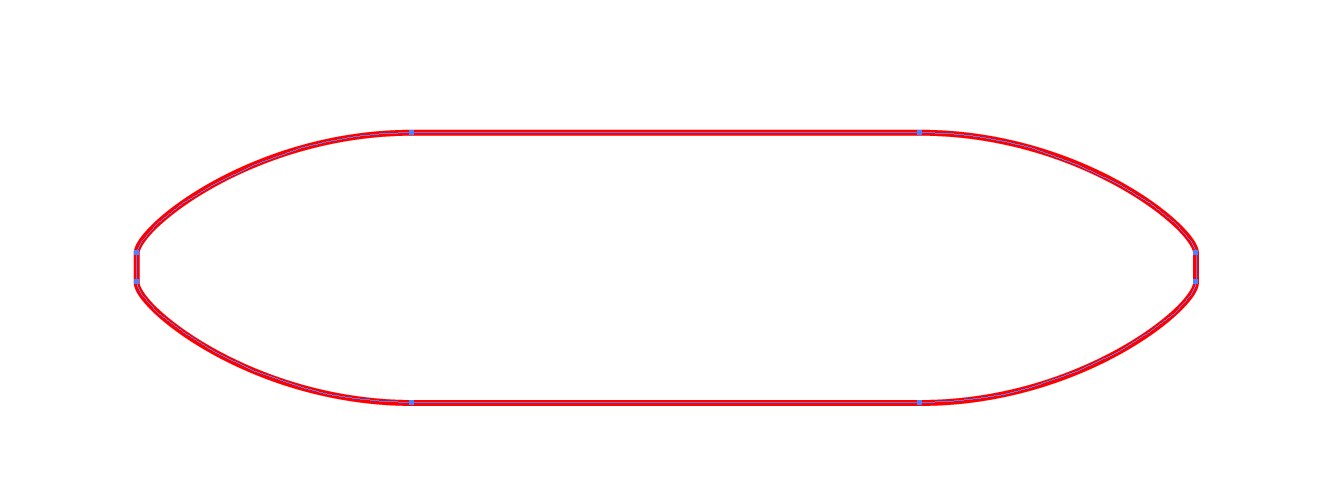
In the next image All items are selected. The new rounded shape is formed and the excessive corner areas are deleted with the Shape Builder.
enter image description here

Your Answer

By clicking “Post Your Answer”, you agree to our terms of service and acknowledge you have read our privacy policy.

Not the answer you're looking for? Browse other questions tagged or ask your own question.