2

Example of what I'm trying to do is the radar maps in MechWarrior 3: you have a "satellite view" of a landscape and the whole image has a semi-transparent green hue and you can see all the details of the landscape. It's as if it were done in black and white, but it's different shades of green.

What I am trying to do: the radar maps from Pirate's Moon, MechWarrior 3's expansion pack, are not colorized this way, and I wish to duplicate the idea above on those maps, and I am using Gimp... any ideas how I can do this?

1
  • 2
    An example image might improve the number and specificity of answers. Commented Feb 14, 2015 at 10:42

1 Answer 1

5

In short: Add a layer, fill it with the desired color, and change the layer opacity.

Add a layer

This - and working wit layers in general - is something you want to be able to do without thinking about it. Layers are one of the basic concepts of any reasonably complex image manipulation tool.

The layers dialog is the most common interface to layers, see the docs for more details: http://docs.gimp.org/2.8/en/gimp-dialogs-structure.html#gimp-layer-dialog
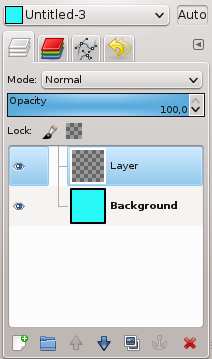
GIMP layers dialog

You will find the button to add a layer there (lower left of the dialog). It is also possible to do this via the menu, or with a keyboard shortcut.

Fill it with a color

That's also something you want to be a no-brainer. You can change the current foreground color via the color area of the toolbox, see http://docs.gimp.org/2.8/en/gimp-tools.html#gimp-toolbox-areas

The color selection dialog you'll get will look similar to the one from http://docs.gimp.org/2.8/en/gimp-dialogs-content.html#gimp-colorselectors (that's actually the one you can add to the user interface permanently):
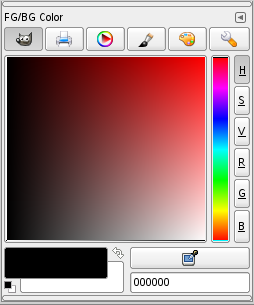
GIMP color selection dialog

In order to get the color into the layer, make sure that it is active in the layers dialog (in the image above, it is the one called "Layer"), and then use Edit->Fill with FG Color from the menus.

Change the layer opacity

For this, let's go back to the layers dialog. You will notice the opacity slider there - in the image above, it is set to 100, meaning the layer is totally opaque. Change this to some lower value and see how this affects your image.

Addendum

For the experienced user, there are some possible shortcuts here - for example, one can adjust the color first and create a layer that is already filled with the color. Or copy an existing layer and fill that instead, this is especially useful if the layer size is different to the image size. But the description above should cover the basics.

6
  • I'd love to, if I knew how to do those three things. I'm completely new to this program and noodling around with it has availed me nothing. I did add a layer but couldn't figure out how to affect the layer.
    – Dan
    Commented Feb 9, 2015 at 22:44
  • @Dan Give a look here, here and perhaps also here. Commented Feb 10, 2015 at 21:31
  • Thanks guys, that was all really helpful and I appreciate it. I got it to work, but then realized when I saw the end result that I was mistaken in thinking that this was how to get what I wanted. So, now what I think I need is to learn how to replace colors in an image globally. I'm thinking that's how to produce the effect I'm looking for.
    – Dan
    Commented Feb 13, 2015 at 21:12
  • OK, I figured it out. I used "colorify"...however I need to save it in .bmp format
    – Dan
    Commented Feb 14, 2015 at 0:52
  • ok, now what's truly frustrating is that GIMP won't save to .bmp!
    – Dan
    Commented Feb 14, 2015 at 0:59

Your Answer

By clicking “Post Your Answer”, you agree to our terms of service and acknowledge you have read our privacy policy.

Not the answer you're looking for? Browse other questions tagged or ask your own question.