0

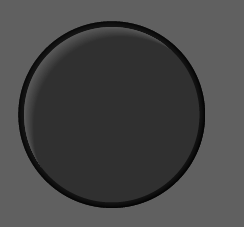
So what I'm trying to do is make a button that has this kind of controller button effect, with the indent of the button holding, and the rounded edges, here's an example:

enter image description here

But I can't quite figure out the details I need to add, this is all I've got:

enter image description here

Any help is appreciated!

2 Answers 2

2

To create depth, it can help to keep lighting in mind. When there is a convex (protruding) object on top of a concave (sunken) object, the lighting needs to hit opposite edges at the same angle to convey a sense of depth. In other words, the light hits the controller handle on the opposite side as it hits the hole the handle is sitting in.

In addition, adding some indication of a "bubble" or curved surface helps by adding a generally lighter edge all the way around the handle itself. Then adding a black stroke to separate the handle from the hole also helps visually in my opinion, sort of creating a pseudo shadow.

Just my take....
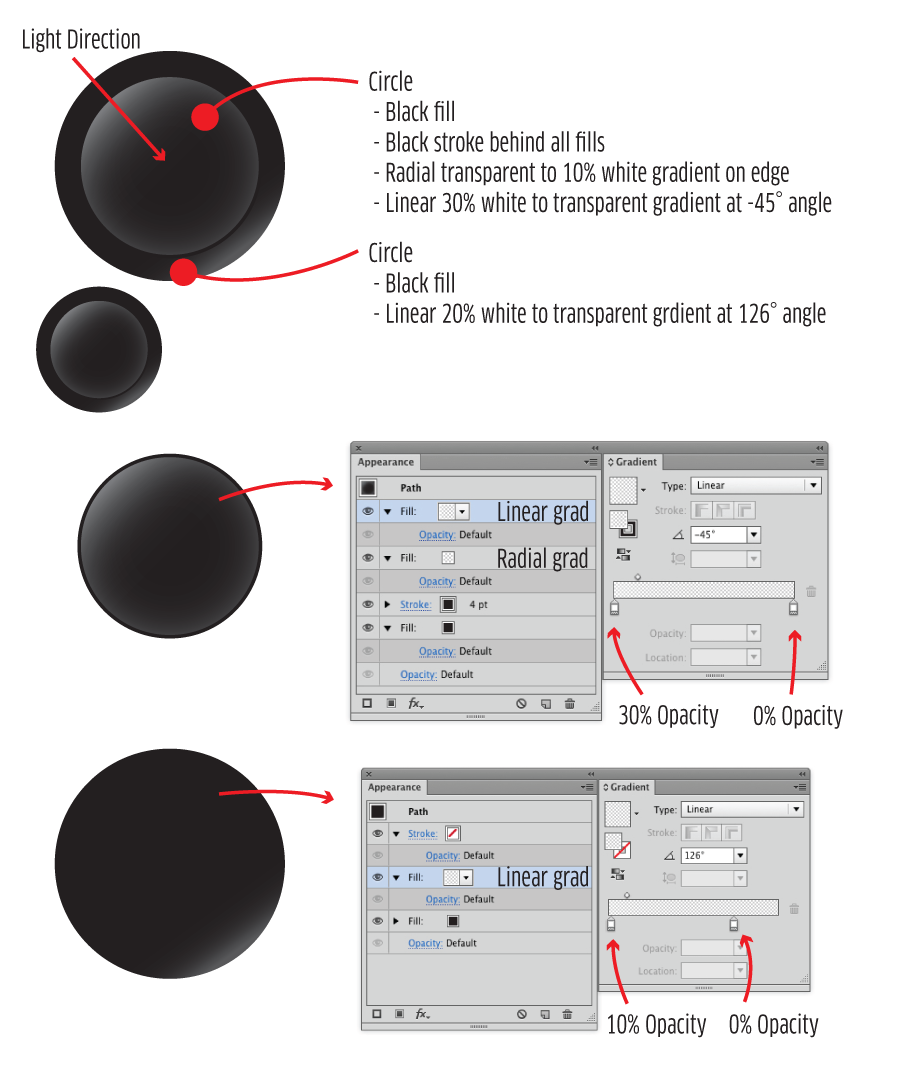
enter image description here

Note that this is a bit more skeuomorphic than your sample Xbox controller. The Xbox controller is merely a series of fills and strokes - lighter strokes on the lighted edge of the handle and the hole which indicate lighting direction.

For the xbox controller, it's merely a series of stacked, centered circles. Then offset circles for the outer highlight and shadow. There's one gradient used on the internal portion to indicate a highlight, but I don't see any other gradients anywhere:
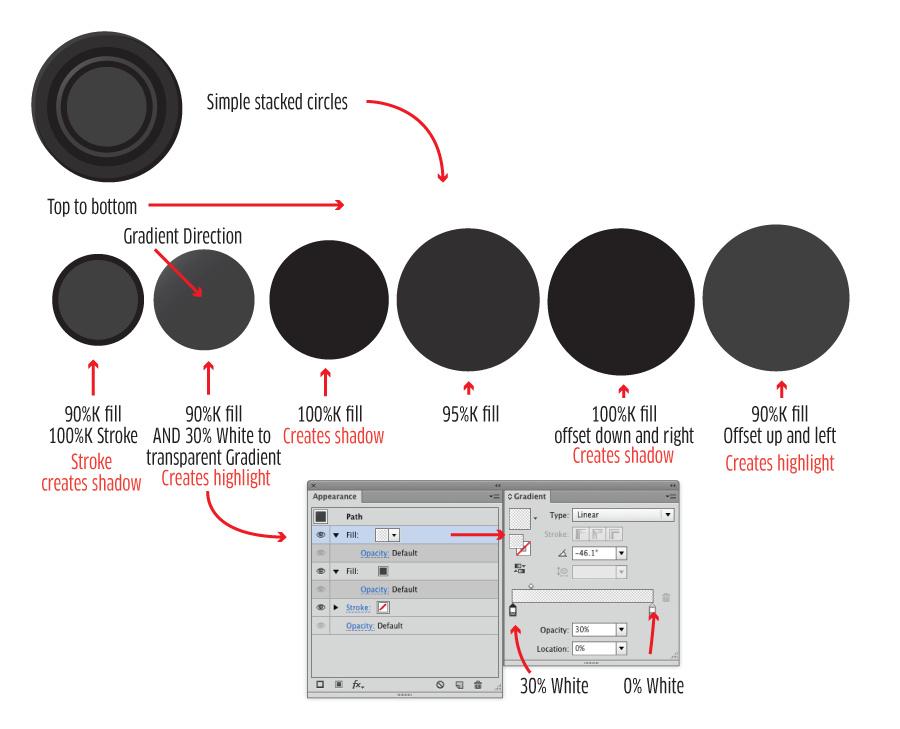
enter image description here

There is a "wavy" aspect to the first circle which I didn't bother implementing. It could be done via the Zig Zag effect in Illustrator easily though.

You could actually implement this all via a single circle and several fills in the Appearance Panel. You wouldn't even really need multiple circles.
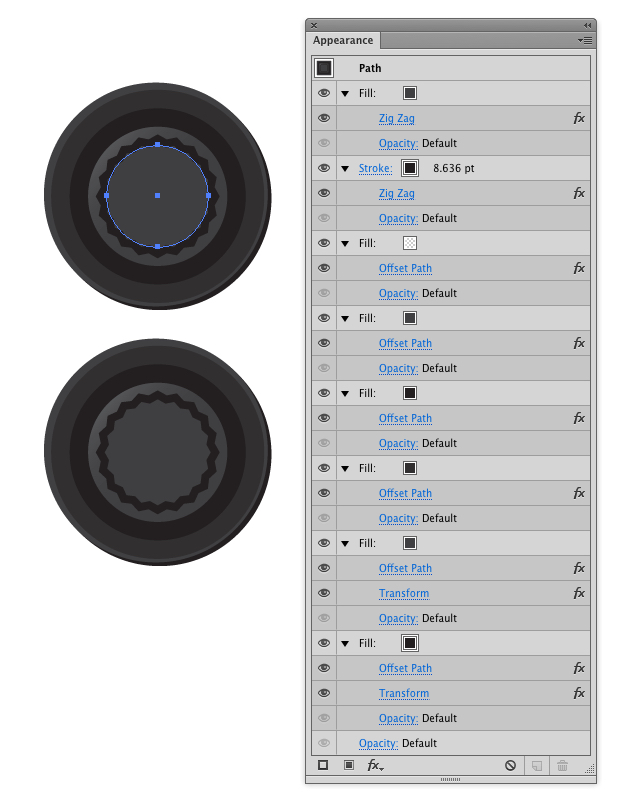
enter image description here

1
  • This is definitely useful information that I'll keep in mind! But for this particular situation I'm looking for more of a flat look, just can't get it quite right. I think it has something to do with the outer edges but I can't really get a good look at the details.
    – Samuel
    Commented Sep 7, 2017 at 19:25
1

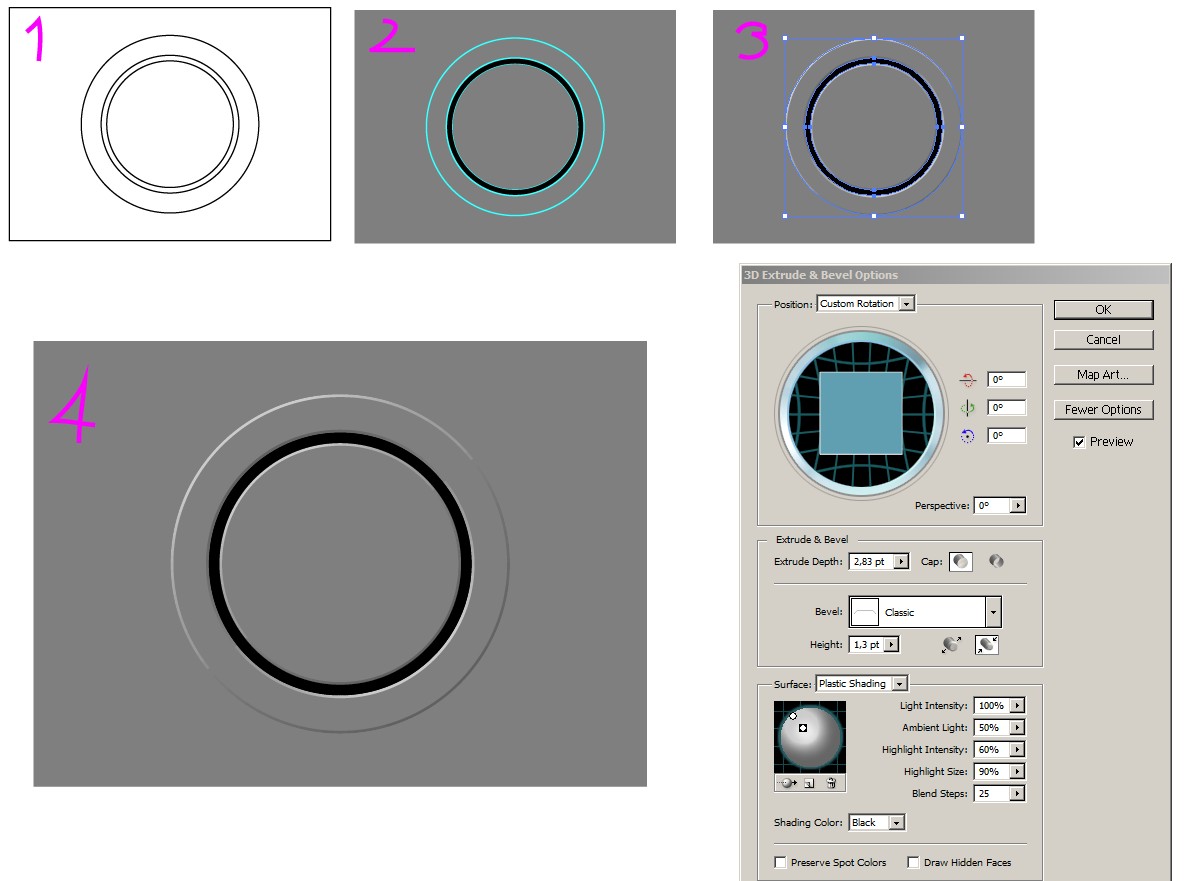
Use Illustrator's 3D Extrude & Bevel effect for the 3D appearance. It can be also subtle as here. I call it a flat 2D button. See the cartoon:

enter image description here

  1. Draw 3 concentric circles. You can start a circle at the center by holding Alt + Shift as you drag with the ellipse tool. Be sure to have the smart quides on.

  2. Remove all strokes and select all. In the Pathfinder panel select Divide to make rings. Ungroup. Fill all rings with grey except the narrow one. Make it filled with black. Group the outer ring and the inner circle. The cyan stroke in only for this cartoon. Be sure to remove all strokes.

  3. Select the outer ring + the inner circle and goto Effects > 3D Extrude & Bevel. Remove all rotations by inputting the angles = 0 degrees. Select quite low extrusion depth and a slight classic bevel. See the dialog for the details. Note that another light is added because default light is quite dim. The unit for the depths (=points) can be inputted in millimeters, but it changes automatically to Illustrator's default unit selected in the preferences.

  4. The result seen in bigger size.

You can change the fill colors and you can return to edit the 3D effect via the appearance panel by clicking the effect line. These are not possible after you expand the effect.

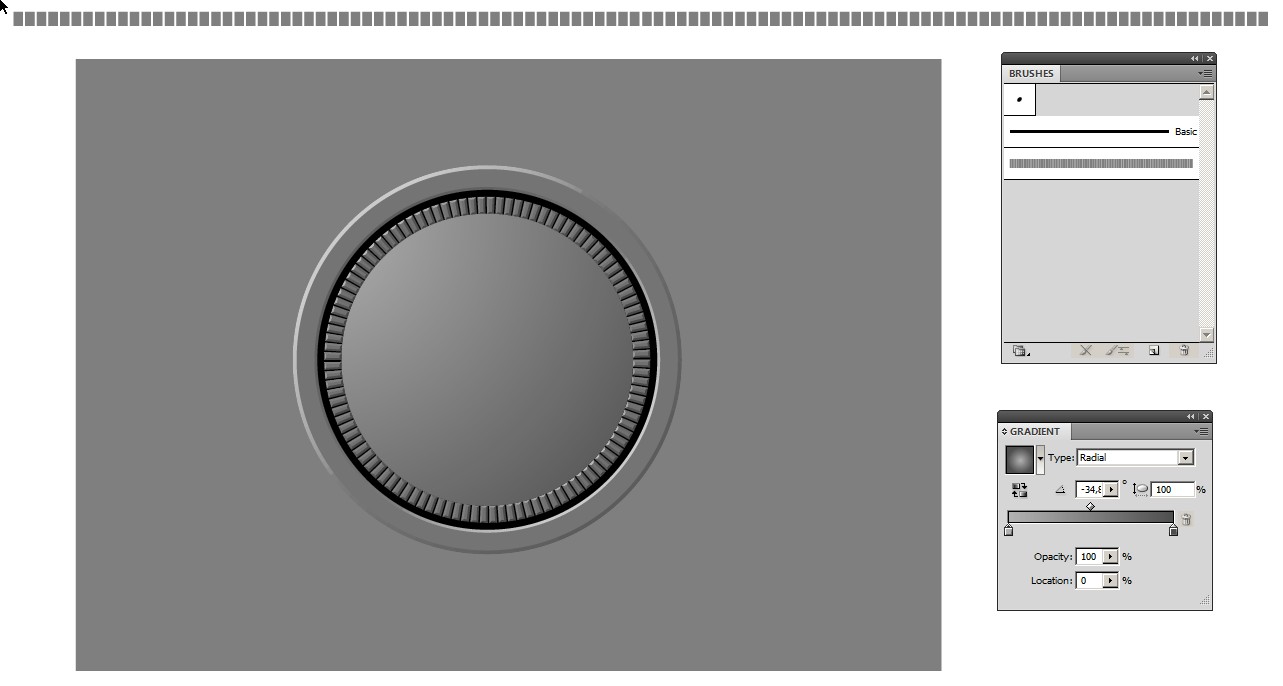
EDIT If the button needs some decorative pattern ring for not too flat appearance, you can draw one. Drag a repeating pattern to the brushes collection and make it an artistic brush or pattern brush. Here a sequence of rectangles is used:

enter image description here

There's now 2 extruded rings

  • the outer grey ring as before
  • a pattern circle between the black and grey mid circle

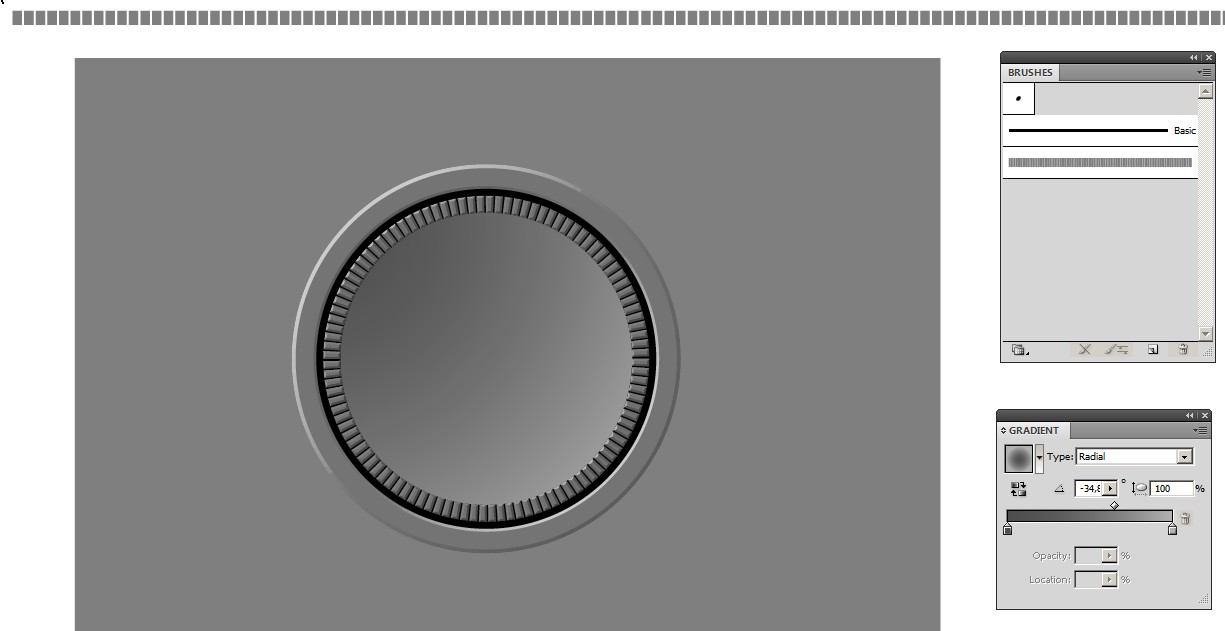
The mid circle is not extruded. But it has a slight radial gradient fill to make it look out convex. A gradient with reversed direction would make it concave (see it at the end of the story)

The pattern circle is with no fill, only a stroke, but the stroke is the new artistic brush.

The black area is a filled black circle at the background. A thin black ring cannot fill the background of the pattern ring.

enter image description here

Your Answer

By clicking “Post Your Answer”, you agree to our terms of service and acknowledge you have read our privacy policy.

Not the answer you're looking for? Browse other questions tagged or ask your own question.