2

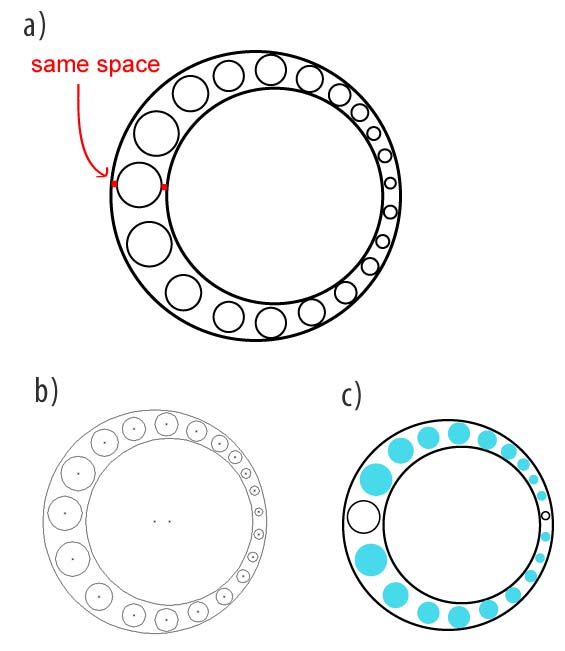
I have a problem I cannot find the answer on the Internet. I want to achieve this figure in (a) in the attached image (of course I made this manually and has a lot of mistakes): Two misaligned circles, and inside them a bunch of circles that have the same distance from the outer circle to the inner circle. My first problem is that I don't know how to align objects between the two lines of the outer and inner circle (and I don't mean manually or measuring with the ruler). Perhaps moving the centers of the big circles (see (b) )to the edge? I suppose I have to create the black elements of (c) and then have a bend somehow to create the blue ones (?). But I am completely lost.

enter image description here


EDIT

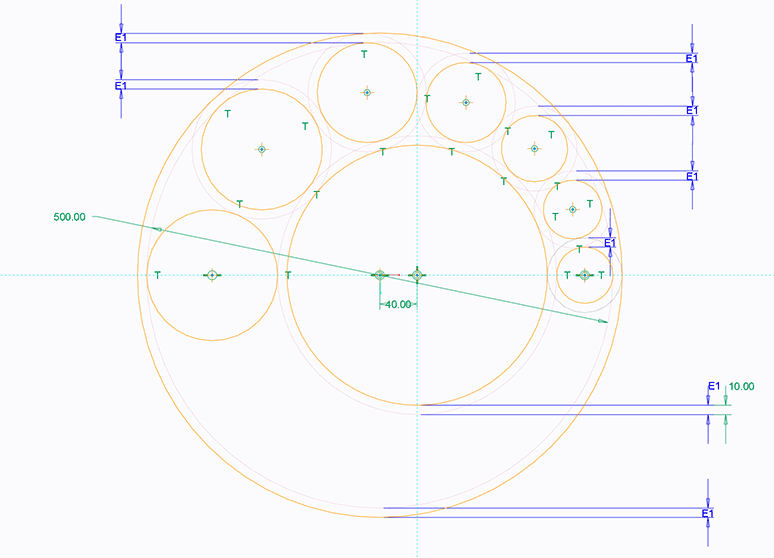
If I can borrow joojaa's image it would look something like this:

joojaas image

3 Answers 3

4

This is achievable by using transform Rotate and Offset path:

  • Step 1: Draw your circles

Create an artboard of 1500 x 1500 pixels. The outer circle is 1200px diameter, the inner is 1000px.
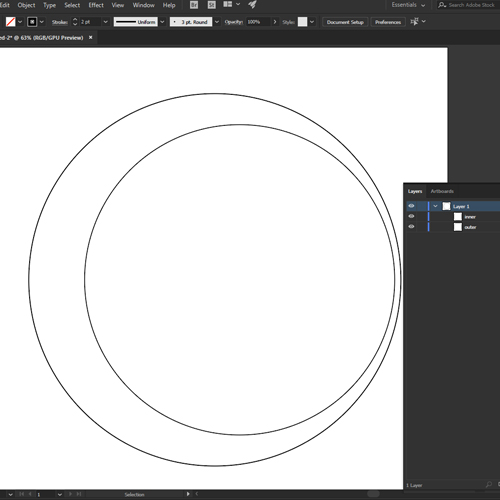
Step 1: Draw your circles

  • Step 2: offset the circles

Now we'll use Object > Path > Offset Path and create new circles that are offset an exact distance from the originals. I used -10px for the outer circle and 10 px for the inner. I then moved them to their own layer and made them red so we can see that they're helpers.
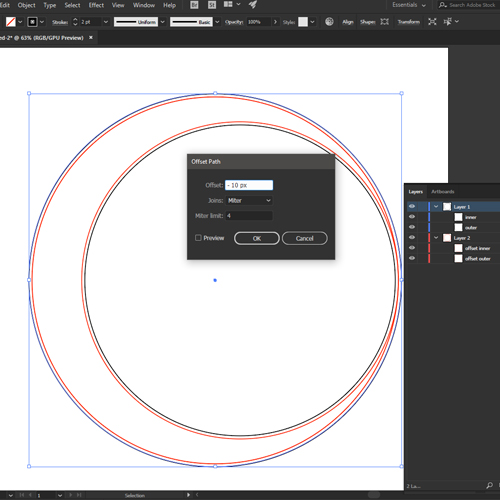
Step 2: offset the circles

  • Step 3: create a middle circle

Next we'll create a middle circle. Since the outer has a 1200px diameter and the inner a 1000px diameter, we know this one will have a 1100px diameter. Position the center horizontally equal to the other two, exactly in the middle. Make it red and move it to the helpers layer.
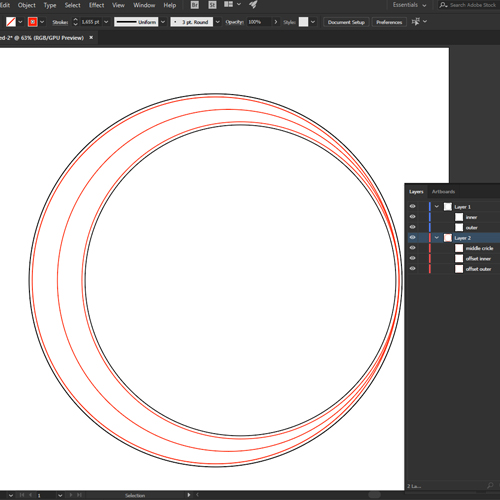
Step 3: create a middle circle

  • Step 4: create division helpers

Next we create a vertical line through the center of the middle circle, 1500px long, starting at the border of the artboard. Next we rotate it 30°, making sure to hit Copy. Next we use CTRL + D (or CMD + D) to repeat until we have a full circle. Make them red and move them to the helpers layer.
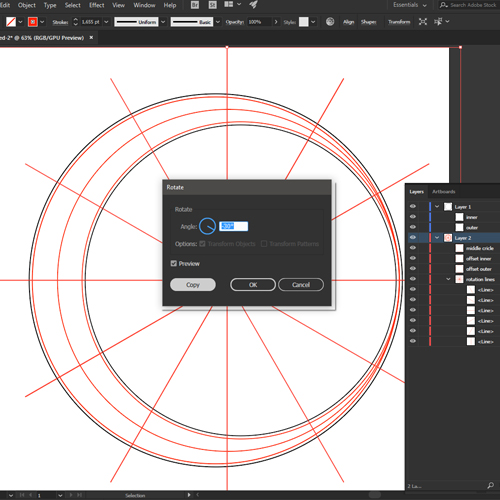
Step 4: create division helpers

  • Step 5: create the inner circles

Next we create the final inner circles. Each circle has a center lined up with a division line and touches both inner and outer offset. Be aware that the center does not necessarily line up with the middle circle (we only used this to determine the center point for the division lines). I eyeballed the inner circles diameter, but of course you can get it more accurate using rotation if you want. I made the circles green just to be able to see them better.
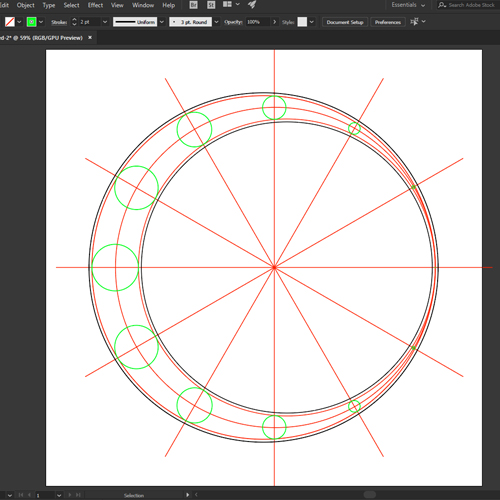
Step 5: create the inner circles

  • Step 6: done

Clean up the file, use the colors you want. Done.
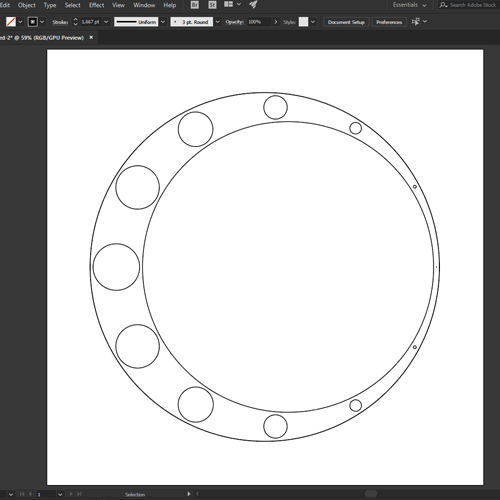
Step 6: done

11
  • Suggestion make middle circle with blend tool then you dont need to think much about it. Anyway yes thsi works but is porblematic as the spacing between ciircles is highly nonuniform and doing a GOOD 3 point spacing is nonlinear mathematics. You can guestimate it though. Center does not inddeed happen in middle buyt its very close to that.
    – joojaa
    Commented Feb 15, 2017 at 9:46
  • Yeah, I try to make my tutorials as easy as possible to follow for beginners, but blend tool would be a good choice for the inner circle. As for the second point, that's why I eyeballed the circles, for most uses that would be good enough. If it really needs to be mathematically accurate I think a post on math.SE would be more appropriate :)
    – PieBie
    Commented Feb 15, 2017 at 9:54
  • Sure, but this one is pretty advanced to do correctly, it has 3 degrees of freedom. Here (see image) is what it looks like when i give the nonlinear solver of the CAD the instruction to do this. Note thet the circle center deviate form center line so little that it can barely be measured.
    – joojaa
    Commented Feb 15, 2017 at 10:17
  • This is the best solution I have found so far. A bit more manual than I wish, but acceptable. And very apropriate the comment of blend. However, I have a small issue with this method, and it is concerning the space between circles (sorry it was not clear in my question and I can open a new one if you consider it necessary). The line rotation gives me very little control on where to place circles. (cont) Commented Feb 16, 2017 at 8:22
  • 1
    @PieBie So what your saying is that designers shouldn't do their vision if its too mathematical? I think this is more of a case of your tool letting you down than anything else.
    – joojaa
    Commented Feb 16, 2017 at 8:54
1

If you add a line through the difference between the two outer circles, you can use this as the hub for each smaller circle around the perimeter...

enter image description here

2
  • Thanks. This is helpful, but still some issues. I 1st create a small circle, so I know the line where the "difference" circle has to pass. But how do I draw this 3rd circle? (ie how can I specify draw a circle from this edge point, like when pressing alt to specify draw a circle from this center). Also, this would solve only my 1st problem... what about the creation of circles from big to small? Some sort of bend? Commented Dec 18, 2016 at 17:28
  • @user1156544 you use the blend command between circle 1 and 2
    – joojaa
    Commented Feb 15, 2017 at 9:24
-2

The Colliderscribe-Plugin from Astute would help with this problem perfectly.

0

Your Answer

By clicking “Post Your Answer”, you agree to our terms of service and acknowledge you have read our privacy policy.

Not the answer you're looking for? Browse other questions tagged or ask your own question.