4

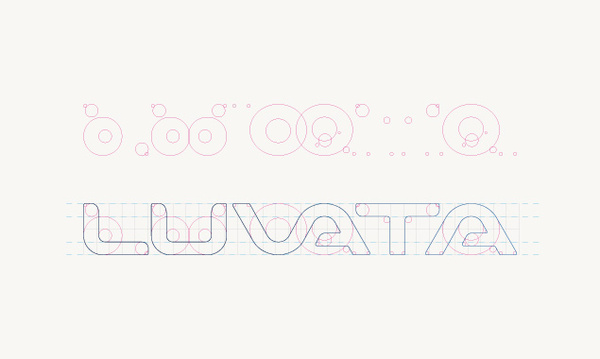
I've always wondered how to create these kind of logos - based on circles and a grid:

enter image description here

How do I connect the circles in the 'U' here and clean up the paths afterwards? The connection could be done with Common Tangents but how do I remove the right points from the circles?

Could someone show me this in steps or perhaps link to a video?

2
  • 6
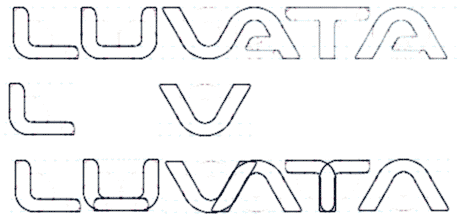
    Consider the possibility that the circles were conceived/placed AFTER the logo was created. There are actually only two basic forms here: the "L" and the "V" which have been mirrored/rotated
    – horatio
    Commented Nov 15, 2012 at 21:05
  • True enough, although the question still stands for creating the initial forms and deriving some of the others, e.g. the T.
    – e100
    Commented Nov 27, 2012 at 18:51

5 Answers 5

3

The Pathfinder panel is your friend when it comes to merging, cutting and lots of other boolean operations. An easy way to use the pathfinder panel is to draw all the required shapes, then click the Divide button. From there you'll be able to select the shapes you don't want and delete them. After that, select all the parts you do want to keep, and unite them.

Here's a good explanation of what's possible: http://www.bittbox.com/illustrator/pathfinder-explained

1

To expand on my comment, I think the circles (and possibly the grid) were added after the logo was created merely for affect or staffage.

The creator made an "L" shape and a "V" shape and then duplicated, mirrored, and translated them. The "T" is an "L" flipped on the horizontal axis, the arm has been shortened slightly, and then duped and flipped on the vertical axis.

This doesn't answer your question per se but I think it is how this particular logo was conceived. Note also that the circle for the "V" (and "A") is actually an oval.

enter image description here

1
  • Thanks guys! I admit that my example here was not the best of practice, since I agree that the circles and grid could have been added afterwards. But I'm still looking for some tutorials showing these kind of circle/cutting/merging-tricks :-)
    – Hotterjoe
    Commented Nov 26, 2012 at 11:41
1

It looks like the Shape Builder tool can help a lot with this, removing all the unnecessary parts of the shape, like shown in this video:

https://www.youtube.com/watch?v=SuHGRwcR-Ho

Another way is the Live Paint Bucket tool, with which you can fill in all the gaps for your new shape (but you will need the straight lines / rectangles for this), just like a kid with a colouring book, and then you get a filled object with your desired shape. You can then use the Pathfinder > Merge shapes to merge all the subshapes of the result into a single outline, like shown here:

https://www.youtube.com/watch?v=b77Nhldf5C8

1

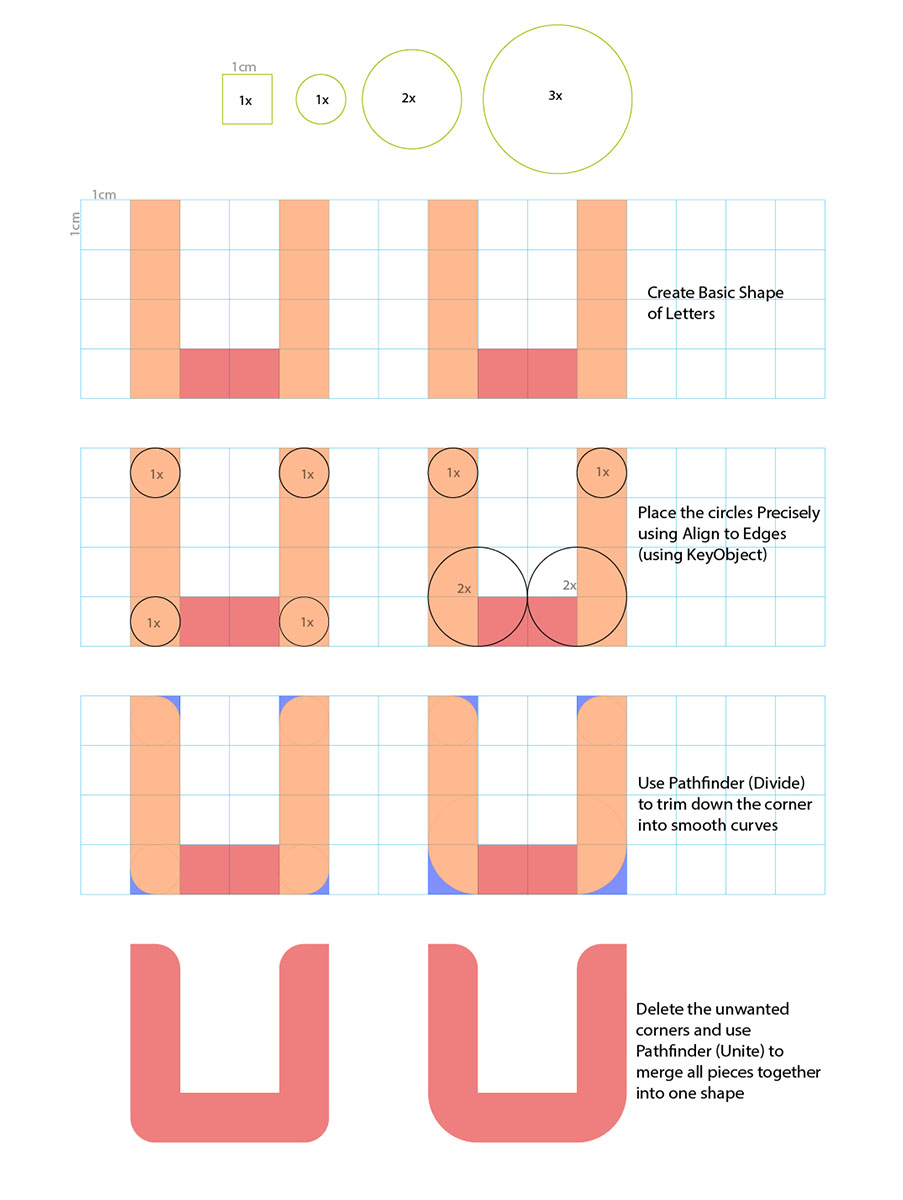
Well there are both ways of achieving the output… But if you are going to use circles and grid to initiate, here is an example:

First set up your grid in unit… say 1cm, so as here the grid is 4 x 15 (row X column).

Now make few circles having diameter 1x, 2x, 3x, 4x (1x stands for 1cm).

Now as we are creating character “U” we will proceed like this:

  • Initially create a shape of letter “U” from 3 separate rectangle

  • Then the circles will be used to cut out the sides of rectangle shape to give them smooth curves at corners…

  • Simple put a circle precisely over the rectangle shape using ALIGN to keyObject

  • Then use Pathfinder (Divide) and remove unwanted parts out of the main shape.

  • Finally use Pathfinder (Unite) to merge all pieces together.

You can achieve similar or much complex output for other letters/shapes.
enter image description here

-1

I was stuck at the same problem, i figured it out. And created a tutorial on that. Hope it helps is about a tip on the pathfinder.

http://youtu.be/nBRzPrWTQrc

Your Answer

By clicking “Post Your Answer”, you agree to our terms of service and acknowledge you have read our privacy policy.

Not the answer you're looking for? Browse other questions tagged or ask your own question.