18

Here is a picture (of many) that I took from a book with my phone camera.enter image description here

The problem is that the background is too grey. I want it fully white. I have adobe Photoshop CS6. Does anyone know how I can fix this?

Note: I need instructions, as I need to do this to many other pics.

Thanks

4
  • This is caused by the camera assuming that the image is, on average, a 15% grey, and setting the exposure and white balance accordingly. If your camera permits it, you can avoid it in future shots by either setting a custom white balance or by deliberately overexposing the photo.
    – Mark
    Commented Jul 25, 2014 at 4:59
  • 2
    @Mark White balance has to do with hue, not brightness. So if your camera gives you the option of manual exposure, you can overexpose the image by about a stop.
    – Circle B
    Commented Jul 25, 2014 at 12:52
  • @CircleB, you're right. I thought I'd fixed a similar issue with grey snow using a custom white balance, but looking at the EXIF data, I fixed it with overexposure.
    – Mark
    Commented Jul 25, 2014 at 19:35
  • 1
    It's not a matter of "overexposing" the image but correctly exposing it. This image is underexposed. A correctly exposed image of a white piece of paper would have a white background and black lines. An overexposed image would have a pure white background and pale grey lines. Commented Jul 26, 2014 at 9:05

5 Answers 5

33

First you'll want to desaturate the image (CMD+SHIFT+U), this removes any color and makes it easier to achieve pure white.

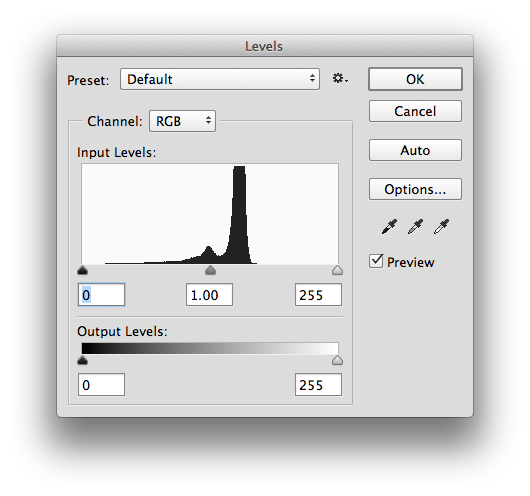
With your file open, choose Image->Adjustments->Levels. You'll get this: enter image description here

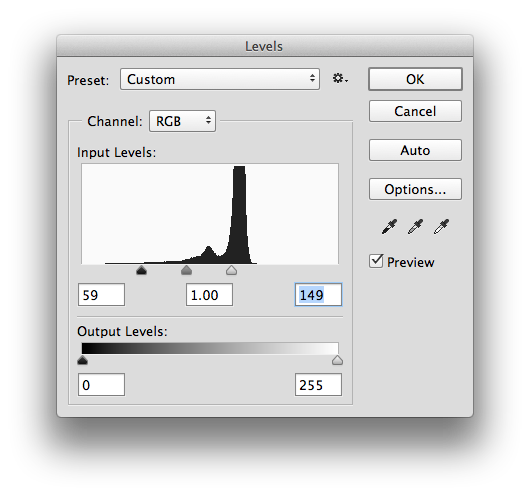
Now bring the two outer triangles in like this (you'll need to play around with this until you get something you like):

enter image description here

You should end up with this!

enter image description here

6
  • This one worked pretty nice. Sometimes a black spot remains in the corner though, but I think I can manually fix that.
    – omega
    Commented Jul 25, 2014 at 3:58
  • +1 I always use this method every time I adjust images taken from my phone. Sometimes a little manual rubbing out is required for the odd darker spot but it usually does the trick in one
    – SaturnsEye
    Commented Jul 25, 2014 at 9:34
  • 7
    If you do this with an adjustment layer instead of 'destructively', you can even copy the layer from picture to picture, and only tweak the settings as needed.
    – Vincent
    Commented Jul 25, 2014 at 10:27
  • 2
    @bakabaka, that is very true, you could also make an action and run it on an entire folder of images.
    – Circle B
    Commented Jul 25, 2014 at 12:45
  • 1
    An easier way to do this with the same control panel is to use the eyedroppers pictured. Choose the white one and then select a white point. Then choose the black one and choose a black point. After that I like to adjust the output levels manually to fine tune. But the eyedroppers make this task tons easier. Commented Jul 27, 2014 at 3:51
25

I came up with a nice method for cleaning up pictures like this, and it works even when the background or lighting is uneven (that is, far worse cases than the example in this question) and it retains the colour.

My instructions are based on the Gimp, but it would be very similar in other programs like Photoshop.

EDIT: Gimp has a filter called "Difference of Gaussians" which implements the process described below in one step.

Firstly, make a duplicate of the layer:
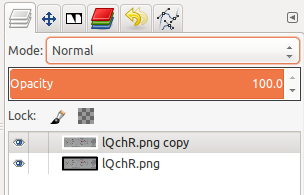
layer dialog

Blur the copied layer with a Gaussian blur. Use a kernel size large enough that you can't make out any detail from the original image. I used 100px for the picture in the original post.
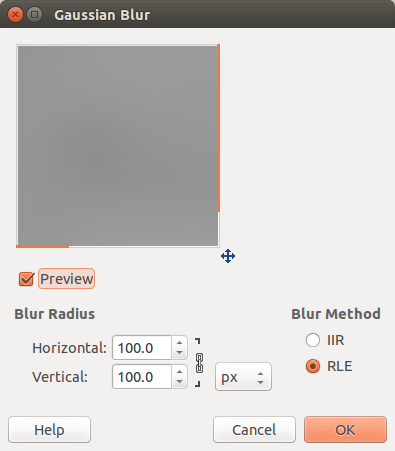
gaussian blur dialog

It will look like this:

blurred fish picture

Then set the "mode" of the blurred layer to "Divide".
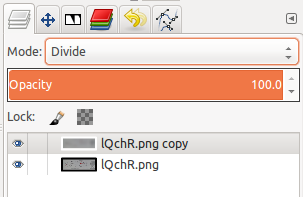
layer dialog with mode set to divide

The resulting image should be the line art on a white background.

fish picture with background removed

What you are doing here is essentially a high-pass-filter on the image, removing the low-frequency information (slow changes in the background colour) and keeping the high-frequency information (the line art).

5
  • Actually I just realised that in the Gimp there is a filter called "Difference of Gaussians" which does exactly this, but in one step ;)
    – pix
    Commented Jul 26, 2014 at 0:03
  • 1
    So edit your answer! Commented Jul 26, 2014 at 9:14
  • 1
    @DavidRicherby Since the question was originally about Photoshop, a post effectively saying "neener-neener, Gimp can do it in one step" would not be very useful to the OP. I've described a method using relatively fundamental image manipulations that should be available in most graphics packages, Photoshop included.
    – pix
    Commented Jul 30, 2014 at 0:43
  • Actually, it's perfectly fine to suggest another method in another software for other users. You may not get as many votes because it is not focused entirely towards the OPs question, but we always welcome alternatives.
    – Dom
    Commented Sep 25, 2014 at 8:44
  • @MrE.Upvoter besides doing this in PS is exactly the steps described just different screenshots. Same applies to imagemagick etc.
    – joojaa
    Commented Sep 25, 2014 at 15:53
10

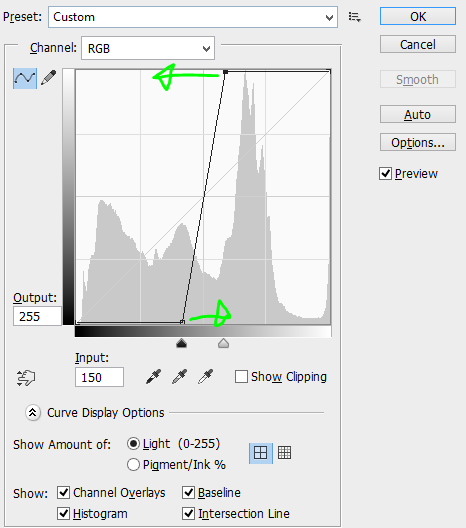
Ramp the contrast up with curves.

Instructions:

Select your image and press Ctrl-M. This will bring up the curves dialog. enter image description here Move the top point left and the bottom point right until your image becomes black and white. (that rhymes!)

2
  • I can't explain it, but sometimes this method works better. Sometimes I have to use both methods lol.
    – omega
    Commented Jul 25, 2014 at 4:34
  • @omega this method offers more control. Commented Jul 25, 2014 at 5:10
5

For people who don't have Adobe Photoshop, here's a free and cross-platform alternative:

Using ImageMagick, it can be done in command line

convert lQchR.png -auto-level -white-threshold 78% fish.png

enter image description here

This may require some fine tuning of the white threshold value, but it's quicker than GUI especially when you have multiple pictures:

convert *.png -auto-level -white-threshold 78% x-%04d.png


Edit:

Another method using division was pointed out in the comments by joojaa

convert fish.png ( +clone -blur 0x80 ) -compose Divide_Src -composite out_fish.png

enter image description here

4
  • +1 for imagemagick. Btw you can also do the lowpass division in imagemagick, the advantage being you dont need to prime the balance value. Which is arguably better in terms of automation.
    – joojaa
    Commented Sep 25, 2014 at 12:51
  • @joojaa I'm not familiar with that option. Feel free to edit a new paragraph into the answer if it works better
    – Tymric
    Commented Sep 25, 2014 at 12:58
  • @Timmy convert fish.png ( +clone -blur 0x80 ) -compose Divide_Src -composite out_fish.png the method is described here. Add auto level if you wish.
    – joojaa
    Commented Sep 25, 2014 at 15:39
  • @joojaa Thank you. I added it to the answer along with the result
    – Tymric
    Commented Sep 25, 2014 at 16:27
-1

ImageMagick convert command may have conflict with Windows convert command. So you have to specify the full path.

Suppose we want to change the grey background of image phototext.png and create a new image phototext1.png.

Suppose ImageMagick is installed in the folder: C:\Program Files\ImageMagick-7.0.3-Q16

Then write the follwing command on command prompt

"C:\Program Files\ImageMagick-7.0.3-Q16\convert.exe" phototext.png -auto-level -white-threshold 78% phototext1.png

1
  • 1
    Hi Dr Murtaza Khan, welcome to GDSE. We follow a strict Q&A format (as opposed to a forum format), so I'm afraid your answer might get some down-votes because it doesn't really answer the question (I assume this is in response to another answer since the question makes no mention of ImageMagick). You can visit our help center to read more about how the site works.
    – Cai
    Commented Oct 14, 2016 at 9:50

Your Answer

By clicking “Post Your Answer”, you agree to our terms of service and acknowledge you have read our privacy policy.

Not the answer you're looking for? Browse other questions tagged or ask your own question.